Advertisement
Available languages
Available languages
Quick Links
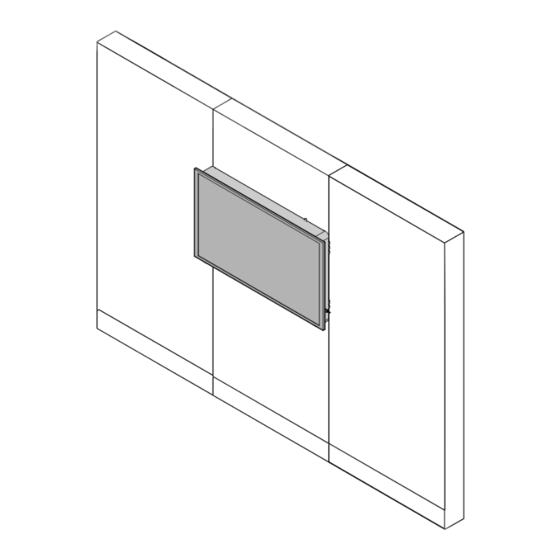
Answer Monitor Mount
®
If you have a problem, question, or request, call
your local dealer, or Steelcase Line 1 at
888.STEELCASE (888.783.3522)
for immediate action by people who want to help you.
(Outside the U.S.A., Canada, Mexico, Puerto Rico,
and the U.S. Virgin Islands, call: 1.616.247.2500)
Or visit our website: www.steelcase.com
English - Page 1 of 8 of 24
©
2016 Steelcase Inc.
French - Page 9 of 16 of 24
Grand Rapids, MI 49501
Spanish - Page 17 of 24 of 24
U.S.A.
25393001 Rev A
Printed in U.S.A.
Advertisement

Related Manuals for Steelcase Answer


Summary of Contents for Steelcase Answer
- Page 1 Answer Monitor Mount ® If you have a problem, question, or request, call your local dealer, or Steelcase Line 1 at 888.STEELCASE (888.783.3522) for immediate action by people who want to help you. (Outside the U.S.A., Canada, Mexico, Puerto Rico, and the U.S.
-
Page 2: Important Safety Instructions
® IMPORTANT SAFETY INSTRUCTIONS - SAVE THESE INSTRUCTIONS When using an electrical furnishing, basic precautions should always be followed, including the following: Read all instructions before using the product. This appliance is intended for commercial use only. Maximum operating temperature is 40 C. Connect this appliance to a properly grounded outlet only. - Page 3 ® Stability Application Guidelines for Monitor Mount Assembly 30" min. 60" max. 30" min. 60" max. 12' 6” max. 66" max. When applying monitor mount on a panel run over 8’ and up to 12’ 6”, you must use at least a 30”...
- Page 4 ® Determine the desired elevation for mounting the unit on the 30” wide Answer ! C L I C K panel. Position the Monitor Mount assembly onto the 30” wide Answer panel at the desired height. ! C L Engage the integral hooks on the pan into...
- Page 5 TIP: The plug is too large to fit the cable routing openings provided in the Answer panel frame. Instead, locally dislodge the panel skin near the base and route the cord and plug between the skin and any horizontal beam or cable tray down to the floor.
- Page 6 RISK OF SERIOUS INJURY Maximum monitor weight is 34 Kg (75 lbs.). Heavier monitors may fall or cause tip over resulting in death or serious injury. Follow assembly/use directions available from Steelcase dealer or call 1-888-783-3522. MONITOR RIESGO DE LESIONES GRAVES HEIGHT El peso máximo del monitor es de 34 kg (75 lbs.).
- Page 7 ® Connect the power cord from the display monitor to the electrical box that is factory installed in the Monitor Mount assembly. NOTE: An adaptor may be required to make the connection to the IEC C13 receptacle in the electrical box. Lift the display monitor into position and engage protruding hooks on mounting brackets into mounting pattern slots on the...
- Page 8 ® SAFETY CATCH FEATURE DISENGAGING AND REMOVAL OF THE MONITOR To remove, grasp firmly on the bottom edge of the monitor, pull outward first (9a), then upward (9b) to disengage the bottom hooks. NOTE: A safety catch feature on the top hook will keep the monitor from disengaging and falling forward at the top.
- Page 9 Installation de l'écran Answer ® Si vous avez un problème, une question à poser ou une requête à faire, appelez votre concessionnaire local ou Steelcase, ligne 1, au numéro 888.STEELCASE (888.783.3522) pour obtenir une action immédiate de personnes prêtes à vous aider.
-
Page 10: Importantes Directives De Sécurité
® IMPORTANTES DIRECTIVES DE SÉCURITÉ CONSERVEZ CES DIRECTIVES Lors de l'utilisation de mobilier électrique, il faut toujours prendre des précautions de base, notamment: Cet appareil est destiné uniquement à une utilisation commerciale. Lisez toutes les directives avant de vous servir du mobilier. Branchez uniquement cet appareil à... - Page 11 ® Directives pour assurer la stabilité des éléments lors de l'installation de l'écran 30 po min. 60 po max. 30 po min. 60 po max. 12 pi 6 po max. 66 po max. Lors de l'installation d'un écran sur un panneau central dont la longueur varie de 8 pi à...
- Page 12 Positionnez l'écran sur le panneau Answer de 30 po de largeur, à la hauteur souhaitée. Insérez les crochets du panneau dans les rainures du poteau de jonction Answer, dans ! C L un mouvement « d'insertion vers le bas » (2a).
- Page 13 TRUC : Si la fiche est trop grosse pour passer par les orifices prévus dans le cadre du panneau Answer, déplacez plutôt la pellicule près de la base, puis faites passer le cordon et la fiche entre la pellicule et toute traverse horizontale ou chemin de câble, en...
- Page 14 RISK OF SERIOUS INJURY Maximum monitor weight is 34 Kg (75 lbs.). Heavier monitors may fall or cause tip over resulting in death or serious injury. Follow assembly/use directions available from Steelcase dealer or call 1-888-783-3522. HAUTEUR DE RIESGO DE LESIONES GRAVES L'ÉCRAN...
- Page 15 ® Branchez le cordon d'alimentation de l'écran dans la prise électrique installée en usine dans le panneau de l'écran. REMARQUE : Vous pourriez avoir besoin d'un adaptateur pour brancher la prise IEC C13 à la boîte électrique. Soulevez l'écran en place, puis insérez les crochets qui ressortent des supports de montage dans les rainures du panneau.
- Page 16 ® CRAN DE SÉCURITÉ DÉSENCLENCHEMENT ET RETRAIT DE L'ÉCRAN Pour retirer l'écran, agrippez fermement le rebord inférieur, tirez d'abord vers vous (9a), puis vers le haut (9b) pour désenclencher les crochets du bas. REMARQUE : Le cran de sûreté du crochet du haut empêche l'écran de se désenclencher du haut et de tomber.
- Page 17 Montaje del Monitor Answer ® ISi tiene algún problema, pregunta o pedido, llame a su distribuidor local , o a la línea 1 de Steelcase al 888.STEELCASE (888.783.3522) para una respuesta inmediata de parte de quienes desean ayudarle. (Fuera de los EE.UU., Canadá, México, Puerto Rico y las Islas Vírgenes de los EE.UU., llame al...
-
Page 18: Instrucciones De Mantenimiento Por Parte Del Usuario
® GUARDE ESTAS INSTRUCCIONES INSTRUCCIONES IMPORTANTES DE SEGURIDAD – Siempre se deben usar Este aparato está destinado únicamente para uso comercial. precauciones básicas de seguridad al usar un aparato eléctrico, incluyendo las Conecte el aparato sólo a una toma de tierra adecuada. Vea las Instrucciones de siguientes: Lea todas las instrucciones antes de usar el producto. - Page 19 ® Directrices de aplicación de estabilidad para el ensamble del soporte del monitor 30 pulg. min. 60 pulg. max. 30 pulg. min. 60 pulg. max. 12 pies 6 pulg. max. 66 pulg. max. Cuando ponga el soporte del monitor sobre un tramo de panel de más de 8 pies y hasta 12 pies y 6 pulg., debe utilizar un panel de retorno de al menos 30 pulg.
- Page 20 ® Determine la elevación deseada para el montaje de la unidad sobre el panel Answer de ! C L 2 2a 30 pulgadas. I C K Coloque el ensamble del soporte del monitor sobre el panel de Answer de 30 pulgadas de ancho a la altura deseada.
- Page 21 CONSEJO: El enchufe es demasiado grande para acomodarse a las aberturas para cables provistas en el marco del panel Answer. En su lugar, desplace localmente el protector del panel cerca de la base y pase el cable y el enchufe entre el protector y cualquier viga horizontal o bandeja de cables hasta el piso.
- Page 22 RISK OF SERIOUS INJURY Maximum monitor weight is 34 Kg (75 lbs.). Heavier monitors may fall or cause tip over resulting in death or serious injury. Follow assembly/use directions available from Steelcase dealer or call 1-888-783-3522. ALTURA DEL RIESGO DE LESIONES GRAVES MONITOR El peso máximo del monitor es de 34 kg (75 lbs.).
- Page 23 ® Conecte el cable de alimentación desde el monitor de visualización a la caja eléctrica instalada en fábrica en el ensamble del soporte del monitor. NOTA: Se puede necesitar un adaptador para hacer la conexión al receptáculo IEC C13 en la caja eléctrica. Levante el monitor de visualización a su posición y enganche los ganchos que sobresalen sobre los soportes de montaje...
- Page 24 ® CARACTERÍSTICA DE SUJECIÓN DE SEGURIDAD DESENGANCHE Y RETIRO DEL MONITOR Para retirarlo, sujete con firmeza el borde inferior del monitor, tire hacia fuera primero (9a), luego hacia arriba (9b) para desenganchar los ganchos inferiores. NOTA: La característica de sujeción de seguridad en el gancho superior no dejará...
Need help?
Do you have a question about the Answer and is the answer not in the manual?
Questions and answers