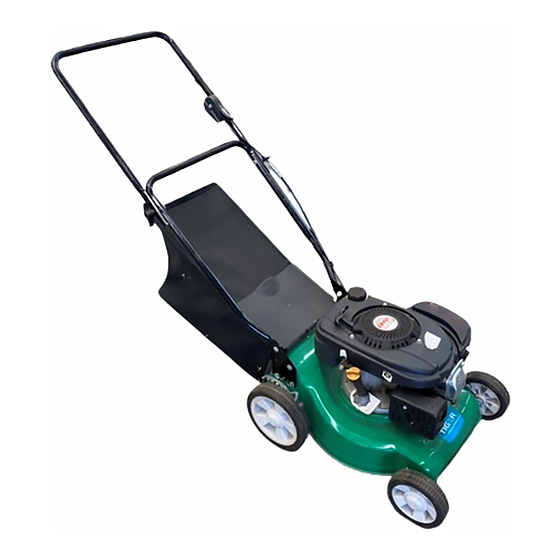
Summary of Contents for Briggs & Stratton TIGER
- Page 1 Operation & Assembly Instructions WARNING - Read all instructions supplied with this product before use.
-
Page 2: Table Of Contents
Table of Contents Important Notes Unit Details Safety & Handling Hazards Personal Safety Equipment Safety Instructions Assembly Procedures Handle Assembly Parts Attaching Lower Handle Attaching Upper Handle Grasscatcher Operating Instructions Cutting Height Fuel and Oil Starting and Stopping Maintenance & Care Blade Replacement Spark Plug Air Filter... -
Page 3: Important Notes
IMPORTANT NOTES Congratulations on your purchase of a Tiger mower. This instruction manual will aid in the assembly, operation and maintenance of your new lawnmower. Please read carefully to ensure safety and the long life of your product. Do not operate the unit before reading this manual. - Page 4 Safety Instructions Transporting the mower • Turn the engine off, by moving the engine throttle lever to the 'STOP' position and switching the fuel tap off (where fitted). • Always disconnect the spark plug lead. • Do not transport the mower with fuel in the fuel tank. Before using the mower •...
-
Page 5: Assembly Procedures
Safety Instructions Maintaining the mower • If the mower begins to vibrate abnormally, or if it strikes a foreign object - STOP the engine, disconnect the spark plug lead and keep it away from the spark plug. Inspect the mower and blades for any damage. - Page 6 ASSEMBLY PROCEDURES Attaching the Upper Handle 1. Attach the upper handle and the zone start bracket to the lower handle as shown in figure 1 using the knobs and bolts provided. The knobs should be on UPPER HANDLE the outside. ZONE START 2.
-
Page 7: Operating Instructions
OPERATING INSTRUCTIONS Cutting Height Height adjustment allows lawn to be cut at different lengths. • Set cutting height by adjusting the height lever. • Various setting for height may be used depending upon conditions. STOP the engine before adjusting the cutting height. -
Page 8: Starting And Stopping
OPERATING INSTRUCTIONS Starting & Stopping • "COLD STARTING" is when the engine is cold. • "HOT STARTING" is when the engine is hot or warm. STARTING STARTING THE ENGINE STEP 1. Set the throttle Control STARTING STOP STOP FOR COLD STARTING: Move the throttle control lever to the CHOKE position. -
Page 9: Spark Plug
Blade Replacement BLADE BLADE Replace all parts that are worn ADAPTOR or damaged. Direction of the blade and WASHER washer are important for the correct assembly. Incorrect assembly may cause serious injury or property damage. HEX BOLT • Before reassembling the blade and the blade adaptor to the unit, lubricate the engine crankshaft and the inner surface of the blade adaptor with light oil. -
Page 10: Oil Change
Oil Change • Fuel tank must be empty before changing the oil. • Always switch off the machine and disconnect spark plug H.T. lead before carrying out any maintenance work. • Drain the engine oil when the engine is warm. Warm oil drains quickly and completely. -
Page 11: Maintenance Chart
Maintenance Chart Time Period Refer to the following table for routine maintenance. Features Requirements • • Lawnmower Visual inspection (leaks) • Throttle lever Check operation • • Remote air filter hose Check • Cutting system Inspect and check assembly (Blades) •... -
Page 12: Troubleshooting
Troubleshooting Problem Possible cause Correction Does not start Fuel tap 'OFF' Turn fuel tap 'ON' Out of fuel Refill tank with correct fuel Throttle lever in incorrect position Refer to 'Starting Procedures' Spark plug lead not connected Press terminal cover fully onto the spark plug Engine flooded Turn fuel tap 'OFF'. -
Page 13: Engine Specifications
TECHNICAL SPECIFICATIONS Engine Specifications Engine model 350 OHV 4 STROKE Displacement 118 cc Bore 60 mm Stroke 42 mm Gross Engine Torque 7 Nm* Fuel tank capacity 1.0L Engine oil SAE 30 Engine oil capacity 0.6L Spark Plug / Spark Plug Replacement F6RTC (Torch) / RN11YC4 (Champion) Spark Plug Gap 0.6 mm - 0.7 mm... - Page 14 WARRANTY Warranty This lawnmower is warranted against mechanical defects and faulty workmanship or material for a period of 12 months, from date of purchase. In the unlikely event that you experience difficulties with your lawn mower, simply take it to an Authorised Service Centre with receipt for repair within 12 months of purchase.
- Page 15 WARRANTY Warranty...
- Page 16 ©2015 Briggs and Stratton Australia Pty Ltd All rights reserved. No part of this booklet may be reproduced by any means without prior written permission. All information herein is subject to change without notice. 1743 CREATED LR02467A WAS LR02329A 25/05/2015 LR02467A-A DESCRIPTION DATE...


Need help?
Do you have a question about the TIGER and is the answer not in the manual?
Questions and answers