Advertisement
Quick Links
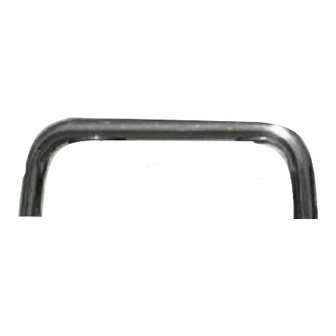
ARB WINCH/NON WINCH BUMPER TO SUIT 08/2004
PRODUCT NO:
FITTING KIT NO:
WHEN INSTALLED IN ACCORDANCE WITH THESE INSTRUCTIONS, THE FRONT
PROTECTION BAR DOES NOT AFFECT OPERATION OF THE SRS AIRBAG.
• THIS PRODUCT MUST BE INSTALLED EXACTLY AS PER THESE INSTRUCTIONS
USING ONLY THE HARDWARE SUPPLIED.
• IN THE EVENT OF DAMAGE TO ANY BULL BAR COMPONENT, CONTACT YOUR
NEAREST AUTHORISED ARB STOCKIST. REPAIRS OR MODIFICATIONS TO THE
IMPACT ABSORPTION SYSTEM MUST NOT BE ATTEMPTED.
• DO NOT USE THIS PRODUCT FOR ANY VEHICLE MAKE OR MODEL, OTHER THAN
THOSE SPECIFIED BY ARB.
• DO NOT REMOVE LABELS FROM THIS BULL BAR.
OPTIONAL LIGHT SETS TO SUIT THIS PRODUCT:
- ARB 6821201 Fog Light Kit Suit 3163015
- Up to IPF 900 SERIES FOG OR DRIVING LIGHT SETS
IMPORTANT
This winch bumper is suitable only for Warn winches up to 9500lb.
24-04-13
If you have any queries regarding the installation of this product please contact the distributor from whom it was purchased, or alternatively the ARB office in your state.
Head Office – ARB Corporation Ltd VIC: 42-44 Garden Street, Kilsyth, Victoria, 3137 Tel: (03) 9761 6622 Fax: (03) 9761 6807
WA:(08) 9244 3553 NSW: (02) 9821 3633 ACT: (02) 6280 7475 SA: (08) 8244 5001 QLD: (07) 3872 3872 NT: (08) 8947 2262 TAS: (03) 6331 4190
ONWARDS NISSAN GU PATROL
3917140
5100050 Top Tube Kit
5100160 Buffer Kit – With hole (required when fitting Top Tube)
5100170 Buffer Kit – With no hole
6172355
WARNING
FOR VEHICLES EQUIPPED WITH SRS AIRBAG
TAKE NOTE OF THE FOLLOWING:
Page 1 of 12
3786417
Advertisement

Related Manuals for ARB 3917140


Summary of Contents for ARB 3917140
- Page 1 3786417 If you have any queries regarding the installation of this product please contact the distributor from whom it was purchased, or alternatively the ARB office in your state. Head Office – ARB Corporation Ltd VIC: 42-44 Garden Street, Kilsyth, Victoria, 3137 Tel: (03) 9761 6622 Fax: (03) 9761 6807...
- Page 2 USE. PART NO. QTY. DESCRIPTION 4581088 Chassis rail extension adjuster bolt 6151096 Bolt M12 x 1.25 x 40mm 6151095 Bolt M12 x 1.25 x 35mm 6151135 Nut M12 x 1.25 6151189 Nut M12 x 1.75 4581049 Washer M12 Flat CHASSIS BRACKETS TO 4581050 Washer M12 Spring CHASSIS...
-
Page 3: Tools Required
USE. PART NO. QTY. DESCRIPTION 6151017 Bolt M6 x 16mm 6151046 Washer flat M6 NO. PLATE 6151128 Flange nut M6 6781408 Double sided tape 6522873 Air deflector front 3314852 Air deflector extension 6151017 Bolt M6 x 16mm AIR DEFLECTOR 6151046 Washer flat M6 6151128 Flange nut M6... - Page 4 BULL BAR PREPARATION Nut M12 Assemble the two chassis brackets to Shoulder Washer the bull bar using two per side, M12 x 35mm bolts, heavy duty D washers, Spring Washer Washer 12mm shoulder washers, heavy duty D Washer 12mm washers, spring washers and nuts. Bolt M12x35m Position the impact absorbers centrally on the upright slots.
- Page 5 WINCH FITMENT For ease of access the winch gearbox handle needs to be rotated. To do this, first undo all the cap screws and carefully lift the gearbox clear of the winch body so as not to damage the gasket. (Do not lift the gearbox more than a couple of millimetres) Rotate the gearbox 144°...
- Page 6 12. Remove the two bolts in the base of the control box and reposition them into the more centralised holes. 13. Replace the 4 solenoids, making sure they line up with the holes in the base. 14. Replace the 2 cap screws, washers and nuts removed in step 13 above into original holes.
- Page 7 19. Place winch on a stand with mounting holes facing upwards and lower bull bar onto winch. Align all four holes and secure using 1 ½” x 3/8” bolts on top holes and 1 ¾” x 3/8” bolts on lower holes, plus 3/8”...
- Page 8 27. Before fitting the bull bar, using black paint, paint the section between bull bar wing and the bottom of the headlight. 28. Position the bull bar on top of the chassis rails and bolt into place using the M12 x 40mm bolts, heavy-duty washers and spring washers.(Do not tighten) NOTE: Due to variations in the vehicle...
- Page 9 30. Fit M12 x 40mm bolt (passenger’s side) & M12 x 35mm bolt (driver’s side), ½” flat washers, heavy duty flat washers, spring washers and 12mm nuts to lower bull bar mounting holes and vehicle tie down plates. (Do not Tighten) NOTE: Insert bolt from outside of lower mount holes so heavy-duty washer covers large hole on tie down plate.
- Page 10 IF FITTING TOP TUBE 35. Push the tube through the holes in the top of the buffer and fix using the M12 X 40mm bolts washers and spring washers. NOTE: Torque these M12 fasteners to 44Nm only (Critical) 36. Assemble and install combination light surrounds (p/n 3163015) as per instructions no.
- Page 11 37. Fit three M6 cage nuts to the upper deflector panel as shown on the left. 38. For non-4.8 litre petrol engine vehicles, assemble the second deflector panel using M6x16mm bolts, washers and flange nuts as shown on the left. 39.
- Page 12 43. If no winch is fitted to the bar, wrap rubber extrusion around winch cover. 44. Place stainless steel washers over the winch cover fixing holes located on the top middle face of the winch bar. 45. Place the winch cover on top of the bar inline with the mount holes.
Need help?
Do you have a question about the 3917140 and is the answer not in the manual?
Questions and answers