
Related Manuals for Creative Play AS101


Summary of Contents for Creative Play AS101
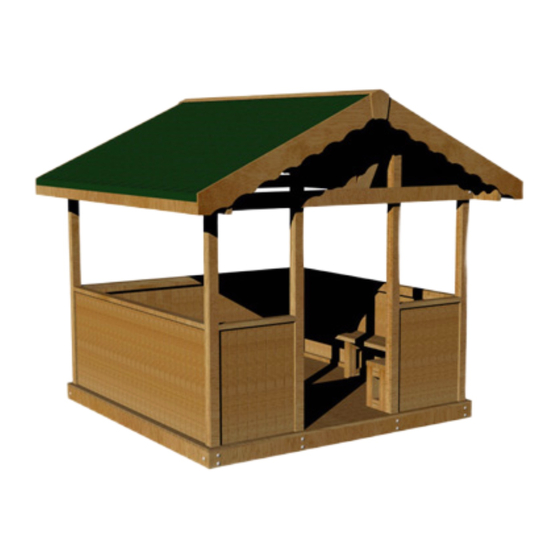
- Page 1 ALPINE SHELTER Assembly + Installation Instructions REF: AS101 - ALPINE SHELTER pg 1 of 26...
-
Page 2: Parts Required
ASF2 ASF2 ASF2 ASF1 x269 (FM80 BRASS SCREWS) (M12 200 cup square hex) (M12 155 cup square hex) x500* (13mm FELT NAILS) approx.* (M12 Nylocs) x500* (DECK SCREWS) approx.* (End Caps) pg 2 of 26 REF: AS101 - ALPINE SHELTER... - Page 3 PARTS required UPRIGHT TIMBERS ASU3 ASU3 ASU1 ASU1 ASU2 ASU1 ASU2 ASU1 x4.5 PACKS (CURVED GREEN FELT ROOF SHINGLES) EACH PACK CONSISTS OF 21 x 1m Felting ‘STRIPS’ and will cover 3m2 pg 3 of 26 REF: AS101 - ALPINE SHELTER...
- Page 4 RAFTER with HOLES ASR3 ASR4 ASR3 ASR2 ASR4 ASR3 ASR3 ASR5 ASR7a / b ASR2 ASR3 ASR5 ASR6 ROOF TIMBERS additional ASR10 ASR8 ASR8 ASR9 RIDGE CAP / COVER ASR8 ASR10 ASR8 pg 4 of 26 REF: AS101 - ALPINE SHELTER...
- Page 5 FENCE PANELS 2x SMALL FENCE PANELS 2 x SMALL 3 x LARGE SEAT SLATS (consists of SEAT SLATS (consists of inner and outer parts) inner and outer parts) 9 x LEGS pg 5 of 26 REF: AS101 - ALPINE SHELTER...
-
Page 6: Tools Required
TOOLS required pg 6 of 26 REF: AS101 - ALPINE SHELTER... -
Page 7: Foundation Details
Foundation Details *FOUNDATIONS NOT REQUIRED - PLEASE MARK THE AREA / POSITION THE TIMBERS MUST BE INSTALLED ONTO A LEVEL SURFACE pg 7 of 26 REF: AS101 - ALPINE SHELTER... - Page 8 Attach using M12 bolts and nylocs ASF2 End caps NOT required as the decking will cover the nuts ASF2 M12 x 200 BOLTS / NYLOCS ASF1 M12 x 155 BOLTS / NYLOCS pg 8 of 26 REF: AS101 - ALPINE SHELTER...
- Page 9 M12 x 155 BOLTS / NYLOCS ASU3 Bolt the ROOF timbers (ASR5 / ASR6) to the corner up- right timbers (ASU1 ) Using M12 x 155 cup square hex bolts ASR6 ASR5 ASR5 ASR6 pg 9 of 26 REF: AS101 - ALPINE SHELTER...
- Page 10 Assembly Instructions Ensure END CAPS are used End caps must be positioned on the inside pg 10 of 26 REF: AS101 - ALPINE SHELTER...
- Page 11 Bolt the ASR2 timber (rafter with holes) to the ASU1 / 2 Uprights Using M12 x 155 square cup hex bolts / nylocs / end caps ASU2 ASU1 Attach the ASR7a / ASR7b timbers Using FM80 Brass screws ASR7a / b pg 11 of 26 REF: AS101 - ALPINE SHELTER...
- Page 12 Assembly Instructions Screw from the INSIDE No Screw be be screw from the outside for these PARTS SCREW HOLES LOCATIONS Drop the RIDGE BEAM ASR1 into position Attach using FM80 Brass screws pg 12 of 26 REF: AS101 - ALPINE SHELTER...
- Page 13 Assembly Instructions Ensure the BACK is ‘FLUSH’ Circled BELOW RIGHT Attach the remaining rafters to the ASR5 / ASR1 roof timbers using brass screws Remaining rafters are WITHOUT HOLES ASR1 ASR5 ASR5 pg 13 of 26 REF: AS101 - ALPINE SHELTER...
- Page 14 Assembly Instructions Rafters MUST be spaced correctly This is to ensure the PLYWOOD FITS CORRECTLY ASR3 ASR3 ASR3 ASR3 ASR3 ASR3 pg 14 of 26 REF: AS101 - ALPINE SHELTER...
- Page 15 Assembly Instructions Attach the ASR4 timbers to the RAFTERS Using FM80 Brass screws ASR4 Bottom EDGE flush with corner - as shown RIGHT ASR2 ASR3 ASR4 pg 15 of 26 REF: AS101 - ALPINE SHELTER...
- Page 16 NARROW plywood sheet is positioned at the BACK RIDGE BEAM Notes: Edge of PLYWOOD flush with the centre of the RIDGE BEAM Edge of PLYWOOD flush with face of ASR4 timber ASR4 pg 16 of 26 REF: AS101 - ALPINE SHELTER...
- Page 17 Assembly Instructions Ensure they are positioned CORRECTLY Repeat for the OPPOSITE SIDE pg 17 of 26 REF: AS101 - ALPINE SHELTER...
- Page 18 STRAIGHT edge to be attached tot the ASR4 timber Ensure: The first ROW (which are positioned upside down) are all in line - approx positioned 50mm down the ASR4 timbers ASR4 pg 18 of 26 REF: AS101 - ALPINE SHELTER...
- Page 19 Continue to attach the FELT SHINGLES to the PLYWOOD SHEETS Using FELT NAILS Notes: Only the FIRST ROW are positioned ‘UPSIDE DOWN’ Notes: The SECOND ROW will positioned AS SHOWN RIGHT Attach the SHINGLES ROW by ROW pg 19 of 26 REF: AS101 - ALPINE SHELTER...
- Page 20 TOP OF THE SHEET - If required TRIM the last row of SHINGLES to suit Notes: There is a TIMBER cover to cover the TWO SIDES REPEAT STEPS for the OPPOSITE SIDE pg 20 of 26 REF: AS101 - ALPINE SHELTER...
- Page 21 Using FM80 Brass screws Notes: BOTTOM EDGE FLUSH with the BOTTOM EDGE of the SHOWN SOLID BLACK BELOW ASR4 Attach the RIDGE CAP and ASR9 timber / cap Using FM80 Brass screws pg 21 of 26 REF: AS101 - ALPINE SHELTER...
- Page 22 Start from the FRONT working towards the back Notes: SPACE EVENLY approx. 4mm between each board ENSURE: INSTALL THE BOARDS ‘FRONT’ to ‘BACK’ - any discrepency in the gaps will be hidden by the ‘BACK’ BENCH BACK FRONT pg 22 of 26 REF: AS101 - ALPINE SHELTER...
- Page 23 UPRIGHT - DRILL PILOT HOLES to ensure the timbers do not split - ENSURE the 2” x 2” frame is on the INSIDE LARGE LARGE LARGE SMALL SMALL pg 23 of 26 REF: AS101 - ALPINE SHELTER...
- Page 24 - ALL VERTICAL / HORZONTAL legs are positioned 10mm from the INNER EDGE (FLUSH with the BACK EDGE - Gap between INNER and OUTER BOARDS = 5mm - BLACK CIRCLES = SCREW HOLE LOCATIONS (BOTTOM LEFT) pg 24 of 26 REF: AS101 - ALPINE SHELTER...
-
Page 25: Side Panels
Assembly Instructions Seating is positioned AGAINST the 2” x 2” timber on the SIDE PANELS Notes: Only the FIRST ROW are positioned ‘UPSIDE DOWN’ Notes: Screw the legs into the DECK BOARD pg 25 of 26 REF: AS101 - ALPINE SHELTER... -
Page 26: Additional Dimensions
Additional Dimensions pg 26 of 26 REF: AS101 - ALPINE SHELTER...
Need help?
Do you have a question about the AS101 and is the answer not in the manual?
Questions and answers