
Subscribe to Our Youtube Channel
Related Manuals for Inalto IDWD60DS


Summary of Contents for Inalto IDWD60DS
- Page 1 U S E R M A N U A L I N A L T O . H O U S E 60cm Double Dishwasher Drawer — M O D E L C O D E I D W D 6 0 D S A H I G H E R L E V E L O F L I V I N G V 1 .
- Page 2 Again, thank you for choosing an InAlto appliance and we look forward to being of service to you. A RESIDENTIA GROUP INITIATIVE...
-
Page 3: Table Of Contents
PAGE 3 INALTO.HOUSE Contents Page Welcome Quick Start Guide Safety Instructions Product Overview Control Panel Using Your Dishwasher Installation Operation Instructions Maintenance & Cleaning Troubleshooting Product Specifications Purchase Details Your Receipt Warranty... -
Page 4: Quick Start Guide
PAGE 4 Quick Start Guide QUICK USER GUIDE Starting A Wash STARTING A WASH Discard scraps Load dishes carefully Scrape large food particles off and For better washing result, place the remove any foreign objects. dishes properly avoiding any contact or overlapping between them. -
Page 5: Safety Instructions
PAGE 5 INALTO.HOUSE Safety Instructions SAFETY INSTRUCTIONS SAFETY INSTRUCTIONS WARNING WARNING WARNING: • Unplug before cleaning and performing READ ALL INSTRUCTIONS BEFORE USE READ ALL INSTRUCTIONS BEFORE USE. maintenance on the appliance. READ ALL INSTRUCTIONS BEFORE USE It is your responsibility to use caution when installing It is your responsibility to use caution when •... -
Page 6: Product Overview
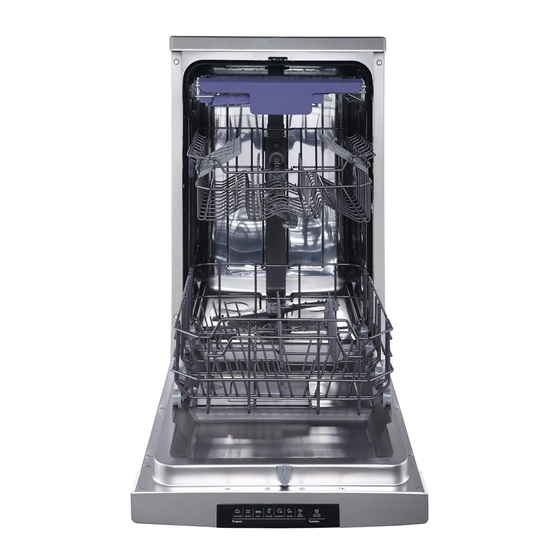
PAGE 6 Product Overview CT DESCRIPTION PRODUCT DESCRIPTION PRODUCT DESCRIPTION PRODUCT DESCRIPTION IMPORTANT: IMPORTANT: IMPORTANT: performance from your dishwasher, read all operating instructions To get the best performance from your dishwasher, read all ope To get the best performance from your dishwasher, read all operating instructions or the first time. -
Page 7: Control Panel
PAGE 7 INALTO.HOUSE Control Panel Control Panel Operation (Button) CONTROL PANEL Power: Press this button to turn on your dishwasher, the screen will light up. Press this button to turn on your dishwasher, the screen will Power Drawer Selector: Press the button to select either upper drawer or lower drawer loaded, the light up. -
Page 8: Using Your Dishwasher
PAGE 8 SING YOUR DISHWASHER Using Your Dishwasher Before using your dishwasher : USING YOUR DISHWASHER BEFORE USING YOUR DISHWASHER Before using your dishwasher : 1. Removing the larger residue off the wash items 2. Loading the basket 3. Loading the detergent 4. - Page 9 Folding down the pins PAGE 9 INALTO.HOUSE The spacing between the pins can be increased by folding the loading of large bowls and deep pot and pans. The pins on the front rack can also be folded down to crea Do not load the basket with the front rack removed.
- Page 10 PAGE 10 Using Your Dishwasher (Continued) SAFETY INSTRUCTIONS PREPARING AND LOADING DISHES • Be sure that no wash items protrude WARNING • Consider buying utensils which are through the basket base where they will READ ALL INSTRUCTIONS BEFORE USE identified as dishwasher-proof. likely foul the spray arm.
- Page 11 CAUTION Items will be hot! To prevent damage, do not take glass and cutlery out of the dishwasher for around 15 minutes after the PAGE 1 1 INALTO.HOUSE program has ended. Loading the dishwasher Using Your Dishwasher (Continued) The loading pattern in the illustration is recommended for the design of basket.
- Page 12 WARNING Dishwasher detergent is dangerous. Avoid skin and eye contact Keep the dishwasher detergent out of reach of children. Keep it sealed in a dry place. PAGE 12 Add the recommended quantity of detergent to the detergent chute on the basket. Using Your Dishwasher (Continued) Adding Rinse Aid ADDING RINSE AID...
- Page 13 PAGE 13 INALTO.HOUSE Using Your Dishwasher (Continued) ADJUSTING THE RINSE AID DISPENSER To achieve the best drying result, with the least amount of rinse aid being used, the dispenser can be adjusted by the user. There are 5 levels of adjustment, the factory setting is D3.
- Page 14 PAGE 14 Installation Instructions INSTALLATION INSTRUCTION Product Dimensions PRODUCT DIMENSIONS Height (H1) 820mm Height (H2) 85-132mm (Height of kickplate) Height (H1) 820 mm Width (W2) 595mm Depth (D1) 570mm Height (H2) 85-135 mm (Height of kick plate) Depth (D2) 1080mm (Drawer open) Width (W) 595 mm Depth (D1)
-
Page 15: Installation
Parts supplied Wire clamps (2) Hose clamp (1) (for drain hose coupling) (for sink waste connection) PAGE 15 INALTO.HOUSE Mounting brackets (4) Installation Instructions (Continued) Moisture protection tape (1) Before Installation Before Installation Drain hose coupling (1) SUPPLIED PARTS Parts supplied... - Page 16 Electrical, drain Electrical, drain and water supply and water supply min. 820 mm min. 820 mm line entrances line entrances PAGE 16 Space between cabinet Space between cabinet bottom and floor bottom and floor Installation Instructions (Continued) min. 600 mm Prepare the dishwasher Drawer dishwashers are unstable until they are secured to their surrounding cabinetry.
- Page 17 PAGE 17 INALTO.HOUSE Fit the dishwasher Installation Instructions (Continued) Fit the dishwasher Position the dishwasher in the cavity so the the drawer fronts are inline with the adjacent cabinetry. Position the dishwasher in the cavity so the the drawer fronts are inline with the Draw the hoses and power cord through the their opening as you slide the product in.
- Page 18 PAGE 18 Install the kick plate Installation Instructions (Continued) 1. Prepare a kick plate as shown. he kick plate (The mounting hole position is measured by the machine at the factory state. If the height of the feet is adjusted, the position of the mounting hole should be changed according to the actual situation.) a kick plate as shown.
- Page 19 It is your responsibility to use caution when installing Failure to do so could result in death or maintaining, and operating your dishwasher. PAGE 19 INALTO.HOUSE electrical shock. We will not be liable for any damage resulting from improper use.
- Page 20 PAGE 20 Installation Instructions (Continued) Connection Of The Drain Hose There are two recommended options for connecting the drain hose. CONNECTION OF THE DRAIN HOSE Option A: Connecting to the sink waste There are two recommended options for connecting the drain hose. This is the typical modern method.
- Page 21 PAGE 21 INALTO.HOUSE Installation Instructions (Continued) Option B: Connecting to a standpipe CONNECTION OF THE DRAIN HOSE (continued) The standpipe must be a minimum diameter of 38mm (1 1/2 inch) and requires a trap for odor control. Option B: Connecting to a standpipe...
-
Page 22: Operation Instructions
PAGE 22 Operation Instructions WASHING PROGRAMS • Auto Auto sensing wash, lightly, or heavily soiled crockery, with or with out dried-on food. • Intensive Display For heaviest soiled crockery, such as pots, pans, casserole dishes and dishes that have been sitting with dried food on them for some time. - Page 23 PAGE 23 INALTO.HOUSE OPERATING THE APPLIANCE Operation Instructions (Continued) Wash Cycle Table Wash Cycle Table The table below shows which programs are best for the levels of food residue on them and how much detergent is needed. It also show various information about WASH PROGRAMS TABLE the programs.
- Page 24 PAGE 24 Operation Instructions (Continued) CHANGING THE PROGRAM ONCE STARTED SELECT A DRAWER A wash program can only be changed if it has Close the drawer, press the Power button to switch on the machine. not been running long. You need to ensure that the wash water is still present and it has Press the Drawer button to choose not drained out and began rinsing.
-
Page 25: Maintenance & Cleaning
It is your responsibility to use caution when installing maintaining, and operating your dishwasher. We will not be liable for any damage resulting from PAGE 25 INALTO.HOUSE improper use. This is the safety alert symbol. This symbol alerts you to Maintenance & Cleaning... - Page 26 SAFETY INSTRUCTIONS PAGE 26 WARNING READ ALL INSTRUCTIONS BEFORE USE It is your responsibility to use caution when installing Maintenance & Cleaning (Continued) maintaining, and operating your dishwasher. We will not be liable for any damage resulting from improper use. This is the safety alert symbol.
- Page 27 PAGE 27 INALTO.HOUSE Troubleshooting TROUBLESHOOTING TIPS Before Calling For Service BEFORE CALLING FOR SERVICE Before calling for service, check the following list for problems probable causes and Before calling for service, check the following list for problems probable causes and what you what you can do.
-
Page 28: Troubleshooting
PAGE 28 Troubleshooting (Continued) Problem Possible Causes What To Do Wash items are not Unloading dishwasher The drying cycle must be complete fully dry too soon. before the dishwasher is unloaded. Check the Display for end time. Insufficient Rinse Aid. Check for Low Rinse Aid Level warning and re fill if necessary. - Page 29 PAGE 29 INALTO.HOUSE Troubleshooting (Continued) Error Codes ERROR CODES If there is a malfunction, the dishwasher will display error codes to identify the symptom. If there is a malfunction, the dishwasher will display error codes to identify the problem. Codes...
-
Page 30: Product Specifications
PAGE 30 Product Specifications Model: IDWD60DS Product Type: Double Dishwasher Drawer Standard Place Settings: 14 (7 places per drawer) Energy Efficiency: 3.5 (MEPS) Water Consumption 4.5 (WELS) Standard Cleaning Cycle: Energy Consumption of 0.34 kWh the Standard Cleaning Cycle Water Consumption of 6.7 litres... -
Page 31: Purchase Details
PAGE 31 INALTO.HOUSE Purchase Details For future reference, please record the following information which can be found on the rating plate and the date of purchase which can be found on your sales invoice. STORE DETAILS STORE NAME ADDRESS TELEPHONE... - Page 32 PAGE 32 Warranty Information AUSTRALIAN WARRANTY TERMS & CONDITIONS IN THIS WARRANTY DISHWASHER DRAWERS ‘acceptable quality’ as referred to in clause 10 of this warranty has the same meaning referred to This document sets out the terms and conditions of in the ACL;...
-
Page 33: Warranty
PAGE 33 INALTO.HOUSE Warranty Information (Continued) You will bear the cost of transportation, travel For Appliances and services provided by and delivery of the Appliance to and from Residentia Group in Australia, the Appliances Residentia Group or its ASR. If you reside outside... - Page 34 The provision of service under this warranty is Simply visit the below website, or ask your retailer for limited by a 25km boundary from the retailer where help: https://inalto.house/nz/registration the product was purchased except for microwaves. Such travelling outside of these limits will incur...
- Page 35 PAGE 35 INALTO.HOUSE THIS PAGE IS INTENTIONALLY LEF T BL ANK...
- Page 36 PAGE 36 A H I G H E R L E V E L O F L I V I N G VER SION A RESIDENTIA GROUP INITIATIVE...
Need help?
Do you have a question about the IDWD60DS and is the answer not in the manual?
Questions and answers