
Subscribe to Our Youtube Channel
Related Manuals for Reed Instruments R4700SD


Summary of Contents for Reed Instruments R4700SD
- Page 1 R4700SD Data Logging Environmental Meter Instruction Manual GlobalTestSupply www. .com Find Quality Products Online at: sales@GlobalTestSupply.com...
-
Page 2: Table Of Contents
Light Measurement ................11 Changing the Light Meter unit of Measure .......... 11 Zero Adjustment .................. 11 Sound Level Measurement (Requires optional R4700SD-SOUND probe) ........12 Data Hold ..................... 12 Recording Maximum and Minimum Readings ........13 Backlight ....................13 Setup Mode ..................14-17... -
Page 3: Introduction
Product Disposal and Recycling .............. 26 Product Support ..................26 Introduction Thank you for purchasing your REED R4700SD Data Logging Environmental Meter. Please read the following instructions carefully before using your instrument. By following the steps outlined in this manual your meter will provide years of reliable service. -
Page 4: Product Quality
Servicing should only be provided by an authorized service center. Features • Measures air velocity/temperature, ambient temperature, relative humidity, light, and contact temperature • Measures sound level (dB) with R4700SD-SOUND (sold seperately) • Air velocity is measured in m/s, ft/min, km/h, mph or knots • Light levels are measured in foot-candles or lux • Temperature is measured in °C or °F • Data hold and Max/Min functions • Real-time datalogger with integrated SD memory card • User selectable sampling rate from 1 to 3600 seconds... -
Page 5: Specifications
<70%RH: ±3%RH Resolution: 0.1% RH Light Measuring Ranges: 0 to 20,000 Lux (0 to 1,860 Ft-cd) Accuracy: ±(5% rdg ± 8 dgt) Resolution: 1 Lux/0.1 Ft-cd Sound (Optional, R4700SD-SOUND Adapter Sold Separately) Measuring Ranges: 30 to 80dB 50 to 100dB 80 to 130dB continued... GlobalTestSupply www. .com Find Quality Products Online at:... - Page 6 Accuracy: Basic Accuracy of ±3.5dB Resolution: 1 dB General Specifications Response Time: 1 second Display: 4-digit dual LCD Backlit Display: Data Hold: Min: Max: Zero Adjustment: Yes (for Light) Datalogging Capabilities: Real-Time Clock and Date Stamp: Selectable Sampling Rate: Yes (1, 2, 5, 10, 30, 60, 120, 300, 600, 1800, 3600 seconds) External Memory: Yes, expandable up to 16GB with...
-
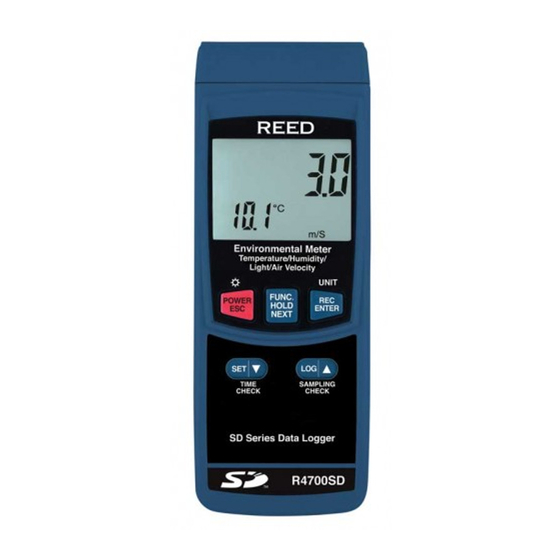
Page 7: Instrument Description
Light/Air Velocity FUNC. POWER HOLD ENTER NEXT TIME SAMPLING CHECK CHECK SD Series Data Logger R4700SD 1. POWER/Backlight/ESC Button 11. Tripod Mounting Screw 2. SET/Down/TIME 12. Battery Cover CHECK Button 13. Kickstand 3. SD Card Slot 14. Type K/J Thermocouple 4. LCD Display Input Jack 5. HOLD/FUNCTION/... -
Page 8: Display Description
Display Description Ft-cd Knot Km/h %RH 7. Measurement Reading 1. Light Unit of Measure Indicator 2. Thermocouple Type Indicator 8. Sound Unit of Measure 3. Date/Time Stamp 9. Maximum and Minimum 4. Date & Time Values/ Indicators Temperature Measurement 10. Record Mode Indicator Reading 11. Data Hold Indicator 5. Temperature Unit of Measure 12. Low Battery Indicator 6. Units of Measure GlobalTestSupply www. -
Page 9: Operating Instructions
Turn the meter on by pressing the POWER button. To turn the meter off, press and hold the POWER button for 2 seconds. Note: This meter can be powered by either six (6) "AA" batteries or AC adapter (sold separately). Selecting Measurement Modes The R4700SD offers 4 types of measurement modes: • Air Velocity/Temperature • Humidity/Temperature • Type K/J Thermocouple Temperature • Light Meter When the meter is on, press and hold the FUNCTION button to scroll through the measuring modes. The display will flash "An" (for air... -
Page 10: Humidity/Temperature Mode (Rh/Ta)
Humidity/Temperature Mode (rH/tA) Plug the environmental probe into the probe input socket while the meter is off. Select the "rH" function (see Selecting Measurement Modes for details). The top part of the display will indicate the humidity value while the lower part of the display will indicate the air temperature value as shown. -
Page 11: Light Measurement
Light Measurement Plug the environmental probe into the probe input socket while the meter is off. Select the "LIgHt" measurement mode (see Selecting Measurement Modes for details). Hold the probe handle and face the probe head against the measuring light source. The display will show the light measurement value as shown below. Changing the Light Meter unit of Measure Press and hold the UNIT button, while in the Light Meter measurement mode. -
Page 12: Sound Level Measurement (Requires Optional R4700Sd-Sound Probe)
Sound Level Measurement (Requires optional R4700SD- SOUND probe) Plug the optional sound probe into the Probe Input Socket while the meter is off. When the meter is powered on, the LCD display will indicate "Sound" confirming it is now in sound measurement mode. There are three manual dB ranges to select from:... -
Page 13: Recording Maximum And Minimum Readings
Recording Maximum and Minimum Readings Press the REC button to enter recording mode as indicated by "REC" on the LCD. The meter will now begin recording maximum and minimum readings. While in recording mode; Press the REC button once and the maximum value will appear on the display as indicated by "REC MAX". Press the REC button again and the minimum value will appear on the display as indicated by "REC MIN". C) To exit recording mode and resume normal operation, press and hold the REC button for two seconds. When in recording mode the POWER button is disabled and the meter cannot be turned off. -
Page 14: Setup Mode
Setup Mode Press and hold the SET button for 2 seconds to enter Setup Mode. Press the NEXT button continuously to scroll through the following parameters. Parameter Description dAtE Set the time and date Set the decimal format (USA (20.00) or European (20,00)) PoFF Enable or disable the auto-power off function bEEP Turn the beeper on or off tYPE... -
Page 15: Setting Data Decimal Format (Dec)
Setting Data Decimal Format (dEC) Numeric formats vary in different countries. By default the meter is set to bASIC mode where a decimal point is used to separate units, (i.e. 20.00). The European format uses a comma (i.e. 20,00) to separate units. To change this setting, follow steps 1 and 2 when the "dEC" parameter appears on the LCD. -
Page 16: Selecting Thermocouple Type (Type)
Selecting Thermocouple Type (tYPE) Follow steps 1 and 2 when "tYPE" appears on the LCD. Press the buttons to select between type K and J. Press the ENTER button to confirm selection and skip to next parameter. Note: At any time, you can press the ESC button to exit the Setup mode and resume normal operation. Selecting the Temperature Unit of Measure (t-CF) Follow steps 1 and 2 when "t-CF" appears on the LCD. -
Page 17: Verify Set Time And Date
Note: It is recommended that new SD cards should be formatted prior to first use. If the formatting process fails, the meter will display -E-. Verify Set Time and Date During normal operation press the TIME CHECK button to display the year, month, day, hour and minutes. -
Page 18: Automatic Data Logging Mode
Press the ENTER button to confirm selection. Press the LOG button to save a reading to memory. "SCAn Card" will flash each time a data point is stored. Note: If a card is not inserted or the card is defective, the meter will flash "CArD -E-". In this case, power the meter OFF and try again with another SD memory card or verify that the card is correctly inserted. To exit manual data logging mode, press and hold the REC button 2 seconds to resume normal operation. -
Page 19: Transferring Data From The Sd Memory Card To A Computer
Transferring Data from the SD Memory Card to a Computer While the meter is powered Off remove the SD memory card from the SD card slot. Insert the SD memory card into the computer. Open the file(s) with Excel. See sample below for a Light measurement: Place Date Time Value Unit 19-07-10 12:18:28 LUX... - Page 20 See sample below for a Humidity/Temperature measurement: Place Date Time Value Unit Value Unit 19-07-10 12:19:00 15.4 %RH 22.8 RHTemp C 19-07-10 12:19:02 15.4 %RH 22.7 RHTemp C 19-07-10 12:19:04 %RH 22.7 RHTemp C 19-07-10 12:19:06 %RH RHTemp C 19-07-10 12:19:08 14.6 %RH 22.7 RHTemp C 19-07-10 12:19:10...
- Page 21 See sample below for a Air Velocity/Temperature measurement: Place Date Time Value Unit Value Unit 19-07-10 12:39:51 m/S 22.4 AMTemp C 19-07-10 12:39:53 m/S 22.4 AMTemp C 19-07-10 12:39:55 m/S 22.4 AMTemp C 19-07-10 12:39:57 m/S 22.4 AMTemp C 19-07-10 12:39:59 m/S AMTemp C 19-07-10 12:40:01...
-
Page 22: Data Stream Output
Data Stream Output Using Terminal application, a data stream can be viewed from the RS-232 output, connect RS-232/USB cable between the product and terminal/PC and use the following setting to view the data stream. Terminal Settings: • Bits per second: 9600 • Data bits: 8 • Parity: None • Stop bits: 1 41110000000335 = Upper Value, 335 FPM Reading Decimal Place 0-3 Positive (+) = 0, Negative (-) = 1 °C = 01, °F = 02, %RH = 04, m/s = 08, Knot = 09, Km/h = 10, FPM = 11, mph = 12, LUX = 15, Ft-cd = 16... -
Page 23: System Reset
Secure the battery cover with the two (2) Phillips screws. Applications • Meteorological Stations • Environmental Monitoring Accessories and Replacement Parts R4700SD-PROBE Replacement Probe for R4700SD R4700SD-SOUND Sound Level Adaptor R2920 Surface Thermocouple Probe R2930 Right Angle Thermocouple Probe R2940 Air/Gas Thermocouple Probe R2950 Immersion Thermocouple Probe R2960 Needle Tip Thermocouple Probe continued... -
Page 24: Frequently Asked Questions (Faq's)
TP-01 Beaded Thermocouple R1500 Tripod RSD-ADP-NA Power Supply, 110V RSD-ADP-EU Power Supply, 220V CA-05A Soft Carrying Case R8888 Deluxe Hard Carrying Case SD-4GB 4GB Class 4 SDHC Memory Card RSD-16GB 16GB Micro SD Memory Card w/ Adapter Don't see your part listed here? For a complete list of all accessories and replacement parts visit your product page on www.reedinstruments.com. Frequently Asked Questions (FAQ's) I cannot turn off my meter, do you know why? Often times, the meter cannot be turned off because it is in recording... -
Page 25: Product Care
REED Instruments guarantees this instrument to be free of defects in material or workmanship for a period of one (1) year from date of shipment. During the warranty period, REED Instruments will repair or replace, at no charge, products or parts of a product that proves to be defective because of improper material or workmanship, under normal use and maintenance. -
Page 26: Product Disposal And Recycling
Product Support If you have any questions on your product, please contact your authorized REED distributor or REED Instruments Customer Service by phone at 1-877-849-2127 or by email at info@reedinstruments.com. Please visit www.REEDINSTRUMENTS.com for the most up-to-date manuals, datasheets, product guides and software. - Page 27 TEST & MEaSuRE wITh ConfIDEnCE ChECk ouT ouR LaTEST PRoDuCTS! GlobalTestSupply www. .com Find Quality Products Online at: sales@GlobalTestSupply.com...
- Page 28 GlobalTestSupply www. .com Find Quality Products Online at: sales@GlobalTestSupply.com...
Need help?
Do you have a question about the R4700SD and is the answer not in the manual?
Questions and answers