Table of Contents
Advertisement
Available languages
Available languages
Quick Links
Advertisement
Chapters
Table of Contents

Related Manuals for Kernau KBO 0965 SK B


Summary of Contents for Kernau KBO 0965 SK B
- Page 1 INSTRUKCJA OBSŁUGI PIEKARNIKA KBO 0965 SK B www.kernau.com...
- Page 3 SZANOWNY KLIENCIE, Naszym celem jest zaoferowanie Wam produktów o wysokiej jakości, które spełnią Wasze oczekiwania. Opisywane urządzenie zostało wyprodukowane w nowoczesnych zakładach i dokładnie przetestowane pod względem jakości. Niniejsza instrukcja została opracowana w celu ułatwienia obsługi urządzenia, które wyprodukowano z wykorzystaniem najnowszej technologii gwarantującej zaufanie i maksymalną wydajność. Przed przystąpieniem do korzystania z urządzenia należy uważnie zapoznać się z niniejszą instrukcją, ponieważ zawiera podstawowe informacje dotyczące bezpiecznej instalacji, konserwacji i obsługi.
-
Page 4: Table Of Contents
SPIS TREŚCI ROZDZIAŁ 1. OSTRZEŻENIA DOTYCZĄCE BEZPIECZEŃSTWA ..5 • OGÓLNE OSTRZEŻENIA DOTYCZĄCE BEZPIECZEŃSTWA ........ 5 • OSTRZEŻENIA DOTYCZĄCE INSTALACJI ................ 6 • PODCZAS EKSPLOATACJI ...................... 7 ROZDZIAŁ 2. PRZYGOTOWANIE DO INSTALACJI I OBSLUGI ..8 • WYBÓR MIEJSCA INSTALACJI PIEKARNIKA ............... 8 •... -
Page 5: Rozdział 1. Ostrzeżenia Dotyczące Bezpieczeństwa
ROZDZIAŁ 1. OSTRZEŻENIA DOTYCZĄCE BEZPIECZEŃSTWA Przed u życiem u rządzenia n ależy u ważnie p rzeczytać c ała i nstrukcję, a następnie p rzechowywać ją w dostępnym miejscu na wypadek późniejszych wątpliwości. Niniejsza instrukcja została opracowana z myślą o kilku modelach urządzenia. Zakupiony piekrarnik może nie obsługiwać niektórych funkcji opisanych w niniejszej instrukcji. Czytając instrukcje obsługi, należy zwracać szczególną uwagę na podane wartości liczbowe. OGÓLNE OSTRZEŻENIA DOTYCZĄCE BEZPIECZEŃSTWA •... -
Page 6: Ostrzeżenia Dotyczące Instalacji
OSTRZEŻENIE: Przed wymianą lampy sprawdź czy zostało wyłączone zasilanie urządzenia, aby uniknąć porażenia prądem elektrycznym. OSTRZEŻENIE: Podczas gotowania lub grillowania potraw dostępne elementy piekarnika mogą być gorące. Małe dzieci nie powinny zbliżać się do urządzenia. • Urządzenie zostało wyprodukowane zgodnie ze wszystkimi krajowymi oraz międzynarodowymi normami i przepisami. • Czynności konserwacyjne i naprawcze należy powierzać wyłącznie pracownikom autoryzowanego serwisu. Instalacja i naprawy przeprowadzone przez osoby inne niż pracownicy autoryzowanego serwisu mogą zagrażać bezpieczeństwu użytkowników urządzenia. Wszelkie zmiany i modyfikacje specyfikacji mogą być niebezpieczne pod wieloma względami. -
Page 7: Podczas Eksploatacji
• Po rozpakowaniu urządzenia należy upewnić się, że nie zostało ono uszkodzone podczas przewożenia. W przypadku stwierdzenia jakichkolwiek usterek nie wolno korzystać z urządzenia i natychmiast skontaktować się z przedstawicielem autoryzowanego serwisu. Ponieważ materiały wykorzystane do opakowania urządzenia (folia, zszywki, styropian itp.) mogą być niebezpieczne dla dzieci, należy je natychmiast zebrać i usunąć. • Urządzenie należy chronić przed wpływem czynników atmosferycznych. Nie należy narażać urządzenia na działanie światła słonecznego, deszczu, śniegu itp. • Materiały znajdujące się w pobliżu urządzenia (obudowa) powinny być odporne na temperaturę minimum 100°C. -
Page 8: Rozdział 2. Przygotowanie Do Instalacji I Obslugi
ROZDZIAŁ 2. PRZYGOTOWANIE DO INSTALACJI I OBSLUGI Przed rozpoczęciem czyszczenia lub konserwacji należy zawsze wyłączyć zasilanie urządzenia. Do powyższych czynności można przystapić po odłączeniu przewodu zasilającego lub ustawieniu głównego włącznika w pozycji wyłączonej. Nie wolno demontować pokręteł regulacyjnych, aby oczyścić panel sterowania. Aby zachować... -
Page 9: Instalacja Piekarnika Przeznaczonego Do Zabudowy
INSTALACJA PIEKARNIKA PRZEZNACZONEGO DO ZABUDOWY Wsuń piekarnik do szafki, popychając ją do przodu. Otwórz drzwiczki piekarnika i włóż 2 śruby do otworów znajdujących się na ramie piekarnika. Jeśli rama urządzenia zetknie się z drewnianą powierzchnią szafki, dokręć śruby. Jeśli piekarnik zostanie zainstalowany pod płytą grzejną, odległość między blatem kuchennym i panelem górnym powinna wynosić minimum 50 mm, a odległość między blatem kuchennym i górną częścią panelu sterowania minimum 25 mm. -
Page 10: Instalacja Elektryczna I Zabezpieczenie Piekarnika Przeznaczonego Do Zabudowy
INSTALACJA ELEKTRYCZNA I ZABEZPIECZENIE PIEKARNIKA PRZEZNACZONEGO DO ZABUDOWY Podczas przeprowadzania instalacji elektrycznej należy postępować zgodnie ze wskazówkami podanymi poniżej: • Przewód uziemienia należy podłączyć przy pomocy śruby oznaczonej symbolem uziemienia. Podłączenie przewodu zasilającego powinno być zgodne z podanym na Rys. 6. W przypadku braku wyjścia uziemienia wymaganego zgodnie z przepisami w miejscu instalacji, należy natychmiast porozumieć się z personelem autoryzowanego serwisu. -
Page 11: Rozdział 3. Wygląd I Wymiary Urządzenia
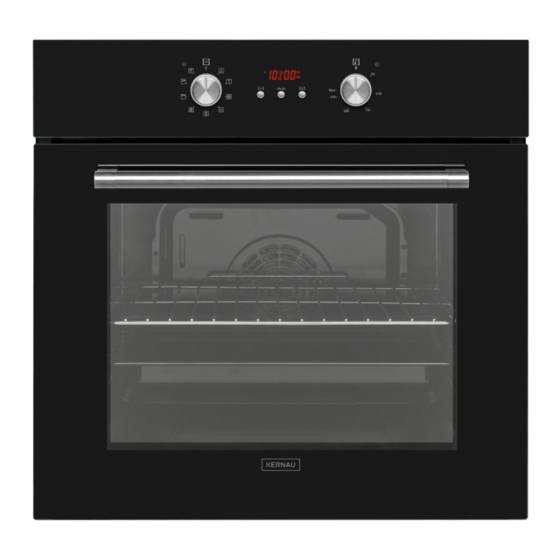
ROZDZIAŁ 3. WYGLĄD I WYMIARY URZĄDZENIA Panel sterowania Uchwyt Drzwi piekarnika Dolny element grzejny (z tyłu płyty) Górny element grzejny (z tyłu płyty) Grill elektryczny Podświetlenie piekarnika Taca Ruszt Kratka wylotu powietrza... -
Page 12: Rozdział 4. Korzystanie Z Piekarnika
ROZDZIAŁ 4. KORZYSTANIE Z PIEKARNIKA PANEL STEROWANIA Pokrętło do ustawiania Pokrętło do ustawiania Cyfrowy timer funkcji piekarnika funkcji piekarnika Wskaźnik pracy piekarnika Wskaźnik termostatu piekarnika Pokrętło do ustawiania funkcji piekarnika Żeby wybrać żądany tryb pracy, ustaw pokrętło przy odpowiednim symbolu. Objaśnienia funkcji piekarnika zostały podane w następnej części. Pokrętło do ustawiania funkcji piekarnika Żeby wybrać żądany tryb pracy, ustaw pokrętło przy odpowiednim symbolu. Objaśnienia funkcji piekarnika zostały podane w następnej części. -
Page 13: Funkcje Piekarnika
FUNKCJE PIEKARNIKA Podświetlenie piekarnika: Zostanie włączone tylko podświetlenie piekarnika, które będzie świecić się podczas wszystkich trybów pracy. Tryb rozmrażania: Zostaną włączone światła ostrzegawcze, wentylator rozpocznie pracę. Żeby skorzystać z trybu rozmrażania, umieść zamrożoną potrawę w piekarniku na półce znajdującej na trzecim poziomie od dołu. Zalecane jest umieszczenie tacy pod rozmrażaną potrawą, aby zgromadzić wodą powstającą na skutek rozmrażania lodu. Ten tryb pracy nie służy do gotowania ani pieczenia potraw, ale tylko do ich rozmrażania. -
Page 14: Wykorzystanie Cyfrowego Timera
Tryb szybkiego grillowania: Zostaną włączone termostat oraz światła ostrzegawcze, grillujący i górny element grzejny rozpoczną pracę. Tryb doskonały do szybkiego grillowania większych produktów, na przykład mięs; przy tej funkcji należy używać górnych poziomów piekarnika. Posmaruj ruszt cienką warstwą oleju, by zapobiec przywieraniu produktów, i umieść jedzenie na środku kratki. Pod rusztem zawsze umieszczaj tacę, na którą spadnie kapiący olej lub tłuszcz. Zaleca się rozgrzewanie piekarnika przez 10 minut. - Page 15 Ustawienie godziny: Przed rozpoczęciem korzystania z piekarnika należy ustawić godzinę. Po włączeniu zasilania na wyświetlaczu piekarnika zacznie pulsować symbol (A) i trzy „0”. Naciśnij równocześnie przyciski (+) i (). Na wyświetlaczu pojawi się symbol . Zacznie również pulsować kropka na środku wyświetlacza. Jeśli kropka pulsuje, ustaw godzinę korzystając z przycisków (+) i (). Po ustawieniu godziny kropka powinna świecić się w sposób ciągły. Jeśli po włączeniu zasilania na wyświetlaczu piekarnika zacznie pulsować symbol (A) i trzy „0”, urządzenia nie można obsługiwać przy pomocy przycisków. Jeśli przyciski (+) i () zostaną równocześnie naciśnięte w celu ustawienia godziny, na wyświetlaczu pojawi się symbol .Jeśli ten symbol pojawi się na wyświetlaczu, sekcję piekarnika można obsługiwać ręcznie. Jeśli ustawiona godzina zostanie zresetowana w przypadku przerwy w zasilaniu, należy ponownie ustawić godzinę. Sygnał dźwiękowy ustawionego czasu: Przed rozpoczęciem korzystania z piekarnika należy ustawić godzinę. Po włączeniu zasilania na wyświetlaczu piekarnika zacznie pulsować symbol (A) i trzy „0”. Naciśnij równocześnie przyciski (+) i ().
- Page 16 Istnieje możliwość ustawienia czasu przygotowania potraw w zakresie od 0 do 10 godzin. Po upływie ustawionego czasu timer zatrzyma działanie piekarnika i wyemituje sygnał dźwiękowy. Na wyświetlaczu zacznie również pulsować symbol (A). Po ustawieniu przycisku piekarnika i termostatu na pozycji 0 naciśnięcie dowolnego przycisku timera zakończy emitowanie sygnału dźwiękowego. Timer będzie można ustawiać ręcznie. Półautomatyczne programowanie zgodnie z czasem zakończenia przygotowania potrawy: Tryb odpowiedni do przygotowania potrawy zgodnie z żądanym czasem zakończenia przygotowania. Włóż do piekarnika potrawę, którą chcesz przygotować. Piekarnik ustawi się w żądanym trybie pracy. Termostat...
-
Page 17: Tabele Z Przykładowymi Nastawami Piekarnika
Istnieje możliwość ustawienia czasu w zakresie do godziny 23.59 po upływie czasu zwiększonego o czas przygotowania potrawy dodanego do aktualnej godziny. Piekarnik rozpocznie pracę o godzinie obliczonej na podstawie czasu przygotowania potrawy odjętego od ustawionej godziny zakończenia procesu i wyłączy się o ustawionej godzinie zakończenia. Timer wyemituje sygnał dźwiękowy i zacznie pulsować symbol (A). Po ustawieniu przycisku piekarnika i termostatu na pozycji 0 naciśnięcie dowolnego przycisku timera zakończy emitowanie sygnału dźwiękowego. Godzinę będzie można ustawiać ręcznie. - Page 18 DOLNY-GÓRNY TERMOOBIEG POTRAWY CZAS PRZY- USTAWIENIE POZIOM GOTOWANIA TERMOSTATU (°C) KRATKI (MINUTY) Ciasto warstwowe 170-190 2-3-4 25-35 Ciasto 150-170 2-3-4 25-35 Ciasteczka 150-170 2-3-4 25-35 Grillowane klopsiki — — — Produkty wilgotne 175-200 40-50 Kurczak 2-3-4 45-60 Kotlety — — —...
-
Page 19: Wyposażenie Dodatkowe
WYPOSAŻENIE DODATKOWE Urządzenie dostarczane jest razem z wyposażeniem. Możesz również używać akcesoriów innych producentów, ale muszą one być odporne na ciepło i ogień. Możesz również używać naczyń szklanych, form do ciasta oraz tac odpowiednich do użycia w piekarniku. Akcesoriów innych producentów używaj zgodnie z ich instrukcjami obsługi. Używając małych naczyń, umieść je na ruszcie, aby znalazły się dokładnie na jego środku. Jeśli jedzenie, które chcesz przygotować, nie zajmuje całego miejsca na blasze, jeśli przygotowujesz jedzenie głęboko zamrożone lub jeśli używasz tacy, by zebrać tłuszcz kapiący z grillowanych produktów, taca może się odkształcać. Jest to spowodowane wysokimi temperaturami podczas pieczenia. Taca odzyska kształt, gdy po jej użyciu wystygnie. Jest to normalny proces zachodzący podczas wymiany ciepła. Nie umieszczaj gorących szklanych tac ani naczyń w zimnie tuż po wyjęciu z piekarnika, aby uniknąć rozbicia tacy lub naczynia. Nie umieszczaj ich na zimnych i mokrych powierzchniach. Umieść naczynia na suchej ścierce kuchennej i pozwól im powoli wystygnąć. Podczas grillowania zalecamy (gdy jest to odpowiednie) używać rusztu dostarczonego z piekarnikiem. Podczas używania rusztu umieść tacę na jednym z niższych poziomów piekarnika, aby zebrać... -
Page 20: Rozdział 5. Czyszczenie I Konserwacja
ROZDZIAŁ 5. CZYSZCZENIE I KONSERWACJA Przed przystąpieniem do czyszczenia piekarnika upewnij się, że nie są wciśnięte żadne przyciski i że urządzenie jest zimne. Odłącz piekarnik od prądu. Nie używaj produktów czyszczących z drobinkami, które mogłyby zarysować emaliowane i malowane elementy piekarnika. Używaj mleczek lub płynów czyszczących, które nie zawierają drobinek. Nie używaj produktów żrących, proszków ścierających, wełny szklanej ani ostrych narzędzi, które mogłyby uszkodzić powierzchnię piekarnika. Gdyby nadmiar płynów wylanych na piekarnik zapalił się, mogłoby to spowodować uszkodzenie emalii. Natychmiast sprzątnij rozlane płyny. Do czyszczenia piekarnika nie należy stosować odkurzaczy parowych. CZYSZCZENIE WNĘTRZA PIEKARNIKA Przed przystąpieniem do czyszczenia należy koniecznie odłączyć piekarnik od źródła zasilania. Najlepsze rezultaty osiągniesz czyszcząc wnętrze piekarnika, gdy będzie on jeszcze delikatnie ciepły. Przetrzyj piekarnik miękką ściereczką, zamaczaną w wodzie z mydłem po każdym użyciu. Potem przetrzyj go raz jeszcze wilgotną ściereczką, a następnie wytrzyj do sucha. Pełne czyszczenie z użyciem suchych i proszkowanych środków czyszczących. W produktach z wnętrzem z emalii katalitycznej tylna i boczne ścianki wnętrza piekarnika nie wymagają czyszczenia. Jednak zaleca się ich wymianę po pewnym czasie, zależnym od intensywności użytkowania urządzenia. -
Page 21: Rozdział 6. Serwisowanie I Przewożenie
ROZDZIAŁ 6. SERWISOWANIE I PRZEWOŻENIE WYMAGANIA PRZED ODDANIEM DO SERWISU Jeśli piekarnik nie działa: Piekarnik może być odłączony od prądu, być może nastąpiła awaria zasilania. W modelach posiadających timer czas może być niewyregulowany. Jeśli piekarnik nie nagrzewa się: Pokrętło temperatury mogło nie zostać ustawione w odpowiedniej pozycji. Jeśli wewnętrzne podświetlenie piekarnika nie zapala się: Należy sprawdzić zasilanie. Należy sprawdzić, czy lampki nie są uszkodzone. Jeśli lampki są uszkodzone, należy wymienić je zgodnie z instrukcjami. Podgrzewanie (jeśli dolna i górna warstwa jedzenia nie podgrzewają się równomiernie): Sprawdź z instrukcją obsługi zalecane położenie tac, czas przygotowania oraz temperaturę. -
Page 22: Rozdział 7. Dane Techniczne
ROZDZIAŁ 7. DANE TECHNICZNE KERNAU Marka KBO 0965 SK B Model ELEKTRYCZNY Rodzaj piekarnika 30,1 kg Masa 103,6 Współczynnik efektywności energetycznej — w trybie konwencjonalnym Współczynnik efektywności energetycznej — z wymuszonym obiegiem 94,1 powietrza Klasa energetyczna 0,87 W h/cykl Zużycie energii (elektrycznej) — w trybie konwencjonalnym 0,79 W h/cykl Zużycie energii (elektrycznej) — z wymuszonym obiegiem powietrza liczba wnęk ELEKTRYCZNY Źródło ciepła 69 l Pojemność... - Page 23 USER MANUAL OVEN KBO 0965 SK B www.kernau.com...
- Page 24 DEAR CUSTOMER, Our goal is to offer you high quality products that exceed your expectations. Your appliance is produced in state of the art facilities and is carefully tested for quality. This manual is prepared to help you use your appliance, which has been manufactured using the most recent technology, with confidence and maximum efficienc. Before using your appliance, carefully read this guide which includes basic information on safe installation, maintenance and use. Please contact your nearest Authorized Service Centre for the installation of your product.
- Page 25 CONTENTS CHAPTER 1. SAFETY WARNINGS .............. 26 • GENERAL SAFETY WARNINGS .................. 26 • INSTALLATION WARNINGS .................... 27 • DURING USE ........................... 28 CHAPTER 2. PREPARATION FOR INSTALLATION AND USE ..29 • CHOOSING A PLACE FOR THE OVEN .............. 29 •...
-
Page 26: Chapter 1. Safety Warnings
CHAPTER 1. SAFETY WARNINGS READ THESE INSTRUCTIONS CAREFULLY AND COMPLETELY BEFORE USING YOUR APPLIANCE, AND KEEP THEM IN A CONVENIENT PLACE FOR REFERENCE WHEN NECESSARY. THIS MANUAL IS PREPARED FOR MORE THAN ONE MODEL. YOUR APPLIANCE MAY NOT HAVE SOME OF THE FEATURES THAT ARE EXPLAINED IN THIS MANUAL. WHILE YOU ARE READING THE OPERATING MANUAL, PAY A SPECIAL: ATTENTION TO THE EXPRESSIONS THAT HAVE IMAGES. GENERAL SAFETY WARNINGS • This appliance can be used by children aged 8 years and above and persons with reduced physical, sensory or mental capabilities or lack of experience and knowledge if they have been given supervision or instruction concerning use of the appliance in a safe way and understand the hazards involved. -
Page 27: Installation Warnings
CAUTION: Accessible parts may become hot when cooking or grilling. Young children should be kept away from the appliance. • Your appliance is produced in accordance with all applicable local and international standards and regulations. • Maintenance and repair work must be carried out only by authorized service technicians. Installation and repair work that is carried out by unauthorized technicians may endanger you. Altering or modifying the specifications of the appliance in any way is hazardous. • Prior to installation, ensure that the local distribution conditions (nature of the gas and gas pressure or electricity voltage and frequency) and the requirements of the appliance are compatible. The requirements for this appliance are stated on the label. WARNING: This appliance is designed only for cooking food and is intended for indoor domestic household use only and should not be used for any other purpose or in any other application, such as for nondomestic use or in a commercial environment or room heating. • Do not try to lift or move the appliance by pulling on the door handle. • All possible security measures have been taken to ensure your safety. Since the glass may break, you should be careful while cleaning it to avoid scratching. Avoid hitting or knocking on the glass with accessories. • Ensure that the supply cord is not wedged during the installation. If the supply cord is damaged, it must be replaced by the manufacturer, its service agent or similarly qualified persons in order to prevent a hazard. -
Page 28: During Use
DURING USE • When you first run your oven, a certain smell will emanate from the insulation materials and the heater elements. For this reason, before using your oven, run it empty at the maximum temperature for 45 minutes. At the same time you need to properly ventilate the environment in which the product is installed. • During use, the outer and inner surfaces of the oven become hot. While opening the oven door, step back to avoid the hot steam coming out of the oven. A risk of burns may occur. • Do not put flammable or combustible materials, in or near the appliance when it is in operation. • Always use oven gloves to remove and replace food in the oven. • Do not leave the cooker while cooking with solid or liquid oils. They may catch fire as a result of of extreme heating. Never pour water on to flames that are caused by oil. Cover the saucepan or frying If you are not going to use the appliance for a long time, remove the plug from the socket. Keep the main control switched off. Additionally, when not using the appliance, shut the gas valve off. • Make sure the appliance control knobs are always in the “0” (stop) position when it is not being used. • The trays incline when pulled out. Be careful not to let hot liquid spill over. • When the door or drawer of the oven is open, do not leave anything on it. You may unbalance your appliance or break the cover. -
Page 29: Chapter 2. Preparation For Installation And Use
CHAPTER 2. PREPARATION FOR INSTALLATION AND USE Always turn the appliance off before operations such as cleaning or maintenance. You can do this after removing the plug for the appliance off or turning the main switches off. Do not remove the control knobs to clean the control panel. TO MAINTAIN THE EFFICIENCY AND SAFETY OF YOUR APPLIANCE, WE RECOMMEND YOU ALWAYS USE ORIGINAL SPARE PARTS AND ONLY CALL OUR AUTHORIZED SERVICE AGENTS SHOULD SUCH A NEED ARISE. -
Page 30: Installation Of Builtin Oven
INSTALLATION OF BUILTIN OVEN Insert the oven into the cabinet by pushing it forward. Open the oven door and insert 2 screws in the holes located on the oven frame. When the product frame touches the wooden surface of cabinet, tighten the screws. If the oven is installed under a hob, the distance between the worktop and the top panel of the oven must be Worktop Builtin hob Builtin oven a minimum of 50 mm and the distance between the worktop and the top of control panel must be a minimum of 25 mm. -
Page 31: Wiring And Safety Of The Built In Oven
WIRING AND SAFETY OF THE BUILT IN OVEN The instructions given below must be followed explicitly during wiring: • The grounding cable must be connected via the screw with the grounding mark. The supply cable connection must be carried out as shown in fig re. If there is no grounded outlet conforming to regulations in the installation environment, call the Authorized Service Centre immediately. • The grounded outlet must be in close proximity to the appliance. Never use an extension cord. • The supply cable should not contact the product’s hot surface. • In the event of any damage to the supply cable, make sure to call the Authorized Service Centre. The cable must be replaced by the Authorized Service technician. • Wiring of the appliance must be performed by the Authorized Service technician. A H05 VV F type supply cable must be used. •... -
Page 32: Chapter 3. Presentation And Size Of Product
CHAPTER 3. PRESENTATION AND SIZE OF PRODUCT Panel sterowania Control panel Uchwyt Handle Oven Door Drzwi piekarnika Dolny element grzejny Lower Heating Element (z tyłu płyty) (behind the plate) Upper Heating Element (behind the plate) Górny element grzejny (z tyłu płyty) Grill Wire Grill elektryczny Podświetlenie piekarnika Oven Light Tray Taca Ruszt Racks Air Outlet Shutters Kratka wylotu powietrza... -
Page 33: Chapter 4. Using The Oven
CHAPTER 4. USING THE OVEN CONTROL PANEL Pokrętło do ustawiania Pokrętło do ustawiania Digital Timer Oven function Control Knob Oven function Control Knob Cyfrowy timer funkcji piekarnika funkcji piekarnika Wskaźnik pracy piekarnika Wskaźnik termostatu piekarnika Oven Operation Light Oven Thermostat Light Oven Function Control Knob To select the desired cooking function, turn the knob to the related symbol the details of the oven functions are explained in the next section. Thermostat Control Knob To select the desired temperature, turn the knob to the related degrees the details of the oven functions are explained in the next section. -
Page 34: Oven Functions
OVEN FUNCTIONS Oven Lamp: Only the oven light will be turned on and it remains on in all the cooking function. Defrost Function: The oven’s warning lights will be turned on, the fan starts operating. To use the defrost function, take your frozen food and place it in the oven on a shelf placed in the third slot from the bottom. It is recommended that you can place an oven tray under the defrosting food, to catch the water accumulated due to melting ice. This function will not cook or bake your food, it will only help to defrost it. Turbo Function: The oven’s thermostat and warning lights will be turned on, the ring heating element and fan will start operating. The turbo function evenly disperse the heat in the oven. All foods on all racks will be cooked evenly. It is recommended to preheat the oven about 10 minutes. Static Cooking Function: The oven’s thermostat and warning lights will be turned on, the lower and upper heating elements will start operating. The static cooking function emits heat, ensuring even cooking of the lower and upper food. This is ideal for making pastries, cakes, baked pasta, lasagne and pizza. Prehating the oven for 10 minutes is recommended and it is best to cook on only one shelf at a time in this function. Fan Function: The oven’s thermostat and warning lights will be turned on, the upper and lower heating elements and fan will start operating. This function is very good for obtaining results in baking pastry. -
Page 35: Use Of Digital Timer
Faster Grilling Function: The oven’s thermostat and warning lights will be turned on, the grill and upper heating elements will start operating. The function is used for faster grilling and for covering a larger surface area, such as grilling meats, use the upper shelves of oven. Lightly brush the wire grid with oil to stop foods sticking and place foods in the center of the grid. Always place a tray beneath to catch any drips of oil or fat. It is recommended to preheat the oven about 10 minutes. WARNING: When grilling, the oven door must be closed and the oven temperature should be adjusted to 190ºC. Double Grill and Fan Function: The oven’s thermostat and warning lights will be turned on, the grill and upper heating elements and fan will start operating. The function is used for faster grilling of thicker foods and for covering a larger surface area. Both the upper heating elements and grill will be energised along with the fan to ensure even cooking. Use the upper shelves of oven. Lightly brush the wire grid with oil to stop foods sticking and place foods in the center of the grid. Always place a tray beneath to catch any drips of oil or fat. It is recommended to preheat the oven about 10 minutes. WARNING: When grilling, the oven door must be closed and the oven temperature should be adjusted to 190ºC. Pizza Function: The oven’s thermostat and warning lights will be turned on, the ring and lower heating elements and fan will start operating. Fan and lower heating function is ideal for baking food, such as... - Page 36 Time Adjustment: The time must be adjusted before starting to use the oven. Following the power supply to the oven, symbol (A) and the three “0”s on the screen will begin to flash. Press the (+) and () keys simultaneously. The symbol will appear on the screen. Also, the dot in the middle of the screen will begin to flash. Using the (+) and () buttons, adjust the current time while this dot is flashing. A fter the adjustment, the dot should be lit continuously. Following the power supply to the oven, when symbol (A) and the three “0”s on the screen begin to flash, the oven can not be operated using the control buttons. When the (+) and () buttons are pressed simultaneously for time adjustment, the symbol will appear on the screen. When this symbol appears on the screen, you can manually operate the oven. As the adjusted time will be reset in the event of a power failure, the time adjustment operation will have to be carried out once again. Audible Warning Time Adjustment: The time must be adjusted before starting to use the oven. Following the power supply to the oven, symbol (A) and the three “0”s on the screen will begin to flash. Press the (+) and () keys simultaneously. The symbol will appear on the screen. Also, the dot in the middle of the screen will begin to flash. Using the (+) and () keys, adjust the current time while this dot is flashing. After the adjustment, the dot Tryb should be lit continuously. This function can be used to receive audible warnings at the completion of the adjusted time period. Press the MODE key in the middle. The symbol will flash on the screen. Three “0”s will also appear. Adjust the desired time period for the warning by using (+) and () keys while the symbol is flashing. Some time after the completion of the adjustment, the symbol will be lit continuously. When the symbol begins to light continuously, the audible warning time adjustment is done.
- Page 37 At the completion of the set duration, the timer will stop the oven and give an audible warning. Also, symbol (A) will begin to flash on the screen. After bringing the oven button and oven thermostat button to 0 position, pressing any button of the timer will end the audible warning. Also, the timer will be brought to the manual use function. Adjustment of the cooking end time: This function is used to cook according to desired finishing time. The food to be cooked is put into the oven. The oven is adjusted to the desired cooking function. The oven thermostat is adjusted to the desired degree depending on the dish to be cooked. Keep pressing the MODE button until you see “end” on the timer screen, symbol (A) and the day’s time will respectively begin to flash. Adjust the finishing time for the food you wish to cook, by using the (+) and () keys while the timer is in Tryb this position. Some time after the adjustment operation is completed, the current time will appear on the screen and symbols (A) and will begin to continuously light on the screen. While doing this, the oven will also start to operate. You can set a time which can be up to 10 hours after the current time. Upon completion of the set duration, the timer will stop the oven and an give audible warning. Then the symbol (A) will also begin to flash on the screen. After bringing the oven button and oven thermostat button to 0 position, pressing any button of the timer will end the audible warning. The timer will also be brought to manual use function.
-
Page 38: Tables With Example Oven Settings
The oven will start operating at the time calculated by deducting the cooking period from the set finishing time, and will stop at the set finishing time. The timer will give an audible warning and the symbol (A) will begin to flash. After bringing the oven button and oven thermostat button to the 0 position, pressing any button of the timer will end the audible warning. Also, current time will be displayed on timer. Key Lock: • The mode button needs to be pressed for at least 2 seconds, if none of the buttons are activated within last 5 seconds. • After activation of the mode button, each button is activated immediately as they are pressed. TABLES WITH EXAMPLE OVEN SETTINGS TURBO DISHES THERMOSTAT COOKING RACK POS. POS. (°C) PERIOD (MIN) Layered pastry 170190 3545 Cake 150170 3040 Cookie 150170 2535 Grilled — — — Watery food 175200 4050... - Page 39 LOWER-UPPER FAN DISHES THERMOSTAT COOKING RACK POS. POS. (°C) PERIOD (MIN) Layered pastry 170190 2535 Cake 150170 2535 Cookie 150170 2535 Grilled — — — Watery food 175200 4050 Chicken 4560 Chop — — — Beefstake — — — GRILL DISHES THERMOSTAT COOKING...
-
Page 40: Accessories
ACCESSORIES The product is supplied with accessories. You can also use accessories you purchase from other sources, but they must be heat and flame resistant. You can also use glass dishes, cake moulds and oven trays that are appropriate for use in an oven. Follow the manufacturer’s instructions when using other accessories. In the event small size dishes are used, place the dish onto the wire grid, as it will completely be on the middle part of the grid. If the food to be cooked does not cover the oven tray completely, if the food is taken from the deep freezer or the tray is being used for collecting the food’s juices that flow during grilling, form changes can be observed in the tray. This is due to the high temperatures that occur during cooking. The tray will return to its old form when the tray cools down after cooking. This is a normal physical event that occurs during heat transfer. Do not place hot glass trays and dishes into a cold environment straight from the oven to avoid breaking the tray or dish. Do not put onto cold and wet surfaces. Place on a dry kitchen cloth and allow to cool slowly. When using the grill in your oven; we recommend you use the grid that was supplied with the product (where appropriate). When using the wire grid; put a tray onto one of the lower shelves to allow the oil to be collected. Water may be added to the tray to assist in cleaning. As explained in the corresponding clauses, never attempt to use the gas operated grill burner without the grill protection lid. If your oven has a gas operated grill burner, but the grill heat shield is missing, or if it is da maged and cannot be used, request a spare part from the nearest Authorized Service Centre. WIRE GRID The wire grid is used to grill or place different cookwares on it. WARNING: Fit the grid correctly into any corresponding rack in the oven cavity and push it to the back. DEEP TRAY The deep tray is used to cook stews.To locate the tray correctly in the cavity, put it to any rack and push it to the back. REMOVAL OF WIRE SHELF Pull the wire shelf as shown in the picture. After releasing it from clips, lift it up. * The accessories for your oven may be different due to the model of your product. -
Page 41: Chapter 5. Cleaning And Maintenance
CHAPTER 5. CLEANING AND MAINTENANCE Before starting to clean your oven, be sure that all control buttons are off and your appliance has cooled down. Unplug the appliance. Do not use cleaning materials containing particles that might scratch the enamelled and painted parts of your oven. Use cream cleaners or liquid cleaners, which do not contain particles. As they might harm the surfaces, do not use caustic creams, abrasive cleaning powders, rough wire wool or hard tools. In the event the excess liquids spill over and your oven should burn, this may cause damage to the enamel. Clean up the split liquids immediately. Do not use steam cleaners to clean the oven. CLEANING THE INTERIOR OF THE OVEN Make sure to unplug the oven before you start cleaning it. You will obtain best results if you clean the oven interior while the oven is slightly warm. Wipe your oven with a soft piece of cloth dampened with soap and water after each use. Then wipe it again, this time with a wetted cloth, and wipe it dry. Complete cleaning using dry and powder type cleaners. For product with catalytic enamel frames, the rear and side walls of the inner frame do not require cleaning. However; depending on usage, replacing them after a certain period of time is recommended. REPLACING THE OVEN LIGHT The change of oven lamp must be done by by an authorized technician. The rating of the bulb should be 230V, 25Watt, Type E14,T300 before changing the lamp, the oven should be switched off and it should be cool. The lamp design is specific for use in household cooking appliances and it is not suitable for household room illumination. THE EASYFIX WIRE RACK Clean the accessories thoroughly with warm water, detergent and a soft clean cloth on first use. • Insert the accessory to the correct position inside the oven. -
Page 42: Chapter 6. Information Related To Transport
CHAPTER 6. INFORMATION RELATED TO TRANSPORT REQUIREMENTS BEFORE CALLING FOR SERVICE SERVER: If the oven does not working: The oven may be disconnected form the mains; the power breakdown may occur. In models equipped with timer function the current time must be adjusted. If the oven does not pre-heats: The temperature knob can be setted in wrong position. If the internal oven illumination does not start: Check the power supply. Check if the lightbulbs are not damaged. If lightbulbs are damaged, replace then accordingly with given instructions. Meals heating (if upper and bottom layer of meal is not evenly heated): Check with the manual, the recommended tray location, cooking time and temperature. -
Page 43: Chapter 7. Technical Details
CHAPTER 7. TECHNICAL DETAILS KERNAU Marka KBO 0965 SK B Model ELECTRIC Type of oven 30,1 kg Masss 103,6 Energy Efficiency Index — conventional 94,1 Energy Efficiency Index — fan forced Energy Class 0,87 W h/cykl Energy consumption (electrity) — conventional 0,79 W h/cykl Energy consumption (electrity) — fan forced Number of cavities ELECTRIC Heat Source 69 l Volume This oven complies with EN 603501 ENERGY SAVING TIPS •... - Page 44 NÁVOD K OBSLUZE OVEN KBO 0965 SK B www.kernau.com...
- Page 45 OBSAH KAPITOLA 1. BEZPEČNOSTNÍ UPOZORNĚNÍ ........46 • OBECNÁ BEZPEČNOSTNÍ UPOZORNĚNÍ .............. 46 • UPOZORNĚNÍ K INSTALACI .................... 47 • BĚHEM POUŽITÍ ....................KAPITOLA 2. PŘÍPRAVA NA INSTALACI A POUŽITÍ ....... 49 • VÝBĚR MÍSTA PRO TROUBU .................. 49 • INSTALACE VESTAVĚNÉ TROUBY ................ 50 •...
-
Page 46: Kapitola 1. Bezpečnostní Upozornění
KAPITOLA 1. BEZPEČNOSTNÍ UPOZORNĚNÍ TYTO POKYNY SI PŘEČTĚTE PEČLIVĚ JEŠTĚ NEŽ ZAČNETE SPOTŘEBIČ POUŽÍVAT A UCHOVEJTE JE NA PRAKTICKÉM MÍSTĚ, KDE JE V PŘÍPADĚ POTŘEBY NALEZNETE. TENTO NÁVOD K POUŽITÍ JE PŘIPRAVEN PRO VÍCE NEŽ JEDEN MODEL. VÁŠ SPOTŘEBIČ NEMUSÍ MÍT NĚKTERÉ Z FUNKCÍ UVEDENÝCH V TOMTO NÁVODU. BĚHEM ČTENÍ NÁVODU VĚNUJTE POZORNOST VÝRAZŮM, KTERÉ MAJÍ OBRÁZKY. OBECNÁ BEZPEČNOSTNÍ UPOZORNĚNÍ •... -
Page 47: Upozornění K Instalaci
VAROVÁNÍ: Při vaření nebo grilování se mohou přístupné části zahřát. Malé děti udržujte mimo dosah. • Váš spotřebič je vyrobený v souladu se všemi platnými a mezinárodními směrnicemi a nařízeními. • Údržbu a opravy musí provádět pouze autorizovaní servisní technici. Instalace a opravy prováděné neautorizovanými techniky vás mohou ohrozit. Jakákoli úprava nebo změna specifikací spotřebiče je nebezpečná. • Před instalací se ujistěte, zda lokální distribuční sítě (druh plynu a tlak plynu nebo elektrické napětí a kmitočet) jsou kompatibilní s požadavky spotřebiče. Požadavky pro tento spotřebič jsou uvedeny na štítku. UPOZORNĚNÍ: Tento spotřebič je navržen pouze k vaření potravin a je určen pouze k domácímu použití a nesmí být použit k žádnému jinému účelu nebo v jiném prostředí, například k nedomácímu použití nebo v komerčním prostředí nebo k vytápění místnosti. • Spotřebič se nepokoušejte zdvihnout ani posunovat tahem za rukojeť dveří. • K zajištění vaší bezpečnosti je třeba přijmout veškerá možná bezpečnostní opatření. Vzhledem k tomu, že se sklo může rozbít, musíte dávat během čištění pozor, abyste sklo nepoškrábali. Dejte pozor, abyste příslušenstvím nenarazili do skla. -
Page 48: Během Použití
BĚHEM POUŽITÍ • Při prvním spuštění se může objevit určitý zápach, způsobený izolačními materiály a topnými prvky. Proto, než troubu použijete, nechte ji 45 minut spuštěnou na maximální teplotu. Ve stejný okamžik musíte prostředí, v kterém je spotřebič umístěný, správně vyvětrat. • Během použití se mohou vnější a vnitřní povrchy zahřát. Během otevírání dveří trouby ustupte o krok zpět, abyste se tak vyhnuli horké páře vycházející z trouby. Mohlo by dojít k popálení. • Jeli spotřebič spuštěný, nedávejte na něj nebo do jeho blízkosti hořlavé materiály. • K vyjmutí a vložení jídla do trouby vždy používejte chňapky. • Během vaření s tekutými nebo pevnými tuky spotřebič neopouštějte. V důsledku extrémního zahřátí se mnohou vznítit. Na plameny způsobené olejem nikdy nelijte vodu. Abyste udusili plamen, který zapříčinil olej, zakryjte pánev pokličkou a vypněte vařič. •... -
Page 49: Kapitola 2. Příprava Na Instalaci A Použití
KAPITOLA 2. PŘÍPRAVA NA INSTALACI A POUŽITÍ Před čištěním nebo údržbou vždyspotřebič vypněte. Můžete spotřebič odpojit ze sítě nebo vypnout hlavní vypínač. Při čištění ovládacího panelu nesnímejte ovladače. ABYSTE ZACHOVALI EFEKTIVITU BEZPEČNOST VAŠEHO SPOTŘEBIČE, DOPORUČUJEME, ABYSTE VŽDY POUŽILI ORIGINÁLNÍ NÁ HRADNÍ ČÁSTI A V PŘÍPADĚ POTŘEBY KONTAKTOVALI POUZE NAŠE AUTORIZOVANÉ... -
Page 50: Instalace Vestavěné Trouby
INSTALACE VESTAVĚNÉ TROUBY Troubu zasuňte do skříně. Otevřete dveře trouby a do otvorů v rámu trouby zasuňte 2 šrouby. Zatímco se rám produktu dotýká dřevěného povrchu skříně, šrouby utáhněte. Pracovní deska Vestavná deska Vestavná trouba Jeli trouba nainstalovaná pod plotnou, vzdálenost mezi pracovní plochou a horním panelem trouby musí být minimálně 50 mm a vzdálenost mezi pracovní plochou a horní částí ovládacího panelu musí být minimálně 25 mm. -
Page 51: Elektroinstalace A Bezpečnost Vestavěné Trouby
ELEKTROINSTALACE A BEZPEČNOST VESTAVĚNÉ TROUBY Před provedením elektroinstalace je třeba dodržet níže uvedené pokyny: • Uzemňovací kabel musí být zapojen pomocí šroubu se znamením uzemnění. Zapojení napájecího kabelu musí být provedeno jak je znázorněno na Obr. 6. Pokud v prostředí instalace není provedeno uzemnění odpovídající směrnicím, okamžitě kontaktujte autorizovaný servis. • Uzemněná zástrčka se musí nacházet v blízkosti spotřebiče. Nikdy nepoužívejte prodlužovací kabel. • Napájecí kabel nesmí být v kontaktu s horkým povrchem produktu. • V případě poškození napájecího kabelu kontaktujte autorizovaný servis. Kabel musí vyměnit autorizovaný servis. • Zapojení spotřebič musí provést autorizovaný servis. Je třeba použít typ napájecího kabelu H05VVF. •... -
Page 52: Kapitola 3. Prezentace A Velikost Produktu
KAPITOLA 3. PREZENTACE A VELIKOST PRODUKTU Panel sterowania Ovládací panel Uchwyt Rukojeť Dveře trouby Drzwi piekarnika Dolny element grzejny Spodní topný prvek (za deskou) (z tyłu płyty) Horní topný prvek (za deskou) Górny element grzejny (z tyłu płyty) Grill Drátěná police elektryczny Podświetlenie piekarnika Světlo v troubě Zásobník Taca Ruszt Přihrádky Závěrky odsávání Kratka wylotu powietrza... -
Page 53: Kapitola 4. Použití Trouby
KAPITOLA 4. POUŽITÍ TROUBY OVLÁDACÍ PANEL Pokrętło do ustawiania Pokrętło do ustawiania Digitální časovač Tlačítko ovládání trouby Tlačítko ovládání trouby Cyfrowy timer funkcji piekarnika funkcji piekarnika Wskaźnik pracy piekarnika Wskaźnik termostatu piekarnika Světlo v troubě Světlo termostatu v troubě Tlačítko ovládání trouby Pro výběr požadované funkce vaření otočte kolečkem na symbol s detaily funkce trouby, jak je vysvětleno v následující části. Tlačítko ovládání trouby Pro výběr požadované funkce vaření otočte kolečkem na symbol s detaily funkce trouby, jak je vysvětleno v následující části. -
Page 54: Funkce Trouby
FUNKCE TROUBY Světlo v troubě: Zapne světlo v troubě, které zůstane rozsvícené po celou dobu vaření. Funkce rozmrazování: Zapne se termostat a rozsvítí se kontrolky trouby, spustí se ventilátor. Chceteli použít funkci rozmrazování, dejte zmražené jídlo do trouby na třetí poličku odspodu. Doporučuje se, abyste pod rozmrazované jídlo dali plech, do kterého zachytíte vodu vzniklou v důsledku rozmrazování. Tato funkce vaše jídlo neuvaří ani neupeče, pouze pomůže s jeho rozmrazením. Funkce Turbo: Zapne se termostat trouby a rozsvítí se výstražné kontrolky trouby, spustí se kruhový topný prvek a ventilátor. Díky této funkci se teplo v troubě rozptýlí rovnoměrně. Potraviny na všech roštech se uvaří rovnoměrně. Doporučujeme, abyste troubu předehřívali zhruba 10 minut. Funkce Turbo: Zapne se termostat trouby a rozsvítí se výstražné kontrolky trouby, spustí se kruhový topný prvek a ventilátor. Díky této funkci se teplo v troubě rozptýlí rovnoměrně. Potraviny na všech roštech se uvaří rovnoměrně. Doporučujeme, abyste troubu předehřívali zhruba 10 minut. -
Page 55: Použití Digitálního Časovače
Funkce rychlejšího grilován: Zapne se termostat a výstražné kontrolky trouby, spustí se gril a horní topné prvky. Funkce se používá k rychlejšímu grilování a k pokrytí větší plochy, např. při grilování masa, použijte horní poličky trouby. Drátěnou mřížku lehce potřete olejem, aby se na ni nepřichytilo jídlo to umístěte doprostřed mřížky. Dolů umístěte plech, který zachytí kapky olejeów, nebo tuku. Doporučujeme, abyste troubu předehřívali zhruba 10 minut. VAROVÁNÍ: Během grilování musí být dveře trouby zavřené a teplotu trouby je třeba nastavit na 190ºC. Funkce Dvojitý gril a ventilátor: Zapne se termostat a výstražné kontrolky trouby, spustí se gril a horní topné prvky a ventilátor. Funkce se používá k rychlejšímu opékání potravin a k pokrytí větší plochy povrchu. Aby se zajistilo rovnoměrné vaření, spustí se horní topné prvky, gril a ventilátor. Použijte horní poličky v troubě. Drátěnou mřížku lehce potřete olejem, aby se na ni nepřichytilo jídlo to umístěte doprostřed mřížky. Dolů umístěte plech, který zachytí kapky oleje nebo tuku. Doporučujeme, abyste troubu předehřívali zhruba 10 minut. - Page 56 Nastavení času: Před použitím trouby je třeba provést nastavení času. Po zapojení trouby do napájení začne symbol (A) a tři „0” na obrazovce blikat. Současně stiskněte tlačítka (+) a (). Na obrazovce se zobrazí symbol . Rovněž začne blikat i tečka uprostřed obrazovky. Zatímco tečka bliká, použijte tlačítka (+) a () a nastavte čas. Po nastavení se tečka trvale rozsvítí. Pokud se po zapojení trouby do napájení symbol (A) rozsvítí a tři „0” na obrazovce začnou blikat, troubu lze ovládat pomocí tlačítek ovládání. Dojdeli během nastavení času k současnému stisknutí tlačítek (+) a (), na obrazovce se zobrazí symbol . Když se na obrazovce zobrazí...
- Page 57 Poloautomatické programování podle času dokončení: Tato funkce se používá k vaření dle požadovaného času dokončení. Potraviny, které chcete uvařit, vložte do trouby. Trouba je nastavená na požadovanou funkci vaření. Termostat trouby se nastaví na požadovanou úroveň, v závislosti na tom, jaké jídlo budete připravovat. Tlačítko MODE (REŽIM) držte dokud se na obrazovce nezobrazí „end” (konec) a nerozbliká se symbol (A) a čas. Zatímco je časovač v požadované pozici, nastavte čas dokončení vaření Tryb jídla pomocí tlačítek (+) a (). Chvíli po dokončení nastavení se na obrazovce zobrazí čas a na obrazovce se rozsvítí symboly (A) a .
-
Page 58: Tabulky S Příklady Nastavení Trouby
TABULKY S PŘÍKLADY NASTAVENÍ TROUBY TURBO POKRMY POZICE DÉLKA VAŘENÍ TERMOSTATU (°C) POZICE ROŠTU (MIN.) Listové těsto 170 — 190 35 — 45 Koláč 150 — 170 30 — 40 Čajové pečivo 150 — 170 25 — 35 Masové kuličky —... -
Page 59: Příslušenství
GRILL POKRMY POZICE DÉLKA VAŘENÍ POZICE ROŠTU TERMOSTATU (°C) (MIN.) Listové těsto — — — Koláč — — — Čajové pečivo — — — Masové kuličky — Dušené jídlo — — — Kuře 50 — 60 Sekaná 15 — 25 Hovězí... -
Page 60: Vyjmutí Drátěného Roštu
HLUBOKÝ PLECH Hluboký plech se používá k pečení dušeného masa. Abyste ho do trouby umístili správně, zasuňte ho do držáků a zcela do. VYJMUTÍ DRÁTĚNÉHO ROŠTU Za drátěný rošt zatáhněte jak je znázorněno na obrázku. Po uvolnění ho zdvihněte... -
Page 61: Kapitola 5. Čištění A Údržba Vaší Trouby
KAPITOLA 5. ČIŠTĚNÍ A ÚDRŽBA VAŠÍ TROUBY Než s čištěním trouby začněte, ujistěte se, zda je veškeré ovládání vypnuto a zda váš spotřebič vychladl. Odpojte spotřebič. Nepoužívejte čisticí přípravky obsahující částice, které by mohly smaltované na natřené části vaší trouby poškodit. Použijte krémové nebo tekuté čisticí přípravky, které neobsahují malé částice. Vzhledem k tomu, že by mohly poškodit povrchy, nepoužívejte leptavé krémy, abrazivní čisticí prášky, hrubé drátěnky nebo tvrdé nástroje. V případě rozlití nadbytečné tekutiny může dojít k poškození smaltu. Rozlité kapaliny okamžitě vyčistěte. K čištění spotřebiče nepoužívejte parní čističe. -
Page 62: Kapitola 6. Servis A Přeprava
KAPITOLA 6. SERVIS A PŘEPRAVA CO JE TŘEBA UDĚLAT, NEŽ BUDETE KONTAKTOVAT SERVIS Pokud trouba nefunguje: Trouba může být odpojená ze sítě, mohlo dojít k výpadku napájení. Na mo-delech vybavených časovačem nemusí být seřízený čas. Pokud trouba nehřeje: Teplo nesmí být nastavováno pomocí spínače trouby. Pokud světlo v troubě nesvítí: Je třeba zkontrolovat elektřinu. Je třeba zkontrolovat, zda nejsou žárovky vadné. Jsou-li vadné, můžete je vyměnit. -
Page 63: Kapitola 7. Technické Údaje
KAPITOLA 7. TECHNICKÉ ÚDAJE KERNAU Značka KBO 0965 SK B Model ELEKTŘINA Typ trouby 30,1 kg Hmota 103,6 Index spotřeby energie — běžný 94,1 Index spotřeby energie — vynucený Energetická třída 0,87 W h/cykl Spotřeba energie (elektřina) - běžná 0,79 W h/cykl Spotřeba energie (elektřina) - vynucená Počet otvorů ELEKTŘINA Zdroj tepla 69 l Objem Tato trouba splňuje EN 603501 TIPY PRO ÚSPORU ENERGIE •... - Page 64 www.kernau.com...
Need help?
Do you have a question about the KBO 0965 SK B and is the answer not in the manual?
Questions and answers