Advertisement
Available languages
Available languages
Quick Links
Tecnologia
SPECIFICHE
TECNICHE
Frequenza emessa
Potenza emessa
Densità di potenza emessa
Altezza d'installazione
Standard
Alta
Angolo d'inclinazione
Area di rilevazione (altezza d'installazione = 2.2 m)
Area di rilevazione larga
Area di rilevazione stretta
Modo di rilevazione
Velocità min. di rilevazione
Tensione d'alimentazione
Frequenza della rete di
alimentazione
Consumo
Configurazione « output » in modo di « non detezione »
(fonte corrente ON)
Tensione max. circuito-
aperto
Voltaggio di « output »
disponibile a 10mA
Carica tipo
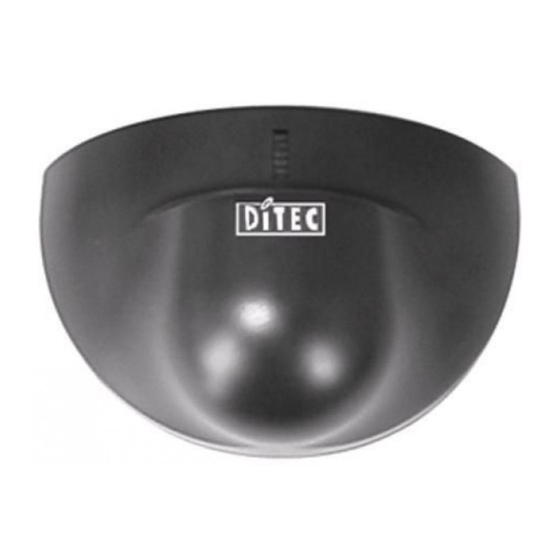
DESCRIZIONE
DEL RILEVATORE
CONSIGLI PER
L'INSTALLAZIONE
Fissare fermamente il
rilevatore in modo che
non vibri.
PER PORTE AUTOMATICHE DI USCITA DI SICUREZZA
: Iperfrequenza e
microprocessore
: 24.175 GHz
: <20 dBm EIRP
: < 5 mW/cm²
: 1.8 m a 3 m
:
3 m a 4 m
: 0° à 90° in senso verticale
-30° à + 30° in senso
laterale
: 4m (L) x 2m (P)
: 2m (L) x 2.5m (P)
: Movimento
: 5 cm/s (misurata nell'asse
del radar)
: 12V a 24V AC ±10%
12V a 24V DC +30%/ -10%
: 50 à 60 Hz
: < 2W (VA)
: 6.5V
: 3V min.
: fino a 3 opto-combinatore
collegati in serie. Libero di
potenziale.
VISTA DALL'INTERNO
Il rilevatore non può
essere installato
direttamente dietro di un
pannello né di qualsiasi
materiale.
RILEVATORE DI MOVIMENTO AUTO-SORVEGLIATO
Configurazione « output » in modo « detezione » (fonte
corrente OFF)
Corrente di fuga
Tensione rimanente
del circuito-aperto
Durata del contatto in
uscita
Gamma di temperature : -20°C a +55°C
Grado di protezione
Conformità alle norme : R&TTE 1999/5/EC; EMC 89/336/EEC
Dimensioni
Peso
Materia del cofano
Colore del cofano
Lunghezza del cavo
Aggiustamenti manuali
Sensibilità (per pulsanti)
Orientamento dell' area di rilevazione (meccanicamente)
Forma dell' area di rilevazione (scelta fra due antenne)
Aggiustamenti con telecomando
Sensibilità
Durata del contatto in
uscita
Modo di rilevazione
Immunità
Altezza d'istallazione
Controllo della porta
Codice di sicurezza
Morsettiera
Impronte per
il passaggio
del cavo
Antenna planare
lobo stretto
Ricevitore infrarosso
LED
Pulsanti
Orientazione laterale
dell'antenna
Antenna planare lobo largo
(standard)
Orientazione verticale
dell'antenna
Togliere ogni oggetto
che potrebbe muoversi
o vibrare nella area di
rilevazione.
PASM24T
ISTRUZIONI PER L'USO
: < 100µA
: < 500mV
: 0.5 s a 9s (regolabile)
: IP54
: 120 mm (L) x 80 mm (H) x 50 mm (P)
: 0.215 kg
: ABS
: Grigio antracite, colore alu o bianco
: 2.5m
:
10 livelli (0 a 9)
:
10 livelli (0.5s a 9s)
uni-/bidirezionale, MTF, reverse
:
quasi-presenza, normale,
immunità rafforzata
:
normale, alta
:
in automatico, aperto permanentemente
:
codice d'accesso a 1-4 cifre
COFANO
(VISTA DALL'INTERNO)
Evitare la presenza di
Evitare il contatto con le
tubi neon nella area di
parti elettroniche
rilevazione.
(scariche
elettrostatiche).
1/8
Advertisement

Related Manuals for DITEC PasM24T


Summary of Contents for DITEC PasM24T
- Page 1 PASM24T ISTRUZIONI PER L’USO RILEVATORE DI MOVIMENTO AUTO-SORVEGLIATO PER PORTE AUTOMATICHE DI USCITA DI SICUREZZA Tecnologia : Iperfrequenza e Configurazione « output » in modo « detezione » (fonte SPECIFICHE microprocessore corrente OFF) TECNICHE Frequenza emessa : 24.175 GHz : < 100µA...
- Page 3 LA LARGHEZZA DELL’ AREA DI RILEVAZIONE DIPENDE DALL’ANTENNA PLANARE SCELTA AGGIUSTAMENTI MECCANICI Per un’ area di rilevazione larga, Per un’ area di rilevazione stretta, utilizzare l’antenna a 3 elementi utilizzare l’antenna a 6 elementi Le aree di rilevazione indicate qui accanto Antenna a corrispondono agli aggiustamenti 3 elementi...
- Page 4 D. LA POSIZIONE DELL’ AREA DI RILEVAZIONE DIPENDE DALL’ANGOLO LATERALE DELL’ANTENNA PLANARE AGGIUSTAMENTI MECCANICI Le aree di rilevazione indicate qui accanto corrispondono agli aggiustamenti seguenti : Antenna area larga ; Modo bidirezionale ; Angolo laterale dell’antenna : 30°, - 30° Altezza d’installazione : 2.2m.
-
Page 5: Table Of Contents
INSERIRE LE BATTERIE CONFIGURAZIONE DEI PARAMETRI CON IL TELECOMANDO Aprire l’apposito comparto all’indietro dal telecomando ; Inserire le 2 batterie AAA, fornite nell’imballaggio del telecomando, come indicato qui accanto ; Chiudere il comparto. (10) Non usato Tasti numero0-9 (1) (11) Non usato (12) Non usato (13) Altezza d’istallazione Non usato (2) -
Page 6: Durata Del Contatto In Uscita
N.B. : I parametri e funzioni ripresi nelle tabelle seguenti sono solo accessibili se il rilevatore è in modo aggiustamenti. La LED rossa lampeggia lentamente. Durante una sessione di aggiustamento, il valore di ogni parametro può essere verificato o modificato come indicato qui sotto : PARAMETRI PROCEDURA CONTROLLO... -
Page 7: Immunità
Durante una sessione di configurazione, è possibile ritornare, per ogni parametro, alle impostazioni di fabbrica come indicato qui sotto : PARAMETRI PROCEDURA IMPOSTAZIONI Premere il tasto SETUP (19), poi il tasto numero 9. DI FABBRICA Le impostazioni di fabbrica di tutti i parametri (tranne il codice d’accesso) vengono ripristinate. IMPOSTAZIONI DI FABBRICA : Tabella delle impostazioni di fabbrica Parametro... - Page 8 Il telecomando non è orientato bene Puntare bene il telecomando in direzione del rilevatore. Dìtec S.p.A. - Via Mons. Banfi, 3 21042 Caronno P.lla (VA) ITALY - Tel. +39 02 963911 Fax +39 02 9650314 - e-mail: ditec@ditecva.com - www.ditec.it...
- Page 9 PasM24T USER’S GUIDE SELFMONITORED MOTION SENSOR FOR AUTOMATIC ESCAPE DOORS Technology : microwave and Output configuration in detection status (current source OFF) TECHNICAL microprocessor Leakage current : < 100µA SPECIFICATION Transmitter frequency : 24.175 GHz Open-circuit : < 500mV Transmitter radiated power : <20 dBm EIRP remained voltage Transmitter power density : <...
- Page 11 WIDTH OF THE SENSING FIELD DEPENDS ON THE CHOICE OF THE PLANAR ANTENNA MECHANICAL CONFIGURATION To obtain a wide sensing field, To obtain a narrow sensing field, use the 3-components antenna use the 6-components antenna The sensing fields (in meter) here on the right correspond to the following 3-components adjustments:...
- Page 12 D. POSITION OF THE SENSING FIELD IS DETERMINED BY THE LATERAL ANGLE OF THE PLANAR ANTENNA MECHANICAL CONFIGURATION The sensing fields here on the right correspond to the following adjustments : Wide sensing field antenna; Bidirectionnal mode ; Lateral angle of the antenna : 30°, - 30°...
- Page 13 INSERTION OF BATTERIES FUNCTIONS CONFIGURATION WITH REMOTE Open the battery compartment at the back of the remote control ; CONTROL Insert two AAA batteries supplied with the remote control as shown beside ; Close the battery compartment. (10) Not used 0-9 Number keys (1) (11) Not used (12) Not used...
- Page 14 Note : All parameters or functions listed in the following tables are only accessible if the sensor is in adjustment session. The red LED is then slowly flashing. During an adjustment session each parameter may be checked or changed at any time in the following way : PARAMETERS OPERATIONS CHECK...
- Page 15 During an adjustment session all parameters may be reset to their factory values in the following way : PARAMETERS OPERATIONS FACTORY Press the SETUP key (19), then press the NUMBER key 9. VALUES All the parameters (except the access code) are reset to the factory values. FACTORY VALUES : Factory Values Table Parameter...
- Page 16 Dìtec S.p.A. - Via Mons. Banfi, 3 21042 Caronno P.lla (VA) ITALY - Tel. +39 02 963911 Fax +39 02 9650314 - e-mail: ditec@ditecva.com - www.ditec.it...
- Page 17 PasM24T MANUEL D’UTILISATION DETECTEUR DE MOUVEMENT AUTOSURVEILLES POUR PORTES DE SECOURS AUTOMATIQUES Technologie : Hyperfréquence et Configuration de sortie en détection (source de courant OFF) SPECIFICATION microprocesseur Courant de fuite : < 100 µA TECHNIQUE Fréquence émise : 24.175 GHz Tension résiduelle...
- Page 19 LA LARGEUR DU LOBE DE DETECTION EST DETERMINEE PAR LE CHOIX DE L'ANTENNE PLANAIRE CONFIGURATION MECANIQUE Pour obtenir le lobe large, Pour obtenir le lobe étroit, utiliser l'antenne à 3 éléments utiliser l'antenne à 6 éléments Les lobes de détection indiqués ci-contre Antenne correspondent aux réglages suivants : 3 éléments...
- Page 20 D. LA POSITION DU LOBE EST DETERMINEE PAR L’ANGLE LATERAL DE L’ANTENNE PLANAIRE CONFIGURATION MECANIQUE Les lobes de détection indiqués ci-contre correspondent aux réglages suivants : Antenne lobe large ; Mode bidirectionnel ; Angle latéral de l’antenne : 30°, - 30° Hauteur d’installation : 2.2m.
- Page 21 INSERER LES BATTERIES CONFIGURATION PARAMETRES Ouvrir le compartiment à l'arrière de la télécommande ; AVEC LA Insérer les deux piles AAA, fournies dans l'emballage de la télécommande, comme indiqué ci-contre ; TELECOMMANDE Fermer le compartiment. (10) Pas utilisée Touches numériques 0-9 (1) (11) Pas utilisée (12) Pas utilisée (13) Hauteur d'installation...
- Page 22 Note : Tous les paramètres et fonctions repris dans les tableaux suivants ne sont accessibles que si le détecteur est en mode réglage. La LED rouge clignote lentement Lors d’une session de configuration, il vous est loisible de vérifier ou de modifier les paramètres à tout moment de la manière suivante : PARAMETRES OPERATIONS CONTRÔLE DE...
- Page 23 Lors d’une session de configuration, vous pouvez initialiser tous les paramètres à leur valeur usine de la manière suivante : PARAMETRES OPERATIONS VALEURS Appuyer sur la touche SETUP (19), puis sur la touche numérique 9. USINE Tous les paramètres (à l’exception du code d’accès) sont réinitialisés à leur valeur usine. VALEURS USINE : Tableau des valeurs usine Paramètres...
- Page 24 Remplacer les piles. télécommande. La télécommande est mal orientée Pointer la télécommande en direction du détecteur. Dìtec S.p.A. - Via Mons. Banfi, 3 21042 Caronno P.lla (VA) ITALY - Tel. +39 02 963911 Fax +39 02 9650314 - e-mail: ditec@ditecva.com - www.ditec.it...
- Page 25 PasM24T GEBRAUCHSANWEISUNG SELBSTÜBERWACHENDER BEWEGUNGSMELDER FÜR AUTOMATIK-FLUCHTWEGTÜREN TECHNISCHE Technologie : Hyperfrequenz und Ausgangskonfiguration bei Erfassung (Stromquelle OFF) Mikroprozessor Leckstrom : <100µA DATEN Sendefrequenz : 24.175 GHz Leerlaufspannung : <500mV Sendeleistung : <20 dBm EIRP Haltezeit : 0.5s bis 9s (einstellbar) Dichte der Sendeleistung : <...
- Page 27 DIE BREITE DES ERFASSUNGSFELDES WIRD DURCH WAHL DER PLANARANTENNE BESTIMMT EINSTELLUNG ERFASSUNGS- FELDES Um ein breites Erfassungsfeld zu erhalten Um ein tiefes Erfassungsfeld zu erhalten benutzen Sie die benutzen Sie die 3-Elemente-Antenne 6-Elemente-Antenne Nebenstehende Grafik illustriert das Erfassungsfeld gemäss folgenden Einstellungen: Vertikaler Winkel der Antenne: 30°...
- Page 28 D. DIE LAGE DES ERFASSUNGSBEREICHES WIRD BESTIMMT DURCH DEN SEITLICHEN WINKEL DER ANTENNE EINSTELLUNG ERFASSUNGS- FELDES Nebenstehende Grafik illustriert das Erfassungsfeld gemäss folgenden Einstellungen: 3-Elemente-Antenne Richtungsunempfindlicher Modus Seitlicher Winkel der Antenne: +30° ; -30° Einbauhöhe : 2.2m E. DIE TIEFE DES ERFASSUNGSBEREICHES WIRD BESTIMMT DURCH DEN VERTIKALEN WINKEL DER ANTENNE Nebenstehende Grafik illustriert das Erfassungsfeld gemäss folgenden Einstellungen: 3-Elemente-Antenne...
- Page 29 EINLEGEN DER BATTERIEN KONFIGURATION DES SENSORS MITTELS Öffnen Sie das Batteriefach der Fernbedienung FERNBEDIENUNG Legen Sie 2 Batterien Typ AAA wie abgebildet ein Schließen Sie das Batteriefach (10) Nicht benutzt 0-9 Zifferntasten (1) (11) Nicht benutzt (12) Nicht benutzt (13) Montagehöhe Nicht benutzt (2) (14) Türsteuerung Plus (3)
- Page 30 Bem. : Alle Parameter oder Funktionen in nachfolgender Tabelle sind nur zugänglich während eines Einstellvorganges. Die rote LED blinkt währenddessen mit langsamer Frequenz. Während eines Einstellvorganges können folgende Parameter jederzeit abgefragt bzw. geändert werden: PARAMETER DURCHZUFÜHRENDE OPERATIONEN KONTROLLE Betätigen Sie die Funktionstaste entsprechend des Parameters, dessen Wert kontrolliert werden soll und anschließend die KONTROLLE WERT WERT-Taste (15).
- Page 31 Während eines Einstellvorganges können alle Parameter auf die werksseitigen Standardwerte zurückgesetzt werden: PARAMETER DURCHZUFÜHRENDE OPERATIONEN WERKS- Betätigen Sie die SETUP-Taste (19) und anschliessend die Zifferntaste 9. Alle Parameter werden auf die werksseitig voreingestellten EINSTELLUNG Standardwerte zurückgesetzt (mit Ausnahme des Zugangskodes). WERKSEINSTELLUNG: Werkseinstellungen Parameter...
- Page 32 Ist die Fernbedienung auf den Sensor Richten Sie die Fernbedienung korrekt auf den Sensor aus. ausgerichtet? Dìtec S.p.A. - Via Mons. Banfi, 3 21042 Caronno P.lla (VA) ITALY - Tel. +39 02 963911 Fax +39 02 9650314 - e-mail: ditec@ditecva.com - www.ditec.it...
- Page 33 PasM24T GUIA DEL USUARIO SENSOR DE MOVIMIENTO AUTOVIGILADO PARA PUERTAS AUTOMÁTICAS DE AYUDA Tecnología : Hiperfrecuencia y Configuración « output » en modo detección (fuente corriendo ESPECIFICACIONES microprocesador OFF) TECNICAS Frecuencia emitida : 24.175 GHz : < 100µA Corriendo de fuga Potencia emitida : <20 dBm EIRP...
- Page 35 LA ANCHURA DEL CAMPO DE DETECCIóN SE DETERMINA MEDIANTE LA ELECCIóN DE LA ANTENA PLANAR CONFIGURACIóN MECANICA Para obtener un campo de detección Para obtener un campo de ancho, usar la antena de 3 elementos detección estrecho, usar la antena de 6 elementos Los campos de detección, aquí...
- Page 36 D. LA POSICIóN DEL CAMPO DE DETECCIóN DEPENDE DEL áNGULO LATERAL DE LA ANTENA PLANAR CONFIGURACIóN MECANICA Los campos de detección, aquí juntos, corresponden a los siguientes ajustes: Antena de campo de detección ancho ; Modo bidireccional ; ángulo lateral de la antena : 30°, - 30°...
- Page 37 INTRODUCCIóN DE LAS PILAS CONFIGURACION DE LOS PARAMETROS CON EL Abrir el compartimento de las pilas en la parte trasera del telemando; TELEMANDO Insertir las dos pilas AAA, contenidas en el embalaje del telemando, tal y como se muestra aquí a la izquierda;...
- Page 38 Nota : Todos los parámetros y las funcciones enumerados en los cuadros siguientes son unicamente accesibles si el detector esta en modo de ajustes. La LED roja parpadea lentamente Durante de una configuración, puede verificar o modificar los parámetros, en cualquier momento, del siguiente modo :: PARáMETROS ACCIONES DEL USUARIO COMPROBACIóN...
- Page 39 Durante una sesión de configuración, pueden initializar todos los parametros en sus valores de fábrica del siguiente modo : PARAMETROS OPERACIONES VALORES DE Pulsar el botón de SETUP (19), luego sobre el botón númerico 9. FABRICA Todos los parametros (con excepción del código de acceso) están re-initializados a sus valores de fábrica. VALORES DE FáBRICA : Descripción de los valores de fábrica Parametros...
- Page 40 El mando a distancia está Apuntar el mando a distancia en la dirección del detector. incorrectamente orientado. Dìtec S.p.A. - Via Mons. Banfi, 3 21042 Caronno P.lla (VA) ITALY - Tel. +39 02 963911 Fax +39 02 9650314 - e-mail: ditec@ditecva.com - www.ditec.it...
- Page 41 Address: via Mons. Banfi, 3 - 21042 Caronno Pertusella (VA) - ITALY declares that the product Type: PASM24, PASM241, PASM24W, PASM24W1, PASM24T, PASAM24W, PASAM24T Intended use: Microwave motion sensor complies with the essential requirements of the following CE Directives R&TTE directive:...
- Page 42 CONSTRAINTS CONCERNING THE USE OF RADIO EQUIPMENT IN THE EU COUNTRY OUTPUT POWER FREQUENCY BAND STATUS AUSTRIA 100 mW E.I.R.P. 24.050 – 24.250 GHz NO LICENCE REQUIRED BELGIUM 100 mW E.I.R.P. 24.050 – 24.250 GHz NO LICENCE REQUIRED DENMARK 100 mW E.I.R.P. 24.050 –...
Need help?
Do you have a question about the PasM24T and is the answer not in the manual?
Questions and answers