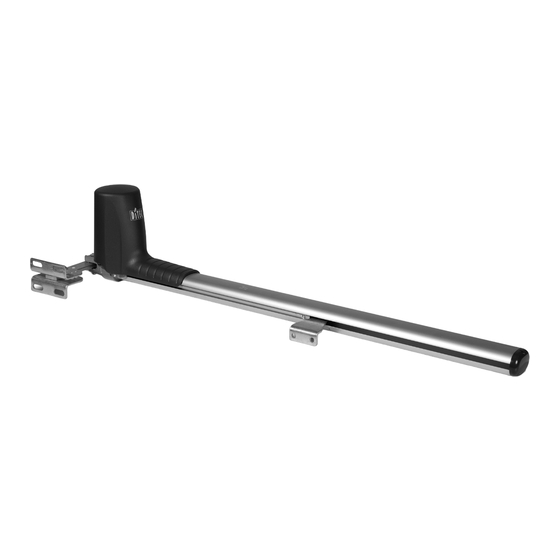
DITEC OBBI3BH Maintenance Manual
Hide thumbs
Also See for OBBI3BH:
- Installation and maintenance manual (31 pages) ,
- Installation and maintenance manual (31 pages)
Table of Contents
Advertisement
Quick Links
Advertisement
Table of Contents

Subscribe to Our Youtube Channel
Summary of Contents for DITEC OBBI3BH
- Page 1 OBBI IP1639EN - rev. 2012-07-31 Installation and maintenance manual for swing gates. (Original instructions) DITEC S.p.A. Via Mons. Banfi, 3 - 21042 Caronno Pertusella (VA) - ITALY Tel. +39 02 963911 - Fax +39 02 9650314 www.ditec.it - ditec@ditecva.com...
-
Page 2: Table Of Contents
INDEX Subject Page 1. General safety precautions 2. Declaration of incorporation of partly completed machinery 2.1 Machinery Directive 3. Technical specifications 3.1 Operating instructions Standard installation 4.1 Geared motor references Installation 5.1 Preliminary checks 5.2 Geared motor installation Electrical connections 6.1 OBBI3BFCH limit switch adjustment Ordinary maintenance program User instructions... -
Page 3: General Safety Precautions
GENERAL SAFETY PRECAUTIONS This installation manual is intended for professionally competent personnel only. Installation, electrical connections and adjustments must be performed in accordance with Good Working Methods and in compliance with applicable regulations. Before installing the product, carefully read the instructions. Bad installation could be hazardous. -
Page 4: Declaration Of Incorporation Of Partly Completed Machinery
DECLARATION OF INCORPORATION OF PARTLY COMPLETED MACHINERY (Directive 2006/42/EC, Annex II-B) The manufacturer DITEC S.p.A. with headquarters in Via Mons. Banfi, 3 - 21042 Caronno Pertusella (VA) - ITALY declares that the automation system for OBBI swing gates: has been constructed to be installed on a manual door to construct a machine pursuant to the Directive 2006/42/EC. -
Page 5: Operating Instructions
TECHNICAL DATA OBBI3BH OBBI3BFCH Power supply 24 V= 24 V= Absorption Thrust 1500 N 1500 N Max run 350 mm 350 mm Opening time 25 s / 90° 25 s / 90° Limit switch Magnetic limit switch Service class 3 - FREQUENT... -
Page 6: Standard Installation
The connection to the mains must be made via an independent channel, separated from the connections to command and safety devices. nOTE: the given operating and performance features can only be guaranteed with the use of DITEC accessories and safety devices. -
Page 7: Geared Motor References
4.1. Geared motor references Ø8,5 Ø12 Ø12 Ref. Code Description Key release Casing Draft tube Tube cover Closing plug Tail bracket Head bracket Cable guide sheat hooking bracket IP1639EN • 2012-07-31... -
Page 8: Installation
INSTALLATION Unless otherwise specified, all measurements are expressed in millimetres (mm). 5.1 Preliminary checks Check that the structure is sufficiently rugged and that the hinge pivots are properly lubricated. Provide an opening and closing stop. 5.2 Geared motor installation Check the installation measurements on the basis of the distance between the hinge of the door wing and the corner of the pillar [C] and of the desired opening angle [D]. - Page 9 If the gearmotor opening direction needs to be modified, proceed as shown in the figure (example of motor transformation with opening direction from right to left). blue brown • Loosen the motor fastening screws. • Extract the motor and the reducer cap and unthread the motor cable.
- Page 10 Fix the tail bracket [14], respecting measurements [A] and [B] on the basis of the desired opening angle [D]. On the tail bracket there are holes that facilitate the assembly operation. Fix the piston to the rear bracket [14] with the pin [F] supplied. Extend the haulage tube completely [11] to its maximum length, then shorten it by approximately 20 WARnInG: the stops must keep a 10 mm margin of tube stroke, in both the door wing closed and door wing open positions.
-
Page 11: Electrical Connections
The gearmotors OBB13BH-OBB13BFCH can be connected to the E2HOB control panel. The electrical wiring and the start-up of the gearmotors OBBI3BH and OBBI3BFCH are shown in figure and in the installation manuals of the E2H control panel. -
Page 12: Obbi3Bfch Limit Switch Adjustment
6.1 OBBI3BFCH limit switch adjustment The OBBI3BFCH geared motor is fitted with magnetic limit switches. Adjust the limit switches in order to obtain the correct opening and closing of the automation, as indicated in figure. dima regolazione finecorsa limit switch adjusting template finecorsa di chiusura closing limit switch finecorsa di apertura... - Page 13 ROUTINE MAINTENANCE PLAN Perform the following operations and checks every 6 months according to intensity of use of the automation. Disconnect the 230 V~ power supply and batteries if present: Clean and lubricate, using neutral grease, the turning pins, the hinges of the gate and the drive screw Check that fastening points are properly tightened.
- Page 14 IP1639EN • 2012-07-31...
-
Page 15: General Safety Precautions
WARnInG: the door wing block and release opera- LEFT PISTON tions must be performed with the motor idle. DITEC S.p.A. Via Mons. Banfi, 3 21042 Caronno Pertusella (VA) - ITALY Tel. +39 02 963911 - Fax +39 02 9650314 www.ditec.it - ditec@ditecva.com IP1639EN • 2012-07-31... - Page 16 DITEC S.p.A. Via Mons. Banfi, 3 21042 Caronno P.lla (VA) Italy Tel. +39 02 963911 Fax +39 02 9650314 www.ditec.it ditec@ditecva.com DITEC BELGIUM LOKEREN Tel. +32 9 3560051 Fax +32 9 3560052 www.ditecbelgium.be DITEC DEUTSCHLAND OBERURSEL Tel. +49 6171 914150 Fax +49 6171 9141555 www.ditec-germany.de...


Need help?
Do you have a question about the OBBI3BH and is the answer not in the manual?
Questions and answers