Table of Contents
Advertisement
Advertisement
Table of Contents

Subscribe to Our Youtube Channel
Related Manuals for Ametek SPECTRO SPECTROCHECK


Summary of Contents for Ametek SPECTRO SPECTROCHECK
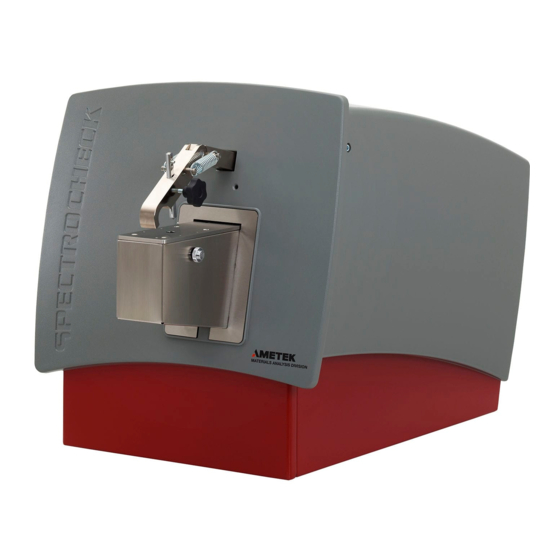
- Page 1 Das v erk nüpfte Bild k ann nicht angezeigt werden. Möglicherweise wurde die Datei v erschoben, umbenannt oder gelöscht. Stellen Sie sicher, dass die Verk nüpfung auf die k orrek te Datei und den k orrek ten Speicherort zeigt. SPECTROCHECK Stationary metal analyzer Original operating instructions...
- Page 2 Das v erk nüpfte Bild k ann nicht angezeigt werden. Möglicherweise wurde die Datei v erschoben, umbenannt oder gelöscht. Stellen Sie sicher k orrek te Datei und den k orrek ten Speicherort zeigt.
-
Page 3: Table Of Contents
Important information Table of Contents Important information ..................5 Description of instrument ..................6 Description .......................... 6 Function ..........................6 Overview ..........................7 2.3.1 Instrument (front) ....................7 ... - Page 4 8.3.4 Removing the spark stand cover ................. 27 8.3.5 Cleaning the exhaust hose .................. 28 8.3.6 Setting the electrode gap ..................29 Replacing the dust filter cartridges ..................30 8.4.1 Replacing the dry filter cartridge ................
-
Page 5: Important Information
Important information Important information Every user of the instrument must have understood these operating instructions. This applies in particular to the safety instructions. More detailed information can be found in "SPECTROCHECK Instructions" (F1/Help). This applies in particular if a technician who was not authorized by SPECTRO initiated the first start-up of the instrument. -
Page 6: Description Of Instrument
Description of instrument Description of instrument Description Designation: SPECTROCHECK Model: LMM01 Type: 76004139 Function Sample material is evaporated by spark discharge inside the instrument. In this process, the released atoms and ions are excited and emit light. This light is directed into the optical systems and measured using CCD* technology. -
Page 7: Overview
Description of instrument Overview 2.3.1 Instrument (front) Component Component Monitor Sample clamp Spark stand Dust filter cartridges SPECTROCHECK — 07.05.2015 — 7... -
Page 8: Connections (Back)
Description of instrument 2.3.2 Connections (back) Component Component Air filter housing Monitor / keyboard connection Argon connection Power connection — 8 SPECTROCHECK — 07.05.2015... -
Page 9: Spark Stand
Description of instrument 2.3.3 Spark stand Component Component Outlet to filter system Spark stand plate Sample clamp Spark stand orifice Contact (movable) Electrode (underneath spark stand plate) Locking wheel for contact Spacer SPECTROCHECK — 07.05.2015 — 9... -
Page 10: Safety
Safety Safety Every user of the instrument must have understood these operating instructions. This applies in particular to the safety regulations. Symbols used The following symbols are used in these abbreviated operating instructions and on the instrument. If required, additional important information is available in connection with these symbols. -
Page 11: User Information
Safety User information Compliance with all safety precautions is mandatory. It's for your own safety. Only carry-out only operator maintenance work that is described in chapter 8 of the operating instructions. The operating personnel is not permitted to proceed with any other maintenance work. -
Page 12: Intended Use
Safety Intended use This instrument analyzes and identifies metals. Only such metals may be analyzed for which the instrument has been calibrated by the manufacturer or by qualified technical personnel. Prohibited operating conditions Do not operate the instrument if one of the following conditions exists: ... - Page 13 Safety Caution! Electrical shock! When the instrument is switched on, there is a risk of an electric shock when the electrode is touched or when the sample is removed during a measurement. Do not touch the sample while the measurement is in progress. ...
-
Page 14: Technical Data
Technical data Technical data Description Value Instrument height 547 mm; 21.6" Instrument width 510 mm; 20.1" Instrument depth 865 mm; 34.1" Instrument width (footprint) 395 mm; 15.6" Instrument depth (footprint) 590 mm; 23.2" Instrument weight approx 51 kg; 113 lbs Power supply 95 –... -
Page 15: Transportation/Setting-Up
Transportation/Setting-up Transportation/Setting-up Notice! Measurement errors! If the instrument is subject to vibrations and shocks, measurement errors may occur during the measuring process. The instrument must be installed in a vibration- and shock-free location. Measurement errors result from temperature differences inside the instrument. -
Page 16: Storage
Transportation/Setting-up Storage Storage conditions: The instrument must be stored in a dry place Room temperature -15°C – +45°C (5°F – 113°F) Avoid storing the instrument at very low temperatures. Gas supply Notice! Measurement errors! Impurities in the argon supply cause measuring errors. ... -
Page 17: Initial Start-Up
Initial start-up Initial start-up The "SPECTROCHECK Instructions" (F1/Help) contain a detailed description on how to proceed during the initial start-up. Preparation of the instrument Before switching on the instrument, proceed as follows: Check the filling level of the wet filter cartridge. Fill with water if required, see page 31. -
Page 18: Operation
Operation Operation Switching the instrument on Note If possible, never shut off the power supply and keep the argon supply always open. If the instrument was disconnected from the power supply for some time (overnight or during the weekend) and/or removed from the argon supply, the instrument must be stabilized for approx. -
Page 19: Switching The Instrument Off
Operation Switching the instrument off Note If possible, leave the instrument on all the time, this means, never shut off the power supply and keep the argon supply always open. If the instrument was disconnected from the power supply and/or removed from the argon supply for some time (due to transport/storage), stabilization may require a longer period of time after switching the instrument on. -
Page 20: Carrying Out The Measurement
Operation Carrying out the measurement Caution! Risk of injury! The sample clamp is held in place by springs. If the sample clamp suddenly folds down and you have your hand under it, you could sustain an injury. Never place your hand under the sample clamp. Caution! Electrical shock! ... -
Page 21: Preparing For The Measurement
Operation 7.3.1 Preparing for the measurement Note An optimum measurement requires a good argon atmosphere inside the spark stand. Therefore, the opening of the spark stand must always be covered. This will prevent oxygen from entering. A flat sample is highly recommended. Oxygen inside the spark stand may cause poor burn spots (see chapter 9 „Troubleshooting“.). -
Page 22: Measuring
Operation 7.3.2 Measuring To proceed with a measurement, follow the steps below: After starting the spectrometer program "Spark Analyzer Pro CHECK", select the "Analysis" function. If necessary, change the method by selecting "Load Method" or pressing the respective function key. Put the sample in position. -
Page 23: Maintenance
Maintenance Maintenance Note In order to ensure the availability and operational safety of the equipment, we recommend having the system checked for correct operation and performance at least once per year by specialized technicians. To find contact addresses of service organizations authorized by SPECTRO go to www.spectro.com Maintenance Reminder The instrument is equipped with a diagnostic system that will prompt you to proceed with a variety of maintenance tasks. -
Page 24: Cleaning The Spark Stand
Maintenance Cleaning the spark stand Caution! Risk of injury and health hazard! The sparking process produces a black precipitate (metal condensate). The condensate could be toxic or flammable, depending on the sample material. Protective gloves and safety glasses must be worn when cleaning the spark stand or when changing the filter cartridges (water-filled filter/dust filter cartridge). -
Page 25: Remove The Spark Stand Plate
Maintenance 8.3.1 Remove the spark stand plate To remove and clean the spark stand plate, proceed as follows: Unscrew the four fasteners (1) and remove the spark stand plate. Use a dry grease-free cloth to clean both sides of the spark stand plate. -
Page 26: Remove/Replace The Electrode
Maintenance 8.3.2 Remove/replace the electrode To remove/replace the electrode, proceed as follows: Remove the spacer (1) from the spark stand. Loosen the socket head screw (2), using the provided screwdriver. A spring is located underneath the electrode (1). In order to prevent the spring from pushing out the electrode and preventing the spring itself from popping... -
Page 27: Removing The Spark Stand Insert
Maintenance 8.3.3 Removing the spark stand insert To remove and clean the spark stand insert, proceed as follows: Remove the spark stand plate. Remove the screw from the accessories. Screw it into the spark stand insert (1). Lift the insert and pull it out. Use a dry grease-free cloth to clean the spark stand insert, the mica washer, and the spark... -
Page 28: Cleaning The Exhaust Hose
Maintenance 8.3.5 Cleaning the exhaust hose To clean the exhaust hose, proceed as follows: Remove the exhaust hose from the spark stand and from the filter cartridge. Hold on to the hose and unlock the connection (1). Loosen the cable clamp on the dust filter cartridges. -
Page 29: Setting The Electrode Gap
Maintenance 8.3.6 Setting the electrode gap After cleaning or replacing the electrode, the gap of the electrode must be reset. To do this, proceed with the following steps: Use the spacer (2) to set the gap of the electrode. Press the spacer into the opening (1) of the spark stand plate. -
Page 30: Replacing The Dust Filter Cartridges
Maintenance Replacing the dust filter cartridges The exhaust air from the spark stand is led through two filters: Water-filled filter (wet filter cartridge) Dry filter with fabric filter (dry filter cartridge) 8.4.1 Replacing the dry filter cartridge Caution! Risk of injury and health hazard! ... -
Page 31: Checking/Changing The Water In The Wet Filter Cartridge
Maintenance 8.4.2 Checking/changing the water in the wet filter cartridge In order to check the water, proceed as follows: Check the water level inside the filter cartridge. The filter cartridge must be filled half with water (1). (Min. filling level 50%, max. filling level 75%). -
Page 32: Replacing The Air Filter
Maintenance Replacing the air filter In order to replace the air filter, proceed as follows: Carefully lift the filter holder (1) then pull it back. Remove the old filter. Install the new filter. First, carefully install the mat with the rounded edges. -
Page 33: Replacing The Icalisation Sample
Maintenance Replacing the ICALisation sample When the ICALisation sample is almost used up, you have to procure a replacement. The new ICALisation sample has a composition which is different from that of the original sample. The intensities of the new sample must be matched to that of the old sample. -
Page 34: Troubleshooting
Troubleshooting Troubleshooting Caution! Damage to instrument! Improper repairs may damage the instrument. Do not repair the instrument yourself. Contact your immediate supervisor. Status messages The status information is displayed in the footer of the software. These indications provide important information about the status of the instrument. The following information is available: Status information Description... - Page 35 Troubleshooting Fault Cause Remedy Poor argon quality. Connect new argon; specifications, see chapter 4 „Technical data“. Incorrect electrode gap. Clean the electrode and re-adjust the gap using the spacer. The samples have not Prepare sample properly, (grind, been prepared turn or mill).
-
Page 36: Spare Parts And Consumables
Spare parts and consumables Spare parts and consumables You can find the spare parts and consumables for this instrument under "Support - Parts Catalogue" (Service – Parts Catalogue) on our website at www.spectro.com. Use only genuine spare parts for repairing the instrument. The use of non-genuine spare parts will make the CE Declaration of Conformity null and void. -
Page 37: Ec Declaration Of Conformity
EC Declaration of Conformity EC Declaration of Conformity EU DECLARATION OF CONFORMITY with ln Accordance Machinery Directive 2006 l42lEG Appendix We herewith confirm that the instrument described below is designed, manufactured and distributed by SPECTRO Analytical Instruments in fully compliance with the health and safety regulations of the above and other relevant EC directives.
Need help?
Do you have a question about the SPECTRO SPECTROCHECK and is the answer not in the manual?
Questions and answers