Table of Contents
Advertisement
Quick Links
Advertisement
Table of Contents

Related Manuals for Ametek Solartron Metrology ORBIT LT


Summary of Contents for Ametek Solartron Metrology ORBIT LT
- Page 2 Index Section Title Page INTRODUCTION ..........3 OPTICAL TRIANGULATION .
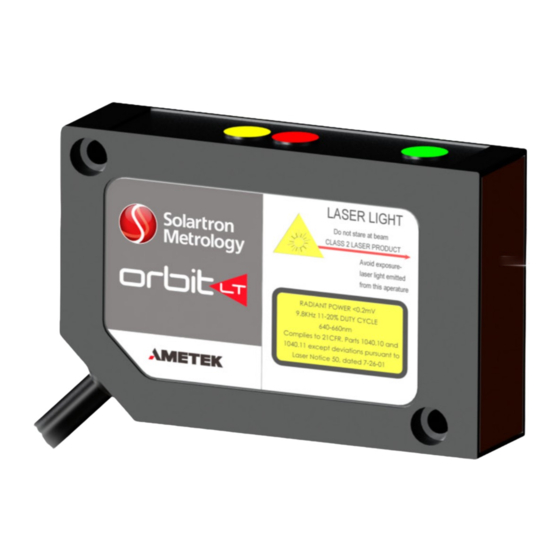
- Page 3 1.0: Introduction Solartron Metrology’s Class 2 visible laser gauge sensor combined with Solartron’s Orbit and Orbit ACS products offers a solid non contact metrology solution for many applications. 1.1 OPTICAL TRIANGULATION The design of the LT sensor is based on optical triangulation. An emitter transmits a visible laser light beam towards a target.
- Page 4 2.0: Laser Warnings and Laser Class 2 Safety Notes WARNING DO NOT look directly at the laser beam with the naked eye or any form of optical equipment. DO NOT point the laser at a persons eye at close range Beam Paths The beam emitted by the laser sensor should be terminated at the end of its useful path.
- Page 5 3.0: Setting the LT Optimum Measuring Position The optimum measuring position for the LT sensor is a distance of 49 mm to 51 mm from the LT sensor face to the target. Best results are obtained after allowing a 20 minute warm up period. Unless requested otherwise the LT sensor will be shipped set up with a measuring range of 10...
- Page 6 4.0: Control Buttons The laser speed can be adjusted to 450 Hz, 45 Hz or 4.5 Hz. The lower the speed, the better the performance. The laser will be supplied set to 4.5 Hz. Pressing the speed button will change the speed, the FAST and SLOW indicator lights show the current speed The Teach Button is used to set the...
- Page 7 5.0: Setting the LT Range The LT Sensor range is set using the sensor keypad, this may be required to calibrate the laser against different surfaces. The range can be adjusted using the following sequence. 5.1 SET THE 0 MM POSITION (FURTHEST FROM THE SENSOR) Set the target to the required 0 mm position ensure that this is no further than 60 mm from the LT sensor face.
- Page 8 6.0: Laser Beam Control The laser beam can be switched off, allowing lasers to measure points very close together where the beams may interfere if both beams were on. In the Beam off mode the laser head is still powered which keeps the laser operating at full specification so that readings can be taken quickly following turning the beam on.
Need help?
Do you have a question about the Solartron Metrology ORBIT LT and is the answer not in the manual?
Questions and answers