
Related Manuals for Ametek SPECTRO ARCOS FHX3X


Summary of Contents for Ametek SPECTRO ARCOS FHX3X
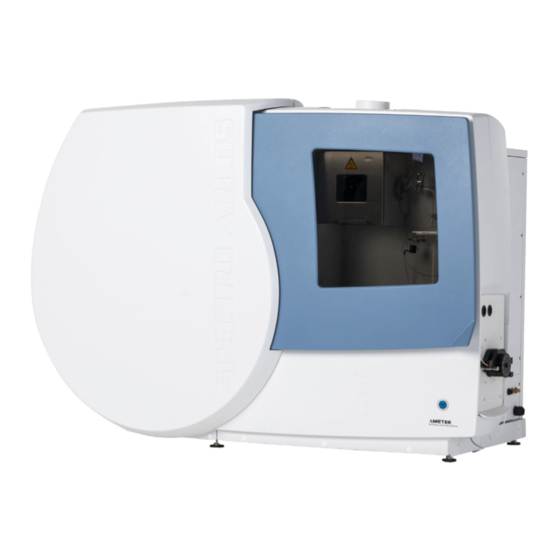
- Page 1 Das v erk nüpfte Bild k ann nicht angezeigt werden. Möglicherweise wurde die Datei v erschoben, umbenannt oder gelöscht. Stellen Sie sicher, dass die Verk nüpfung auf die k orrek te Datei und den k orrek ten Speicherort zeigt. SPECTRO ARCOS FHX3X Optical emission spectrometer with...
-
Page 3: Table Of Contents
Argon ........................28 5.7.2 Oxygen (optional) ....................28 Exhaust air (to the outside) ....................29 Operation ......................31 Overview of controls ......................31 SPECTRO ARCOS FHX3X — 08.02.2022 — 3... - Page 4 Troubleshooting ....................65 Spare parts and consumables ................71 De-commissioning .................... 71 Manufacturer address ..................71 EC Declaration of Conformity ................71 — 4 SPECTRO ARCOS FHX3X — 08.02.2022...
-
Page 5: Description Of Instrument
76004567 Year of construction: 2022 Function The SPECTRO ARCOS FHX3X is an automatic optical emission spectrometer providing simultaneous measurements. It uses inductively coupled plasma excitation and a semiconductor-based detector system for quantitative and semi- quantitative analysis of liquids. The peristaltic pump is used to feed in the sample. -
Page 6: Safety
If required, additional important information is available in connection with these symbols. General warning sign! Warning! High voltage! Warning! Hot surface! Warning! Toxic substances! Warning! Sharp edges! Warning! Optical radiation! Warning! Risk of suffocation! Warning! Risk of hand injury! — 6 SPECTRO ARCOS FHX3X — 08.02.2022... -
Page 7: User Information
Check the protective measures after every technical maintenance or repair activity. The checking procedure is carried out in accordance with DGUV V3 (German Social Accident Insurance) or an equivalent national regulation. SPECTRO ARCOS FHX3X — 08.02.2022 — 7... -
Page 8: Working Zones And Hazardous Areas
The hazardous area must be entered for the following tasks: Inserting samples Assembly of samplers Setting up, installing, and optimizing the sample input Installing the plasma interface Measurement mode Maintenance Cleaning Troubleshooting — 8 SPECTRO ARCOS FHX3X — 08.02.2022... -
Page 9: Intended Use
Laboratory clothing must be tight-fitting so that the garment cannot be pulled into rotating parts (e.g. peristaltic pump). SPECTRO ARCOS FHX3X — 08.02.2022 — 9... -
Page 10: Prohibited Operating Conditions
The cooling system contains a coolant. The applicable safety data sheet is available at https://www.spectro.com/support/msds. The content of the UV Plus purifier is a hazardous substance. The applicable safety data sheet is available at https://www.spectro.com/support/msds. — 10 SPECTRO ARCOS FHX3X — 08.02.2022... - Page 11 The instrument is operated with argon. Argon is heavier than air. In case of leakage, argon can accumulate in enclosed spaces, especially on the floor or lower areas. Ensure that adequate ventilation is provided. If necessary, oxygen sensors must be installed. SPECTRO ARCOS FHX3X — 08.02.2022 — 11...
- Page 12 In order to ensure the availability and operational safety of the equipment, we recommend having the system checked for correct operation and performance at least once a year by specialized technicians. Addresses of service organizations authorized by SPECTRO can be found at www.spectro.com. — 12 SPECTRO ARCOS FHX3X — 08.02.2022...
-
Page 13: External Automatic Sample Introduction
Only properly trained technicians shall be permitted to install the connections between the instrument and the external automatic sample introduction. Compliance with the safety instructions in the SPECTRO ARCOS FHX3X operating manual and the external automatic sample introduction is mandatory. -
Page 14: Layout Of The Instrument
Component Component Plasma torch box inspection Connection to sample introduction window system Plasma torch box housing Peristaltic pump (sample transport) Drip pan (behind door) Main switch Sample introduction chamber Connection points Plasma off — 14 SPECTRO ARCOS FHX3X — 08.02.2022... -
Page 15: Rear Panel
Layout of the instrument Rear panel Fig. 2 Component Component Generator exhaust Air filter (behind service flap) Extraction box housing (plasma UV-Plus purifier torch) Service flap SPECTRO ARCOS FHX3X — 08.02.2022 — 15... -
Page 16: Connections (Right-Hand Side)
Layout of the instrument Connections (right-hand side) Fig. 3 Component Component Main switch Oxygen connection (option) PC connection Argon connection Plasma status port (option) Power cable — 16 SPECTRO ARCOS FHX3X — 08.02.2022... -
Page 17: Connections (Analysis Room)
Fig. 4 Component Component Nebulizer gas Gas connection Spectro Intelligent Valve System (SIVS) - optional Additional gas connection Control system Spectro Intelligent Valve System (SIVS) - optional DSOI (Dual Side Optical Interface) - optional SPECTRO ARCOS FHX3X — 08.02.2022 — 17... -
Page 18: Peristaltic Pump
Layout of the instrument Peristaltic pump Information Check the peristaltic pump’s hoses for damage and replace the hoses regularly. Fig. 5 Component Component Leadthrough to sample Trip pan introduction chamber Peristaltic pump — 18 SPECTRO ARCOS FHX3X — 08.02.2022... -
Page 19: Sample Introduction System
Layout of the instrument Sample introduction system Fig. 6 Component Component Plasma torch Argon connection Clamp Nebulizer Spray chamber Spherical joint seal Spray chamber outlet 90° Spray chamber adapter Sample introduction connection (from peristaltic pump) SPECTRO ARCOS FHX3X — 08.02.2022 — 19... -
Page 20: Plasma Torch Box
Plasma torch box SOP Fig. 7 Component Component Extraction box housing and torch Clamp Load coil Connection to sample introduction system Plasma torch Plasma torch bracket Nebulizer gas connection Plasma interface (SPI) Spherical joint seal — 20 SPECTRO ARCOS FHX3X — 08.02.2022... -
Page 21: Plasma Torch Box Eop
The plasma interface (OPI) necessary for the axial version is equipped with an air cooling system. Fig. 8 Component Component Extraction box housing and torch Elbow adapter Load coil Nebulizer gas connection Plasma torch bracket Plasma torch Clamp Plasma interface (OPI) Spherical joint seal SPECTRO ARCOS FHX3X — 08.02.2022 — 21... -
Page 22: Plasma Torch Box Dsoi (Dual Side Optical Interface) - Optional
Fig. 9 Component Component Extraction box housing and torch Plasma torch bracket DSOI (Dual Side On Interface) - Plasma torch optional DSOI argon connection Load coil Connection to sample introduction Plasma interface (OPI/SPI) system — 22 SPECTRO ARCOS FHX3X — 08.02.2022... -
Page 23: Technical Data
∆T ≤ 3 °C/h. (5.4°F/h) Humidity < 80% rel. (non-condensing) Air quality No corrosive components and no high concentrations of dust Operation: Max. 3,000 m above mean sea level SPECTRO ARCOS FHX3X — 08.02.2022 — 23... - Page 24 18 to 25 °C = 200 to 250 m³/h; 118 to 150 CFM > 25 °C = 250 to 300 m³/h; 150 to 177 CFM Generator extraction or without 250 – 300 m³/h; 150 – 177 CFM or blowing into extraction the room without obstruction — 24 SPECTRO ARCOS FHX3X — 08.02.2022...
-
Page 25: Transportation/Setting-Up
Ensure to position the instrument compliant with its intended use. It must be safe to install, simple to operate, easy to remove, and there must be ample clearance to move around the instrument. 756 mm Fig. 10 SPECTRO ARCOS FHX3X — 08.02.2022 — 25... -
Page 26: Space Requirement For Machine Operators And Maintenance Personnel
A table of corresponding dimensions and load-carrying capacity is required, see page 23. In addition to the space required by the SPECTRO ARCOS FHX3X, some space is needed for the gas supply, unless fixed gas connections are available. -
Page 27: Dust Load
The parts and connections of the gas supply line must be checked regularly for leaks or possible damage. Compliance with country-specific national rules and regulations for the safe use of gases and gas cylinders is mandatory. SPECTRO ARCOS FHX3X — 08.02.2022 — 27... -
Page 28: Argon
Nebulizer gas: 0.4 to 1.5 l/min, typically 0.8 l/min 5.7.2 Oxygen (optional) Inlet pressure during 4.0 bar (58 psi) operation Quality ≥ 4.5 (99.995 %) Flow rate The flow rate depends on the application. — 28 SPECTRO ARCOS FHX3X — 08.02.2022... -
Page 29: Exhaust Air (To The Outside)
All installation must be performed in a professional manner and in accordance with applicable engineering standards in order to prevent risk to life and limb and avoid damage to material property. SPECTRO ARCOS FHX3X — 08.02.2022 — 29... - Page 30 Dependent on ambient temperature blowing into the room without 18 to 25 °C = 200 to 250 m³/h; 118 to 150 CFM obstruction > 25 °C = 250 to 300 m³/h; 150 to 177 CFM — 30 SPECTRO ARCOS FHX3X — 08.02.2022...
-
Page 31: Operation
In order to remove small parts and glass fragments, a suitable vacuum must be used. Overview of controls Fig. 12 Control element Function Main switch Switches the power supply (On/Off) Plasma Off Switches the plasma off SPECTRO ARCOS FHX3X — 08.02.2022 — 31... -
Page 32: Preparation Of The Instrument
When the plasma is started, a suitable blank sample should be nebulized during the stabilization period (see point 7). A tube connected to the peristaltic pump is used to insert the samples. — 32 SPECTRO ARCOS FHX3X — 08.02.2022... - Page 33 10 minutes in order to heat up and equalize the components. The instrument is now switched on and the plasma started. SPECTRO ARCOS FHX3X — 08.02.2022 — 33...
-
Page 34: Switch Off The Instrument/Plasma
If step 7 is omitted, the instrument is in the "Instrument Standby" mode. In order to reactivate the instrument, follow the instructions in chapter 6.3, starting at step 2, see page 32. The stabilization period is significantly reduced. — 34 SPECTRO ARCOS FHX3X — 08.02.2022... -
Page 35: Carrying Out The Measurement
before proceeding with high-precision measurements. Aqueous applications The spectrum calibration of aqueous applications requires a solution of the following composition: Element Concentration mg/L Element Concentration mg/L SPECTRO ARCOS FHX3X — 08.02.2022 — 35... - Page 36 Click the “Start Spectrum Calibration” button in order to calibrate the optics. The information box communicates whether the calibration has been completed successfully or if errors occurred. The optics is now calibrated. — 36 SPECTRO ARCOS FHX3X — 08.02.2022...
-
Page 37: Calibrating A Method
Proceed in this way until all standards contained in the list were measured. When all standards contained in the list were measured, click on the ”Calculate“ button. The method is now calibrated. SPECTRO ARCOS FHX3X — 08.02.2022 — 37... -
Page 38: Start The Measurement
When the measurement is complete, the results are displayed on the screen. Press the “Finish” button to terminate the measurement process. The measurement process is finished. Perform further measurements as needed. — 38 SPECTRO ARCOS FHX3X — 08.02.2022... -
Page 39: Maintenance
Check the plasma torch and spray chamber for damage and contamination. Clean or replace, if required; see page 41. Nebulizer Check quality of aerosol generation, see page 50. Air filter (below the left rear Replace, if dirty. instrument cover) SPECTRO ARCOS FHX3X — 08.02.2022 — 39... - Page 40 DSOI (Dual Side On Interface) - Check mirror, replace if necessary; see 62. optional UV-PLUS purifier Use the instrument software program (“System information” dialog) to check the remaining service life of the “UV-PLUS purifier”. — 40 SPECTRO ARCOS FHX3X — 08.02.2022...
-
Page 41: Cleaning The Plasma Torch
Switch off the plasma. Loosen and remove the clamp(s) and the spherical joint seal between the plasma torch and the spray chamber. Loosen the plasma torch by turning it counterclockwise. Remove the plasma torch. SPECTRO ARCOS FHX3X — 08.02.2022 — 41... - Page 42 Remove the hoses (A, C). Pull the torch out of the adapter. Fig. 13 Careful not to touch the sensor mirror in the torch adapter (1). Fig. 14 — 42 SPECTRO ARCOS FHX3X — 08.02.2022...
- Page 43 (3). There is a clearance of ±1 mm to optimize the torch’s height. Reconnect the hoses (A = Axillary, C = Plasma gas). Fig. 16 SPECTRO ARCOS FHX3X — 08.02.2022 — 43...
- Page 44 Insert the torch in the appropriate position and turn the lever (2) clockwise until it snaps into place. Fig. 17: Radial plasma observation (SOP/DSOI) The plasma torch has been cleaned. Fig. 18: Axial plasma observation — 44 SPECTRO ARCOS FHX3X — 08.02.2022...
-
Page 45: Cleaning The Load Coil
Use a small brush (e.g. a toothbrush) and a grinding paste (e.g. toothpaste) to clean the load coil. Do not bend the load coil. Remove the grinding paste completely from the load coil. Reinstall the components. The load coil is cleaned. SPECTRO ARCOS FHX3X — 08.02.2022 — 45... -
Page 46: Cleaning The Nebulizer (Standard Crossflow Nebulizer)
Disconnect all other connections from the nebulizer and the spray chamber. Separate the nebulizer from the spray chamber by slightly twisting it and disconnect the argon connection. Remove the adapter for the argon connection. — 46 SPECTRO ARCOS FHX3X — 08.02.2022... - Page 47 10. Then flush the nebulizer with distilled water and let it dry completely. 11. Reinstall the components. 12. Check aerosol generation and optimize the gas flow of the nebulizer; see page 50. Cleaning of the nebulizer is now complete. SPECTRO ARCOS FHX3X — 08.02.2022 — 47...
-
Page 48: Cleaning The Spray Chamber (Standard Scott Chamber)
Separate the nebulizer from the spray chamber by slightly twisting it. Disconnect the waste water connection from the drainage of the spray chamber and remove the cap from the spray chamber by slightly turning it. — 48 SPECTRO ARCOS FHX3X — 08.02.2022... - Page 49 Now, use distilled water to flush the spray chamber thoroughly. 10. Reinstall the components. 11. Optimize the nebulizer gas flow; see page 50. Cleaning of the spray chamber is now complete. SPECTRO ARCOS FHX3X — 08.02.2022 — 49...
-
Page 50: Checking The Aerosol Formation Of The Nebulizer
Click the “Start” button in the dialog window. The instrument optimizes the nebulizer gas flow. Optimization of the nebulizer gas flow is now complete. For additional information, refer to the online Help. — 50 SPECTRO ARCOS FHX3X — 08.02.2022... -
Page 51: Cleaning The Side-On Plasma Interface (Spi)
If glass is broken, a suitable container (bucket) must be used to collect the larger pieces first. In order to remove small parts and glass fragments, a suitable vacuum must be used. SPECTRO ARCOS FHX3X — 08.02.2022 — 51... - Page 52 (3). Carefully pull the SPI (2) to the front and out of its bracket (1). Remove the SPI from the torch housing. The removal of the SPI is now complete. Fig. 21 — 52 SPECTRO ARCOS FHX3X — 08.02.2022...
-
Page 53: Cleaning The Lens And The Spi
Fig. 23 Clean the contaminated lens using lens cleaning paper or a lint-free soft cloth. Use a lint-free cloth to clean all other parts. The lens and SPI are now clean. SPECTRO ARCOS FHX3X — 08.02.2022 — 53... -
Page 54: Installing The Lens And The Spi
Fig. 24 Insert the SPI into the instrument following the reverse order used for the disassembly procedure. Install the plasma torch and adapter; see page 41. The lens and SPI are now installed. — 54 SPECTRO ARCOS FHX3X — 08.02.2022... -
Page 55: Cleaning The Optical Plasma Interface (Opi) (Multiview Eop Only)
If glass is broken, a suitable container (bucket) must be used to collect the larger pieces first. In order to remove small parts and glass fragments, a suitable vacuum must be used SPECTRO ARCOS FHX3X — 08.02.2022 — 55... - Page 56 (2). Carefully pull the OPI at the handle (3) to the front (4). Remove the OPI from the torch housing. The removal of the OPI is now complete. Fig. 26 — 56 SPECTRO ARCOS FHX3X — 08.02.2022...
-
Page 57: Cleaning The Sampler
Then flush the sampler thoroughly with distilled water. Clean the sampler opening, e.g., using a pipe cleaner. Let the sampler dry using a jet of air or argon. Reinstall the sampler (2). Cleaning of the sampler is now complete. SPECTRO ARCOS FHX3X — 08.02.2022 — 57... -
Page 58: Cleaning The Lens
Carefully push the lens (2) out and onto a piece of lens cleaning paper. Fig. 29 Clean the contaminated lens using lens cleaning paper or a lint-free soft cloth. Cleaning of the lens is now complete. — 58 SPECTRO ARCOS FHX3X — 08.02.2022... -
Page 59: Installing The Lens And The Opi
There is an O-ring inside the OPI support flange. Make sure that the O- ring is clean and sits inside the notch. Install the plasma torch and adapter; see page 55. Installation and cleaning of the OPI is now complete. SPECTRO ARCOS FHX3X — 08.02.2022 — 59... -
Page 60: Installing/Removing Of The Dual Side-On Interface (Dsoi)
Loosen the argon connection (3). Carefully rotate the DSOI (2) one eighth of a turn counterclockwise. Carefully pull off the DSOI to the right. Careful not to damage the glass tube (1). Fig. 31 — 60 SPECTRO ARCOS FHX3X — 08.02.2022... - Page 61 Careful not to touch the sensor mirror in the blind plug (1) Rotate the plug one eighth of a turn clockwise until the plug engages. Fig. 33 SPECTRO ARCOS FHX3X — 08.02.2022 — 61...
-
Page 62: Mirror - Cleaning The Blind Plug, Torch Adapter, And Dsoi
If impurities collect on the sensor’s mirror (1), it can be easily replaced. Use a lint-free cloth and isopropanol in order to clean the adapter, if required. Fig. 34 Fig. 35 Fig. 36 — 62 SPECTRO ARCOS FHX3X — 08.02.2022... -
Page 63: Pump Tubing Maintenance
Sample introduction channel: Inside diameter 0.89 mm; 0.035" (Orange-orange stops). Outlet channel: Inside diameter 1.8 mm; 0.071" (Blue-green stops). Replacement of pump tubes is now complete. SPECTRO ARCOS FHX3X — 08.02.2022 — 63... -
Page 64: Cleaning Agents
Plasma torch Depending on the impurities use diluted hydrochloric acid, nitric acid or aqua regia, demineralized water Nebulizer Depending on the impurities use diluted hydrochloric acid, nitric acid or aqua regia, demineralized water — 64 SPECTRO ARCOS FHX3X — 08.02.2022... -
Page 65: Troubleshooting
Turn off the instrument and restart it again. If the problem persists, please contact the SPECTRO Service Department. The instrument’s door is Close the door in order to start the plasma. open SPECTRO ARCOS FHX3X — 08.02.2022 — 65... - Page 66 Turn off the instrument and restart it again. If the problem failure persists, please contact the SPECTRO Service Department. The MultiView blind plug Check the blind plug and the blind plug’s cable for proper fit. has been disconnected — 66 SPECTRO ARCOS FHX3X — 08.02.2022...
- Page 67 Make sure that there are no blockages in the plasma torch and droplets are removed in the aerosol path. If impurities have accumulated on the coil, clean it as described in the manual. SPECTRO ARCOS FHX3X — 08.02.2022 — 67...
- Page 68 Temperature in the Temperature sensor defective. Please contact the SPECTRO plasma torch box low Service Department. Plasma torch box cover Close the plasma torch box cover in order to start the plasma open — 68 SPECTRO ARCOS FHX3X — 08.02.2022...
- Page 69 Check the O-rings for sealing the plasma torch and replace them, if necessary. Auxiliary gas flow set too low. Increase auxiliary gas flow. Leak in the nebulizer system Localize leak using soapy solution and seal the leak. SPECTRO ARCOS FHX3X — 08.02.2022 — 69...
- Page 70 Switch off the generator and use a paper towel to dry the load coil (if moisture is visible). Dirt on the load coil Switch off the generator and clean the load coil. — 70 SPECTRO ARCOS FHX3X — 08.02.2022...
-
Page 71: Spare Parts And Consumables
Tel.: +49.2821.8 92-0 Fax: +49.2821.8 92-22 00 www.spectro.com Your local SPECTRO Organization or representative can be found under “Contact“ www.spectro.com EC Declaration of Conformity The EC Declaration of Conformity is enclosed with the instrument. SPECTRO ARCOS FHX3X — 08.02.2022 — 71...
Need help?
Do you have a question about the SPECTRO ARCOS FHX3X and is the answer not in the manual?
Questions and answers