
Subscribe to Our Youtube Channel
Related Manuals for IWAKI PUMPS Hicera V Series


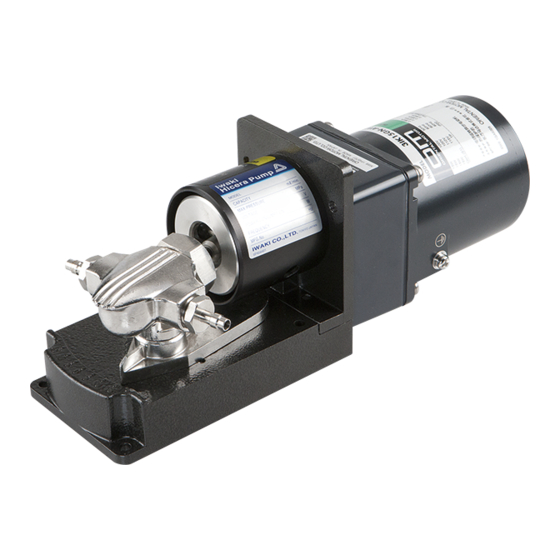
Summary of Contents for IWAKI PUMPS Hicera V Series
- Page 1 IWAKI Hicera Pump V series Instruction Manual Read this manual before use of product...
-
Page 2: Table Of Contents
Thank you for selecting an Iwaki V Series Hicera Pump. This instruction manual deals with "Safety instructions", "Outline", "Installation", "Operation" and "Maintenance" sections. Please read through this manual carefully to ensure the optimum performance, safety and serv- ice of your pump. Contents Important instructions ····································································... -
Page 3: Important Instructions
Important instruction For the Safe and Correct Handling of the Pump ● "Safety Instruction" section deals with important details about handling of the product. Before use, read this section carefully for the prevention of personal injury or property damage. ● Observe the instructions accompanied with "WARNING" or "CAUTION" in this manual. These instructions are very important for protecting users from dangerous situations. -
Page 4: Safety Instructions
Safety instruction WARNING ● Turn off power before work Be sure to turn off power before starting maintenance/repair work. Make sure no one turns on power while working on the pump, otherwise it may result in a serious accident. Let other people know about the situation by Electrical shock displaying a notice such as "POWER OFF (Maintenance)"... - Page 5 Safety instruction CAUTION ● Earthing Risk of electrical shock. Do not run the pump without earthing. Secure Grounding earth protection to reduce the risk. ● Install an earth leakage breaker Risk of electrical shock. Do not run the pump without a leakage breaker. Secure a leakage breaker to reduce the risk.
- Page 6 Safety instruction CAUTION ● For a specified power only Do not apply any voltage other than the specified one on the motor name- plate. Otherwise, damage or fire may result. Prohibition ● Do not run pump dry Do not run pump dry (Operation without liquid). Friction heart builds up during dry running operation and damages internal parts.
-
Page 7: Outline
Outline 1. Unpacking & Inspection ......6 2. Product outline ........6 3. Model code ........... 7 4. Specification ......... 8 - 5 -... -
Page 8: Unpacking & Inspection
Outline 1. Unpacking & Inspection On unpacking the product, check the following points. If you find any problems, contact your near- est distributor. 1. Check the information on nameplate (model code, flow rate, head and voltage) to see if the product is delivered as per order. -
Page 9: Model Code
Outline 3. Model code V - 05SLP 1 A 1 - X a. Plunger diameter, Wet end materials, Flushing port Plunger/Sylinder Pump head ma- Applicable Code Plunger dia (mm) Flushing port material terial pumps 05SL ø5 SiC/SiC SCS14 V-05 05SLP ø5 SiC/SiC SCS14... -
Page 10: Specification
Outline 4. Specification 50/60Hz Max.press. Max. flow Tube joint Standard Mass Model Gear ratio Speed (rpm) (ml/min) (mm) motor (kg) (MPa) V-05SL1A5 1/150 9/11 1.6/1.9 V-05SL1B5 1/75 19/23 3.3/4.0 Induction V-10�L1A5 1/150 9/11 6.0/7.0 ø6 SUS motor tube joint V-10�L1B5 1/75 19/23 13/16... -
Page 11: Installation
Installation 1. Before installation ....... 10 2. Installation/Piping/Wiring ....12 - 9 -... -
Page 12: Before Installation
Installation 1. Before installation 1. Do not run pump dry (except for the start-up dry running to fill the pump head with liquid.) Friction heat builds up in the pump head during dry running and the plunger seizes in the cylin- der. - Page 13 Installation 6. Precipitation or Crystallization Flush out liquid that has property of precipitation or crystallization from the pump head. CAUTION If the pump is left before flushing, the plunger may be stuck in the cylinder. In this case the pump does not start to run. 7.
-
Page 14: Installation/Piping/Wiring
Installation 2. Installation/Piping/Wiring ■ Installation 1. Select an installation location where is con- venient for maintenance. Ambient temperature should not exceed 40ºC or falls below 0ºC. Observe the maximum ambient humidity of 85%RH. Do not install the pump out of doors. CAUTION When installing the pump, be careful not to impact the pump. - Page 15 Installation ■ Plumbing 1. Have tubing length shortest with the minimum number of bends in order to reduce pipe resist- ance. 2. The inlet and outlet ports should be completely sealed for the prevention of air ingress into a flow line.
-
Page 16: Operation
Operation 1. Operation ..........15 - 14 -... -
Page 17: Operation
Operation 1. Operation Do not run pump dry or run it with a discharge valve or a suction valve closed. ■ Starting process Operate the pump according to the following procedure after installation, tubing and wiring of pump. Points to be checked Procedure Tubing, wiring and voltage ●... - Page 18 Operation ■ Daily inspection See the following check items in operation. On detection of abnormality, stop operation immediately. Take measures referring to the item "Trouble shooting". States Points to be checked How to check Pumping • If liquid is pumped. Flow meter or visual inspection •...
- Page 19 Maintenance 1. Disassembly & Assembly ....18 2. Troubleshooting ........24 3. Dimensions ......... 25 4. Wear parts .......... 27 - 17 -...
-
Page 20: Maintenance 1. Disassembly & Assembly
Maintenance 1. Disassembly & Assembly ■ Exploded view (V-05/-10) Part names Q'ty Remarks Part names Q'ty Remarks Plunger Mounting plate /SiC Cylinder Drive joint /SiC Pump head SCS14 Spherical bearing Cap nut SUS303 Tube joint Lock lever SUS316 Lock bar Joint seal PTFE Hex. - Page 21 Maintenance ■ Dismantlement (V-05/-10) Follow the procedure below to take apart the pump head. 1. Remove tube connections from the pump head. Be careful not to get wet with chemical liquid. Wipe chemicals off immediately when your hand or component parts get wet. 2.
- Page 22 Maintenance ■ Assembly (V-05/-10) Follow the procedure below to put together the pump head. 1. Insert the head seal (7) first and then the cylinder (2) into the pump head (3). Make sure the flow paths of the cylinder lie direc- tory beneath those of the pump head.
- Page 23 Maintenance ■ Exploded view (V-15) Part names Q'ty Remarks Part names Q'ty Remarks Plunger ass'y /SiC Drive joint ass'y Cylinder /SiC Bearing case ass'y Pump head SUS304 Drive joint cover SUS304 Head cover SUS304 Pump base SPCC Angle scale Head seal PTFE Tube joint SUS316...
- Page 24 Maintenance ■ Dismantlement (V-15) Follow the procedure below to take apart the pump head. 1. Remove all tube connections from the pump head. Be careful not to get wet with chemical liquid. Wipe chemicals off immediately when your hand or compo- nent parts get wet.
- Page 25 Maintenance ■ Assembly (V-15) Follow the procedure below to put together the pump head. 1. Insert the plunger ass'y (1) into the pump frame (12 ). And then slide the seal stopper (10) down onto the plunger ass'y as far as it will go. 2.
-
Page 26: Troubleshooting
Maintenance 2. Troubleshooting Problem Cause Countermeasures Power is not supplied. Supply power. Wrong wiring or disconnection Correct wiring. Motor failure (winding disconnection or Replace motor. The pump does not start capacitor failure) to run. *Plunger seizing due to crystallization Take apart the pump head and clean wet ends. -
Page 27: Dimensions
Maintenance 3. Dimensions V-05/-10 (15W induction motor) 112 or 122 NOTE1 238 or 248 NOTE2 V-05/-10 (25W induction motor) 122 or 133 NOTE3 248 or 259 NOTE4 - 25 -... - Page 28 Maintenance V-15 4 × ø5 339 or 357 NOTE5 NOTE1: 112mm for the gear ratio of 1/3-1/15 122mm for the gear ratio of 1/30-1/150 NOTE2: 238mm for the gear ratio of 1/3-1/15 248mm for the gear ratio of 1/30-1/150 NOTE3: 122mm for the gear ratio of 1/3-1/15 133mm for the gear ratio of 1/30-1/150 NOTE4: 248mm for the gear ratio of 1/3-1/15 259mm for the gear ratio of 1/30-1/150...
-
Page 29: Wear Parts
Maintenance 4. Wear parts Replace wear parts according to the estimated service life as shown below. Lip seal Joint seal Head seal Back seat Parts V-05 Life 2000hr Each maintenance Each maintenance Each maintenance Q'ty Lip seal Joint seal Head seal Back seat Parts V-10... - Page 30 - 28 -...
- Page 31 - 29 -...
- Page 32 IWAKI Norge AS TEL : (47)23 38 49 00 FAX : 23 38 49 01 China IWAKI Pumps (Guandong) Co., Ltd. TEL : (86)750 3866228 FAX : 750 3866278 Singapore IWAKI Singapore Pte. Ltd. TEL : (65)6316 2028 FAX : 6316 3221 China GFTZ IWAKI Engineering &...
Need help?
Do you have a question about the Hicera V Series and is the answer not in the manual?
Questions and answers