
Subscribe to Our Youtube Channel
Related Manuals for IWAKI PUMPS ES-B Series


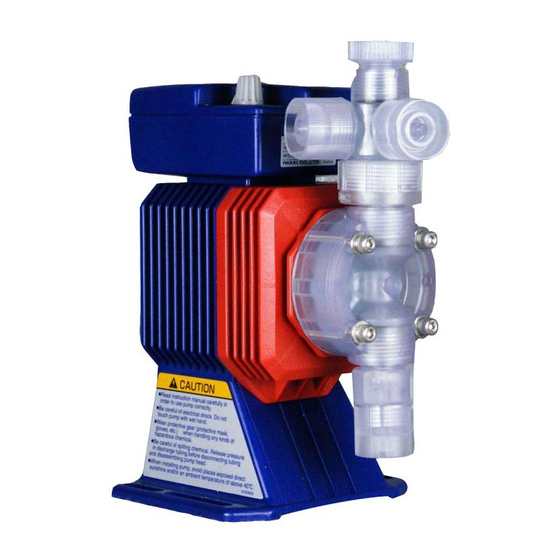
Summary of Contents for IWAKI PUMPS ES-B Series
- Page 1 IWAKI Electromagnetic Metering Pump ES-B/C Type (Asia version) Instruction Manual Read this manual before use of product...
-
Page 2: Table Of Contents
Thank you for selecting the IWAKI's electromagnetic metering pump ES series. This instruc- tion manual deals with "Safety Instructions", "Outline", "Installation", "Operation" and "Maintenance" sections. Please read through this manual carefully to ensure the optimum performance, safety and service of your pump. Contents Important instructions ·····························································... -
Page 3: Important Instructions
Important instructions For the Safe and Correct Handling of the pump ● "Safety Instruction" section deals with important details about handling of the product. Before the use of the pump, read this section carefully for the prevention of personnel injury or loss. ●... -
Page 4: Safety Instructions
Safety instructions WARNING ● Turn off power Working on the pump while the power is ON, you may be shocked. Be sure to turn off the pump and related devices before any work. Electrical Shock ● Terminate operation Finding any abnormal condition, stop the operation immediately and inspect/solve problems. - Page 5 Safety instructions CAUTION ● Ventilate Poisoning may result when handling toxic or odorous liquid. Ventilate the operating site sufficiently. Caution ● Countermeasure against efflux Take a protective measure against the accidental efflux caused by the pump or piping breakage. Caution ●...
-
Page 6: Outline
Outline 1.Safety and Caution Notes ....5 2.Principle of Operation ...... 5 3.Specifications ........6 - 4 -... -
Page 7: Safety And Caution Notes
Outline 1. Safety and Caution Notes Avoid areas where ambient temperature exceeds 40 degrees Celsius or falls below 0 degrees Celsius, or where the pump or tubing would be exposed to direct sunlight. Disconnect the pump from electrical power source before performing any maintenance. When working on or around a metering pump, always wear proper protective clothing and equipment as rec- ommended by the supplier of the liquid being pumped. -
Page 8: Specifications
Outline 3. Specifications Capacity/Pressure Rating Model Max. capacity 2.28 12.0 16.2 24.0 Max. capacity ml/min Max. discharge pressure 0.35 Stroke rate 0 - 353 spm Stroke length 1.00 mm (Fixed stroke length) 1.25 mm (Fixed stroke length) Power supply 207 - 253VAC, 50Hz single phase Average power con- 16 watt 22 watt... -
Page 9: Installation
Installation 1.Unpacking .......... 8 2.Location ..........8 3.Supply Tubing ........9 4. Discharge Tubing ......9 5. Electrical ........... 9 - 7 -... -
Page 10: Unpacking
Installation 1. Unpacking Open the shipping carton and inspect contents for damage. If any items are messing or damaged, contact your local distributor to arrange for replacement. 2. Location Choose a location for the pump which is clean, dry, close to an electrical outlet, and allows convenient access to frequency control and tubing connections. -
Page 11: Supply Tubing
Installation 3. Supply Tubing The supply tubing run should be as short as possible. For flooded suction mounting, install a shout-off valve with an appropriate tubing connector at the tank outlet. Cut a length of tubing from the coil supplied and install between the shut-off valve and the pump inlet fitting. -
Page 12: Operation
Operation 1.Priming ..........11 2.Adjustment ........11 3.Calibration ........12 - 10 -... -
Page 13: Priming
Operation CAUTION ● Do not operate the pump with a completely closed discharge-side valve. Operating the pump with the discharge-side valve fully closed may lead to liquid leakage or pipe rupture. In addition, more than 30 minutes of closed-discharge operation causes abnormal heat in the pump. -
Page 14: Calibration
Operation 3. Calibration If exact output calibration is required, first prime and adjust the pump as above. Then connect a calibra- tion column to the suction side of the pump. Turn the pump on for one minute and read the amount of liquid pumped from the column. - Page 15 Maintenance 1.Diaphragm Replacement ....14 2.Valve Replacement ......14 3.Tubing ..........14 4.Troubleshooting ......15 5.Model Code ........16 6.Dimensions ........17 7.Exploded View ........ 19 8.Parts List ......... 20 - 13 -...
-
Page 16: Maintenance 1. Diaphragm Replacement
Maintenance CAUTION ● Before working on the pump, disconnect the power cord, depressurize the discharge tubing and drain or flush any residual liquid for the pump head and valves. 1. Diaphragm Replacement Remove the power cord from the electrical outlet and disconnect the suction tubing, discharge tubing, and air vent tubing. -
Page 17: Troubleshooting
Maintenance 4. Troubleshooting CAUTION ● Before working on the pump disconnect the power cord, depressurize the discharge tubing and drain or flush any residual liquid from the pump head and valves. Problem Possible Cause Corrective Action Pump does not start - Faulty wiring - Correct wiring - Improper voltage... -
Page 18: Model Code
Maintenance 5. Model Code ES-B 16 VC-230 N 3 Series name ES: With manual stroke speed control (without stroke length adjustment) Drive unit symbol Average power consumption: B 16W, C 22W Diaphragm effective diameter 11: 10mm 16: 15mm 21: 20mm 31: 30mm 36: 35mm Liquid end material symbol See the table of Liquid End Materials presented page 6. -
Page 19: Dimensions
Maintenance 6. Dimensions (ES-B type) Dimensions in mm P&Q Model Tubing ES-B11 Ø4×Ø9 ES-B16 81.5 ES-B21 Ø6×Ø8 Ø8×Ø13 ES-B31 81.5 Ø9×Ø12 Mounting hole Dimensions in mm Model ES all variations - 17 -... - Page 20 Maintenance (ES-C type) POWER CORD (2000) Dimensions in mm P&Q Model Tubing Ø4×Ø9 ES-C16 196.5 ES-C21 Ø6×Ø8 ES-C31 186.5 177.5 Ø8×Ø13 ES-C36 28.5 181.5 186.5 18.5 Ø9×Ø12 Mounting hole Dimensions in mm Model ES all variations - 18 -...
-
Page 21: Exploded View
Maintenance 7. Exploded View Models with thermoplastic liquid end materials and air vent valve ES-B31, C31, C36 1 1 1 1 1 1 1 1 1 A: Air Vent Ass'y B: Valve Ass'y 1 1 1 C: Drive Unit D: Control Unit Notice: Actual fitting nut(4) may differ from illustrated ones. -
Page 22: Parts List
Maintenance 8. Parts List (ES-B type) Q'ty per Item Item Description Material Head, 11 Head, 16 Head, 21 Head, 31 Fitting, φ 4 x φ 9 Fitting, φ 6 x φ 8 Fitting, φ 8 x φ 13 Fitting, φ 9 x φ 12 Fitting nut, φ... - Page 23 Maintenance (ES-C type) Q'ty per Item Item Description Material Head, 16 Head, 21 Head, 31 Head, 36 Fitting, φ 4 x φ 9 Fitting, φ 6 x φ 8 Fitting, φ 8 x φ 13 Fitting, φ 9 x φ 12 Fitting nut, φ...
- Page 24 TEL : (1)508 429 1440 FAX : 508 429 1386 Germany : IWAKI EUROPE GmbH TEL : (49)2154 9254 0 FAX : 2154 1028 Australia : IWAKI Pumps Australia Pty. Ltd. TEL : (61)2 9899 2411 FAX : 2 9899 2421 Italy : IWAKI Italia S.R.L.
Need help?
Do you have a question about the ES-B Series and is the answer not in the manual?
Questions and answers