Mitel MiVoice 6900 Series User Manual
Handset & hosted software
Hide thumbs
Also See for MiVoice 6900 Series:
- Manual (96 pages) ,
- Installation instructions manual (79 pages) ,
- Administrator's manual (45 pages)

Related Manuals for Mitel MiVoice 6900 Series


Summary of Contents for Mitel MiVoice 6900 Series
- Page 1 Handset & Hosted Software User Guide (6900 Series) Telephone: 0330 838 4000 techsupport@futuretel.co.uk...
- Page 2 Thank you for choosing to buy your new phone system from FutureTel. We hope that you are already enjoying the benefits of your new system. We want to make sure you have all of the information you may need moving forward and know how to get in touch with us should you have any questions.
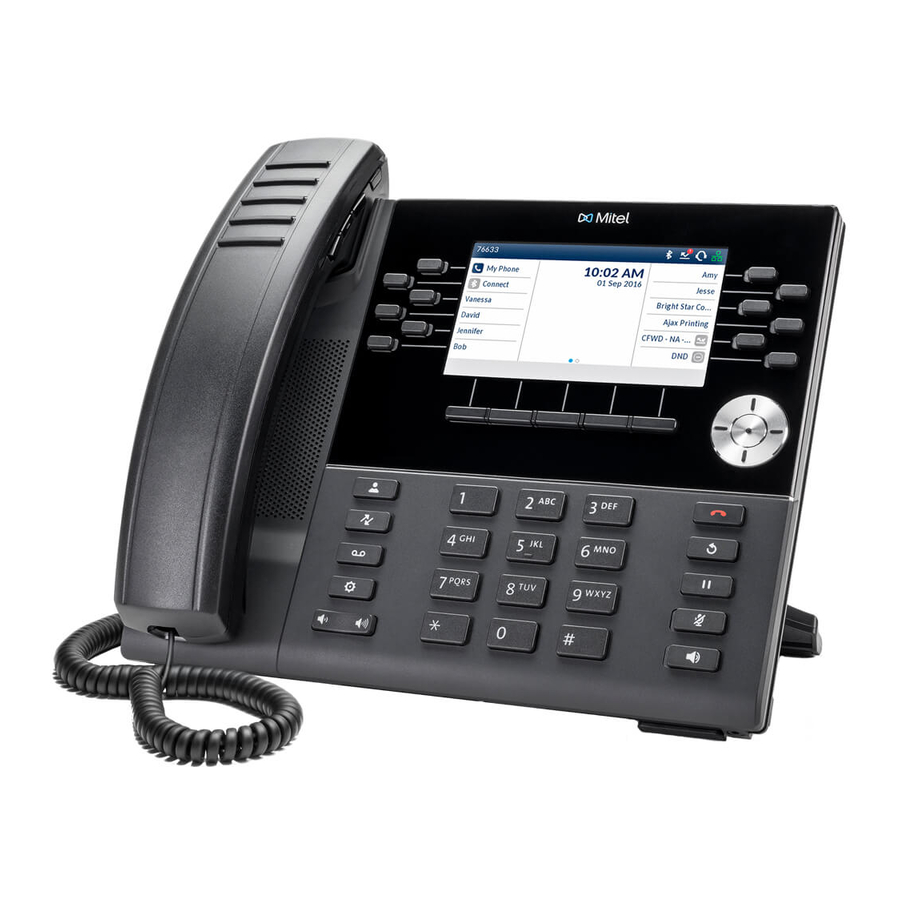
- Page 3 Types of 6900 handsets 6920 Designed for users who require an exceptional HD audio experience via its unique voice optimised handset. 3.5” QVGA (320 x 240 pixel) colour display Speech optimised corded handset Programmable soft keys Native DHSG/EHS analogue headset support USB port for headsets and accessories 6930 Ideal for users who require a phone...
-
Page 4: Using Your New Handset
1. Ensure the Mitel® Cordless Bluetooth Handset is powered on. NOTE: To check if the Mitel® Cordless Bluetooth Handset is in pairing mode, take the handset off the IP phone’s cradle and check the LED indicator. The handset’s blue LED blinks when it is in pairing mode. - Page 5 MAKING A CALL Calls can be made with the receiver lifted or left in the cradle (speakerphone mode); For external calls, dial 9 followed by the external number. For internal calls, dial the internal user’s extension number. ANSWERING A CALL Lift the receiver or press the speakerphone key.
- Page 6 VOICEMAIL To access your mailbox press the voicemail key, enter your passcode and follow prompts to listen to any new messages. When in your mailbox, choose option 4 to enter the greetings menu and record your personal greeting. (Remember to make active by pressing # after recording). DIRECTORY Press the Directory key, choose a Local, Intercom (internal users), System Speed Dial (Stored on Phone System) or Mobile contact, then press Dial or lift the receiver.
- Page 7 Mobile and iPad Guide My mobile app lets you use all my features on the go through your iPad or mobile phone. Search your contacts, see who’s available, talk to and even instant message your colleagues using my smart easy to use interface.
-
Page 8: Dtmf Tones
NOTE: • Use the same user ID and password that you used to login to the eve portal. • If VoIP calls has initialised successfully, a ‘Logout’ button will be displayed. The ‘Logout’ button may be used to stop receiving VoIP calls on your mobile. In case the log in is not successful, the user will get an information message. -
Page 9: Activity View
To close the menu simply slide the view back or pick one of the views in the menu. Activity view The ‘Activity’ view is accessed by dragging handle to the right. In the activity view you can view and set your current presence state. Shortcuts Use shortcuts to set your presence easily. - Page 10 The ‘Me’ view lets you see and manage your presence state, caller ID and your information. Presence is used to show and manage if you are available for calls or not. You can also change your presence information. Caller ID is the number which is presented on outbound calls that you make.
- Page 11 Take a new photo You can take a new photo using front or back camera. Select camera by pressing the switch button. When the back camera is used you are also able to select flash mode in the top right corner and change focus by pressing on the photo preview. 1.
-
Page 12: Group Chat
Group chat A group Chat is always started from the ‘Chats’ view: 1. Navigate to ‘Chats’ 2. Tap the ‘Group Chat’ button on top of the view 3. Set a title for the Chat 4. Select which participants you want to invite 5. - Page 13 To filter on all, missed or inbox items 1. Select ‘Call log’ 2. Select the filter option ‘All’ to view all your communication log items 3. Select the filter option ‘Missed’ to view your missed calls items 4. Select the filter option ‘Inbox’ to view voicemail and recordings To view log history for a specific contact 1.
- Page 14 The MiTeam view will list your current Streams and Meets. Both the one you have created yourself, accepted to be participants in, or you are invited to join. A Meet that is about to start soon will appear at the top of the list. To create a new Stream 1.
- Page 15 A Collaboration user without the Collaboration + licence will have a limited feature set displayed. A user without the Collaboration + licence, your Meets are limited to 10 minutes, file upload is limited to 5MB per file and it’s restricted to two participants. A Collaboration user with Collaboration + will have a 24-hour max length on Meets, file upload limit size at 300MB per file and maximum 50 participants.
- Page 16 To set a future presence change 1. Press the Add Scheduled Change icon to display the ‘Schedule settings’ page 2. Specify a change in ‘Activity’ , ‘Role’ or both. 3. Set the duration of the change in ‘Presence’ . The duration must be set at least 10 minutes into the future and last for a minimum of 5 minutes.
-
Page 17: Transfer Calls
For example, if you are on annual leave you can set your activity to ‘Holiday’ and set up a divert to the main office number. That will automatically divert all your calls to that number when you set your activity as ‘Holiday’ . Selecting an activity to a mapped diversion number will divert your incoming calls to that number. - Page 18 An Attended transfer makes it possible to transfer a call and speak to the user it’s being transferred to, to introduce the call before transferring. For Attended transfers, a banner is shown at the top of the app from where you can cancel the transfer.
-
Page 19: Troubleshooting
Troubleshooting Single handset Should a single handset stop behaving normally please remove the network cable from the rear of the handset (screen will go off) and then re-insert after 10 seconds. Should the handset not be working within 5 minutes please call our service desk. How to ‘Re-pair’... - Page 20 Want peace of mind when your property is left unattended? Commercial surveillance cameras are renowned as being one of the most effective deterrents a business can deploy to keep crime, intrusion and vandalism away from your business. Benefits of CCTV Security Monitoring Activities CCTV cameras help to prevent theft and...
Need help?
Do you have a question about the MiVoice 6900 Series and is the answer not in the manual?
Questions and answers