Advertisement
Quick Links
Advertisement

Summary of Contents for Kogan 3-IN-1
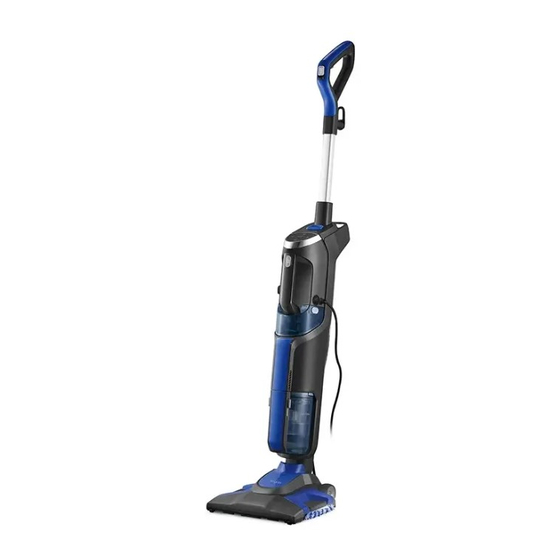
- Page 1 3-IN-1 VACUUM AND STEAM CLEANER KAVACSTM31A...
-
Page 3: Safety And Warnings
Children should be supervised to ensure that they do not play with the appliance. • If the supply cable is damaged, it must be replaced by the manufacturer, its service agent or similarly qualified person in order to avoid a hazard. Contact kogan.com for assistance. •... - Page 4 • Use extra care when cleaning on stairs. • Do not use to pick up flammable or combustible liquids, such as petroleum or use in areas where they may be present. • Do not pick up toxic material (chlorine bleach, ammonia, drain cleaner, etc.) •...
- Page 5 OVERVIEW 10 Water Container 19 Handheld Unit Release Button Handle 2 Steam Trigger 20 Steam Signal Lights Air Deflector 3 Cable Hanger 12 Air Filter 21 Steam Button 4 Handle Pole 13 Dust Container 22 Handheld Steam Button 5 Handle Screw 14 Mop Head Button 23 Power Switch 6 Holder...
- Page 6 Control panel Medium Steam Intensity Indicator Minimum Steam Intensity Indicator Steam Button Maximum Steam Intensity Indicator Steaming ON/Ready Dust container Filter Lid Foam Filter Wire Handle Dust Container Insert Dust Container...
- Page 7 Accessories included Microfibre Cloth Round Brush Window Squeegee Small cloth Jet Nozzle Wall Mounting Wall Mount Comb Brush Screw/Anchor Kit Metal Brush Hose Other parts (pre-installed) Utility Head Anti-Calc Filter...
- Page 8 ASSEMBLY Assemble Your Vacuum & Steam Cleaner Insert the end of the handle assembly into the main body and then use the special screw to lock the two parts. Insert the body into the floor head until you hear the locking tab click.
- Page 9 Inserting/Removing the Handheld Unit Release Button Steam Handheld Body Installation method: Hold the handle of the handheld unit, press in the direction indicated by the arrow and button it into the corresponding position of the host machine.
-
Page 10: Installing The Wall Mount
INSTALLING THE WALL MOUNT Instructions for Wall Hanging Fix the wall mounting fixture to a stable wall capable of bearing the weight of the unit. Hang the machine on the wall. The wall hanging fix height is 715mm... -
Page 11: Operation
OPERATION Filling the water container Turn off the device by pressing the power switch Press the handheld unit release button Pull the handheld unit out of the main unit Press the water container release buttons on both sides of the handheld unit simultaneously Turn the water container upside down, open the plug and pour in water... - Page 12 Note: Upon the first use of the Vacuum and Steam Cleaner or first use after refilling the water tank, the pump may make a 'knocking’ sound. This is normal and could last up to 30 seconds. Warning Do not operate appliance with damp or wet filters or without filters in place. Tinted plates on the floor head may get hot while the unit is in use.
- Page 13 Host Operation Instruction Motor Push Button Steam Trigger Button Host operation mode The motor push button is used to open and close the vacuum cleaner. When the button is pushed forward, the motor is on. When the button is pushed back, the motor is off.
-
Page 14: Cleaning And Care
CLEANING & CARE Warning To reduce the risk of electric shock, turn power switch of and disconnect the plug from the electrical outlet before performing maintenance or troubleshooting checks. Removing Mop Pads Unplug the unit from the electrical outlet. Step on the quick release to remove mop pad tray and lift the unit of tray. Carefully remove the mop pad from the mop pad tray using the quick release tab. - Page 15 Empty Dirt Tank The dirt tank needs to be emptied when the dirt reaches the 'Full’ line on the side of the tank. Unplug hard floor cleaner from electrical outlet. Remove the easy empty dirt tank from the unit by moving the lock button on the front of the unit to the left.
- Page 16 Cleaning or Replacing the Vacuum Filter The key to maximum performance is having a clean filter. Cleaning the filter after each use will help your vacuum to operate at peak efficiency. To clean the filter Turn power off and unplug the unit. Remove the dirt container from the unit, as directed above.
- Page 17 Warning To reduce the risk of electric shock, turn the power switch off and disconnect polarised plug from electrical outlet before performing maintenance or troubleshooting checks. Wash the mop Press the release button on the back of the mop head and pull the mop head out of the main body.
- Page 18 NOTES...
- Page 20 Need more information? We hope that this user guide has given you the assistance needed for a simple set-up. For the most up-to-date guide for your product, as well as any additional assistance you may require, head online to help.kogan.com...


Need help?
Do you have a question about the 3-IN-1 and is the answer not in the manual?
Questions and answers