Table of Contents
Advertisement
Quick Links
Advertisement
Table of Contents

Subscribe to Our Youtube Channel
Related Manuals for Kogan M8 PRO CORDLESS 22.2V STICK VACUUM CLEANER AND MOP


Summary of Contents for Kogan M8 PRO CORDLESS 22.2V STICK VACUUM CLEANER AND MOP
- Page 1 M8 PRO CORDLESS 22.2V STICK VACUUM CLEANER AND MOP KAVACSTM08A...
-
Page 3: Safety And Warnings
• Do not operate any appliance with a damaged or abnormal cord or plug. If the main cord is damaged, it must be replaced by Kogan.com or a service agent on Kogan.com's behalf. • Recharge the battery using only with the charger supplied with the appliance. - Page 4 Kogan.com or a service agent on Kogan.com's behalf. • If the device is dropped, please contact Kogan.com to check it before using it again. Internal damage could cause accidents. For any kind of problems or repairs, please contact Kogan.com.
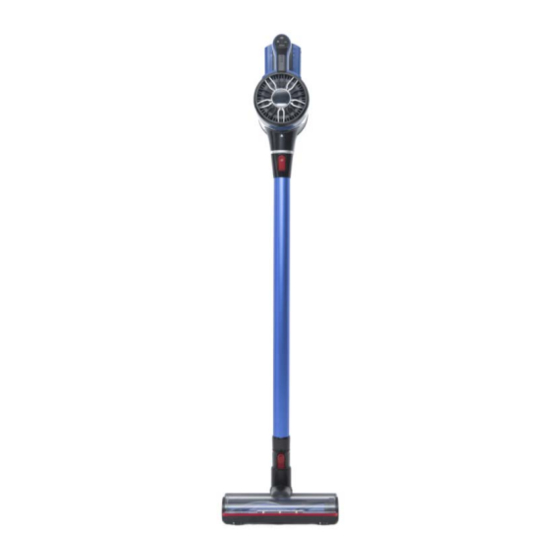
- Page 5 OVERVIEW Detachable battery pack Floor brush release button Ergonomic handle Floor brush Indicator lights Crevice head Outlet filter cover 2 in 1 brush head Dust tank Wall mount with removable sticker Dust tank release button Floor brush switch Metal tube release button Power level buttons (3 levels) Metal tube Power button...
-
Page 6: Installation
INSTALLATION Metal Tube Insert the metal tube into the main body until a ‘click’ sound is heard. Press the metal tube release button and remove the tube. Floor Brush Installation Insert the floor brush on the end of the metal tube until a ‘click’ sound is heard. - Page 7 Press the floor brush release button to remove the floor brush. Water Tank Installation Position the cloth to the base of the water tank. Attach the water tank with floor nozzle, keep the magnetic cells both on nozzle base and water tank together. Fill the water tank with water.
- Page 8 Dust Tank Installation Insert dust tank into the main body and twist counter-clockwise until a ‘click’ sound is heard. Holding the opening part connected to the tube, twist clockwise to remove it.
- Page 9 Battery Installation Install the battery into the bottom of the main body until a ‘click’ sound is heard. Press the battery release button to remove it.
-
Page 10: Operation
OPERATION Before First Use Unpack the appliance and any accessories. Dispose of the packing materials. Ensure all packing material around the appliance and the protective elements inside the appliance compartments are removed prior to first use. • Carton board and the sheets of paper included are recyclable. They must be disposed of in the appropriate recycle bin. - Page 11 All three lights flashing at the same time, please check if the Fault brush roller is stuck or contact Kogan.com. Discharging from high to low, During discharging or lights flash sequentially until last light flashing. Last light flashing until power Out of power off, please charge.
- Page 12 Setting the Power Level • Select the appropriate accessory for your cleaning task. • Press the power button, the vacuum will switch on. Press the power button again to switch it off. • Press the ‘+’ or ‘-’ power level button to adjust between the three suction power levels.
-
Page 13: Cleaning And Care
Ensure the bottom line of removable gel sticker is 940mm from to the floor, stick it to a clean vertical surface (wooden, ceramic etc.) (the gel sticker is washable). Adhere the magnetic wall mount to the gel sticker. Place the appliance on to the magnetic holder. CLEANING &... - Page 14 Lift out the filter cover and separate the HEPA filter from the filter cover by twisting counter-clockwise and pulling out. Clean the dust cup and filters under running water. Ensure the filters are completely dry before reassembling. Counter-clockwise to unlock Clockwise to lock...
- Page 15 Post-Motor Filter Cleaning Note: Clean the post-motor filter every 6 months. Rotate the filter cover counter-clockwise to remove it. Lift out the post-motor sponge filter. Shake to remove dust. Wash the filter under cold running water. Ensure the filter is completely dry before reassembling. Floor Brush Cleaning Using a coin press down and turn the fastener counter-clockwise to unlock.
- Page 16 Ensure the brush roller is completely dry before reassembling. To reassemble, install the brush roller inside the original place. Using a coin press down and turn the fastener clockwise to lock. Water Tank Cloth Cleaning Wash the cloth under running water. Ensure the cloth is completely dry before assembling.
-
Page 17: Specifications
Disposal This marking indicates that this appliance should not be disposed with other house-hold wastes. To prevent possible harm to the environment or human health from uncontrolled waste disposal, recycle it responsibly to promote the sustainable reuse of material resources. SPECIFICATIONS Power supply Rechargeable battery... -
Page 18: Troubleshooting
TROUBLESHOOTING If you encounter a problem with your device or if you suspect the device is not working properly, you can make a few simple checks before contacting Kogan.com. Problem Solution Before using the appliance, check that it is fully charged, No power empty the dust tank and clean the filters. - Page 19 NOTES...
- Page 20 Need more information? We hope that this user guide has given you the assistance needed for a simple set-up. For the most up-to-date guide for your product, as well as any additional assistance you may require, head online to help.kogan.com...
Need help?
Do you have a question about the M8 PRO CORDLESS 22.2V STICK VACUUM CLEANER AND MOP and is the answer not in the manual?
Questions and answers