Table of Contents
Advertisement
Quick Links
Advertisement
Table of Contents

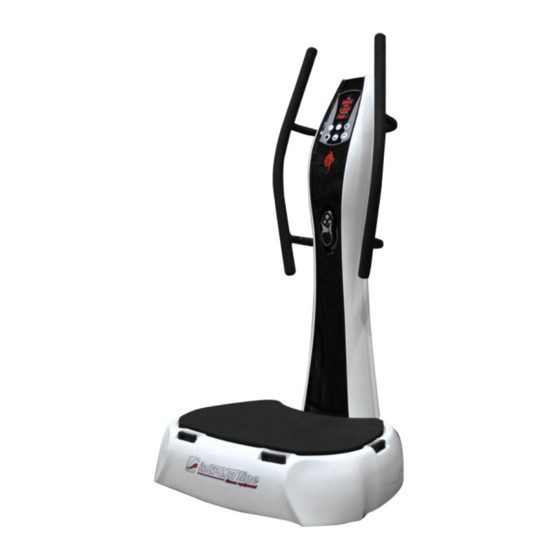
Summary of Contents for Insportline VibroGym Alex
- Page 1 USER MANUAL – EN IN 19141 Vibration Platform VibroGym inSPORTline Alex...
-
Page 2: Table Of Contents
CONTENTS SAFETY INSTRUCTIONS ........................3 PRODUCT DESCRIPTION ........................5 ASSEMBLY ............................. 6 WARNINGS ............................. 8 PRODUCT INSTALLATION ........................9 CONTROL PANEL ..........................10 BUTTONS ............................10 USE ............................... 11 General use (manual mode) ......................11 Time mode (countdown) ........................11 High/Low modes .......................... -
Page 3: Safety Instructions
SAFETY INSTRUCTIONS Please follow the warnings and cautions said below strictly. This will prevent to damage of your machine or any harm to your body or any lose which caused by any improper use of the machine. Read the manual carefully before first use and keep it for future references. Read the manual carefully and keep it for future reference. - Page 4 • Please do not use damaged power cord or plug. • It might lead to fire or electrocution. • Do not install the machine in wet place or near to water. • It might lead to electric leakage. The machine may get corroded when used in wet place or place nearby water.
-
Page 5: Product Description
PRODUCT DESCRIPTION... -
Page 6: Assembly
ASSEMBLY Step 1 Open the box and lay out all parts. - Page 7 Step 2 Attach the post to the base (pic. 1) and connect the cables (pic. 2). Ask another person for help. Step 3 With washers and nuts attach the base with the post. Ask another person for help.
-
Page 8: Warnings
WARNINGS This part is about user safety use. Read this part carefully and use the device properly. Follow the instruction or you are risking injury. Follow the instruction or you are risking injury. This product is designed for AC 220V, 50Hz / 60Hz. Do not use in these conditions. -
Page 9: Product Installation
PRODUCT INSTALLATION WARNING Place the machine at a distance of min. 1 m from all walls and furniture. Place the machine on a flat surface. Do not attempt to disassemble or repair the device yourself. Children or the elderly must be supervised when exercising on this machine. -
Page 10: Control Panel
CONTROL PANEL TIME Time is displayed from 00:00 to 10 min When turned on displays Lo, If you push HIGH/LOW button, it changes to Hi SPEED Speed displays from L15.00 to L60.0(Lo mode) Or H15.0 to H60.0 (Hi mode) during workout When turned on, default program is manual PROGRAM When the display flashes you can select one of 18... -
Page 11: Use
During exercise: Press to set vibration to 30 Hz. After exercise: Press the button to set the value of the selected mode, e.g., time During exercise: Press to set vibration to 40 Hz. After exercise: Press to change mode. Order of modes: TIME → SETUP USER PROGRAM → PROGRAM/USER PROGRAM → TIME. -
Page 12: Program Profiles
6. Press START/STOP to start program. 7. During preset program you cannot adjust speed. 8. Length of the program is: P01 ~ P06: 5 levels, 1 minute/level – total time 5 minutes. P07 ~ P12: 7 levels, 1 minute/level – total time 7 minutes. P13 ~ P18: 9 levels, 1 minute/level –... -
Page 13: Maintenance
7. Use FAST/SLOW buttons to adjust speed of each interval. Press SET to confirm. At the end of each interval, information about the next interval will appear on the display. You should complete all 7 intervals in each user program. Set up the user program before attempting to start the exercise. - Page 14 EXERCISES Thigh muscles, shins and calves • Step on middle of mat and set your leg apart a little bit. • Bend your knee 20-80 degree. • Bend knee should not go forwarder than toe. • Strengthen your back and neck then keep this posture. Posterior thigh muscles •...
- Page 15 Abdominal muscles, tailor muscle and thigh area • Sit on the mat and bend your legs. • Stand on the mat and touch the ankle. • Hug the post with your thighs, then strengthen your thighs on a mat (you strengthen the belt). •...
-
Page 16: Diagram
DIAGRAM... -
Page 17: Parts List
PARTS LIST Name Qty. Name Qty. Bottom steel frame Base cushion Power board Silent Blok Handles Remote controller cover Bolt Anti-slip mat Bolt Power cord Bolt Surge protection switch Strap holders cable from switch to power socket 1 Cross bolt cable from switch to power socket 2 Connecting the control unit to the surge Cross bolt... -
Page 18: Terms And Conditions Of Warranty, Warranty Claims
TERMS AND CONDITIONS OF WARRANTY, WARRANTY CLAIMS General Conditions of Warranty and Definition of Terms All Warranty Conditions stated here under determine Warranty Coverage and Warranty Claim Procedure. Conditions of Warranty and Warranty Claims are governed by Act No. 89/2012 Coll. Civil Code, and Act No. - Page 19 26847264 VAT ID: CZ26847264 Phone: +420 556 300 970 E-mail: eshop@insportline.cz reklamace@insportline.cz servis@insportline.cz Web: www.inSPORTline.cz inSPORTline s.r.o. Headquaters, warranty & service center: Električná 6471, Trenčín 911 01, SK CRN: 36311723 VAT ID: SK2020177082 Phone: +421(0)326 526 701 E-mail: objednavky@insportline.sk reklamacie@insportline.sk servis@insportline.sk...


Need help?
Do you have a question about the VibroGym Alex and is the answer not in the manual?
Questions and answers