Advertisement
Quick Links
Advertisement

Subscribe to Our Youtube Channel
Related Manuals for Insportline homegym in 133 easy


Summary of Contents for Insportline homegym in 133 easy
- Page 1 USER MANUAL Homegym IN 133 EASY...
- Page 2 Safety • please be sure to consult with your doctor. Frequent strenuous exercise should be approved your doctor and proper use of your multi gym product is essential. Please read this manual carefully before commencing assembly of your product or starting to exercise. •...
-
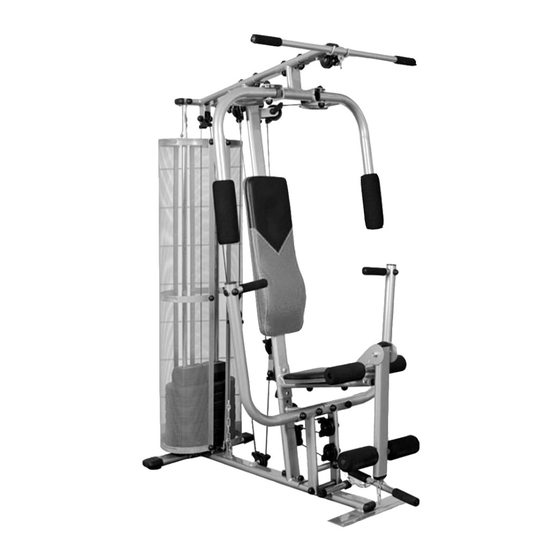
Page 3: Parts Drawing
Parts drawing... -
Page 5: Part List
Screw drawing Part List Description Q‘ty Main base Stabilizer Front vertical column Upper column Pectoral column... - Page 6 Seat post Right butterfly arm Left butterfly arm Press arm support Lower butterfly arm Extension swing Dorsal bar Traction bar Roller axles Chrome guide Weight protector plate Weight selector Weight selector pulley column Plates for pulleys Chain (11) Weight selector pin Spring hook Chain (7) Weight protector support plate...
- Page 7 Washer Diam. 11 Nut M10 Bolt M10 x 65mm Bolt M10 x 50mm Washer Diam. 13.5 Nut M12 Bolt M10 x 80mm Bolt M10 x 60mm Bolt M10 x 205mm Bolt M10X120mm Bolt M10 x 25mm Bolt M6 x 15mm Washer Nut M6 Washer D38*D10.5*3T...
- Page 8 STEP 2 • Place the front vertical column (3) onto the main base (1) Place the front vertical column (3) onto the main base (1) by means of the bolts (123), the washers by means of the bolts (123), the washers...
- Page 9 (101) and the nuts (102). • Put the plastic caps(37) and round caps (33) onto the front vertical column(3). Put the plastic caps(37) and round caps (33) onto the front vertical column(3). STEP 3...
- Page 10 • Connect the upper column (4) on top of the front vertical column (3) , pectoral column (5) and the Connect the upper column (4) on top of the front vertical column (3) , pectoral column (5) and the Connect the upper column (4) on top of the front vertical column (3) , pectoral column (5) and the weight guides (16).
- Page 11 Press the bushings (59) into the leg extension (11). Join the leg extension (11) to the seat support (6) by extension (11). Join the leg extension (11) to the seat support (6) by extension (11). Join the leg extension (11) to the seat support (6) by means of bolt (63), washers (106), and the nut (107).
- Page 12 STEP 6 Press the bushings (31) into the holes of the butterfly arms (7&8). Join the butterfly arms (7&8) to the pectoral Press the bushings (31) into the holes of the butterfly arms (7&8). Join the butterfly arms (7&8) to the pectoral Press the bushings (31) into the holes of the butterfly arms (7&8).
- Page 13 STEP 7 • Attach the backrest (48) to the vertical beam (3) Attach the backrest (48) to the vertical beam (3) and the seat (49) to the seat support (6), using bolts and the seat (49) to the seat support (6), using bolts (121) and washers (101).
- Page 14 STEP 8 How to assemble the pulleys: Pulleys type A): Attach the press arm pulleys set to the press arm support (9), by means of the bolt (112), the Pulleys type A): Attach the press arm pulleys set to the press arm support (9), by means of the bolt (112), the Pulleys type A): Attach the press arm pulleys set to the press arm support (9), by means of the bolt (112), the pinching finger protectors (parts 41 &...
- Page 15 How to assemble the cables, CABLE (50): Connect the screw at tip of this cable to the upper weight (46), pass the other tip of the cable above pulley (a), go down and pass it underneath pulley (b), go up and pass it over pulley (c) and from there straight to pulley (d).
- Page 17 STEP 11 & STEP 12 Weight protectors and accessories assembly Weight protectors and accessories assembly • Once the cables are assembled, assembling first the curved plates with pin (28) on top and base of Once the cables are assembled, assembling first the curved plates with pin (28) on top and base of Once the cables are assembled, assembling first the curved plates with pin (28) on top and base of both weight protectors (17), and the curved plate (29) in the middle of the weight protector, by means of the weight protectors (17), and the curved plate (29) in the middle of the weight protector, by means of the...
- Page 19 STEP 13 For safety purpose, when no exercise, please fix the weight plates by using the bolt For safety purpose, when no exercise, please fix the weight plates by using the bolt (125) and nut (127).
- Page 20 Training Instruction PRINCIPALS OF EXERCISE • How to Stand? Please always stand your feet on the Extend Wing of Front Base Beam as shown Please always stand your feet on the Extend Wing of Front Base Beam as shown...
- Page 21 To avoid body injuries, please follow the following instruction. NOTE : Please move out the whole set of seat pad before you start to exercise the above function. Training Instruction...
Need help?
Do you have a question about the homegym in 133 easy and is the answer not in the manual?
Questions and answers