
Related Manuals for Badger Meter E Series


Summary of Contents for Badger Meter E Series
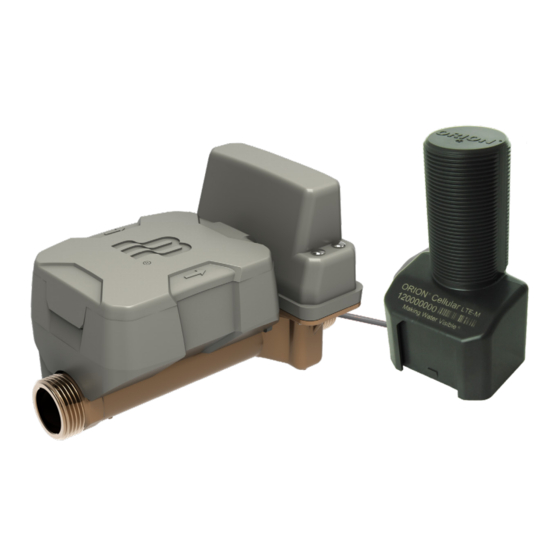
- Page 1 E-Series® Ultrasonic Plus Meter with Integrated Valve User Manual ESM-UM-02156-EN-02 (August 2020)
-
Page 2: Table Of Contents
E-Series® Ultrasonic Plus Meter with Integrated Valve CONTENTS Scope of this Manual About the E-Series Ultrasonic Plus Meter Safety Information Product Unpacking and Inspection System Requirements Storage Mode Meter Installation Outdoor Installations Indoor Installations Special Fittings and Accessories Pre-Installation Meter Installation Endpoint Installation and Valve Activation BEACON First Time Setup Integrated Valve... -
Page 3: Scope Of This Manual
Scope of this Manual SCOPE OF THIS MANUAL This manual contains installation and operation instructions for the E-Series® Ultrasonic Plus meter Failure to read and follow these instructions can lead to misapplication or misuse of this product, resulting in personal injury and damage to equipment Proper performance and reliability of the product depend upon installation in accordance with these instructions ABOUT THE E-SERIES ULTRASONIC PLUS METER The E-Series Ultrasonic Plus meter uses solid-state ultrasonic transit-time technology to measure cold potable water,... -
Page 4: Storage Mode
Storage Mode STORAGE MODE Meter Storage Mode All E-Series Ultrasonic Plus meters are shipped in Storage mode so that a meter alarm is not triggered During Storage mode, the empty pipe shows up on the LCD display as an error message, but it will not trigger a meter alarm After sensing a full pipe for 24 hours, the meter moves from Storage mode to normal operation If installed when the meter is still in Storage mode, the meter will function as expected with the addition of also displaying “err”... -
Page 5: Indoor Installations
Meter Installation Indoor Installations As a precautionary measure when working with metallic pipes, check indoor locations for electrical continuity through the service pipe before you remove or service a meter AWWA policy specifies that service pipes must not be used as an electrical ground Check your local codes and practices A permanent ground strap or metal setter must be used if electrical grounding to water services is required in your community... -
Page 6: Meter Installation
Meter Installation Meter Installation Follow these steps to install the E-Series Ultrasonic Plus meter: Begin at this step if cutting in for new service If cutting in is not required, begin at step 2 • Close the curb (shutoff ) valve to relieve water pressure in the line before starting the cutting operation Be sure to use a high-quality upstream shutoff valve with a low pressure drop •... -
Page 7: Endpoint Installation And Valve Activation
Endpoints shipped by air are in Stop mode and must be manually activated via infrared (IR) communication Endpoints in Pause mode can also be manually activated via IR You can activate the endpoint via IR in two ways: • Use the Badger Meter IR Communication Device (Figure 3) to activate... - Page 8 Endpoint Installation and Valve Activation MPORTANT Valve Activation Once the endpoint is activated, the following process occurs automatically: Endpoint senses and activates the valve on the E-Series Ultrasonic Plus meter The endpoint then captures the initial meter reading and valve information Endpoint begins the network registration process BEACON assigns multiple daily call-in times to the endpoint as part of this process For weekdays, the endpoint call-in schedule is based on the configurable time slots as defined in BEACON Utility Settings (See...
-
Page 9: Beacon First Time Setup
BEACON First Time Setup BEACON FIRST TIME SETUP Perform these steps to make sure the integrated valve information is accessible in BEACON OTEE: Do these steps one time only, regardless of the number of E-Series Ultrasonic Plus meters you have installed or will install They should be performed by the Utility Administrator after ORION Cellular LTE-M or LTE-MS endpoints are provisioned in BEACON In BEACON, go to Assets >... - Page 10 BEACON First Time Setup Go to the Monitor Page Filters section, select the valve filters as shown in the example (Figure Selecting these filters enables valve information to display on the BEACON Monitor page and the meter card Figure 6: Valve filters Select Update Utility at the bottom of the page to save your changes Figure 7: Update Utility to save changes...
-
Page 11: Integrated Valve
Integrated Valve INTEGRATED VALVE The valve position LED (Figure 9) provides visual cues as green, red and amber lights to indicate valve position and status Figure 9: Valve position LED Valve Positions Status Valve Position LED Color LED Indicator Active Open Green Blinks once per minute... -
Page 12: Beacon Monitor
Integrated Valve BEACON Monitor BEACON AMA monitors, updates and displays information about each E-Series Ultrasonic Plus meter Each card on the Monitor page in BEACON corresponds to a meter in the Utility portfolio The card is a resource for meter account information, including meter ID, account ID, name and address Click the plus sign (+) in the upper right corner to expand the card Expanding the card reveals tabs with additional account information: Location, Meter, Reads, Endpoint and Valve Select a tab to see information specific to the tab label In... -
Page 13: Actuating The Integrated Valve In Beacon
Actuating the Integrated Valve In BEACON ACTUATING THE INTEGRATED VALVE IN BEACON Best Practice Actuate the valve through BEACON AMA. Make sure the ORION Cellular LTE-M or LTE-MS endpoint is connected to the meter and activated. MPORTANT Make sure to complete first time setup in BEACON Monitor. See "BEACON First Time Setup"... - Page 14 Actuating the Integrated Valve In BEACON Scheduling Valve Position Change OTEE: Scheduling a valve to open can only be set for the next communication On the Monitor page in BEACON, locate the desired account You can use the filters on the left side of the screen, enter the Account ID, Name, or Meter ID into the Search field, or scroll to find the desired account meter card On the account meter card, click the Valve button...
- Page 15 Actuating the Integrated Valve In BEACON After Actuation • BEACON information updates approximately two (2) minutes after scheduled actuation is completed • For five (5) calendar days after a valve closes, the endpoint communication accelerates to once every 2 hours See "Accelerated Endpoint Call-In"...
- Page 16 Actuating the Integrated Valve In BEACON Batch Actuation To schedule multiple valves to actuate, you can perform a batch actuation On the Schedule Batch Valve Actuation popup window in BEACON, you can search for specific valves, filter results based on the current or scheduled position movement, and select multiple valves to schedule position changes You can also cancel scheduled actuations for multiple valves See instructions below When scheduling batch actuation, remember the following criteria:...
- Page 17 Actuating the Integrated Valve In BEACON On the next window, select the desired new position Then schedule the actuation You can select On Next Communication or select a specific date after the next communication Figure 21: Select valve position and schedule actuation Click Next to see the confirmation window You will see the valve position you selected and the scheduled actuation date If you selected On Next Communication, the window shows the date all valves will actuate...
- Page 18 Actuating the Integrated Valve In BEACON Canceling Batch Actuation You can cancel scheduled batch actuation for any or all accounts in the batch any time before the scheduled date Follow these steps Select Actuate Valves from the Actions drop-down menu on the top right of the BEACON Monitor page (Figure to open the Schedule Batch Valve Actuation window In the filter menu at the top of the window, click...
-
Page 19: Valve Conditions
Valve Conditions VALVE CONDITIONS The following chart describes the possible conditions specific to the integrated valve that may be triggered Exceptions are communicated to BEACON when connected to an ORION Cellular LTE-M or LTE-MS endpoint Integrated Valve Description Exceptions Endpoint sends message saying it cannot complete command Valve may have reached the desired Command Failed position, but settings did not update Local Actuation... -
Page 20: Meter Operations
Meter Operations METER OPERATIONS Display Lines Indicating Black/White Number Wheels Flow Rate E-Series Ultrasonic Plus meters use a nine-digit Unit of Measure Liquid Crystal Display (LCD) to show consumption, flow rate and alarm information Status Indicators Indicators and alarms illuminate when the condition is active, and dim when the condition Indicators/Alarms is eliminated... -
Page 21: Activating The Display
Meter Operations Activating the Display The display illuminates when the register lid is opened After a period of time, the display will revert to sleep mode You can alternate the display between total flow and rate of flow mode by touching the optical display switch or by closing and opening the meter lid The optical switch is located just below the LCD on the left side of the register face (Figure... -
Page 22: Specifications
Specifications SPECIFICATIONS E-Series Ultrasonic Plus Meter Size 5/8 in. x 3/4 in. (15 mm) 3/4 in. (20 mm) Normal Test Flow Limits 0 1…25 gpm (0 02…5 68 m /hr) 0 1…32 gpm (0 02…7 27 m /hr) Minimum Test Flow Limits 0 05 gpm (0 01 m /hr) 0 05 gpm (0 01 m... -
Page 23: Maintenance
Maintenance MAINTENANCE Badger Meter E-Series Ultrasonic Plus meters are designed and manufactured to provide long-term service with no maintenance The enclosure, which includes the electronic meter ultrasonic sensors, battery and display, is completely potted, permanently sealed, and non-removable The integrated valve portion of the meter is field serviceable... - Page 24 SMART WATER IS B ADGER ME T ER E-Series and ORION are registered trademarks of Badger Meter, Inc Other trademarks appearing in this document are the property of their respective entities Due to continuous research, product improvements and enhancements, Badger Meter reserves the right to change product or system specifications without notice, except to the extent an outstanding contractual obligation exists ©...
Need help?
Do you have a question about the E Series and is the answer not in the manual?
Questions and answers
My meter read 422.92 on 2/17/25. Now its with the new Badger meter and reads 89.605 FT3 ( cubic feet). How do I get an idea of what i used ? This was easy now I just need to know how to convert.
The Badger Meter E Series displays consumption in cubic feet with a resolution of 0.001 cubic feet. To determine water usage in another unit, follow these conversions:
1. Cubic Feet to Gallons: Multiply the reading in cubic feet by 7.48 (1 cubic foot = 7.48 gallons).
2. Cubic Feet to Cubic Meters: Multiply the reading in cubic feet by 0.0283 (1 cubic foot = 0.0283 cubic meters).
3. Cubic Feet to Liters: Multiply the reading in cubic feet by 28.3168 (1 cubic foot = 28.3168 liters).
Use the displayed consumption value and apply the appropriate conversion factor based on your required unit of measure.
This answer is automatically generated