Advertisement
Quick Links
OWNER'S
MANUAL
Warning
! Do not slide, climb, or
play on pole.
! Keep organic material
away from pole base.
Grass, litter, etc. could
cause corrosion and /or
deterioration.
! Check pole system
twice a year for signs of
corrosion (rust, pitting,
and chipping). Remove
rust and/or loose paint
completely and repaint
with exterior enamel
paint. If rust has pene-
trated through the steel
anywhere, replace pole
immediately.
! Check unit before
each use for loose
hardware, excessive
wear, and signs of cor-
rosion and repair be-
fore using.
! During play, use ex-
treme caution to keep
players face away from
the backboard, rim, and
net.
! Wear a mouth guard
when playing to avoid
dental injuries.
! When adjusting
height, keep hands and
fingers away from mov-
ing parts.
! During play, do not
wear jewelry (rings,
watches, necklaces,
etc.). Objects may en-
tangle in net.
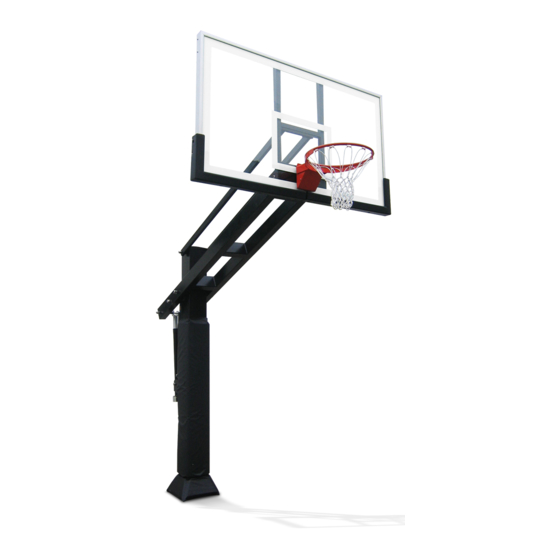
Pro Dunk® Diamond
WELCOME TO THE FAMILY OF
Thank you for purchasing our basketball system. We try hard to ensure that our
products are of high quality and free of manufacturing defects and of missing
parts. However, if you have any problems with your basketball pole, such as a
manufacturing defect or a missing part please contact us at the following:
Toll Free: 1.888.600.8545
Web: www.produnkhoops.com
FAX: (281) 357-4822
Please provide model number, serial number, and/or part number of the product
and/or part when you call, write or email. These numbers can be found on the
product, packaging, or on the back of the main pole.
Purchase Parts:
www.produnkhoops.com/parts
Support:
www.produnkhoops.com/support
Installation Video:
www.produnkhoops.com/video/installation.php
Read this manual all the way through before starting to
put up your system. Then read each step completely
before beginning installation.
Basketball System
PRO DUNK
OWNERS
®
www.Call811.com
Pro Dunk® Hoops
22047 Lutheran Church Rd.
Tomball, TX 77377
1
Advertisement

Summary of Contents for Pro Dunk Hoops Diamond
- Page 1 OWNER’S MANUAL Warning Pro Dunk® Diamond ! Do not slide, climb, or play on pole. Basketball System ! Keep organic material away from pole base. Grass, litter, etc. could WELCOME TO THE FAMILY OF cause corrosion and /or deterioration.
- Page 2 Bill Of Materials Ref. Qty. Description Vertical Post Main Extension Arm Parallel Linkages H-Frame Backboard Mount (pre-assembled to backboard) Spring-Assist Cartridges Crank Adjustment Cylinder Steel Rim Height Indicator Rim Height Sticker 16mm X 14cm Hex Bolt 16mm Hex Nut 18mm Anchor J-Bolts (needed for day 1) 18mm J-Bolt Hex Nuts (12 of the 18 needed for day 1) Anchor Footing Rebars (needed for day 1) Anchor Footing Template (needed for day 1)
- Page 4 Pre-Assembled...
-
Page 5: Safety Instructions
Safety Instructions Do not use the basketball system as a lift or to IMPORTANT hoist anything. Players should wear protective mouth guard It is the responsibility of purchaser to ensure that all installers and players fully comply with the de- during play to avoid any time of dental injury. -
Page 6: Installation Overview
Installation Overview In order to have the safest, fun and longest use of your Pro Dunk® system, please note and heed the following: Where Should I Install My Goal produnkhoops.com/video/place_basketball_goal.html 1) Prior to goal assembly, call utility services (811) for location of un- derground utility lines before you dig. -
Page 7: Required Tools
Where Should I Install My Goal produnkhoops.com/video/place_basketball_goal.html Required Tools Post Hole Digger Socket/Wrench Sizes Shovel Recommended Wheel Barrow (20-25) 80 lbs. bags of concrete OR 30mm (27-32) 60 lbs. bags of concrete 27mm Garden Hose ... -
Page 8: Installation Video
Installation Video Navigate to be below URL to watch our installation video. www.produnkhoops.com/video/installation.php Installation of a Pro Dunk® Gold basketball goal system by an experienced profes- sional assembly crew. It shows the two step process starting with the pier installation followed by assembly of the basketball goal on the cured pier. - Page 9 Pro Dunk Accessories https://www.produnkhoops.com/basketball_goals/accessories/ Why stop playing in the evening. You don’t have to! Order the Pro Dunk Goal Light LED. It easily lights up the entire 3-point line with 2 powerful LED lamps extending play into the night. There’s always time for one more game! [patent pending 62458721] Comes with Free Shipping! Goal Light LED!
- Page 10 Day 1 ANCHOR SYSTEM INSTALLATION INSTRUCTIONS 1) Installation Location Choose the proper location to dig for the con- crete footing. Use the distance chart on the pervious page to help you make your decision. When choosing the exact position to dig, make sure to maximize the amount of playing surface while minimizing possible driveway obstruction.
- Page 11 3) Anchor Assembly Twist (6) nuts (L) to the bottom of threads on (6) J-bolts (K). Place these J-bolts through the holes on the black anchor plate (N) and install (6) nuts (L) and tighten. The bottom of the J- bolts should be positioned as shown.
- Page 12 Pour the remaining concrete into the hole until completely full and coming out of the top. Using a trowel, smooth the concrete to your preferred liking. NOTE: The top of the concrete needs to be level with or higher than your playing area to ensure you sys- tem will adjust to 10ft regulation height.
- Page 13 Use the level to ensure that the pier anchor template (L) it is level in all directions. Additionally, the center line of the 18mm Anchor J-Bolts (K) must be parallel with the edge of the playing surface. Once level smooth out with trowel Leveling the Pier Once completely smooth let the concrete cure.
- Page 14 Day ~5 PRO DUNK® ASSEMBLY INSTRUCTIONS 5) Main Pole Assembly Loosen the top six 18mm J-Bolt Hex Nuts (L) from the 18mm Anchor J-Bolts (K). Level all six 18mm J-Bolt Hex Nuts (L). Leave Anchor Footing Template (N) in place. Install (6) metal washers (Z) on top of the anchor bolts (K).
- Page 15 Install both Main Pole Ears (X) using the (6) hex bolts, washers, and lock nuts (Y) to the rear of the main pole as shown below. The Main Pole Ears (X) will be mounted on the outside of the tabs welded to the rear of the Main Pole (A).
- Page 16 6) Main Extension Arm Assembly Slide the Main Extension Arm (B) over the top of the Vertical Post (A) and attach to the lower pivot tube with a 20mm X 42cm Hex Bolt (JJ) and a 20mm Lock Nut (KK). NOTE: Tighten the lock nut down and then back off a 1/4 turn to al- low the joint to pivot when adjust-...
- Page 17 8) Spring Assist Assembly Attach both Spring-Assist Cartridges (E) to the Main Extension Arm (B) using an 20mm X 42cm Hex Bolt (JJ) and 20mm Lock Nut (KK). In order to attach both Spring-Assist Cartridges (E) at the bottom, lower the open end of each Spring-Assist Cartridge (E) down over the top of each welded tab as shown in the diagram.
- Page 18 10) Backboard Assembly Mounting The Backboard produnkhoops.com/video/mount_backboard.html CAUTION: ATTACHING THE BACKBOARD REQUIRES AT LEAST FOUR CAPABLE ADULTS. Mount the H-Frame Backboard Mount (D) and Backboard assembly lower pivot tube first to the Main Extension Arm (B) using one 18mm X 42cm Hex Bolt (V) and one 18mm Lock Nut (BB).
- Page 19 12) Rim Spacers Assembly Prior to installing the rim, locate four Plastic and Steel Spacers (W). Insert them into four rim holes in the backboard. This is very important to prevent backboard break- age. CAUTION: Do not proceed with Install Rim Spacers rim installation without these spacers! produnkhoops.com/video/rim_spacer.html 13) Rim Assembly...
- Page 20 NOTE: Use a level to make sure rim is level side to side before tightening nuts OPTIONAL: If desired, you can level the rim front to back using shim washers placed between the rim spacer (W) and Rim (II). Using (2) Rim Plate Screws (FF) attach the Metal Rim Plate (GG) to the rim (II). The Metal Rim Plate (GG) covers the springs in the Rim (II) as shown below.
- Page 21 14) Height Meter and Sticker Assembly To apply the Rim Height Sticker (H) and Steel Rim Height Indicator (G), first use a tape measure to crank rim up to exactly 10' from the playing surface. This is meas- ured from the top of the rim to the playing area. Install Height Meter produnkhoops.com/video/height_meter_installation.html Attach the Steel Rim Height...
- Page 22 15) Safety Pin Installation If you’d like to restrict height adjustment from 10’ to 7’ 6” you can optionally insert the Black Safety Rod And Pin (AA) into the tube on the back of the Vertical Post (A). If a lower height is desired remove the Safety Rod and Pin (AA) before adjusting any lower than 7’...
- Page 23 17) Maintenance Like any piece of hardware proper maintenance is required. Several factors such as the en- vironment, organic materials, herbicides, pesticides, excessive use or misuse can eventually cause the basketball system to require maintenance. Failure to do so could result in system failure, property damage, or even personal injury.
- Page 24 Hoops Inc. Pro Dunk® Limited Lifetime Warranty Hoops Pro Dunk® basketball structural components are warranted to the original purchaser to be free from defects in material or workmanship for the duration of ownership by the original retail purchaser. The word “defects” is defined as imperfections that impair the use of the product.
Need help?
Do you have a question about the Diamond and is the answer not in the manual?
Questions and answers