
Related Manuals for Gaggia Milano NAVIGLIO MILK


Summary of Contents for Gaggia Milano NAVIGLIO MILK
- Page 1 ENGLISH NEDERLANDS POLSKI GAGGIA NAVIGLIO MILK RI8749 (SUP050P) User manual Bedieningshandleiding Instrukcja obsługi Naviglio milk en-nl-pl.indd 1 01/08/2019 09:46:15...
- Page 2 ITALIANO Congratulations on your purchase of a Gaggia Naviglio Milk fully automatic coffee machine! This appliance is suitable for preparing espresso coffee using coffee beans. To ensure perfect performance, all our high-quality machines undergo rigorous testing in our laboratories prior to packaging. Because real coffee is used during testing, ENGLISH some residue may remain.
-
Page 3: Installation
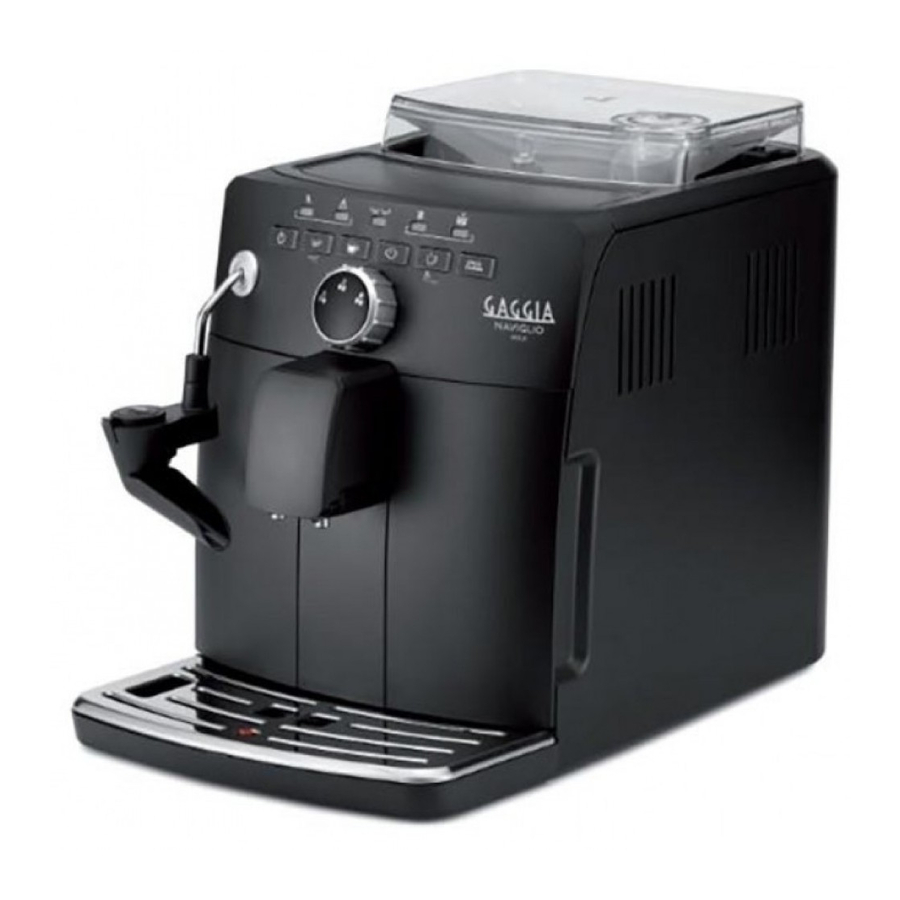
ENGLISH NEDERLANDS POLSKI Installation / Installatie / Instalacja Product overview / Productoverzicht / Przegląd produktu Naviglio milk en-nl-pl.indd 3 01/08/2019 09:46:18... -
Page 4: Table Of Contents
Lubricating the brew group ................................................................................................Descaling ........................................................................................................................Accidental interruption of the descaling cycle ..................................................................Understanding the different lights ....................................................................................Control panel display ........................................................................................................Troubleshooting ..............................................................................................................Energy saving ..................................................................................................................Stand-by ......................................................................................................................Accessories ...................................................................................................................... Technical Specifications ..................................................................................................Naviglio milk en-nl-pl.indd 4 01/08/2019 09:46:19... -
Page 5: General Description
Hot water dispensing button Full drip tray indicator Steam button Drip tray "Aroma" selector switch Coffee pucks container Cappuccino brew button Brew group Espresso brew button Coffee residues drawer ON/OFF button Service door "No water" LED light Naviglio milk en-nl-pl.indd 5 01/08/2019 09:46:20... -
Page 6: Preparing For Use
Warning: NEVER remove the drip tray when the machine has just been turned on. Wait a couple of minutes for the machine to carry out a rinse/self-cleaning cycle. Remove the water tank. Rinse the water tank with fresh water. Naviglio milk en-nl-pl.indd 6 01/08/2019 09:46:21... - Page 7 ” button to turn on the machine. 14 The “ ” “ ” LED lights and the “ ” button LED light start to flash slowly to indicate that the water circuit needs to be primed. Naviglio milk en-nl-pl.indd 7 01/08/2019 09:46:23...
-
Page 8: Using The Machine For The First Time
” button for 5 seconds to start the cycle. The machine starts the automatic priming of the circuit by dispensing some water through the steam wand. When this process has been completed, the “ ” e “ ” buttons will flash. The machine is heating up. Naviglio milk en-nl-pl.indd 8 01/08/2019 09:46:24... -
Page 9: Automatic Rinse Cycle
Press the “ ” button. The machine will start brewing a coffee. Wait until brewing has finished, then empty the container. Repeat the operations from step 1 to step 3 twice, then continue with step 5. Naviglio milk en-nl-pl.indd 9 01/08/2019 09:46:27... -
Page 10: Intenza+" Water Filter Installation
Using the “INTENZA+” water filter will prevent mineral deposits from building up and improve your water quality. Remove the small white filter from the water tank and store it in a dry place. Naviglio milk en-nl-pl.indd 10 01/08/2019 09:46:28... -
Page 11: Beverage Brewing
Beverage brewing Before brewing a beverage, check that both the water tank and the coffee bean container are filled. Make sure that the dispensing spout is placed at the correct distance from the cup edge. Naviglio milk en-nl-pl.indd 11 01/08/2019 09:46:28... -
Page 12: Espresso Brewing
How to assemble the Capp in Cup system Note: Before preparing any milk-based beverage, make sure that the Milk in Cup system is correctly installed on the machine. Fix the spout to the Capp in Cup system main body. Naviglio milk en-nl-pl.indd 12 01/08/2019 09:46:30... -
Page 13: How To Brew A Cappuccino
Whilst the machine is heating up, the “ ” and “ ” buttons flash. The machine starts brewing when the “ ” remains on and the “ ” button turns off. Frothed milk; Coffee; Naviglio milk en-nl-pl.indd 13 01/08/2019 09:46:32... -
Page 14: How To Froth Milk
Use the appropriate protective handle only. Before dispensing hot water, check that the “ ”, “ ”, “ ” and “ ” LED lights are permanently on and that the water tank is full. Naviglio milk en-nl-pl.indd 14 01/08/2019 09:46:34... -
Page 15: Customisation
You can adjust the grind setting using the grinder adjustment knob on the coffee bean container. The ceramic coffee grinder guarantees perfect, even grinding for the preparation of every cup of coffee. The aroma is thus preserved, ensuring the perfect flavour every time. Naviglio milk en-nl-pl.indd 15 01/08/2019 09:46:35... -
Page 16: Adjusting The Aroma Intensity
By rotating the selector switch you can choose from three options. The aroma will vary depending on the chosen position: = mild aroma = medium aroma = strong aroma Naviglio milk en-nl-pl.indd 16 01/08/2019 09:46:37... -
Page 17: Adjusting The Amount Of Coffee In The Cup
” button when the desired quantity of milk is reached and press it again to stop brewing coffee. Now the “ ” button is programmed. Whenever pressed, the machine will brew the same preset amount of cappuccino. Naviglio milk en-nl-pl.indd 17 01/08/2019 09:46:38... -
Page 18: Cleaning And Maintenance
Water tank Weekly Clean under running water. Coffee outlet duct Weekly Clean with a spoon handle as shown in the chapter "Cleaning the brew group under running water". Naviglio milk en-nl-pl.indd 18 01/08/2019 09:46:38... -
Page 19: Quick Clean Of Capp In Cup System
” and “ ” buttons flash. When the “ ” button goes out, the water is dispensed to clean the circuit. When the solution is finished, press the “ ” button to stop dispensing. Naviglio milk en-nl-pl.indd 19 01/08/2019 09:46:39... - Page 20 ” button to stop dispensing. 16 Remove the Capp in Cup system from the steam wand.. 17 Remove the rubber handle from the steam wand. 18 Remove the spout from the Capp in Cup system. Naviglio milk en-nl-pl.indd 20 01/08/2019 09:46:40...
- Page 21 21 Remove the rubber lid. 22 Wash all parts under running water. 23 After cleaning, reassemble all the components by following the same procedure in reverse order. Naviglio milk en-nl-pl.indd 21 01/08/2019 09:46:41...
-
Page 22: Cleaning The Classic Pannarello
Removing the brew group Turn off the machine by pressing the “ ” button and remove the plug from the socket. Remove the coffee pucks container and open the service door. Remove the coffee residues drawer. Naviglio milk en-nl-pl.indd 22 01/08/2019 09:46:42... - Page 23 Before reinserting the brew group into the machine, ensure that the two yellow reference indicators on the side coincide. If this is not the case, perform the following step: Make sure that the lever comes into contact with the base of the brew group. Naviglio milk en-nl-pl.indd 23 01/08/2019 09:46:44...
-
Page 24: Lubricating The Brew Group
Remove the brew group and rinse it using lukewarm water (see “Brew Group Cleaning under Running Water”). Apply a thin layer of the lubricant provided around the inserting pin on the lower part of the brew group. Naviglio milk en-nl-pl.indd 24 01/08/2019 09:46:45... -
Page 25: Descaling
Note: The descaling cycle may be paused by pressing the button. To resume the cycle, press the button again. This allows you to empty the con- tainer or to leave the machine unattended for a short time. Naviglio milk en-nl-pl.indd 25 01/08/2019 09:46:46... - Page 26 10 Remove the water tank, rinse it and fill it up with fresh water up to the MAX level. Place the water tank back into the machine. 11 Empty the drip tray and place it back. Insert the container. Naviglio milk en-nl-pl.indd 26 01/08/2019 09:46:48...
- Page 27 (if any). Fill the water tank with fresh water up to the MAX level and insert it back into the machine. 18 Remove and rinse the brew group (see "Coffee Group Cleaning" chapter). 19 The machine is now ready for use. Naviglio milk en-nl-pl.indd 27 01/08/2019 09:46:50...
-
Page 28: Accidental Interruption Of The Descaling Cycle
Before preparing any beverages, carry out a manual rinse cycle as described in the dedicated chapter. Note: If the orange LED light does not turn off, it is necessary to perform another descaling cycle as soon as possible. Naviglio milk en-nl-pl.indd 28 01/08/2019 09:46:50... -
Page 29: Understanding The Different Lights
" button to stop the cycle before the end. FLASHING SLOWLY The machine is heating up for beverage brewing FLASHING SLOWLY The machine is ready for use. STEADY ON The machine is in the hot water dispensing phase. STEADY ON Naviglio milk en-nl-pl.indd 29 01/08/2019 09:46:52... - Page 30 The machine is in the Press the “ ” button to pause the cycle. descaling phase. FLASHING SLOWLY Machine "PAUSED" during the Press the “ ” button to start the cycle. descaling cycle. FLASHING QUICKLY Naviglio milk en-nl-pl.indd 30 01/08/2019 09:46:53...
- Page 31 A fault has occurred in the Turn off the machine, wait for 30 seconds and then machine and espresso, turn it on again. water or steam cannot be Try this 2 or 3 times. dispensed. FLASHING SLOWLY Naviglio milk en-nl-pl.indd 31 01/08/2019 09:46:54...
-
Page 32: Troubleshooting
There is a lot of ground coffee The coffee used is not suitable for It may be necessary to change the type under the brew group. automatic machines. of coffee or the coffee grinder settings. Naviglio milk en-nl-pl.indd 32 01/08/2019 09:46:55... -
Page 33: Energy Saving
In stand-by mode, the energy consumption is below 1Wh. To turn on the machine, press this button (if the power button on the back of the machine is set to “I”). If the boiler is cold, the machine performs a rinse cycle. Naviglio milk en-nl-pl.indd 33 01/08/2019 09:46:55... -
Page 34: Accessories
Maximum height of the cup under the dispensing spout (mm) Water tank 1.5 litres - Removable type Coffee bean container capacity 300 g Coffee pucks container capacity Pump pressure 15 bar Boiler Stainless steel Safety devices Thermal Fuse Naviglio milk en-nl-pl.indd 34 01/08/2019 09:46:56... - Page 35 Invetten van de zetgroep ..................................................................................................Ontkalking ........................................................................................................................Onverwachte onderbreking van de ontkalkingscyclus ....................................................Betekenis van de verlichte signalen ................................................................................Display van het bedieningspaneel ......................................................................................... Oplossing van problemen ................................................................................................Energiebesparing ............................................................................................................Stand-by ......................................................................................................................Accessoires ...................................................................................................................... Technische kenmerken ....................................................................................................Naviglio milk en-nl-pl.indd 35 01/08/2019 09:46:56...
-
Page 36: Algemene Beschrijving
Toets voor de afgifte van heet water Indicator lekbakje vol Stoomknop Lekbakje Keuzeschakelaar voor “Aroma” Koffieresidureservoir Toets voor het zetten van cappuccino Zetgroep Toets voor het zetten van espresso Koffieopvanglade Toets ON/OFF Servicedeur Led voor “Geen water” Naviglio milk en-nl-pl.indd 36 01/08/2019 09:46:57... -
Page 37: Voorbereidende Handelingen
Let op: Verwijder het lekbakje NOOIT meteen na inschakeling van de machine. Wacht een paar minuten totdat de machine de spoelcyclus heeft uitgevoerd. Haal het waterreservoir uit de machine. Spoel het reservoir met vers water. Naviglio milk en-nl-pl.indd 37 01/08/2019 09:46:57... - Page 38 14 Led “ ” “ ” en de led van de toets “ ” beginnen langzaam te knipperen om aan te geven dat het nodig is om het watercircuit te vullen. Naviglio milk en-nl-pl.indd 38 01/08/2019 09:46:59...
-
Page 39: Eerste Inschakeling
” om de cyclus te starten. De machine zal nu automatisch het circuit vullen waarbij een beperkte hoeveelheid water uit het stoompijpje stroomt. Aan het einde van het proces knipperen de toetsen “ ” en “ ”. De machine is bezig met opwarmen. Naviglio milk en-nl-pl.indd 39 01/08/2019 09:46:59... -
Page 40: Automatische Spoelcyclus
Druk op de toets “ ”. De machine begint met koffie te zetten. Leeg het kannetje na beëindiging van de afgifte. Herhaal twee keer de handelingen van stap 1 tot stap 3; ga vervolgens verder met stap 5. Naviglio milk en-nl-pl.indd 40 01/08/2019 09:47:01... -
Page 41: Installatie "Intenza+" Waterfilter
Het “INTENZA+” waterfilter kan de vorming van mineraalafzettingen voorkomen, waardoor de kwaliteit van het water wordt verbeterd. Verwijder het witte filtertje dat zich in het waterreservoir bevindt en bewaar het op een droge plaats. Naviglio milk en-nl-pl.indd 41 01/08/2019 09:47:02... -
Page 42: Bereiding Van De Dranken
Vul het waterreservoir opnieuw. Bereiding van de dranken Controleer vóór het zetten van een drank of het waterreservoir en het koffiebonenreservoir beide vol zijn. En of de koffietuit zich op de juiste hoogte van het kopje bevindt. Naviglio milk en-nl-pl.indd 42 01/08/2019 09:47:03... -
Page 43: Afgifte Van Espresso
Opmerking: Voordat u een drank op basis van melk bereidt, moet u zich ervan vergewissen dat het Capp in Cup-systeem correct op de machine gemonteerd is. Monteer het pijpje op het centrale huis van het Capp in Cup-systeem. Naviglio milk en-nl-pl.indd 43 01/08/2019 09:47:03... -
Page 44: Cappuccino Zetten
”. De machine warmt op en de toetsen “ ” “ ” knipperen. Wanneer de toets “ ” blijft branden en de toets “ ” gaat uit, wordt de afgifte gestart: Opgeschuimde melk; Koffie; Naviglio milk en-nl-pl.indd 44 01/08/2019 09:47:05... -
Page 45: Melk Opschuimen
Gebruik alleen de speciale beschermende handgreep. Alvorens heet water te verstrekken, dient men te controleren of de leds “ ”, “ ”, “ ” en “ ” continu branden en of het waterreservoir vol is. Naviglio milk en-nl-pl.indd 45 01/08/2019 09:47:06... -
Page 46: Aanpassing Van De Dranken
De keramische koffiemolen garandeert een perfecte en homogene maling voor de bereiding van elk kopje koffie. Zo wordt het aroma behouden, om altijd een perfecte smaak te garanderen. Naviglio milk en-nl-pl.indd 46 01/08/2019 09:47:08... -
Page 47: Instelling Van De Intensiteit Van Het Aroma
Kies uw favoriete koffiemelange en stel de hoeveelheid te malen koffie in op basis van uw persoonlijke smaak. Door de keuzeschakelaar te draaien, zijn er drie selecties mogelijk. Het aroma wijzigt aan de hand van de gekozen stand: = mild aroma = normaal aroma = sterk aroma Naviglio milk en-nl-pl.indd 47 01/08/2019 09:47:09... -
Page 48: Instelling Van De Hoeveelheid Koffie In Een Kopje
Nu is de toets “ ” geprogrammeerd; bij elke druk op de toets zal de machine de zojuist ingestelde hoeveelheid cappuccino zetten. Naviglio milk en-nl-pl.indd 48 01/08/2019 09:47:10... -
Page 49: Reiniging En Onderhoud
Waterreservoir Wekelijks Onder het stromende water reinigen. Koffieleiding Wekelijks Reinigen met het handvat van een lepel zoals afgebeeld in het hoofdstuk “Reiniging van de zetgroep onder vers water”. Naviglio milk en-nl-pl.indd 49 01/08/2019 09:47:10... -
Page 50: Snelle Reiniging Van Het Capp In Cup-Systeem
” uitgaat, wordt de afgifte gestart van het water dat het circuit reinigt. Wanneer de oplossing op is, drukt u op de toets “ ” om de afgifte te stoppen. Let op: drink niet de in dit proces verstrekte oplossing. Naviglio milk en-nl-pl.indd 50 01/08/2019 09:47:11... - Page 51 15 Wanneer het water op is, druk op de toets “ ” om de afgifte te stoppen. 16 Verwijder het Capp in Cup-systeem van het stoompijpje. 17 Verwijder de rubberen handgreep van het stoompijpje. 18 Verwijder het pijpje van het Capp in Cup-systeem. Naviglio milk en-nl-pl.indd 51 01/08/2019 09:47:12...
- Page 52 21 Verwijder het rubberen dopje. 22 Was alle onderdelen onder het stromende water. 23 Na voltooiing van de reiniging monteert u alle onderdelen opnieuw door de procedure in omgekeerde volgorde uit te voeren. Naviglio milk en-nl-pl.indd 52 01/08/2019 09:47:13...
-
Page 53: Reiniging Van De Klassieke Pannarello
Verwijdering van de zetgroep Schakel de machine uit door op de toets “ ” te drukken en haal de stekker uit het stopcontact. Verwijder het koffieresidureservoir en open de servicedeur. Verwijder de koffieopvanglade. Naviglio milk en-nl-pl.indd 53 01/08/2019 09:47:14... - Page 54 Voordat u de zetgroep in de machine terugplaatst, moet u ervoor zorgen dat de twee gele referentietekens aan de zijkant overeenkomen. Als dit niet zo is, handelt u als volgt: Zorg ervoor dat de hendel in contact staat met de basis van de zetgroep. Naviglio milk en-nl-pl.indd 54 01/08/2019 09:47:15...
-
Page 55: Invetten Van De Zetgroep
Verwijder de zetgroep en spoel deze af met lauw water (zie het hoofdstuk “Reiniging van de zetgroep onder het stromende water”). Breng een dunne laag van het meegeleverde smeervet aan rond de plaatsingspin, onderaan de zetgroep. Naviglio milk en-nl-pl.indd 55 01/08/2019 09:47:16... -
Page 56: Ontkalking
Opmerking: De ontkalkingscyclus kan op pauze gezet worden door op de toets te drukken. Om de cyclus weer verder te laten gaan, moet u opnieuw op de toets drukken. Hierdoor kan men de bak legen of even weggaan. Naviglio milk en-nl-pl.indd 56 01/08/2019 09:47:17... - Page 57 10 Haal het waterreservoir eruit, spoel zorgvuldig om en vul het met vers water tot het MAX niveau. Plaats het waterreservoir weer in de machine. 11 Leeg het lekbakje en plaats deze weer terug. Plaats de bak. Naviglio milk en-nl-pl.indd 57 01/08/2019 09:47:18...
- Page 58 MAX niveau en plaats het terug in de machine. 18 Haal de zetgroep eruit en spoel hem af (zie hoofdstuk "Reiniging van de zetgroep"). 19 De machine is gereed voor gebruik. Naviglio milk en-nl-pl.indd 58 01/08/2019 09:47:19...
-
Page 59: Onverwachte Onderbreking Van De Ontkalkingscyclus
Alvorens ongeacht welke drank u gaat bereiden, voert u een handmatige spoelcyclus uit zoals beschreven in het betreffende hoofdstuk. Opmerking: als de oranje led niet uitgaat, moet zo snel mogelijk een nieuwe ontkalkingscyclus worden uitgevoerd. Naviglio milk en-nl-pl.indd 59 01/08/2019 09:47:20... -
Page 60: Betekenis Van De Verlichte Signalen
LANGZAAM KNIPPE- REND Machine in verwarmingsfase voor de afgifte van dranken. LANGZAAM KNIPPE- REND De machine is klaar voor gebruik. CONTINU AAN De machine is bezig met de afgifte van heet water. CONTINU AAN Naviglio milk en-nl-pl.indd 60 01/08/2019 09:47:21... - Page 61 Druk op de toets “ ” om de cyclus op pauze ontkalken. te zetten. LANGZAAM KNIPPE- REND De machine staat op "PAUZE" Druk op de toets “ ” om de cyclus te starten. tijdens de ontkalkingscyclus. SNEL KNIPPEREND Naviglio milk en-nl-pl.indd 61 01/08/2019 09:47:22...
- Page 62 De machine heeft een storing Zet de machine uit en na 30 seconden weer aan. Probeer dit 2 of 3 keer. staat de afgifte van espresso, cappuccino, water of stoom LANGZAAM KNIPPE- niet toe. REND Naviglio milk en-nl-pl.indd 62 01/08/2019 09:47:23...
-
Page 63: Oplossing Van Problemen
Er ligt veel gemalen koffie De koffie is niet geschikt voor Het zou nodig kunnen zijn om van onder de zetgroep. automatische machines. koffiesoort te veranderen of om de instelling van de koffiemolen te wijzigen. Naviglio milk en-nl-pl.indd 63 01/08/2019 09:47:24... -
Page 64: Energiebesparing
In de stand-by modus is het energieverbruik minder dan 1Wh. Om de machine in te schakelen, dient men op deze toets te drukken (indien de hoofdschakelaar in de stand “I” staat). Als de ketel koud is, voert de machine een spoelcyclus uit. Naviglio milk en-nl-pl.indd 64 01/08/2019 09:47:24... -
Page 65: Accessoires
Bedieningspaneel Front Klassieke Melkopschuimer Speciaal voor cappuccino's Maximum hoogte van kopje onder de koffietuit (mm) Waterreservoir 1,5 liter - Uitneembaar Inhoud koffiebonenreservoir 300 g Inhoud koffieresidureservoir Pompdruk 15 bar Waterketel Roestvrij staal Veiligheidsinrichtingen Thermozekering Naviglio milk en-nl-pl.indd 65 01/08/2019 09:47:24... - Page 66 Czyszczenie bloku zaparzającego ....................................................................................... Smarowanie bloku zaparzającego ........................................................................................ Odkamienianie ................................................................................................................Przypadkowe przerwanie cyklu odwapniania ..................................................................Znaczenie sygnalizacji świetlnej ......................................................................................Wyświetlacz panelu sterowania ..........................................................................................Rozwiązywanie problemów .............................................................................................. Oszczędność energii ........................................................................................................ Stand-by ......................................................................................................................Akcesoria ........................................................................................................................Właściwości techniczne ..................................................................................................Naviglio milk en-nl-pl.indd 66 01/08/2019 09:47:25...
-
Page 67: Opis Ogólny
Wskaźnik pełnej tacy ociekowej Przycisk pary Taca ociekowa Przełącznik „Aromat” Pojemnik na fusy Przycisk parzenia cappuccino Blok zaparzający Przycisk do parzenia kawy Espresso Kasetka na resztki kawy Przycisk ON/OFF Drzwiczki serwisowe Kontrolka „Brak wody” Naviglio milk en-nl-pl.indd 67 01/08/2019 09:47:25... -
Page 68: Operacje Wstępne
Uwaga: NIE wyjmować tacy ociekowej zaraz po włączeniu urządzenia. Odczekać kilka minut, aż urządzenie wykona cykl płukania. Wyjąć pojemnik na wodę. Opłukać pojemnik pod bieżącą wodą. Naviglio milk en-nl-pl.indd 68 01/08/2019 09:47:26... - Page 69 13 Na panelu sterowania zacznie migać przycisk „ ”. Nacisnąć przycisk „ ”, aby włączyć urządzenie. 14 Kontrolki „ ” „ ” oraz kontrolka przycisku „ ” zaczną powoli migać wskazując, że należy przystąpić do napełnienia obwodu hydraulicznego. Naviglio milk en-nl-pl.indd 69 01/08/2019 09:47:27...
-
Page 70: Pierwsze Uruchomienie
” i przytrzymać go 5 sekund, aby uruchomić cykl. Urządzenie przystąpi do automatycznego napełniania obwodu, wypuszczając niewielką ilość wody przez rurkę wylotu pary. Po zakończeniu operacji zaczną migać przyciski „ ” i „ ”. Urządzenie nagrzewa się. Naviglio milk en-nl-pl.indd 70 01/08/2019 09:47:28... -
Page 71: Cykl Automatycznego Płukania
” świecą się światłem ciągłym. Nacisnąć przycisk „ ”. Urządzenie rozpoczyna nalewanie kawy. Po zakończeniu nalewania kawy opróżnić pojemnik. Dwukrotnie powtórzyć czynności od punktu 1 do punktu 3, a następnie przejść do punktu 5. Naviglio milk en-nl-pl.indd 71 01/08/2019 09:47:30... -
Page 72: Instalacja Filtra Wody „Intenza
Woda jest podstawowym składnikiem każdej kawy espresso. Bardzo ważna jest zatem jej odpowiednia filtracja. Filtr wody „INTENZA+” zapobiega tworzeniu się osadów mineralnych i poprawia jakość wody. Wyjąć mały biały filtr znajdujący się w pojemniku na wodę i przechowywać go w suchym miejscu. Naviglio milk en-nl-pl.indd 72 01/08/2019 09:47:31... -
Page 73: Przygotowanie Napojów
(patrz rozdział „Nalewanie gorącej wody”). Ponownie napełnić pojemnik na wodę. Przygotowanie napojów Przed zaparzeniem kawy należy sprawdzić, czy pojemnik na wodę i pojemnik na kawę ziarnistą są napełnione. A dozownik znajduje się na odpowiedniej wysokości filiżanki. Naviglio milk en-nl-pl.indd 73 01/08/2019 09:47:31... -
Page 74: Parzenie Kawy Espresso
Jak zamontować system Capp in Cup Informacja: przed przygotowaniem jakiegokolwiek napoju na bazie mleka należy się upewnić, że system Capp in Cup został prawidłowo zamontowany w urządzeniu. Zainstalować dozownik (rynienkę) w środkowym korpusie systemu Capp in Cup. Naviglio milk en-nl-pl.indd 74 01/08/2019 09:47:32... -
Page 75: Jak Przygotować Cappuccino
Capp in Cup. Nacisnąć przycisk „ ”. Urządzenie nagrzewa się a przyciski „ ”, „ ” migają. Kiedy przycisk „ ” zostaje zapalony, a przycisk „ ” zgaśnie, rozpocznie się dozowanie: Spienionego mleka; Kawy; Naviglio milk en-nl-pl.indd 75 01/08/2019 09:47:34... -
Page 76: Jak Spienić Mleko
Zaleca się stosowanie specjalnego uchwytu ochronnego. Przed nalaniem gorącej wody należy sprawdzić, czy kontrolki „ ”, „ ”, „ ” i „ ” świecą się światłem ciągłym oraz czy pojemnik na wodę jest pełny. Naviglio milk en-nl-pl.indd 76 01/08/2019 09:47:36... -
Page 77: Indywidualne Ustawienia Napojów
Stopień mielenia można regulować za pomocą pokrętła do regulacji młynka znajdującego się w pojemniku na kawę ziarnistą. Młynek ceramiczny zapewnia idealne i jednolite mielenie ziaren przy przygotowywaniu każdej filiżanki kawy. W ten sposób zachowywany zostaje aromat, który zapewnia zawsze doskonały smak kawy. Naviglio milk en-nl-pl.indd 77 01/08/2019 09:47:37... -
Page 78: Regulacja Intensywności Aromatu
Wybierz ulubioną mieszankę kawy i ustaw ilość kawy do zmielenia według indywidualnych upodobań. Obracając pokrętło, można wybrać jedno z trzech ustawień. Aromat różni się w zależności od wybranego położenia: = lekki aromat - średni aromat - silny aromat Naviglio milk en-nl-pl.indd 78 01/08/2019 09:47:38... -
Page 79: Pokrętło Do Regulacji Ilości Kawy W Filiżance
”, po osiągnięciu żądanej ilości mleka, a następnie ponownie go wcisnąć po nalaniu przez urządzenie żądanej ilości kawy. W tym momencie przycisk „ ” jest już zaprogramowany; po każdym naciśnięciu przycisku urządzenie zaparzy taką samą ilość kawy cappuccino, jaka została ustawiona. Naviglio milk en-nl-pl.indd 79 01/08/2019 09:47:39... -
Page 80: Czyszczenie I Konserwacja
Opróżnić zbiornik na Co tydzień Oczyścić pod bieżącą wodą. wodę. Przewód wylotowy Co tydzień Wyczyścić za pomocą rączki łyżki, jak opisano w kawy rozdziale „Czyszczenie bloku zaparzającego pod bieżącą wodą”. Naviglio milk en-nl-pl.indd 80 01/08/2019 09:47:39... -
Page 81: Szybkie Czyszczenie Systemu Capp In Cup
Urządzenie nagrzewa się, a przyciski „ ” i „ ” migają. Kiedy przycisk „ ” zgaśnie, rozpocznie się dozowanie wody do czyszczenia obwodu. Gdy wyczerpie się roztwór, należy wcisnąć przycisk „ ”, aby przerwać dozowanie. Naviglio milk en-nl-pl.indd 81 01/08/2019 09:47:40... - Page 82 15 Gdy skończy się woda, należy nacisnąć przycisk „ ”, aby przerwać nalewanie. 16 Usunąć z rurki wylotu pary system Capp in Cup. 17 Zdjąć gumowy uchwyt z rurki wylotu pary. 18 Wyjąć dozownik z systemu Capp in Cup. Naviglio milk en-nl-pl.indd 82 01/08/2019 09:47:41...
- Page 83 21 Zdjąć gumową pokrywę. 22 Wszystkie elementy umyć pod bieżącą wodą. 23 Po zakończeniu czyszczenia, ponownie zamontować wszystkie części składowe urządzenia wykonując te same czynności w odwrotnej kolejności. Naviglio milk en-nl-pl.indd 83 01/08/2019 09:47:42...
-
Page 84: Czyszczenie Przystawki Pannarello Do Spieniania Mleka
Wyjmowanie bloku zaparzającego Wyłączyć urządzenie, naciskając przycisk „ ” i wyjąć wtyczkę z gniazda elektrycznego. Wyjąć pojemnik na fusy i otworzyć drzwiczki serwisowe. Wyjąć szufladkę na odpadki z kawy. Naviglio milk en-nl-pl.indd 84 01/08/2019 09:47:43... - Page 85 Przed ponownym włożeniem bloku zaparzającego do urządzenia należy się upewnić, że dwa żółte znaki znajdujące się na części bocznej pokrywają się ze sobą. Gdyby tak nie było, należy: Upewnić się, czy dźwignia styka się z podstawą bloku zaparzającego. Naviglio milk en-nl-pl.indd 85 01/08/2019 09:47:44...
-
Page 86: Smarowanie Bloku Zaparzającego
Wyłączyć urządzenie i odłączyć kabel zasilający. Wyjąć blok zaparzający i przepłukać go letnią wodą (patrz rozdział „Czyszczenie bloku zaparzającego pod bieżącą wodą”). Cienką warstwę smaru dostarczonego z urządzeniem nanieść wokół sworznia wprowadzającego znajdującego się w dolnej części bloku zaparzającego. Naviglio milk en-nl-pl.indd 86 01/08/2019 09:47:45... -
Page 87: Odkamienianie
Informacja: W trakcie odwapniania nie należy wyjmować bloku zaparzającego. Informacja: Cykl odwapniania może zostać przerwany poprzez naciśnięcie przycisku ; aby wznowić cykl, należy ponownie wcisnąć przycisk Funkcja ta pozwoli na opróżnienie pojemnika lub na krótkotrwałe oddalenie się z miejsca. Naviglio milk en-nl-pl.indd 87 01/08/2019 09:47:46... - Page 88 10 Wyjąć pojemnik, dokładnie go opłukać i napełnić świeżą wodą do poziomu MAX. Ponownie włożyć do urządzenia pojemnik na wodę. 11 Opróżnić tacę ociekową i włożyć ją ponownie w odpowiednie miejsce. Włożyć pojemnik. Naviglio milk en-nl-pl.indd 88 01/08/2019 09:47:47...
- Page 89 17 Wyjąć pojemnik i dokładnie go opłukać. Ponownie włożyć filtr wody Intenza+ (jeśli jest). Napełnić pojemnik świeżą wodą do poziomu MAX i włożyć go z powrotem do urządzenia. 18 Wyjąć i opłukać blok zaparzający (patrz rozdział „Czyszczenie bloku zaparzającego”). 19 Urządzenie jest gotowe do użytku. Naviglio milk en-nl-pl.indd 89 01/08/2019 09:47:48...
-
Page 90: Przypadkowe Przerwanie Cyklu Odwapniania
Włączyć urządzenie. Urządzenie wykona automatyczne płukanie. Przed przyrządzeniem jakiegokolwiek napoju należy wykonać ręczny cykl płukania, jak opisano w dedykowanym rozdziale. Informacja: jeżeli pomarańczowa kontrolka nie zgaśnie, należy jak najszybciej wykonać nowy cykl odkamieniania. Naviglio milk en-nl-pl.indd 90 01/08/2019 09:47:49... -
Page 91: Znaczenie Sygnalizacji Świetlnej
ŚWIATŁA WOLNO MIGA- JĄCE Urządzenie w fazie nagrzewania przed rozpoczęciem dozowania napojów. ŚWIATŁA WOLNO MIGA- JĄCE Urządzenie jest gotowe do pracy. ZAPALONE ŚWIATŁA CIĄGŁE Urządzenie w fazie nalewania gorącej wody. ZAPALONE ŚWIATŁO CIĄGŁE Naviglio milk en-nl-pl.indd 91 01/08/2019 09:47:50... - Page 92 Uruchomić cykl odwapniania. Jeżeli odwapnianie urządzenia. nie będzie wykonywane regularnie, urządzenie przestanie działać prawidłowo. Usterka nie jest objęta gwarancją. ZAPALONE ŚWIATŁO CIĄGŁE Urządzenie w fazie Wcisnąć przycisk „ ”, aby przerwać cykl. odwapniania. ŚWIATŁO WOLNO MIGA- JĄCE Naviglio milk en-nl-pl.indd 92 01/08/2019 09:47:51...
- Page 93 Działanie urządzenia jest Wyłączyć urządzenie i włączyć je ponownie po nieprawidłowe i upływie 30 sekund. nie jest możliwe Spróbować 2 lub 3 razy. przygotowanie kawy espresso, cappuccino, ŚWIATŁA WOLNO MI- nalanie wody ani GAJĄCE wytworzenie pary. Naviglio milk en-nl-pl.indd 93 01/08/2019 09:47:52...
-
Page 94: Rozwiązywanie Problemów
Pojemnik na fusy jest włożony. Wyjąć pojemnik na fusy przed wyjęciem bloku zaparzającego. Pod blokiem zaparzającym Ten typ kawy jest nieodpowiedni Konieczna może być zmiana typu kawy jest dużo zmielonej kawy. do automatycznych ekspresów. lub przeprowadzenie regulacji młynka. Naviglio milk en-nl-pl.indd 94 01/08/2019 09:47:53... -
Page 95: Oszczędność Energii
W trybie stand-by zużycie energii nie przekracza 1Wh. Aby włączyć urządzenie, należy nacisnąć ten przycisk (wyłącznik główny z tyłu urządzenia jest w położeniu „I”). Jeżeli bojler jest zimny, urządzenie wykona cykl płukania. Naviglio milk en-nl-pl.indd 95 01/08/2019 09:47:53... -
Page 96: Akcesoria
Maksymalna wysokość filiżanki pod dozownikiem (mm) Zbiornik na wodę 1,5 litra - Wyjmowany Pojemność pojemnika na kawę 300 g ziarnistą Pojemność pojemnika na fusy Ciśnienie pompy 15 barów Bojler Stal nierdzewna Urządzenia zabezpieczające Bezpiecznik termiczny Naviglio milk en-nl-pl.indd 96 01/08/2019 09:47:53... - Page 97 Naviglio milk en-nl-pl.indd 97 01/08/2019 09:47:54...
- Page 98 Naviglio milk en-nl-pl.indd 98 01/08/2019 09:47:54...
- Page 99 Naviglio milk en-nl-pl.indd 99 01/08/2019 09:47:54...
- Page 100 +39 0534 771111 / Fax +39 0534 31025 Sede Legale/Registered Office Piazza A. Diaz, 1 20123 Milano - Italia Capitale Sociale Euro 104.000 i.v. REA MI1387376 - R.I. Cod.Fisc. 02069680367 Part. IVA : IT-13054780153 www.gaggia.it www.gaggia.com Naviglio milk en-nl-pl.indd 100 01/08/2019 09:47:54...
Need help?
Do you have a question about the NAVIGLIO MILK and is the answer not in the manual?
Questions and answers