
Subscribe to Our Youtube Channel
Related Manuals for Miele PWM 307


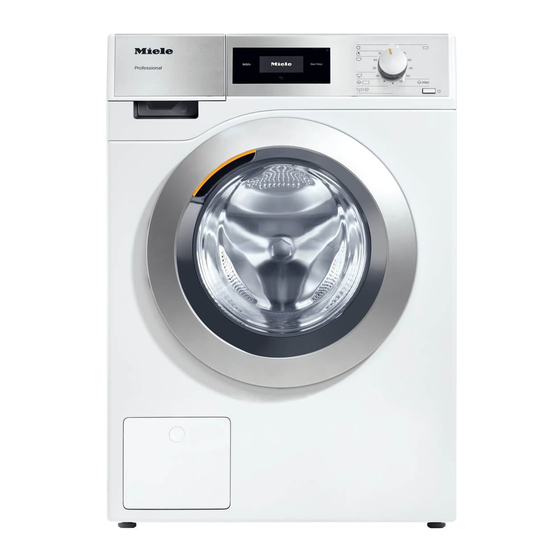
Summary of Contents for Miele PWM 307
- Page 1 Operating and installation instructions Washing machine To avoid the risk of accidents or damage to the machine, it is essen- tial to read these instructions before it is installed and used for the first time. en-GB M.-Nr. 11 713 010...
-
Page 2: Table Of Contents
Contents Caring for the environment ................Warning and safety instructions ..............Operating the washing machine ..............15 Control panel ....................... 15 Symbols on the control panel ................16 Symbols in the display ..................17 Sensor controls and touch display with sensor controls ........18 Standard menu.................... - Page 3 General problems ....................46 The door will not open..................48 Opening the door in the event of a blocked drain outlet and/or power cut ..49 Miele Service ..................... 51 Contact in case of malfunction ................51 EPREL database ....................51 Optional accessories...................
- Page 4 Contents Supervisor level ....................69 Code-based access .................... 69 Changing the code ....................69 Opening the Supervisor level ................69 Exiting the Supervisor level ................. 69 Language......................70 Brightness ......................70 Clock display....................... 70 Finish tone volume ....................70 Keypad tone volume ................... 70 Welcome tone volume..................
- Page 5 Contents Remote ........................ 77 RemoteUpdate ....................78 SmartGrid ......................78 Alternating current ....................78 Heating ........................ 78 Legal information....................79 Copyrights and Licences................79 Payment system ....................79 Settings for payment systems................ 79 Feedback signal to pay system..............80 Payment system lock ..................80 FOC programmes...................
-
Page 6: Caring For The Environment
/ recycling centre for electrical and electronic ap- pliances, or contact your dealer or Miele for advice. You are also respons- ible for deleting any personal data that may be stored on the appliance being disposed of. Please ensure that your old appliance poses no risk to children while being stored prior to disposal. -
Page 7: Warning And Safety Instructions
Miele cannot be held liable for damage caused by non-compliance with these instructions. Keep these operating instructions in a safe place and pass them on to any future owner. - Page 8 Warning and safety instructions This washing machine can only be used by people with reduced physical, sensory or mental capabilities, or lack of experience or knowledge, if they are supervised whilst using it or have been shown how to use it in a safe way and understand and recognise the con- sequences of incorrect operation.
- Page 9 It is most important that this basic safety requirement is tested and in case of any doubt the on-site wiring system should be inspected by a qualified electrician. Miele cannot be held liable for the consequences of an inadequate earthing system. ...
- Page 10 Warning and safety instructions If the electrical connection cable is faulty it must only be replaced by a Miele authorised service technician to protect the user from danger. The washing machine must only be connected to the on-site wa- ter supply using a new hose kit.
- Page 11 While the washing machine is under warranty, repairs should only be undertaken by a Miele authorised service technician. Otherwise the warranty will be invalidated. Correct use ...
- Page 12 If, however, you do wish to descale it, only use special non-corrosive descaling agents and strictly ob- serve the instructions on the packaging. Special descaling agent is available from your Miele dealer or from Miele Service. Strictly ob- serve the instructions for the descaling agent. ...
- Page 13 Warning and safety instructions Only use dyes suitable for use in a washing machine. Always ob- serve the manufacturer's instructions carefully. Colour run and dye removers contain sulphur compounds which can cause damage such as corrosion. Do not use these products in this washing machine.
- Page 14 Miele tumble dryer and the Miele washing machine. If installing the machine on a Miele plinth (available as an optional accessory), please make sure you order the correct one for this washing machine.
-
Page 15: Operating The Washing Machine
Operating the washing machine Control panel a Language sensor control e Optical interface For selecting the current user lan- For the Customer Service Depart- guage. ment. The system language is displayed f Programme selector again at the end of the programme. For selecting the wash programme. -
Page 16: Symbols On The Control Panel
Operating the washing machine Symbols on the control panel Cottons Cottons / Express Minimum iron Delicates Woollens ECO 40-60 Cottons ECO 40-60 / Drain/Spin... -
Page 17: Symbols In The Display
Operating the washing machine Symbols in the display Temperature: use the Temperature sensor control to set the temperature of the wash programme. Spin speed: use the Spin speed sensor control to set the spin speed of the wash programme. Pre-wash: use the Pre-wash sensor control to select the Pre-wash Extra ... -
Page 18: Sensor Controls And Touch Display With Sensor Controls
Operating the washing machine Sensor controls and touch dis- Standard menu play with sensor controls The standard menu of a wash pro- gramme displays different values de- The sensor controls , and pending on the programme. Start/Stop and the sensor controls in the display respond to finger tip con- For programmes with a fixed temperat- tact. -
Page 19: Examples Of How To Operate The Appliance
Operating the washing machine Setting numerical values Examples of how to operate the appliance To change a numerical value, use the and arrows above or below the Option lists numbers you want to change. The and arrows on the right of the display indicate that choices are avail- ... -
Page 20: Before Using For The First Time
After that, See “Installation”. they must be changed by Miele Ser- vice. Emptying the drum Complete the initial commissioning A swivel elbow for the drain hose and/ process. - Page 21 Before using for the first time Reference to external appli- Setting the time of day ances A reference to external hardware ap- pears. Time Confirm with the sensor control. Connect the XCI box or adapter before ...
- Page 22 Before using for the first time Select pre-wash water Removing the transit bars The display will remind you to remove the transit bars. Cold Damage resulting from failure to Pre-wash water remove the transit bars. Failure to remove the transit bars can result in damage to the washing ma- ...
- Page 23 Before using for the first time Completing the commissioning process To complete commissioning, the Cot- tons 60 °C programme must be run without laundry and without detergent. If the power is interrupted prior to the start of the first wash programme (e.g. if the machine is switched off with the ...
-
Page 24: Washing Environmentally And Economically
Washing environmentally and economically Energy and water consumption Detergent - To get the most out of your machine, - Do not exceed the amounts of deter- load the maximum dry load size for gent recommended by the manufac- the wash programme you are using. turer on the packaging. -
Page 25: Preparing The Laundry
1. Preparing the laundry Emptying pockets Risk of explosion due to solvent- based detergents. When using solvent-based deter- gents, an explosive mixture may de- velop. Never use solvent-based detergents in the washing machine. General tips - Do not machine wash items which are specified by the manufacturer as not washable on the care label (). -
Page 26: Loading The Washing Machine
2. Loading the washing machine Opening the door Closing the door Reach under the door grip and pull Make sure that no items are caught the door open. between the door and the seal. Check the drum for foreign objects before loading it with laundry. -
Page 27: Selecting A Programme And Settings
3. Selecting a programme and settings Switching on the washing ma- Selecting a temperature chine You can alter the preset temperature of certain programmes. Press the control. Touch the Temperature sensor con- Selecting a programme trol. Select the desired temperature. The selected temperature is marked with a frame. - Page 28 3. Selecting a programme and settings Selecting Extras Selecting further options You can select Extras for a wash pro- You can select a delay start period or gramme. change the settings of the washing ma- chine. Selecting Pre-wash Touch the Further choices sensor The Pre-wash ...
-
Page 29: Adding Detergent
4. Adding detergent You can use any detergent that is suit- Adding detergent able for washing machines. Detergent dispensing Please follow the detergent manufac- turer's instructions in relation to dosage. Adding too much detergent will lead to excessive foaming. Avoid adding excess detergent. The amount to dispense will depend on: - the amount of laundry ... - Page 30 4. Adding detergent Automatic dispensing of fabric Dye removers and dyes softener or liquid starch Damage due to colour run/dye removers. Colour run and dye removers can cause corrosion in the washing ma- chine. Do not use colour run or dye re- movers in this washing machine.
-
Page 31: Starting The Programme - End Of The Programme
5. Starting the programme – end of the programme Payment system End of programme If your machine is connected to a pay- The door remains locked during the ment system, the amount of payment anti-crease phase. However, the wash- required will appear in the display. ing machine door can be unlocked at any time by touching the Start/Stop Do not cancel the programme once it... -
Page 32: Delay Start
Delay start The Delay start function can be used to Cancelling or changing Delay set the time until the programme starts start or the programme finish time (see Touch the Start/Stop sensor. “Delay start” under “Supervisor level”). The following will appear in the display: Selecting the Delay start func- tion Start programme... -
Page 33: Programme Chart
Programme chart Cottons 20 °C to 90 °C Max. load 7.0 kg Use for Cotton, linen and mixed fibre textiles - Select the temperature according to the instructions on the care label, the detergent, the type of soiling and the hygiene require- ments. - For dark-coloured fabric, use a colour detergent or liquid deter- gent. - Page 34 Programme chart Delicates 30 °C Max. load 2.5 kg Use for Delicate garments made from synthetic fibres, mixed fibres and viscose - Deselect the final spin speed for fabric that creases easily. 600 rpm Extras: Pre-wash Rinses: 2 Woollens 20 °C Max. load 2.5 kg Use for Machine-washable woollens and woollen blends - Use detergent formulated for delicates/woollens.
-
Page 35: Special Features In The Programme Sequence
Special features in the programme sequence Spinning Anti-crease At the end of the programme, the drum Final spin speed continues to turn at intervals for up to When a programme is selected, the 30 minutes to help prevent creasing. maximum spin speed for this wash pro- The washing machine can be opened at gramme is shown in the display. -
Page 36: Changing The Programme Sequence
Changing the programme sequence If you want to select a different pro- A programme cannot be cancelled or gramme: changed when operating a payment system. Close the door. Select the programme you want. Changing a programme Add detergent to the detergent After the start of a programme, it is no drawer. -
Page 37: Adding Or Removing Laundry
Changing the programme sequence Adding or removing laundry The safety lock will remain activated if the temperature in the drum is above You can add or remove items during the 55 °C. The lock will not deactivate un- first few minutes after the programme til the temperature has dropped to be- has started. -
Page 38: Detergent
Detergent The correct detergent You can use any detergent that is suitable for washing machines. Instructions for use and recommended amounts are given on the detergent packaging. Recommended detergents in accordance with Directive (EU) No. 1015/2010 The recommendations apply to the temperature ranges given in the section “Pro- gramme chart”. -
Page 39: Cleaning And Care
Cleaning and care Cleaning the detergent drawer Risk of electric shock. Only ever perform cleaning and Washing at low temperatures and the maintenance work when the appli- use of liquid detergent can lead to a ance is disconnected from the build-up of mould and bacteria in the power. - Page 40 Cleaning and care Cleaning the siphon and the channel Cleaning the detergent drawer Pull the siphon out of the compart- Use a bottle brush to remove deter- ment . gent residues and limescale from the Clean the siphon under warm running jets inside the detergent drawer.
-
Page 41: Cleaning The Drum, Suds Container And Drainage System
Cleaning and care Cleaning the drum, suds con- Cleaning the water inlet filters tainer and drainage system The washing machine has filters to pro- tect the water intake valves. You should The drum, suds container and drainage inspect the filters approximately every system can be cleaned if necessary. -
Page 42: Problem Solving Guide
You are able to correct the majority of faults and problems that arise during day-to- day use without external assistance. You can save time and money in many cases, as you do not need to call Miele Service. The following tables are designed to help you to find the cause of a malfunction or a fault and to resolve it. -
Page 43: Programme Cancellation And Error Message
Service city supply. Wait at least 2 minutes before reconnecting the washing machine to the electricity supply. Switch the washing machine on again. Start the programme again. If the fault message appears again, contact Miele Service. -
Page 44: A Fault Message Appears In The Display
The washing machine or drain valve is leaking. Machine is leaking Close the stopcock. Call Miele Service. The messages will appear at the end of the programme and when the washing machine is switched on and must be acknowledged with the OK sensor control. -
Page 45: An Unsatisfactory Wash Result
Problem solving guide An unsatisfactory wash result Problem Cause and remedy Liquid detergent does Liquid detergents usually contain no bleaching not give the required agents. They do not remove fruit, coffee, and tea result. stains. Use a general purpose powder detergent contain- ing a bleaching agent. -
Page 46: General Problems
Problem solving guide General problems Problem Cause and remedy The machine shakes The machine feet are not level and not secured. during the spin cycle. Level the machine and adjust the feet correctly. Strange pump noises This is not a fault. These slurping noises occur at can be heard. - Page 47 Problem solving guide Problem Cause and remedy The drum remains sta- Switch the washing machine off and then back on tionary but the pro- with the button. gramme keeps running. Note the message in the display. Touch the Start/Stop sensor control. The drum continues to spin and the programme con- tinues.
-
Page 48: The Door Will Not Open
The following appears The door lock has jammed. in the display: Call Miele Service. Door lock jammed. Call Service. -
Page 49: Opening The Door In The Event Of A Blocked Drain Outlet And/Or Power Cut
Problem solving guide Emptying the drum Opening the door in the event of a blocked drain outlet and/ ..For machines with a drain pump or power cut Place a suitable container under the access flap. Risk of electric shock. Only ever perform cleaning and Remove the drain filter, though not maintenance work when the appli-... - Page 50 Problem solving guide Cleaning the drain filter Water damage. Once the flow of water ceases: Water will escape from the machine if you forget to replace the drain filter. Replace the drain filter correctly and tighten it securely. Opening the door ...
-
Page 51: Miele Service
From 1 March 2021, information on en- cannot remedy yourself, please contact ergy labelling and ecodesign require- your Miele Dealer or Miele Service. ments will be available in the European Product Database (EPREL). You can Contact information for Miele Service... -
Page 52: Installation
*INSTALLATION* Installation Front view a Inlet hose (cold water) e Door b Electrical connection f Access flap to drain filter and drain pump c Control panel g Height-adjustable feet d Detergent drawer... -
Page 53: Rear View
*INSTALLATION* Installation Rear view a Protruding lid for holding when mov- e Water inlet hose (cold water) ing the appliance f Safety caps for transit bars b Electrical connection g Transport clips for hoses c Interface for communicating with ex- h Holder for removed transit bars ternal appliances d Drain hose... -
Page 54: Installation Locations
Installation on a plinth Installation locations The washing machine can be installed Side view on a steel plinth (open or closed, avail- able as an optional Miele accessory) or on a concrete plinth. 1132 Injury can occur if the washing machine has not been adequately secured. -
Page 55: Transporting The Washing Machine To Its Installation Site
*INSTALLATION* Installation Transporting the washing machine to Transporting the washing ma- its installation site chine to its installation site The protruding lid at the back can be Danger of injury from incorrect used to hold the machine when trans- transport. -
Page 56: Installation Surface
*INSTALLATION* Installation Installation surface Removing the transit bars A concrete floor is the most suitable in- stallation surface, being far less prone to vibration during the spin cycle than wooden floorboards or a carpeted sur- face. The machine must be level and se- curely positioned. - Page 57 *INSTALLATION* Installation Pull out the transit bar. Pull out the transit bar. Risk of injury from sharp edges. There is a risk of injury from reaching into holes that are not covered. Cover the holes for the transit bars after they have been removed.
-
Page 58: Refitting The Transit Bars
*INSTALLATION* Installation Levelling the washing machine The washing machine must stand per- fectly level on all four feet to ensure safe and proper operation. Incorrect installation may increase elec- tric and water consumption and may cause the machine to move about. Screwing out and adjusting the feet The 4 adjustable screw feet are used for levelling the washing machine. -
Page 59: Holding Bracket For Plinth
*INSTALLATION* Installation Holding bracket for plinth The holding bracket prevents the wash- ing machine from falling off the plinth during operation. Fastening with the holding bracket is only intended for plinths made from concrete. The plinth must be flat and level. - Page 60 *INSTALLATION* Installation Installing the holding bracket Place the holding bracket on the marking on the plinth. In the middle of the two outer slotted holes, mark a point for each drill hole. Drill 2 holes (8 mm) with a depth of approx.
-
Page 61: External Control Equipment
This washing machine can be fitted with a payment system (optional accessory). The necessary reprogramming must al- ways be carried out by Miele Service or a Miele Service Dealer. Coins/tokens must be removed from the coin box regularly. Otherwise, the ... -
Page 62: Water Connection
1000 kPa. If the pressure exceeds 1000 kPa, a pressure reducing valve This requires a special water inlet hose. must be installed. The hose can be ordered from a Miele dealer or the Miele Customer Service For the connection, a stopcock with a Department. -
Page 63: Drainage
(gully). If required, the hose can be extended to a length of up to 5 m. Accessories are available from Miele or from your Miele dealer. For a drain height of more than 1 m (up to a max. of 1.6 m), a replacement drain pump is available from Miele or from your Miele dealer. -
Page 64: Electrical Connection
Conversion must be performed by that conforms to the national and local Miele Service or by an authorised codes and regulations. Miele dealer. Do not connect the machine to an ex-... - Page 65 *INSTALLATION* Installation Single phase AC 230 V – country vari- ant 230V 25A This device is intended for connection to a power supply system where the maximum value of external phase neut- ral loop impedance Zmax of 0.38 Ohms at the point of distributor supply con- nection is not exceeded.
-
Page 66: Technical Data
Technical data Height 850 mm Width 596 mm Width (for appliances with a stainless steel 605 mm lid) Depth 714 mm Depth with door open 1132 mm Weight Approx. 100 kg Maximum floor load in operation 3000 newtons Capacity 7.0 kg dry laundry Supply voltage See data plate on back of appli- ance Rated load See data plate on back of appli-... -
Page 67: Conformity Declaration
Technical data Conformity declaration Miele hereby declares that this washing machine complies with Directive 2014/53/ The complete text of the EU declaration of conformity is available from one of the following internet addresses: - Products, Download from www.miele.co.uk - For service, information, operating instructions etc: go to www.miele.co.uk/do- mestic/customer-information-385.htm and enter the name of the product or the... - Page 68 Consumption data...
-
Page 69: Supervisor Level
Brightness chine from unauthorised access. Please inform Miele Service if you Select the setting you want. have forgotten your new code. Miele Service will have to reset the code. Some settings are only visible if ex-... -
Page 70: Language
Supervisor level Language Keypad tone volume The display can be set to appear in The volume of the tone that sounds one of several different languages. To when a sensor is touched can also be select the permanent operator lan- changed. -
Page 71: Anti-Crease
Supervisor level Anti-crease "Display" switch-off status The Anti-crease function reduces To save energy, the display goes out creasing after the end of the pro- and the Start/Stop button flashes gramme. slowly. At the end of the programme, the drum Changing this setting leads to increased continues to turn at intervals for up to energy consumption. -
Page 72: Delay Start
Supervisor level Delay start Programme name The type of time input for the Delay When selecting a standard pro- start function can be changed or gramme, the name of the selected switched off. programme is shown in the display. - Off - On (factory default) The Delay start function is not avail- When a programme is selected, the... -
Page 73: Pre-Wash Water
Supervisor level Pre-wash water First rinse water You can select the water type for the You can select the water type for the pre-wash. first rinse in some programmes. - Cold - Cold (factory default) Only cold water is used for the pre- Only cold water is used for the first wash. -
Page 74: Low Water Pressure
Supervisor level Low water pressure Water level Minimum iron If the water pressure is below 100 kPa You can increase the water level for (1 bar), the programme will be can- the main wash in the Minimum celled and the fault message iron programme. -
Page 75: Wash Time Cottons
Supervisor level Wash time Cottons Pre-rinse Minimum iron You can increase the duration for the A pre-rinse can be activated in the main wash in the Cottons programme. Minimum iron programme. - + 0 min (factory default) Factory default: Off - + 10 min Pre-wash Cottons/Min. -
Page 76: Temp Reduction
Supervisor level Temp reduction WiFi/LAN The suds temperature can be reduced Control the networking of your wash- to prevent the suds from boiling too ing machine. early in high-altitude locations. - Setup Factory default: Off This message only appears if the washing machine has not yet been Auto load control connected to a WiFi network. -
Page 77: Network Time
Internet. A Soft AP machine is declared as the master and sends data to the slave devices. Activate the function with the Miele app on your smart device within - As slave 10 minutes. The machines are in a network and Tip: The app will guide you through the are connected to the Internet. -
Page 78: Remoteupdate
Alternating current you can continue to use your washing machine in the usual way. However, The time left display depends on the Miele recommends installing Re- electrical connection. If a single-phase moteUpdates. connection is used, the setting must be switched to No. -
Page 79: Legal Information
Miele Customer Service De- partment. Copyrights and Licences The XCI-AD or XCI box accessory unit Miele uses their own and third party is required to connect a payment sys- software which is not subject to any so- tem. -
Page 80: Feedback Signal To Pay System
Supervisor level Feedback signal to pay system Payment system lock Setting the feedback signal for the To avoid tampering, a programme lock coin box. can be set up in programme control. If the lock is applied, the programme is - Factory default: Off interrupted and payment credit is lost as soon as the door is opened. -
Page 81: Foc Programmes
Supervisor level FOC programmes In coin mode, you can decide whether Drain/Spin programme can be used for free. Factory default: Off Delete paid signal The “Paid” signal in coin box mode can be applied until the end of the programme or discarded if the pro- gramme is not started after 5 minutes. - Page 83 United Kingdom Malaysia Miele Sdn Bhd Miele Co. Ltd., Fairacres, Marcham Road Suite 12-2, Level 12 Abingdon, Oxon, OX14 1TW Menara Sapura Kencana Petroleum Professional Sales, Tel: 0845 365 6608 Solaris Dutamas No. 1, Jalan Dutamas 1 E-mail: professional@miele.co.uk 50480 Kuala Lumpur, Malaysia Internet: www.miele.co.uk/professional...
- Page 84 PWM 307 CC en-GB M.-Nr. 11 713 010 / 00...
Need help?
Do you have a question about the PWM 307 and is the answer not in the manual?
Questions and answers