Table of Contents
Advertisement
Quick Links
ADMINISTRATOR GUIDE
1.3.1 | January 2021 | 3725-32911-004A
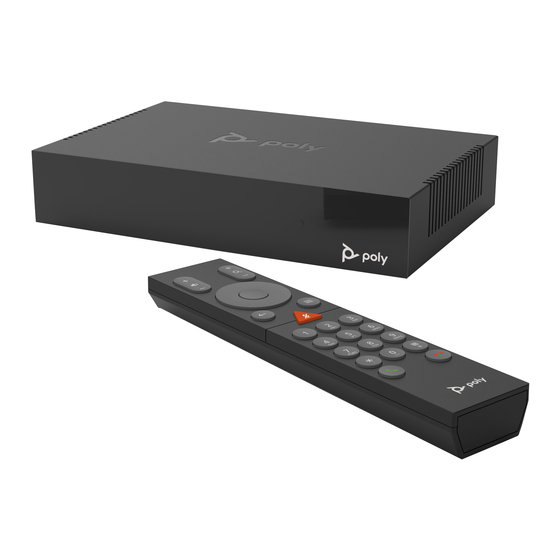
Poly G200
Getting Help
For more information about installing, configuring, and
administering Poly/Polycom products or services, go to
Polycom Support.
Plantronics, Inc. (Poly — formerly Plantronics and Polycom)
345 Encinal Street
Santa Cruz, California
95060
©
2021 Plantronics, Inc. All rights reserved. Poly, the propeller
design, and the Poly logo are trademarks of Plantronics, Inc.
All other trademarks are the property of their respective
owners.
Advertisement
Table of Contents

Related Manuals for Poly G200


Summary of Contents for Poly G200
- Page 1 Plantronics, Inc. (Poly — formerly Plantronics and Polycom) 345 Encinal Street Santa Cruz, California 95060 © 2021 Plantronics, Inc. All rights reserved. Poly, the propeller design, and the Poly logo are trademarks of Plantronics, Inc. All other trademarks are the property of their respective owners.
-
Page 2: Table Of Contents
Contents Before You Begin....................4 Audience, Purpose, and Required Skills................4 Related Poly and Partner Resources..................4 Getting Started with Poly G200.................5 G200 Overview........................5 Dual Monitors Feature....................5 Powering On and Off......................6 Navigating the System......................6 Access the System Web Interface................6 Change the Password....................6 Setting Up the System.................. - Page 3 Enable Polycom NoiseBlock..................... 34 Configuring Video Settings................35 High-Definition Video Conferencing.................. 35 Maximizing HDTV Video Display................35 G200 System HDMI Interfaces................35 Using Sleep Settings to Prevent Monitor Burn-In..............36 Configure Your USB Camera.................... 36 Use HDMI Input as the Camera Source................38 Avoid Video Flicker......................38 Configuring Call Settings................
- Page 4 Update Software from the System Web Interface..........43 Update Software Using the Provisioning Service...........44 Activate a License......................44 Importing and Exporting System Settings................. 44 Restart Your System......................45 Reset Your G200 System....................45 Factory Restore Your System................... 46 Pair the Bluetooth Remote Control................... 46 Troubleshooting....................47 Logs..........................47 Enable or Disable Logs..................
-
Page 5: Before You Begin
Create an account to access Poly support personnel and participate in developer and support forums. You can find the latest information on hardware, software, and partner solutions topics, share ideas, and solve problems with your colleagues. -
Page 6: Getting Started With Poly G200
• Poly G200 with a Poly EagleEye Cube USB camera that supports only SVC mode. You can connect a Poly Studio USB video bar or USB headset to the Poly G200 system as a peripheral. Dual Monitors Feature You can connect your G200 system to two monitors if your system is licensed to use dual monitors. -
Page 7: Powering On And Off
Getting Started with Poly G200 Powering On and Off The Poly G200 doesn’t have a power button. When you plug in the power cord, the device turns on. Navigating the System You can use the system web interface to complete the setup process and manage your G200 system. - Page 8 Getting Started with Poly G200 Setting Description Confirm Password Confirms the new password.
-
Page 9: Setting Up The System
When you attach a Poly Studio USB video bar that uses an outdated software version, the system displays a prompt to update the device. Refer to the Poly Studio User Guide for information on updating the software. -
Page 10: Poly G200 Led Indicators
System upgrade via USB flash drive LAN connection Power Related Links Reset Your G200 System on page 45 Poly G200 LED Indicators Poly G200 uses LED indicators to show basic system status. LED Color System Status • Initializing Blue •... -
Page 11: Eagleeye Mini Camera Led Indicators
Setting Up the System EagleEye Mini Camera LED Indicators The EagleEye Mini camera uses LED indicators to show basic device status. Camera LED Indicators LED Color Device Status Amber No active video output Green Active video output Alternating amber and Software update green EagleEye Cube USB Camera LED Indicators... -
Page 12: Basic Poly Studio Led Indicators
On hold Run the Setup Wizard When you power on your G200 system for the first time or reset it, the setup wizard starts and leads you through the minimum configuration steps. The setup wizard is also known as the out-of-box (OOB) wizard. It's available during the initial setup, after the system reset with system settings deleted, or after a factory restore. - Page 13 You can use the number pad on the remote control to enter text. After you run the setup wizard, view or change the admin configuration by going to the system web interface. Related Links Reset Your G200 System on page 45 Updating the System Software on page 42...
-
Page 14: General System Settings
• Set the Date and Time You can define the G200 system name, configure the system deployment mode, and set the date and time for your system. Note: Depending on your deployment, you can configure your system's sleep settings to align with certain devices in System Settings >... -
Page 15: Configure Deployment Mode
General System Settings Configure Deployment Mode You can manually configure the deployment mode from the system user interface. You can't configure the deployment mode when the G200 system is in a call, sharing content, or upgrading the camera. Procedure 1. In the system web interface, go to System Settings > Deployment Mode. -
Page 16: Customizing The Interface
3. Select Submit. Change the Home Screen Background Image The G200 system local interface displays a background image that you can customize. You can upload your own image to replace the background image or reset it to the default. Your image must be smaller than 10 MB with a pixel size of 1920 × 1080 (width by height). The image must be in .jpg, .jpeg, .bmp, or .png format. - Page 17 Customizing the Interface The image uploads to the system Home screen. If you use dual monitors, both screens use the new picture as backgrounds. 4. Select Reset to retrieve the default background image.
-
Page 18: Provisioning The System
Navigating the System on page 6 Locate the MAC address Before you begin provisioning, you need to know the MAC address for the G200 system you want to provision. Procedure 1. In the system web interface, go to Device Status. -
Page 19: Create A Provisioning Profile
Provisioning the System Create a Provisioning Profile To provision the G200 system, you must create a G200 provisioning profile on the provisioning server. Procedure 1. Get the provisioning template file from Poly Online Support Center. The file name is G200_Provisioning_Template.cfg. -
Page 20: Provision The Deployment Mode
The password cannot contain "@" and ":". Provision the Deployment Mode You can provision the deployment mode of your G200 system through the system’s provisioning profile. Three parameters determine which deployment mode the system uses. When you enable more than one parameters, the parameter priority applies in the following order: •... -
Page 21: Disable The Provisioning Service
LDAP searches (50 results at most) • SIP and H.323 calls with LDAP contacts • LDAP status Note: G200 1.3.x doesn’t support the Polycom RealPresence Resource Manager LDAP server. Procedure » In your provisioning profile configure the following parameters: • serverAddressH350 •... -
Page 22: Configuring Network Settings
Poly offers contract high-definition readiness services. For more information, contact your Poly distributor. Configure VLAN Settings You can configure VLAN settings for your G200 system from both the system web interface and the local interface. You can find part of the same settings on the local interface by selecting Settings >... -
Page 23: Configure Ipv4 Settings
Configuring Network Settings Setting Description VLAN Settings Choose to enable or disable VLAN. • Disable • LLDP: Enables LLDP. When enabled, LLDP automatically configures the system for a detected VLAN in the following order: ◦ Video Conferencing VLAN ◦ Voice VLAN ◦... -
Page 24: Configure Ipv6 Settings
You can find part of the same settings on the local interface by selecting Settings > Network from the Home screen. The IPv6 settings apply only to the system web interface access. Poly G200 doesn’t support calling, provisioning, registering, and other functions with IPv6. Procedure 1. -
Page 25: Configure Svc Call Settings
Displays the default gateway assigned to the system. This setting is only configurable when Manual is selected. Configure SVC Call Settings If you use SVC mode, use the Poly RealPresence Clariti Ensemble server as the call server. Make sure to enable SVC deployment mode. Procedure 1. -
Page 26: Configure H.323 Settings
14 Configure H.323 Settings If your network uses a gatekeeper, the G200 system can register its H.323 name and extension. This enables others to call the system by entering the H.323 name or extension instead of the IP address. -
Page 27: Configure Sip Settings
Specifies the registrar protocol. Select SIP. Protocol Transport Protocol Indicates the protocol the system uses for SIP signaling. The SIP network infrastructure your G200 system operates within determines which protocol is required. • TCP: Provides reliable transport via TCP for SIP signaling. - Page 28 Configuring Network Settings Setting Description User Name Specifies the user name to use for authentication when registering with a SIP marySmith proxy server, for example, . If the SIP proxy server requires authentication, this field and the password cannot be blank. Password Specifies the password associated with the user name used to authenticate the system to the proxy server.
-
Page 29: Securing The System
If a call is unencrypted, an unlocked padlock appears on the monitor. Note: When the SVC call server supports encryption, the G200 system enables encryption for the audio and video stream by default. SVC calls automatically enables encryption if all the involved devices and servers support encryption. -
Page 30: Port Usage
Media Ports beginning value you set. Note: You must also open the firewall's TCP ports (80/443/8080/5060/5061/1719/1720) to allow H.323 or SIP traffic. Port Usage The following table lists the open ports that Poly G200 uses. Poly G200 Ports Port Direction Type... - Page 31 Securing the System Port Direction Type Protocol Function Default Configurable 3230–3249 Bidirectional Static RTP/RTCP video and audio 5060 Bidirectional Static TCP/UDP 5061 Bidirectional Static SIP TLS Inbound Static HTTP server Bidirectional Static System web interface...
-
Page 32: Managing Certificates
(CA) for official issuance. The CA is the trusted entity that issues, or signs, digital certificates for others. Once signed by the CA, you can install the certificate on the G200 system for use in all TLS connections used by the system. -
Page 33: Create A Certificate Signing Request
Managing Certificates Create a Certificate Signing Request If you deploy a PKI in your environment, create a CSR to make sure your G200 system or device is trusted by its network peers. Note: Only a single outstanding CSR of either type can exist at a time. After a CSR is generated, get it signed and installed on your system before creating another. -
Page 34: Install A Certificate
Managing Certificates Install a Certificate You can install a certificate on the G200 system. Your server certificate may have been signed by a CA after having been previously generated as a CSR, or it may be a CA certificate needed by the system to validate a certificate it receives from another system. -
Page 35: Configuring Audio Settings
Test Your Audio and Video on page 48 Select the Audio Input When you connect both the expansion microphone and a USB audio device to your G200 system, you can select either device for the audio input. Procedure 1. In the system web interface, go to System Settings > Audio/Video Settings. -
Page 36: Configuring Video Settings
Enabling this mode may improve your video conferencing experience. • Before attaching your G200 system to a TV monitor, ensure the monitor is configured to display all available pixels. This setting, sometimes known as fit to screen or dot by dot, enables the monitor to display the entire HD image. -
Page 37: Using Sleep Settings To Prevent Monitor Burn-In
2. Select the number of minutes the system can be idle before it goes to sleep. Configure Your USB Camera To improve video quality, you can configure most of the settings for your USB camera from the G200 system web interface. - Page 38 Specifies the camera tracking mode. (EagleEye Cube USB & • Frame Speaker: The camera automatically locates and frames the active Poly Studio) speaker. When someone else starts speaking, the camera switches to that person. Note: When you mute your microphone, the camera tracking mode automatically switches to Frame Group.
-
Page 39: Use Hdmi Input As The Camera Source
Adjusts the color saturation. Use HDMI Input as the Camera Source You can configure your G200 system to use the HDMI input as a camera source instead of content when in AVC mode. Poly recommends connecting an HDCI camera using a camera adapter via the HDMI input and share the content via the Polycom Content App. -
Page 40: Configuring Call Settings
SVC Call Rates • Set the Auto Answer Mode • Automatically Show HDMI Content Specify how you want your G200 system to handle and manage calls. Related Links Set the Encryption Mode on page 28 Set the AVC Call Rate You can manually set the call rate. -
Page 41: Set The Auto Answer Mode
Mute on Auto Answer: Mutes near-end audio when an incoming call is automatically answered. This option is only available when you enable Auto Answer. Automatically Show HDMI Content You can configure the G200 system to automatically share HDMI content in a call once you connect a device via HDMI. Procedure 1. -
Page 42: Setting Up A Directory
Import Directory Contacts • Export Directory Contacts In AVC mode, you can manage and configure directory settings in the G200 system web interface. Import Directory Contacts You can import directory contacts to your G200 system from the system web interface. -
Page 43: System Maintenance
A key code is the number that activates software on a specific system. A key code is valid only on the system for which it is generated. Poly G200 requires a key code to enable the dual monitor feature or... -
Page 44: Update Software From A Usb Flash Drive
Create a Single Key Code File to Update Multiple Systems If you have multiple G200 systems, you can create a single key code file that contains all of the key codes you need to update your systems. -
Page 45: Update Software Using The Provisioning Service
Provision the Deployment Mode on page 19 Activate a License Poly G200 requires a license to enable certain features. Get a license from your Poly distributor if you want to use dual monitors. Procedure 1. In the system web interface, go to Admin Settings > License. -
Page 46: Restart Your System
2. Select Restart. Reset Your G200 System If your G200 system isn’t functioning correctly or you forgot the password, you can reset the system. This procedure effectively refreshes your system, deleting all settings except the current software version. You can also reset the system from the system web interface in Admin Settings > System Reset. -
Page 47: Factory Restore Your System
System Maintenance Factory Restore Your System A factory restore completely erases the system’s flash memory and restores the system to the software version and default configuration stored in its factory partition. A factory restore deletes the following items: • Software updates •... -
Page 48: Troubleshooting
Logs contain information about system activities and configurations to help you troubleshoot issues. Enable or Disable Logs You can choose whether to enable or disable the system logs of your G200 system. Procedure 1. In the system web interface, go to Diagnostics > System Logs. -
Page 49: Viewing System Alerts
The Device Status page of the system web interface lists the status of the components and services that your G200 system is using. You can select the yellow exclamation mark in the Status column and get to the corresponding page to fix the issue. -
Page 50: Contact Technical Support
34 Contact Technical Support If you can’t make test calls successfully and you have verified that the equipment is installed and set up correctly, contact your Poly distributor or Poly Technical Support. Procedure 1. Go to the Poly Online Support Center.
Need help?
Do you have a question about the G200 and is the answer not in the manual?
Questions and answers