Table of Contents
Advertisement
Advertisement
Table of Contents

Related Manuals for Avios BushMule V2


Summary of Contents for Avios BushMule V2
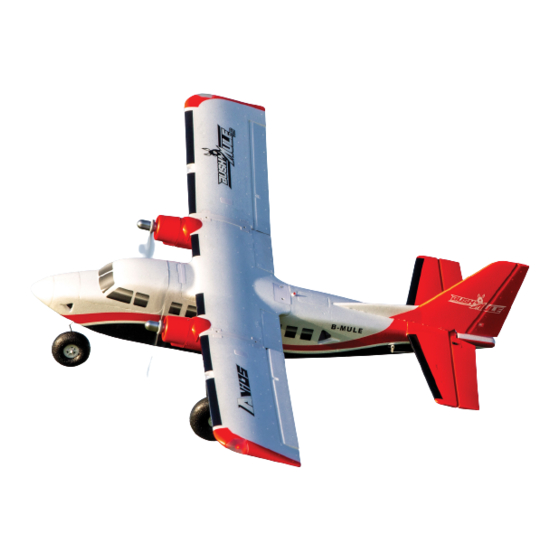
- Page 1 1500MM TWIN ENGINED WORKHORSE OF THE SKY INSTRUCTION MANUAL...
- Page 2 Read this instruction manual fully so as to become completely familiar with the features of this product before operating. Failure to operate this product correctly could result in damage to the product, personal property and cause serious injury. This is a sophisticated hobby product and is NOT a toy.
-
Page 3: Table Of Contents
6. CENTRE OF GRAVITY........................7. HINTS..............................8. OPTIONAL SKIS..........................9. MODEL FLYING PRECAUTIONS..................... 10. PRE-FLIGHT CHECKS........................11. FLYING THE AVIOS BUSHMULE....................12. FROM AVIOS TO THE CUSTOMER....................SPARE PARTS LISTING ................... RECOMMENDED ACCESSORIES FOR THE AVIOS BUSHMULE V2: ..TROUBLE SHOOTING.................. -
Page 4: Introduction
(STOL) machine. Prepare your bush landing strips, snow fields and water runways for this exciting workhorse of the sky. The Avios BushMule V2 is ready to take whatever you can throw at it. It is designed to perform many tasks,and takes everything in its stride, rough runways, water, snow, dropping cargo and FPV flying, the adventure starts today. -
Page 5: Content
CONTENTS: 1. Fuselage 6. Hardware 2. Centre and outer wings 7. Propeller 3. Tail assembly 8. Landing gear / Ski's 4. Sports Canopy 9. Wing struts 5. FPV canopy 10. Auxiliary fins for use with optional floats... -
Page 6: Assembly
3. If you have no need to remove these parts or if you are going to push the BushMule to its extreme flight envelope, the Avios team suggests that you apply either foam safe contact adhesive or a long set time 2-part epoxy on these tail surfaces. -
Page 7: Installation Of Main Wing
3. Installation of main wing 1. The main wing center piece houses the motors, ESC’s, flaps, flap servos and main wiring harness. 2. Please center all servos, and flex the ailerons on the outer wing panels. 3. Connect all control rods to the control horns with the supplied hardware to the flaps and ailerons. 4. -
Page 9: Electronic Avionics Set Up
4. Electronic avionics set up 1. The BushMule V2 ideally uses a 6 channel receiver as a minimum to get the best from the model. Bind your chosen receiver to your transmitter, and plug in all the servos to the corre- sponding channels. - Page 10 Basic assembly of your BushMule V2 is complete. Now perform a final check on all screws, bolts and components, ensuring all are secure and firmly in place.
- Page 11 Aileron Elevator Rudder Roll left Aileron (Roll) Roll right Pitch up Elevator (Pitch) Pitch down Yaw left Rudder (Yaw) Yaw right CONTROL THROWS: 20 -40 mm 15-30 mm 15-30 mm 20 -40 mm Elevator Rudder 50-60 mm ~ Aileron 10 - 15 mm 10 - 15 mm * Elevator ‘low rates’...
-
Page 12: Centre Of Gravity
The centre of gravity or CoG is the most important measurement for a successful maiden flight of any model airplane. The suggested CoG for the Avios BushMule V2 is 50-60mm from the leading edge of the wing with your flight battery installed. We suggest aiming for the 50mm forward position for initial flights. -
Page 13: Hints
Balancing the 3 bladed propellers helps to keep vibration to a minimum, and helps with efficiency of the drive train. With your Avios BushMule V2 fully built and ready for flight now is a perfect time to go over your model once more to make sure nothing has been overlooked, check that all screws, nuts and bolts are secure, and that your flight control surfaces are set correctly and secure. -
Page 14: Model Flying Precautions
• If this is the first flight with your BushMule V2, double check the CoG is at the correct position. If not adjust the battery position inside the battery area to achieve the required balance point. -
Page 15: Flying The Avios Bushmule
• The BushMule V2 has a very wide flight envelope, and will happily fly very slowly with the help of the large barn door style flaps, the BushMule V2 is a true STOL (Short Take Off and Landing) workhorse. - Page 16 Even though the optional floats have the provision for a water rudder it’s a lot easier to taxi on water, snow or rough fields with this additional mix. Flying the BushMule V2 with this throttle / rudder mix also opens up the Bushmule’s wild side with flat spins and crazy antics.
-
Page 17: Spare Parts Listing
SPARE PART LISTING 1: BushMule V2 Canopy w/ BushMule V2 Wing Center FPV Canopy Hatch: Decals : Section: Part No. Part No. Part No. 9310000453-0 9310000448-0 9310000311-0 Black Foam Nose Cone: Foam Wheel Set (EPO) AeroStar 3536-850KV w/Plastic Hubs: Brushless Motor w/X Mount: Part No. - Page 18 SPARE PART LISTING 2: BushMule V2 Fuselage w/ BushMule V2 Outer Wing BushMule V2 Horizontal Decals Panels w/Decals Stabilizer w/Decals Part No. Part No. Part No. 9310000447-0 9310000449-0 9310000450-0 BushMule V2 Vertical BushMule V2 Motor BushMule V2 Decal Set Stabilizer w/Decals Cowl Set Part No.
-
Page 19: Recommended Accessories For The Avios Bushmule V2
RECOMMENDED ACCESSORIES FOR THE AVIOS BUSHMULE V2: OrangeRx Tx10i 10ch 2.4GHz Turnigy T6A-V2 AFHDS 2.4GHz RADIOMASTER TX16S 2.4GHz DSMX Radio System 6Ch Transmitter w/Receiver 16ch Multi-Protocol OpenTx Transmitter Part No. Part No. Part No. 9171001399-0 9114000074-0 9914000015-0 ZIPPY Compact 3000mAh... -
Page 20: Trouble Shooting
• hobbyking.com Or see our Facebook page at: • Facebook.com/hobbyking And don’t forget you can see the product video for this model and the entire Avios range at: • youtube.com/hobbykinglive For your next Avios purchase be sure to visit: •...
Need help?
Do you have a question about the BushMule V2 and is the answer not in the manual?
Questions and answers