Table of Contents
Advertisement
Advertisement
Table of Contents

Related Manuals for Avios Grand Tundra


Summary of Contents for Avios Grand Tundra
- Page 1 INSTRUCTION MANUAL...
-
Page 2: Safety Instructions
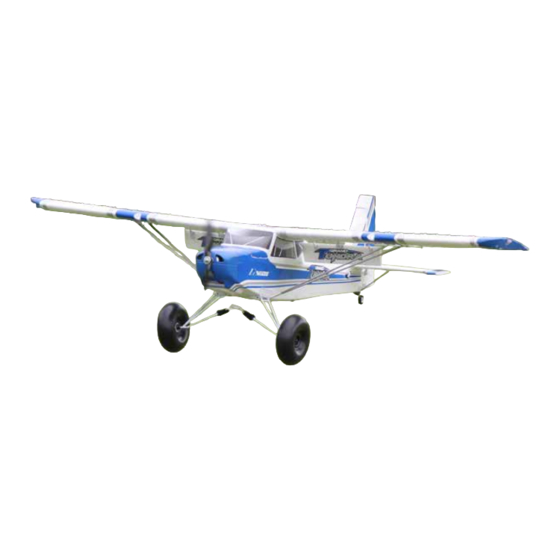
SAFETY INSTRUCTIONS 1. Please read this manual carefully and follow the instructions of the manual before you use this products. 2. Our airplane is not a toy, which is only suitable for experienced pilot. Or if you are a novice pilot, please operate under the guidance of an experienced pilot. - Page 3 The Grand Tundra happily flies on 4S, however, on 6S you'll realize there is another side to the GT. This is when the GT comes to life as it's no ordinary PNF model. If you have never tried skis or floats then this plane is for you and its something that everyone must try as there is nothing like landing or taking off on water.
- Page 4 ASSEMBLY (PNF) 1. Out of the box your GT comes with reinforced foam hinge hinges. However before assembly can begin, Each hinge line must be fixed back and forth 5-6 times to reduce tension and load on the servo. Do thos for all control surface before continuing. 2A.
- Page 5 2B. Now install the main wheels to the shaft, Hold the wheels in the shaft with supplied Nylon insert nuts, busure do not over tigth the nuts for the freely spin of the wheels. 3. Insert the rudder into the hinge socket on the trailig hinge of vertical fin, secure the rudder into place- with the supplied self tapping screw 2.3X10(1pc)while holding the rudder in position, do not over tighten the screw for the freely moviaaaa 2.3X10mm...
- Page 6 2.3x6 2.3X6mm 2.3X6mm 2.3X6mm 6. Try to place the tail brace into right slots and then secure them into place with the screws2.3X10 (4pcs ,2 for each side)
- Page 7 2.3X6mm 3X10mm bolt(4pcs) 3.0X10mm...
- Page 8 With the wing struts packed in a separate bag in each, secure the tube to the main trunk of the struts respectively with provided screws come with the struts’ bag(1.7X4mm). Make sure the plastic securing bits at wing end should bent to the same side before screwing on. Attach each wing strut to their respective sides (A), both struts are marked “L”...
- Page 9 Also please choose the right prop to install to match what battary will you using, The 17X8 FOR 4 cells the 16X8 for 6cells.
- Page 10 10. Install your choice of receiver (minimum 6 channel) Congratulations, basic assembly of your Grand Tundra is now complete. Please perform a final check on all screws, bolts and components, ensuring all are secure and firmly in place.
- Page 11 SETTING UP YOUR MODEL:...
-
Page 12: Control Throws
25mm 4. Flaps on the Grand Tundra will need to be set for 3 stages (up/no flap, mid flap and full down flap). Either via your radio or mechanically by turning the clevis’s on the flap control rod (or via both in most cases), set mid flap to approximately 45 degrees and full flaps to approximately 90 degrees to the wing. - Page 13 5. The recommended center of the gravity (CG) for the Grand Tundra is approximately 75-80mm from the leading edge of the wing. Your Grand Tundrawill balance within the CG range with the advised battery secured with the Avios battery straps.
- Page 14 GRAND TUNDRA OPTIONS: 2.3x10 2.3X10mm...
- Page 15 3x10(4pcs) 2.3x10 2.3X10mm 3.0X10mm 2.6X10mm...
- Page 18 Grand Tundra Optional Skis...
- Page 19 HINTS AND TIPS WHEN FLYING YOUR GT. Take off - When you have set up your Grand Tundra depending on the ground surface you will need to hold a little up elevator when taxiing. Once lined up on your runway slowly increase throttle on keeping the plane flying straight with the use of rudder control, Once airborne simply keep the GT flying with a good rate of climb not letting the GT off the throttle until you have climbed to good altitude.
Need help?
Do you have a question about the Grand Tundra and is the answer not in the manual?
Questions and answers