
Related Manuals for Avios Albatross HU-16


Summary of Contents for Avios Albatross HU-16
- Page 1 INSTRUCTION MANUAL For intermediate to advance pilots only. Turnigy 9g splash proof...
- Page 2 WARNING Please read this instruction manual fully and become completely familiar with the features of this product before operating. Failure to operate this product correctly could result in damage to the product, personal property and cause serious injury. This is a sophisticated hobby product and is NOT a toy. It must always be operated with caution, common sense and some basic mechanical ability.
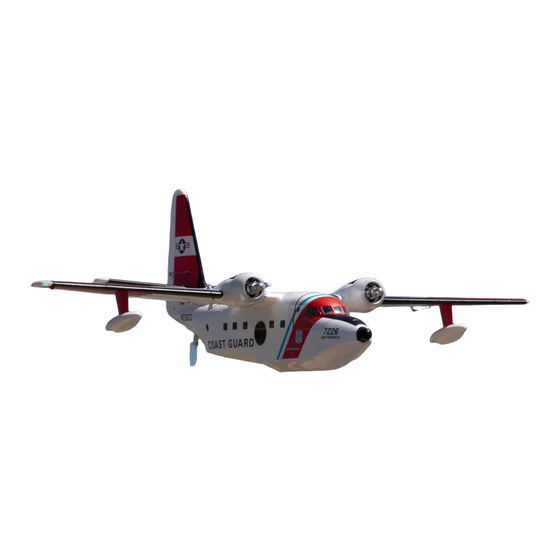
- Page 3 Aerostar ESC's, and a clear more discrete water rudder. The Avios Albatross V2 is the same quality that you have come to expect from the Avios brand and is also very straightforward to build due to the low parts count.
- Page 4 ASSEMBLY Step 1: Slide the wing into position on the fuselage. Step 2: Screw the wing into place with the 64mm x 4mm wing bolts supplied. Step 3: Slide into each side of the wing center section one of the glass fibre wing joiners. Ensure these are the correct way up, there is a very slight dihedral angle which should be to the top.
- Page 5 albatross Step 4: Join the connectors for the aileron servo and the wing tip lights. Step 5: Slide the outer panels onto the center section. Step 6: Use 4 off 14mm x 3mm Hex screws to secure the outer panels.
- Page 6 Step 7: Apply either slow setting CA or foam glue to the tailplane seat on the fuselage. Step 8: Apply a small amount of glue to the tailplane locator. Step 9: Position the tailplane onto the rear of the fuselage.
- Page 7 albatross Step 10: Ensure you pass the connector through the slot in the tailplane. Check the tailplane is correctly aligned as the glue sets. Step 11: Connect the rudder servo extension lead. Step 12: Apply slow setting CA or foam glue to the area where the front of the fin will sit.
- Page 8 Step 13: Apply glue to the base of the fin as shown. Step 14: Locate the bottom rudder hinge into the hole in rear of fuselage, do not glue. Step 15: Secure the fin using the 2 off 50mm x 2mm PK screws. You will find it easier to locate the front screw first,then the rear.
-
Page 9: Propeller Installation
albatross Step 16: Secure the rudder bottom hinge with a 14mm x 3mm PK screw. Propeller installation: Please note that the props rotate in towards each other. Step 17: Slide the propeller onto the motor shaft. - Page 10 Step 18: Ensure the hex on the back of the prop locates with the hex on the motor shaft. Step 19: Attach the propeller spinner nut. Step 20: Tighten the spinner by hand until it's snug with the prop, due to an insert in the spinner this is perfectly secure.
- Page 11 albatross Step 21: Assembly of the wing floats. Step 22: Position the float into the mounting holes on the outer wing panel. Step 23: Attach float using 2 off 14mm x 3mm PK screws.
- Page 12 15% differential motor thrust. The basic assembly of your Avios Albatross is now complete. Please perform a final check on all screws, bolts and components, ensuring all are secure and firmly and correctly in place before the final set-up stage below.
- Page 13 albatross CONTROL SET-UP AND CG: Rudder. Elevator. Elevat Ailerons. Low Rates: 10mm Low Rates: 8mm Low Rates: 15mm High Rates: 20mm High Rates: 14mm High Rates: 24mm 10-20mm 8-14mm 15-24mm 15-24mm 8-14mm 10-20mm 65-70mm Flaps 25 degrees (25mm) 45 degrees (45mm) CG 65-70mm C of G is 65-70mm from leading edge measured from the center of the wing.
-
Page 14: Control Direction Tests
CONTROL DIRECTION TESTS: Assemble the aircraft and bind your transmitter to the receiver before performing this test. After binding a transmitter to the aircraft receiver, set the trims and sub-trims to 0, then adjust the clevises to center the control surfaces. Move the controls on the transmitter to make sure the aircraft control surfaces move in the proper direction. -
Page 15: Taking Off From Grass
albatross FLYING THE ALBATROSS V2: Although not aimed at the beginner the Albatross is a very straightforward aircraft to fly, it's characteristics are very stable and forgiving in flight and taking off of the water or from smooth grass. It looks superb in the air and low passes over water really makes it look the part. -
Page 16: Model Flying Precautions
MODEL FLYING PRECAUTIONS: • Select your flying area carefully. Always choose an open space that is clear and not obstructed by trees, poles, pylons, and buildings etc. Also ensure you are away from people and crowded areas. Avoid flying in areas with roads, near water, or within close proximity to full size air traffic. •... -
Page 17: Troubleshooting
albatross TROUBLE SHOOTING: Motors do not run: 1. Battery is not fully charged (Charge the battery). 2. Transmitter battery is low (Charge or install a fully charged battery). 3. Motors are not connected properly (Check the motor to ESC connections and the ESC to battery connections). -
Page 18: Spare Parts
USCG Albatross Cowl set USCG Albatross Tip floats set USCG Albatross Water Rudder SKU: 9310000465-0 SKU: 9310000466-0 SKU: 9310000467-0 USCG Albatross Nose cone USCG Albatross decal set Avios BushMule/Albatross - SKU: 9310000468-0 SKU: 9310000469-0 AeroStar 3536-850KV Brushless Motor w/X Mount SKU: 9310000444-0... - Page 19 Avios Albatross HU-16/BushMule Avios Albatross HU-16/BushMule Avios Albatross HU-16 - Navigation V2 - Propeller Set 10x8 3-Blade V2 - Spinner and Hub Set (2pcs) Lights Set Std/Reverse (2pcs) SKU: 9310000394-0 SKU: 9310000396-0 SKU: 9310000393-0 Avios Albatross HU-16 - Avios Albatross HU-16 - Light...
-
Page 20: Recommended Accessories
RECOMMENDED ACCESSORIES Turnigy 9X 9Ch Transmitter OrangeRx R720X V3 7Ch OrangeRx Tx10i Mode 2 w/ Module & iA8 Receiver 2.4GHz DSMX EU Version SKU: 9171001399-0 SKU: 9114000070-0 SKU: 9171001395-0 OrangeRx RSF08SB Futaba Turnigy 3300mAh 4S 30C Turnigy Nano-Tech Plus 3300mAh S-FHSS/FHSS-2 Lipo Pack XT-60 4S 70C Lipo Pack w/XT90... - Page 21 APEX CE SPECIALISTS LIMITED UK REP 89 Princess Street, Manchester, M1 4HT, UK APEX CE SPECIALISTS LIMITED Unit 3D North Point House, North Point Business Park, New Mallow Road, Cork, T23 AT2P, Ireland...
Need help?
Do you have a question about the Albatross HU-16 and is the answer not in the manual?
Questions and answers