Table of Contents
Advertisement
Instruction Manual
Suitable for intermediate pilots
The Grumman HU-16 Albatross is a large twin radial engined
amphibious flying boat that saw service with the US Air Force, US
Navy and the US Coastguard. It's primary role was Search and
Rescue and was used extensively in Korea for combat rescue and
very quickly gained a reputation as a rugged and seaworthy airplane.
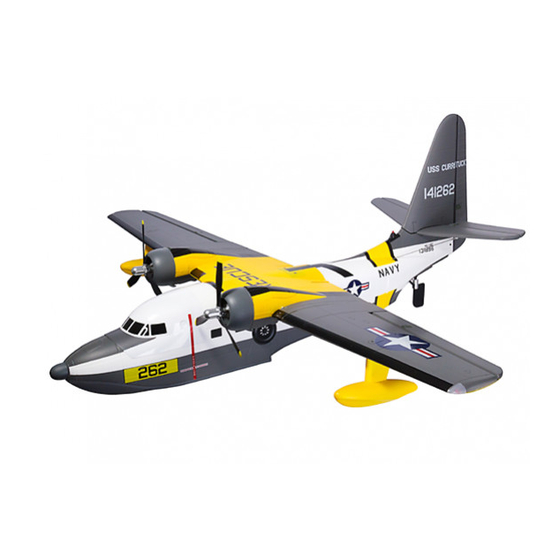
The Avios Albatross captures the looks and ruggedness of the full
size seaplane beautifully and it is right at home taking off of water but
equally happy sliding along a smooth grass runway for take off. The
version we have decided on is the US Navy air-sea rescue scheme
and is supplied with all the decals pre-applied and includes landing/
take-off flaps. The Albatross boasts many other features, these
include water resistant, reversible Aerostar ESC's, water rudder and
navigation lights.
The Avios Albatross is the same quality that you have come to expect
from the Avios brand and is also very straightforward to build due to
the low parts count.
Advertisement
Table of Contents

Related Manuals for Avios Albatross


Summary of Contents for Avios Albatross
-
Page 1: Instruction Manual
Aerostar ESC's, water rudder and navigation lights. The Avios Albatross is the same quality that you have come to expect from the Avios brand and is also very straightforward to build due to the low parts count. -
Page 2: Safety Instructions
SAFETY INSTRUCTIONS 1. Please read this manual carefully and follow the instructions before you use this product. 2. This airplane is not a toy, due to it's advanced flying qualities it is only suitable for pilots with intermediate or higher experience. - Page 3 Propeller: 2 x 10x6 3 Bladed Scale Propeller Servo: 7 x 9g servos Recommended Battery (not supplied): 4S (14.8V) 3000mah or similar Albatross Features: This beautiful model is an accurate 1 : 18 scale replica of the Grumman Albatross. 2. Classic flying boat design.
- Page 4 Assembly Step 1: Slide the wing into position on the fuselage. Step 2: Screw wing into place with the 64mm x 4mm wing bolts supplied...
- Page 5 Albatross Step 3: Slide into each side of the wing center section one of the aluminum wing joiners. Ensure these are the correct way up, there is a very slight dihedral angle which should be to the top. Step 4: Join the connectors for the aileron servo and the wing tip...
- Page 6 Step 5: Slide the outer panels onto the center section. Step 6: Use 4 off 14mm x 3mm Hex screws to secure the outer panels.
- Page 7 Albatross Step 7: Apply either slow setting CA or foam glue to the tailplane seat on the fuselage. Step 8: Apply a small amount of glue to the tailplane locator.
- Page 8 Step 9: Position the tailplane onto the rear of the fuselage. Step 10: Ensure you pass the connector through the slot in the tailplane. Check the tailplane is correctly aligned as the glue sets.
- Page 9 Albatross Step 11. Connect the rudder servo extension lead. Step 12: Apply slow setting CA or foam glue to the area where the front of the fin will sit.
- Page 10 Step 13: Apply glue to the base of the fin as shown. Step 14: Locate the bottom rudder hinge into the hole in rear of fuselage, do not glue.
- Page 11 Albatross Step 15: Secure the fin using the 2 off 50mm x 2mm PK screws. You will find it easier to locate the front screw first, then the rear. Step 16: Secure the rudder bottom hinge with a 14mm x...
- Page 12 Step 17: Slide the propeller onto the motor shaft. Step 18: Ensure the hex on the back of the prop locates with the hex on the motor shaft.
- Page 13 Albatross Step 19: Attach the propeller spinner nut. Step 20: Tighten the spinner by hand until it's snug with the prop, due to an insert in the spinner this is perfectly secure. A small drop of plastic friendly loctite can be used if you wish.
- Page 14 Step 21: Assembly of the wing floats Step 22: Position the float into the mounting holes on the outer wing panel.
- Page 15 Albatross Step 23: Attach float using 2 off 14mm x 3mm PK screws Step 24: Repeat for the other float.
- Page 16 Step 25: Install the receiver of your choice. We recommend that you use a minimum of a 7ch receiver if you wish to use the reversing function of the ESC's. You will also require a Y lead for the nav light function and possibly one for the 2 ESC's. You can of course mix the 2 throttles in your transmitter and couple these with the rudder function.
-
Page 17: Center Of Gravity
For initial flights keep towards the forward mark, this can then be moved rearwards as you get used to the flying characteristics of the Albatross. The prototype with a Zippy 4S 3000mah (285g) positioned as shown flew with a C of G of 80mm from the leading edge and this was deemed as perfect for most flying styles. - Page 18 Albatross THROTTLE CALIBRATION: 1. Turn on your transmitter and move the throttle stick to full throttle (100%).. 2. Connect the battery pack to the ESC, wait for about 2 seconds and the ESC will beep twice quickly 4 times in a row. Once you have heard the last of the 4 double beeps pull the throttle to the closed position (0%) and wait for the arming sequence beeps.
- Page 19 Once airborne climb to a satisfactory height and get used to the Albatross, it is a delight to fly. Approaches and landings are a dream with flaps or no flaps, if having to land in a strong crosswind then it is best to not use the flaps.
- Page 21 Albatross...
- Page 23 Albatross We reserve the right to change or modify the specification and the product design of this product without prior notice.
Need help?
Do you have a question about the Albatross and is the answer not in the manual?
Questions and answers