Table of Contents
Advertisement
Available languages
Available languages
Advertisement
Chapters
Table of Contents

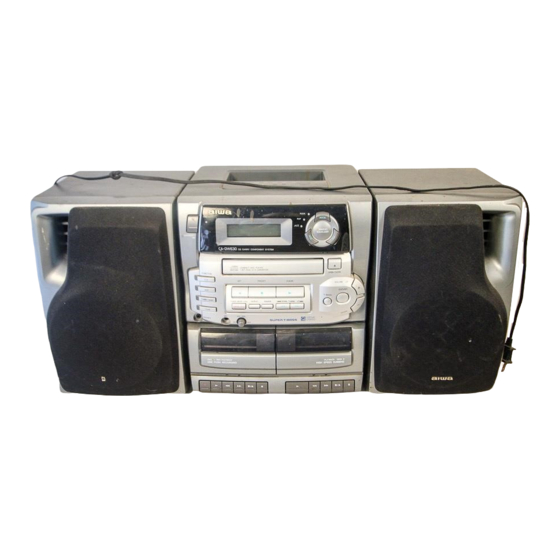
Related Manuals for Aiwa CA-DW630


Summary of Contents for Aiwa CA-DW630
- Page 1 88-CT4-905-01 980409 BA0-I-S COM~ACT DIGITAL AIJDN2...
-
Page 2: Owner's Record
(you will find it at the rear of the unit) and serial number (you will find it in the battery compartment) in the space provided below. Please refer to them when you contact your AIWA dealer in case of difficulty. ‘ode’No ‘eria’NO NOTE... -
Page 3: Table Of Contents
Extension cord - To help prevent electric shock, do not use a polarized AC power plug with an extension cord, receptacle, or other outlet unless the polarized plug can be completely inserted to prevent exposure of the blades of the plug. When not in use - Unplug the AC power cord from the AC outlet or remove al’1th~ batteries if the unit will not be used for several months or more. -
Page 4: Power Supply
POWER SUPPLY USING ON AC HOUSE CURRENT Connect the AC cord as illustrated below. to the inlet of the unit ~ to an AC outlet CAUTION Use only the supplied AC cord. Use with other cords may result in the risk of fire. USING ON BATTERIES Open the lid of the battery compartment insert eight R20 (size D) batteries, not supplied, as illustrated... -
Page 5: Remote Control
REMOTE CONTROL Inserting batteries Detach the battery cover on the rear of the remote control and insert two R6 (size AA) batteries. When to replace the batteries The maximum operational distance of the remote control should be approximately 5 meters (16 feet). When this distance decreases, replace the batteries with new ones. -
Page 6: Manual Tuning
MANUAL TUNING MODE/OSC TUNER Press the TUNER/BAND button repeatedlyto select the desired band. r--FM-AMl Press the+ DOWN or - select a station. Each time the button is pressed, the frequency changes. During FM stereo reception, “STEREO” is displayed. To play a tuned station when the power is off (Direct Play Function) Press the TUNER/BAND button on the main unit. -
Page 7: Presetting Stations
PRESETTING STATIONS — The unit store a total of 24 preset stations for FM and AM. However, up to 16 stations can be preset for each band. When a station is stored, a preset number is assigned to the station. Use the preset number to tune in to a preset station directly. -
Page 8: Cd Operations
CD OPERATIONS REPEAT REMAIN LOADING A DISC Press the CD button, then press the 4 OPEN/ CLOSE button to open the disc compartment. Load a disc with the label side up and close the disc compartment. Total playing time Total number of tracks PLAYING A DISC Load a disc. -
Page 9: Repeat Play
REPEA’TPLAY One track, all the tracks or programmed repeatedly. Press the REPEAT button to display “REPEAT ALL” or “REPEAT 1“. To repeat all the tracks, display “REPEAT ALL”. To repeat the current track only, display “REPEAT 1”. To cancell repeat play, press the REPEAT button to turn off “REPEAT”. -
Page 10: Tape Operations
TAPE OPERATIONS INSERTING A TAPE Use Type I (normal) tapes only. Tapes are played back on one side only. Press the TAPE button and press the WA to open the cassette holder. Deck 1 Insert a tape with the exposed side down and the side to be played facing out. -
Page 11: Sound
SOUND ADJUSTING THE VOLUME CONTROL Press the VOLUME buttons. The volume level is automatically set to 21 when the power is turned off with the volume level set to 22 or more. SUPER T-BASS SYSTEM The T-BASS system enhances the realism of low-frequency sound. -
Page 12: Recording From A Cd Or The Tuner
RECORDING FROM A CD OR THE TUNER Note that recording is done on only one side of the tape. Use Type I (normal) tapes only. Insert the tape to be recorded on into deck 1. Insert the tape with the side to be recorded out. -
Page 13: Dubbinga Tape
DUBBING A TAPE @-1-141fl I.y=l.l-lg Note that recording is done on only one side of the tape. Use Type I (normal) tapes only. Press the TAPE button. Inselrt a tape to be recorded on into deck 1 with the side to be recorded on facing out. Inselrt a tape to be played into deck 2 with the side to be played facing out. -
Page 14: Setting The Timer
SETTING THE TIMER The unit can be turned on at a specified time every day with the built-in timer. Preparation Make sure the clock is set correctly. Press the TIMER button on the remote control to display ~, and press the SET button within 4 seconds. -
Page 15: Setting The Sleep Timer
SETTING THE SLEEP TIMER 1110:: The unit can be turned off automatically Use the remote control. Press the SLEEP button. Within 4 seconds, press the+ to specify the time until the power is turned off. Each time the button is pressed, the time changes between 5 and 240 minutes in 5-minute steps. -
Page 16: General
CARE AND MAINTENANCE Occasional care and maintenance of the unit and the software are needed to optimize the performance unit. To clean the cabinet Use a soft and dry cloth. If the surfaces are extremely dirty, use a soft cloth lightly moistened with mild detergent solution. -
Page 17: Troubleshooting Guide
TROUBLESHOOTING GUIDE If the unit fails to perform as described in these Operating Instructions, check the following guide. GENERAI. There is no sound. Is the AC cord connected properly? Was an incorrect function button pressed? Power is not turned on. Is the AC cord connected to the unit with old batteries inserted? + Remove all the batteries and disconnect the AC cord. -
Page 18: Registro Del Propietario
ADVERTENCIA PARA REDUCIR EL RIESGO DE INCENDIOS O SACUDIDAS NO EXPONGA ESTE APARATO A LA LLUVIA NI A LA HUMEDAD. “CAUTION: TO REDUCE THE RISK OF ELECTRIC SHOCK, DO NOT REMOVE COVER (OR BACK). NO USER-SERVICEABLE PARTS INSIDE. REFER SERVICING TO QUALIFIED SERVICE PERSONNEL.”... - Page 19 medida de seguridad del enchufe de alimentacion anulada, no fuerce el enchufe dentro de un tomacorrientes. Cable de aiimentacion Cuando se desconecte el cable de alimentacion, sujetarlo por el enchufe. No tirar del cable. - No tocar e! enchufe del cable con Ias manes mojadas, ya que puede producirse un incendio o una descarga electrica.
-
Page 20: Electrica
ALINIENTACION ELECTRICA USO A CORRIENTE CONTINUA Conectar’ el cable de alimentacion como se indica en la figura. toma de alimentacion al tomacorrientes PRECAIJCION Usar solamente el cable de alimentacion otros cables puede producir un incendio. USO CON PILAS Abrir la ta,pa del compartimiento de [as pilas situada parte trasera e insertar... -
Page 21: Control Remoto
CONTROL REMOTO Insertion de Ias pilas Abrir la ta~a de Ias Dilas, en la ~arte trasera del control remoto, e’insertar dos pilas R6”(tamafio AA). Cuando cambiar Ias pilas La distancia maxima de funcionamiento es de aproximadamente 5 metros (16 pies). Cambiar Ias pilas por nuevas cuando se reduzca esta distancia. -
Page 22: Sintonia Manual
SINTONiA MANUAL TUNER MODE/OSC Pulsar repetidamente el boton para seleccionar la banda deseada. ‘FM—AM Pulsar repetidamente el boton UP para seleccionar una emisora. La frecuencia cambia cada vez que se pulsa el boton. Durante la recepcion de FM en estereo, se indica “STEREO”... -
Page 23: De Emisoras
IVIEMORIZACION DE EMISORAS En la memoria del aparato se pueden almacenar un total de 24 emisoras de FM y AM. No obstante, el numero maximo de emisoras que pueden almacenarse de 16. Cuando se memoriza una emisora, se la asigna un numero de memoria. -
Page 24: Manejo Del Lector De
MANEJO DEL LECTOR DE CD REPEAT REMAIN CARGA DE DISCOS Pulsar el boton CD y Iuego oprimir OPEN/CLOSE para abrir el compartimiento disco. Cargar un disco con el Iado de la etiqueta hacia arriba y cerrar el compartimiento. Tiempo total de reproduction Ntimero total de pistas REPRODUCTION DE DISCOS... - Page 25 REPETITION DE LA REPRODUCTION Se puede repetir la reproduction de una pista, todas Ias pistas o Ias pistas programadas. Pulsar el boton REPEAT de modo que se indique “REPEAT ALL” o “REPEAT 1“ en la pantalla. Para repetir la reproduction de todas Ias pistas, la pantalla debe indicar “REPEAT ALL”.
-
Page 26: Manejo De La Cinta
MANEJO DE LA CINTA INSERCION DE CINTAS Utilizar solamente cintas de tipo I (normales). Solamente se reproduce un Iado de Ias cintas Pulsar el boton TAPE y presionar para abrir el portacassette. Lado que se va a reproducer Platina 1 ~.:+”... -
Page 27: Control De Volumen
CONTROL DE VOLUMEN Pulsar Ios botones VOLUME. Al apagarse el aparato, el nivel de volumen se ajuste automaticamente en 21 cuando estaba ajustado a un nivel de 220 mas alto. SISTEMA SUPER T-BASS El sistema T-BASS acentua el realismo del sonido de bajas frecuencias. -
Page 28: Grabaciondesde Un Cd O El Sintonizador
GRABACION DESDE UN CD O EL SINTONIZADOR Recuerdese que la grabacion se hate solamente en un Iado de la cinta. Usar solamente cintas de tipo I (normales). Insertar la cinta que se va a grabar Insertar la cinta con el Iado que se va a grabar encarado hacia afuera. -
Page 29: De Cintas
COPIA DE CINTAS Recordar que la grabacion se hate solamente de la cinta. Utilizar solamente cintas de tipo I (normal es) Pulsar el boton TAPE. Insertar la cinta en la que se va a grabar platina 1 con en Iado a grabar af uera. -
Page 30: Ajuste Del Temporizador
AJUSTE DEL TEMPORIZADOR El aparato puede encenderse a cualquier hors especificada del dia mediante el temporizador incorporado. Preparatives Asegurarse de que la horses corrects. Pulsar el boton TIMER del control modo que se indique @ en la pantalla, el boton SET durante un es~acio seuundos. -
Page 31: Ajuste Del Temporizador De Desconexion
AJUSTE DEL TEMPORIZADOR DESCONEXION 2...-k-3z El aparato puede apagarse automaticamente especificada. Utilizar el control remoto. Pulsar el boton SLEEP. Dentro de un es~acio de 4 seuundos, boton <0 para especificar hasta la desconexion del aparato. Cada vez que se pulsa el boton, el tiempo cambiar entre 5 y 240 minutes en pasos de 5 minutes. -
Page 32: Cuidados Y Mantenimiento
CUIDADOS Y MANTENIMIENTO Es necesario cuidar y mantener periodicamente para optimizar su funcionamiento, Limpieza de la supetitcie externa Usar un patio suave y seco. Si esta muy sucio, utilizar un pafio suave Iigeramente humedecido con una solution de detergence suave. No utilizar solventes fuertes como alcohol, bencina o diluyente ya que estos productos pueden datlar el acabado del aparato. -
Page 33: De Problemas
DIAGNOSTIC DE PROBLEMAS Si el aparato no funciona de la manera descrita en estas instrucciones de funcionamiento, comprobar siguientes. GENERAL No hay sonido LEsta conectado correctamente el cable de alimentacion? zSe ha pulsado un boton de funcion incorrect? No se enciende el aparato LEsta el cable de alimentacion conectado al aparato y Ias pilas estan gastadas? - Page 34 Pour votre commodite, rioter clans I’espace reserve a cet effet ci-dessous Ie numero de modele (indique au dos de I’appareil) et Ie numero de serie (indique clans Ie compartment a piles). Toujours mentioner numeros clans toutes Ies relations avec Ies revendeurs AIWA en cas de probleme. ‘OdemOde’e~NOdeserie~ FRANgAIS PRECAUTIONS D’INCENDIE...
- Page 35 Cordon d’alimentation secteur - Pour debrancher Ie cordon d’alimentation tirer en Ie tenant par la fiche. Ne pas tirer sur Ie cordon proprement alit. - Ne jamais manipuler Ie cordon d’alimentation avec des mains mouillees, car cela pourrait provoquer un feu ou une decharge electrique. - Les cordons d’alimentation doivent &re solidement fixes pour eviter qu’ils ne soient plies, pinces, ou qu’on ne...
-
Page 36: Alimentation
ALIMENTATION ALIMENTATION SUR LE SECTEUR Raccorder Ie cordon secteur comme indique ci-dessous. O vers la prise AC de I’appareil vers la prise secteur ATTENTION Utiliser exclusivement Ie cordon d’alimentation L’utilisation d’autres cordons risque de provoquer un feu. ALIMENTATION SUR PILES Ouvrir Ie couvercle du Iogement des piles au dos de I’appareil et inserer huit piles R20 (taille D), non fournies, comme indique ci-dessous. -
Page 37: Telecommande
TELtCOMMANDE Insertion des piles Enlever Ie couvercle des piles au dos de la telecommande inserer deux piles R6 (taille AA). Quand remplacer Ies piles La distance de commande maximale de la tel+commande est d’environ 5 metres. Si cette distance diminue, remplacer Ies piles par des neuves. -
Page 38: Accord Manuel
ACCORD MANUEL TUNER MODE/OSC Appuyer de fagonrepetee surlatouche TUNER/BAND pour selectionner r-’”-’”l Appuyer sur la touche < DOWN pour selectionner la station. A chaque pression sur la touche, la frequence change. Pendant une r6ception FM stereo, “STEREO” s’affiche. Pour Iire une station accordee Iorsque I’appareil est hors tension (Fonction de lecture directe) Appuyer sur la touche TUNER/BAND... -
Page 39: Prereglage Des Stations
PREREGLAGE DES STATIONS L’appareil peut memoriser un total de 24 stations prereglees pour Ies gammes FM et AM. Toutefois, il pourra memoriser un maximum de 16 stations pour chaque gamme. Quand une station est memorisee, un numero de prereglage est affecte a cette station. Utiliser ces numeros de prereglage pour accorder directement Ies stations prereglees. -
Page 40: Operations Du Disque
OPERATIONS DU DISQUE REPEAT REMAIN MISE EN PLACE D’UN DISQUE sur la touche puis Appuyer sur la touche OPEN/CLOSE pour ouvrir Ie tiroir du disque. [e disque en place avec son etiquette et refermer Ie tiroir du disque. Temrx de lecture total Nombre total”de plages LECTURE D’UN DISQUE Mettre un disque en place. -
Page 41: Lecture Repetee
LECTURE REPETEE II est possible de repeter la lecture d’une plage, de toutes Ies plages ou des plages programmers. Appuyer sur la touche REPEAT pour afficher “REPEAT ALL” “REPEAT l“. Pour repeter tous Ies plages, afficher “REPEAT ALL”. Pour repeter la plage en tours, afficher “REPEAT 1”. Pour annuler la lecture repetee, appuyer sur la touche REPEAT de faqon a eteindre “REPEAT”. -
Page 42: Operations De La Cassette
OPERATIONS DE LA CASSETTE (+======* :,:: INSERTION D’UNE CASSETTE Utiliser uniquement des cassettes de type I (normales). Les cassettes ne sent Iues que sur une seule face. Appuyer sur la touche TAPE, puis appuyer sur la marque WA pour ouvrir Ie porte-cassette. Platine Inserer une cassette avec Ie cde expose du ruban magnetique oriente vers Ie bas et la face a Iire vers... -
Page 43: Reglage Du Son
REGLAGE DU SON COMMANDE DE VOLUME Appuyer sur Ies touches VOLUME. Le niveau du volume se regle automatiquement quand I’appareil est mis hors tension alors que Ie volume est regle sur 22 ou plus. SYSTEME SUPER T-BASS Le systeme T-BASS ameliore Ie realisme du son aux basses frequencies. -
Page 44: Enregistrement D'un Disque Compact Ou Du Tuner
ENREGISTREMENT D’UN DISQUE COMPACT OU DU TUNER Noter que I’enregistrement ne s’effectue que sur une face de la cassette. Utiliser uniquement des cassettes de type I (normales). Inserer la cassette a enregistrer clans la platine Inserer la cassette avec la face a enregistrer en premier orientee vers I’exterieur. -
Page 45: Copie De Cassette
COPIE DE CASSETTE Noter que I’enregistrement ne s’effectue que sur une face de la cassette. Utiliser uniquement des cassettes de Type I (normales). Appuyer sur la touche TAPE. Inserer la cassette d’enregistrement platine 1 avec la face d’enregistrement vers I’exterieur. Inserer la cassette de lecture clans la platine 2 avec la face de lecture orientee vers I’exterieur. -
Page 46: Reglage De La Minuterie
REGLAGE DE LA MINUTERIE Avec la minuterie integree, il est possible de mettre I’appareil sous tension chaque jour a I’heure specifiee. Preparation S’assurer que I’horloge est reglee correctement. Appuyer sur la touche TIMER de la telecommande pour afficher 0, puis appuyer sur la touche SET clans Ies 4 secondes. -
Page 47: Reglage De La Minuterie D'arret
REGLAGE DE LA MINUTERIE D’ARR~T 2 JEi% La minuterie d’arr~t permet de mettre I’appareil hors tension automatiquement au bout d’une duree specifiee. Utiliser la telecommande. Appuyer sur la touche SLEEP. Dans Ies 4 secondes, appuyer sur la touche ou PP pour specifier la duree jusqu’a ce que I’appareil se mette hors tension. -
Page 48: Soin Et Entretien
SOIN ET ENTRETIEN Pour pouvoir profiter au maximum des performances I’appareil, il faudra de temps en temps nettoyer et entretenir I’appareil et Ies supports audio. Pour nettoyer Ie coffret Utiliser un chiffon doux et sec. Si Ies surfaces sent tres sales, utiliser un chiffon doux Iegerement humecte d’une solution detergence deuce. -
Page 49: Guide De Depannage
GUIDE DE DEPANNAGE Si I’appareil ne fonctionne pas comme decrit clans ce mode d’emploi, verifier Ie guide suivant. GENERALITIES II n’y a pas de son. Le cordon secteur est-il branche correctement A-t-on appuye sur une mauvaise touche ? L’appareil n’est pas sous tension. Le cordon secteur est-il raccorde a I’appareil alors que Ies vieilles piles sent inserees? + Retirer tous Ies piles et debrancher... - Page 52 ‘--- —- Printed in China AIWA CO.,LTD.
Need help?
Do you have a question about the CA-DW630 and is the answer not in the manual?
Questions and answers