Table of Contents
Advertisement
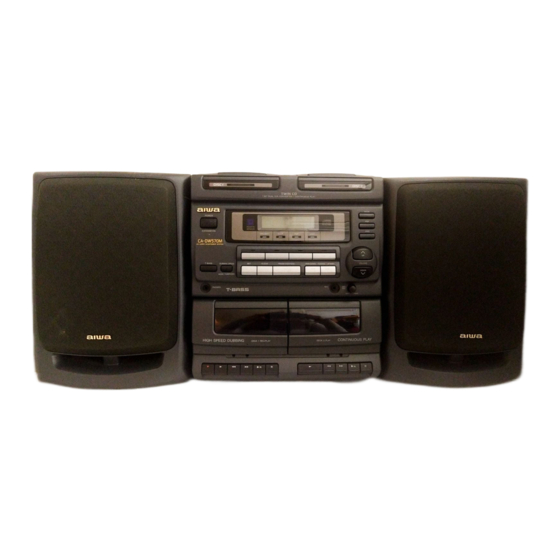
CA"DW570M
U, LH
COMPACT DISC CARRY COMPONENT
SYSTEM
SISTEMA DE COMPONENTS
PORTATIL
CON DISCO COMPACTO
(mIEiE
DIGITAL AUDIO
OWNER'S RECORD
For your convenience,
record the model number
(you will find it on the
rear panel) and serial number (you will find it in the battery compartment)
in the space provided
below. Please refer to them when you contact your
Aiwa dealer in case of difficulty.
Model No.
Serial No.
1
Advertisement
Table of Contents

Subscribe to Our Youtube Channel
Related Manuals for Aiwa CA-DW570


Summary of Contents for Aiwa CA-DW570
- Page 1 (you will find it in the battery compartment) in the space provided below. Please refer to them when you contact your Aiwa dealer in case of difficulty. Model No. Serial No. U, LH...
-
Page 2: Table Of Contents
NOTE This equipment has been tested and found to comply with the limits for a Class B digital device, pursuant FCC Rules. These limits are designed protection against harmful interference installation. This equipment generates, uses, frequency energy and, if not installed with the instructions, may cause harmful interference communications. - Page 3 INDICE PRECAUCIONES ... 5 FUENTES DE ALIMENTACION ....CONEXIONES ... 9 NOMENCLATURE DE LOS CONTROLES CONTROLADOR REMOTO ... 13 AJUSTE DEL RELOJ ....... . 15 AJUSTE DE SONIDO ...
-
Page 4: Installation
PRECAUTIONS Read the Operating instructions carefully and completely before operating the unit. Be sure to keep the Operating Instructions All warnings and cautions in the Operating Instructions should be strictly followed, as well as the safety suggestions Installation Water and moisture --- Do not use this unit near water, such as near a bathtub, washbowl,... -
Page 5: Precauciones
PRECAUCIONES Antes de utilizar la unidad, lea cuidadosamente Guarde Ias instrucciones de manejo para futuras avisos y precauciones de Ias instrucciones deberan seguirse estrictamente, asf como Ias sugerencias indicadas a continuation. Instaiacion Agua yhumedad --- Noutilice estaunidadcercadel Iado de una bafiera, un Iavabo, el fregadero nien un sotano hdmedo,... -
Page 6: Power Supply
OPE/BATT indicator indicator light up. button. you cannot turn the power on with connected only with the attached by Aiwa Co., LTD. Use with of the marks becomes with new your local or a tuned and the... -
Page 7: Different
PRECAUTION Conecte la toma de entrada de CA de esta unidad con el cable de alimentacion de CA suministrado, recomendado por Aiwa Co., Ltd. La utilization podria resultar en el riesgo de incendios de entrada de alimentacion de CA. ALIMENTATION... -
Page 8: Connections
v ., CONNECTIONS Using the center unit coupled with the speakers + Align the speakers center unit. Slide each speaker the height is level with the center unit. Check that the speakers Using the center unit separated from the speakers + E Slide the speakers speaker release knob. -
Page 9: Consult
CONEXIONES Utilization de la unidad central acopiados Alinee Ios altavoces con Ios soportes guia de ambos Iados de la unidad central. Deslice cada altavoz dentro de Ios soportes de la unidad central hasta que la altura de Ios altavoces nivel con la de dicha unidad. Compruebe si Ios altavoces asegurados. -
Page 10: Dubbing
––” I II NAMES OF CONTROLS Front panel DISC 1 compartment @ OPEN button @l DISC 2 compartment @ DISC 1 indicator @ DISC 2 indicator @l POWER b STANDBY/ON @ REMOTE SENSOR @ OPE/BAIT @ Graphic equalizer indicators @ Display window @ Function buttons and indicators (TAPE, TUNER, AUX, CD) @ Graphic equalizer buttons... -
Page 11: Microphone
NOMENCLATURE DE LOS CONTROLES Panel frontal @ Compartimiento del disco 1 (DISC @ Boton de apertura (OPEN) del disco 2 (DISC 2) @ Compartimiento @) Indicador de disco 1 (DISC 1) 6) lndicador de disco 2 (DISC 2) @l Boton de alimentacion (POWER Sensor de control remoto (REMOTE SENSOR) @ Indicador de operation/estado de Ias pilas (OPE/BATT) -
Page 12: Remote Control
r“”- AA (f36) SHIFT FUNCTION REMOTE CONTROL Names of controls+ Numeric buttons and +1 O button T-BASS button SHIFT button II SET button ---@ FUNCTION button POWER button ---@ GEQ button BAND button DOWN SKIP/SEARCH PRESET button CLEAR button -’-@ VOLUME A/V DISC 1 button PRGM button... -
Page 13: Telecommande
CONTROLADORREIVIOTO Nomenclature de Ios controles + Botones numericos y boton +10 Boton de refuerzo de graves Boton de cambio de funcion Boton de ajuste ( II SET) Boton selector de funcion (FIJNCTION) Boton de alimentacion (POWER) Boton del ecualizador grafico (GEQ) Boton selector de banda (BAND) Botones de reduccion/aumento (DOWN/UP... -
Page 14: Setting The Clock
1,3,5 SETTING THE CLOCK When the AC cord is connected the time as follows while the power is off. Keep the II SET button pressed for about half a second. 1,3,5 hour flashes. Press DOWN designate the hour. Press the II SET button to set the hour. The hour stops flashing Press DOWN... -
Page 15: Ajuste Del Reloj
AJUSTE DEL RELOJ Cuando conecte por primers vez el cable de alimentacion parpadeara AM1 2:00. Ajuste la hors de la forma siguiente con la alimentacion desconectada. Mantenga presionado ei bot6n aproximadamente medio segundo. La hors parpadeara. Presione el boton DOWN o designar la hors. -
Page 16: The Sound
G23GS) ADJUSTING THE SOUND Adjusting the volume + Press the VOLUME press the VOLUME The volume display window. Keeping the button pressed Release the button when the volume The volume turned off with the volume The volume VOLUME inserted or when the AC cord is connected. T-BASS + The T-BASS function Press the T-BASS button to emphasize... -
Page 17: Ajuste De Sonido
AJUSTE DEL SONIDO Ajuste del volumen + Presione el boton VOLUME UP para aumentar el boton VOLUME ‘# DOWN para reducirlo. El nivel del volumen se indicara como un numero de O a 16 en el visuaiizador. Si mantiene presionado el boton, el volumen rapidez. -
Page 18: To A Compact Disc
!,,0 LISTENING TO A COMPACT DISC You can place two discs on the DISC 1 and DISC 2 compartment and play them consecutively. Press the Ctl button. The CD indicator Press compartment. Place the disc(s) with the label side up o close the disc compartment You can also load a smaller @ Disc number... -
Page 19: Escucha De Un Disco Compacto
ESCUCHA DE UN DISCO COMPACTO Usted podra colocar dos discos en Ios compartimientos DISC 2, y reproducirlos seguidos. Presione e! boton CD. El indicador CD se encendera. Presione boton OPEN compartimiento de discos. Coloque uno (o dos) disco(s) con la cara de la etiqueta hacia arriba @ y cierre el compartimiento de discos@. - Page 20 DOWN p)ER@w Searching for the start of a track + To restart the track in play, of the button skips back one more track. To skip to the next track, the button skips forward Locating a desired passage+ To search backward on the disc, until the start of the desired To search forward on the disc, hold down the W the start of the desired passage, then release.
-
Page 21: Lecture D'un Disque Compact
ESCUCHA DE UN DISCO COMPACTO Busqueda del comienzo Para reiniciar la cancion en reproduction, H< Cada vez que presione el boton, retrocedera mas. Para saltar a la cancion siguiente, presione el boton WI. vez que presione el boton, avanzara utli~ Localization del pasaje deseado + Para buscar regresivamente en el disco;... -
Page 22: Play Of A Disc
f’-lhf 3 .EAR PRESET PROGRAMMED You can choose desired order for programmed Press the CD button to select the CD function. Wlkl The CD indicator Place the disc(s) with the label side up. “CDI” CLEAR Press the PRGM button on the remote control while pressing the SHIFT button. -
Page 23: Reproduction Programada De Un Disco
REPRODUCTION PROGRAMADA DE UN DISCO Para la reproduction programada, podra elegir hasta 20 canciones de DISC 1 y DISC 2 en el orden que desee. Presione el boton CD para seleccionar de reproductor de discos compactos (CD). Se encendera el indicador Coloque uno(o dos) disco(s) etiqueta hacia arriba. -
Page 24: To The Radio
DUBBING SPEED MODE TUNE R/OSC PRESET — — k’uu”’?i TUNING DOWN UP m EzEl LISTENING TO THE RADIO 1 Press the TUNER button to select FM or AM. The TUNER The band changes ~FM+A/v! SHIFT 2 Press the TUNING M< to tune in to a station. -
Page 25: Escucha De La Radio
ESCUCHA DE LA RADIO Presione el boton TUNER para seleccionar El indicador TUNER se encendera, La banda cambiara en el orden siguiente: l-+ FM+A/vI Presione el boton TUNING I- para sintonizar una emisora. Despues de la escucha, presione el boton POWER para desconectar la alimentacion. -
Page 26: Presetting Stations
TUNING DOWN > llSET PRESETTING STATIONS You can preset up to total of 32 stations However, up to 16 stations Press the TUNER button to select FM or AM. Press the TUNING K to tune in to a station. Press the 11 SET button to preset the station. Stations are assigned beginning... -
Page 27: Memorization De Emisoras
MEMORIZATION DE EMISORAS Usted podra memorizar hasta 32 emisoras Sin embargo, para cada banda solamente emisoras. Presione el boton TUNER para FM o AM. Presione el boton TUNING K< para sintonizar una emisora. Presione el boton SET para memorizar emisora. A cada emisora se Ie asignara un numero de memorizaci6n... -
Page 28: Back A Tape
PLAYING BACK A TAPE The unit plays back the side facing the cassette To play back the other side, turn the cassette Use Type I (normal) tapes. This unit cannot take full advantage of Type IV (metal) and Type II (high/chrome) 1 Press theTAPE button to select the tape function. -
Page 29: Reproduction De Una Cinta
REPRODUCTION DE UNA CINTA La unidad reproducira la cara situada Para reproducer la otra cara, de la vuelta al cassette. Utilice cintas de tipo I (normal). Esta aprovechar todas Ias ventajas de Ias cintas de tipo IV (metal) ni de tipo II (polarization alta/cromo). -
Page 30: From A Compact Disc
PREsET/cDl/cD2 RECORDING FROM A COMPACT DISC Recording is done on the side facing the cassette “ Use Type I (normal) (metal) or Type II (high/chrome) been recorded Insert a cassette into deck 1. Press the @ Insert a cassette. @ The side to be recorded @ Press the cassette Press the CD button. -
Page 31: Grabacion De Un Disco Compacto
GRABACION DE UN DISCO COMPACTO La unidad grabara la cara situada hacia el portacassette, Utilice cintas de tipo I (normal). Si utilizase (metal) o de tipo II (polarization alta/cromo), grabado es posible que nose borrase completamente. Inserte un cassette en el deck 1. Presione el boton para abrir el portacassette. -
Page 32: From The Radio
,!,.” TUNING DOWN UP M EIEl RECORDING FROM THE RADIO Recording is done on the side facing the cassette Use Type I (normal) (metal) or Type II (high/chrome) been recorded Insert a cassette into deck 1. Press the 1/~ @ Insert a cassette. @ The side to be recorded @ Press the cassette ‘$’... -
Page 33: Grabacion De La Radio
GRABACION DE LA RADIO La unidad grabara la cara situada hacia el portacassette. Para grabar, utilice cintas de tipo I (normal). de tipo IV (metal) o de tipo II (polarization ya grabado es posible que nose borrase Inserte un cassette en el deck 1. Presione el boton para abrir el portacassette. -
Page 34: A Tape
DUBBING A TAPE The sound from the cassette in deck 1. Use Type I (normal) (metal) or Type II (high/chrome) been recorded may not be erased completely, Press theTAPE button to select the tape function. The TAPE indicator “TAPE is displayed Insert the playback cassette into deck 2. -
Page 35: Duplication De Una Cinta
DUPLIICACION DE UNA CINTA El sonido del cassette del deck 2 podra duplicarse Para grabar, utilice cintas de tipo I (normal). de tlpo IV (metal) o de tipo II (polarization ya grabado es posible que no se borrase Presialne el boton TAPE para seleccionar funcion de deck de cassettes (TAPE). -
Page 36: Mixing
MICROPHONE Connect a microphone to the MIC jack. Mini plug Select a source to be mixed and play it. Adjust the volume and equalizer setting. Adjust the volume @ Adjust the volume Start singing. To record the microphone Insert a cassette to be recorded button. -
Page 37: Mezcla Con Microfono
MEZCLA CON MICROFONO Conecte un microfono a la toma MIC. Miniclavija Seleccione la fuente que desee mezclar y pongala en reproduction. Ajuste el volumen y el elija ecualizador. Ajusts el volumen del microfono. @ Ajust,s el volumen de la fuente con la que desee mezclar, Comience a cantar. -
Page 38: Maintenance
MAINTENANCE To clean the cabinet a soft cloth lightly moistened with a mild detergent Do not use strong solvents such as alcohol, To clean the heads and the tape paths+ After every 10 hours of use, clean the heads and the tape paths with a head cleaning cassette or cotton... -
Page 39: Mantenimi Ento
IWNTENIMIENTO Pari3 Iimpiar el exterior Utilic(? un pafio Iigeramente humedecido detergence suave. No utilice disolventes bencina, o diluidor de pintura. Para Iimpiar Ias cabezas y Ios trayectos de la cinta + de cada 10 horas de utilization, DI%p:J6s de la cinta con un cassette tri?yectos palillc, de cabezas de algodon humedecido... -
Page 40: Specifications
SPECIFICATIONS Tuner section 87.5 -108.0 MHz (5o kHz steps) Antenna: FM antenna 530-1,710 (1 O kHz steps) 531-1,602 (9 kHz steps) Antenna: Ferrite bar antenna Amplifier section Power output 5W + 5W (4 ohms, EIAJ) FTC rule 4 Watts per channel, Min. -
Page 41: Especificaciones Guia Para La Solucion De Problemas
ESIPECIFICACIONES Seccion del sintonizador Fhrl 87,5 -108,0 MHz (pasos de 50 kHz) Antena: Antena de FM 530-1.710 kHz (pasos de 10 kHz) 531-1.602 kHz (pasos de 9 kHz) Antena: Antena de barra de ferrita Seccion del amplificador Potencia de salida 5 W + 5 W (4 ohmios, EIAJ) Normas de la FTC... -
Page 42: Specifications
SPECIFICATIONS Section tuner 87,5 -108,0 MHz (pas de 50 kHz) Antenne : Antenne 530-1.710 (pas de 10 kHz) 531-1.602 (pas de 9 kHz) Antenne : Antenne a barre de ferrite Section amplificateur Puissance de sortie 5 W + 5 W (4 ohms, EIAJ) Reglementation 4 watts par canal,... - Page 44 AIWA CO.,LTD.
Need help?
Do you have a question about the CA-DW570 and is the answer not in the manual?
Questions and answers