
Subscribe to Our Youtube Channel
Related Manuals for Gilson VALVEMATE


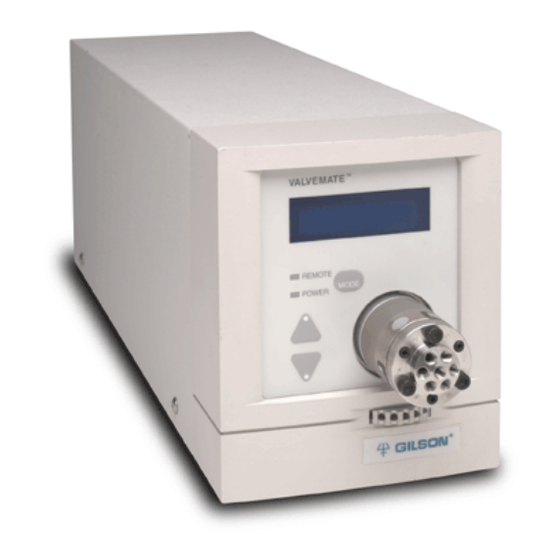
Summary of Contents for Gilson VALVEMATE
- Page 1 (217) 352-9330 | Click HERE Find the Gilson VALVEMATE at our website:...
- Page 2 VALVEMATE ® Valve Actuator User's Guide LT3331/©2002 Gilson, Inc. All rights reserved December 2002 Artisan Technology Group - Quality Instrumentation ... Guaranteed | (888) 88-SOURCE | www.artisantg.com...
- Page 3 Artisan Technology Group - Quality Instrumentation ... Guaranteed | (888) 88-SOURCE | www.artisantg.com...
-
Page 4: Table Of Contents
Contact Connections ............ 2-5 RS-232 Connection ............2-7 GSIOC Connection ............2-8 Plumbing Setup ..............2-9 Checking the VALVEMATE’s Configuration ....2-10 Checking the Unit ID ........... 2-10 Checking the Baud Rate ..........2-11 Valve Installation or Replacement ........2-12 Before You Begin ............ - Page 5 4 Maintenance Replacing the Fuse(s) ............4-2 5 Troubleshooting Error Messages ..............5-2 Troubleshooting ..............5-3 Repair and Return Policies ..........5-5 Before Calling Us ............5-5 Warranty Repair ............5-5 Non-Warranty Repair ..........5-5 Rebuilt Exchange ............5-6 Return Procedure ............5-6 Appendix A Replacement Parts and Accessories High-Pressure Valves, Stainless Steel .......
-
Page 6: Declaration Of Conformity
EN61326, EN61000-3-3, EN61000-3-2, EN61010-1 Manufacturer’s Name ........... Gilson, Inc. Manufacturer’s Address ........3000 W. Beltline Highway Middleton, WI 53562 EC Office Address ..........Gilson S.A.S. 19 Avenue des Entrepreneurs, B.P. 145 F-95400 Villiers-le-Bel, France Type of Equipment ..........Laboratory Equipment Model. - Page 7 Artisan Technology Group - Quality Instrumentation ... Guaranteed | (888) 88-SOURCE | www.artisantg.com...
-
Page 8: Introduction
Position mode. This mode identifies the valve type and its current position. When you turn on the VALVEMATE, it will be in this mode after the initial startup screens are displayed. You can change the valve position by pressing the up or down arrow key on the front panel. -
Page 9: Unpacking
Unpack the VALVEMATE and its accessories carefully from the carton. Check the contents with the list below. Do this now, even if the VALVEMATE will not be used immediately. Many carriers must receive concealed damage claims within seven days of delivery. -
Page 10: Customer Service
800-445-7661 or 608-836-1551. You can also contact the Customer Service Department via its e-mail address: service@gilson.com. Specific contact information can be found on the Gilson web site at www.gilson.com. To help us serve you quickly and efficiently, please refer to the Before Calling Us section on page 5-5. -
Page 11: Technical Specifications
Warning: Changes or modifications to the VALVEMATE not expressly approved by Gilson could void the factory-authorized warranty. The VALVEMATE has been tested and found to comply with the limits for a Class A digital device, pursuant to Part 15 of the FCC commercial environment. - Page 12 Introduction Artisan Technology Group - Quality Instrumentation ... Guaranteed | (888) 88-SOURCE | www.artisantg.com...
- Page 13 Introduction Artisan Technology Group - Quality Instrumentation ... Guaranteed | (888) 88-SOURCE | www.artisantg.com...
-
Page 14: Installation
Installation This section takes you through the steps for setting up your VALVEMATE Valve Actuator. Artisan Technology Group - Quality Instrumentation ... Guaranteed | (888) 88-SOURCE | www.artisantg.com... -
Page 15: Electrical Setup
Installation Electrical Setup Electrical connections are marked on the VALVEMATE’s rear panel. Artisan Technology Group - Quality Instrumentation ... Guaranteed | (888) 88-SOURCE | www.artisantg.com... -
Page 16: Fuse Installation
Installation Fuse Installation You receive the VALVEMATE without any fuses installed. Locate the accessory package containing the fuse drawer appropriate for your line voltage. Discard the other fuse drawer. Locate the accessory package containing the 2.0 amp fuses. Install the fuse(s) into the fuse drawer. The fuse drawer for 100/120V accepts one fuse. -
Page 17: Power Cord Connection
Locate the appropriate power cord for your line voltage. Discard the other power cord. Use the power cord to connect the VALVEMATE to an AC power source. Artisan Technology Group - Quality Instrumentation ... Guaranteed | (888) 88-SOURCE | www.artisantg.com... -
Page 18: Contact Connections
The inputs are labeled for quick identification. Input contacts Via the input contacts, the VALVEMATE can receive signals to turn the valve in a clockwise (CW) or counterclockwise (CCW) direction. When controlling the VALVEMATE via the input contacts, send pulse signals. - Page 19 Installation Making connections To prepare the cable for each connection, do the following: Cut the cable into pieces of appropriate length; then strip about 0.25 cm of insulation from each end. Insert each wire into the appropriate slot on the terminal block connector.
-
Page 20: Rs-232 Connection
Gilson and your local computer store. Connecting RS-232 cable Attach the male end of the RS-232 cable to the RS- 232 port located on back panel of the VALVEMATE. Tighten the retaining screws. Attach the other end of the RS-232 cable to the computer’s RS-232 serial communications port. -
Page 21: Gsioc Connection
Installation GSIOC Connection If your VALVEMATE is part of a Gilson system, use the GSIOC port to connect the VALVEMATE along the Gilson Serial Input/Output Channel (GSIOC). The GSIOC is a two-way communication interface between the computer and most Gilson modules. -
Page 22: Plumbing Setup
Installation Plumbing Setup If the valve is installed in your VALVEMATE, plumb the VALVEMATE into your system as required by your application. If a valve is not installed, refer to page 2-12. Rheodyne valve. To make connections to the valve, use the Rheodyne fittings supplied with the valve to connect 1/16"... -
Page 23: Checking The Valvemate's Configuration
VALVEMATE is being controlled via its RS-232 or GSIOC port. Checking the Unit ID The unit ID identifies the VALVEMATE when it is being externally controlled. For communication to occur, the VALVEMATE and the computer must “agree” on the same unit ID number. Refer to... -
Page 24: Checking The Baud Rate
Press the MODE key until you see the following message on the display: Baud Rate: External If the VALVEMATE is controlled via the RS-232, change the baud rate to the value set for the controlling device. Valid baud rates are 9600 and 19200. -
Page 25: Valve Installation Or Replacement
VALVEMATE If the valve adapter is not installed, also locate the following: • 9/64" Allen (or hex) wrench, supplied with a Rheodyne high-pressure valve, or the Gilson- manufactured adapter wrench supplied with the valve adapter for a Hamilton low-pressure valve. - Page 26 Installation Hamilton 86913, 86915, or 86918 valve. To place the valve in its home position, do the following: With the selector knob installed, turn the • selector knob and align the white line on the knob with a valve port. If the selector knob is not installed, you can use an adjustable wrench to align the valve shaft’s flat edge with an outer port.
- Page 27 Installation Rheodyne 7060 or 9060 valve. To place the valve in its home position: If the selector knob is installed, remove the knob by removing the screw that secures the knob to the valve. Insert a hex wrench into the hole in the valve shaft and rotate until the flat edge on the shaft is aligned with port 1.
-
Page 28: Attaching The Valve Adapter
Installation Attaching the Valve Adapter If a valve adapter is not attached to the valve, refer to the appropriate instructions. Hamilton 86905, 86913, 86915, or 86918 valve. To attach the valve adapter: If necessary, remove the selector knob by removing the screw that secures the knob to the valve. - Page 29 Installation Rheodyne 5011, 5012, 5031, 5032, 5041, or 5042 valve. To attach the valve adapter: Remove the plastic cover plate from the valve by removing the 2 screws that secure the plate to the valve. Remove the detent pin from the valve shaft. Refer to the following diagram to install the valve adapter.
- Page 30 Installation Rheodyne 7060 valve. To install the valve adapter: Remove the two screws that secure the plastic piece to the valve. Remove the pin from the valve shaft. Refer to the diagram to install the valve adapter. When installing the adapter to the valve, ensure that: •...
-
Page 31: Removing The Installed Valve
Installation Removing the Installed Valve To remove the currently installed valve: Turn off and then turn on the VALVEMATE to place the installed valve in its home position. Turn the thumbscrew, located on the VALVEMATE’s front panel, all the way to the left to loosen the valve. -
Page 32: Installing The Replacement Valve
Installing the Replacement Valve To install the replacement valve: Insert the valve with the adapter’s groove facing upward. This is the only position in which the VALVEMATE’s coupler will accept the valve. If necessary, loosen the coupling screws so the shaft can slide into the coupling. -
Page 33: Checking Valve Position And Liquid Flow
Installation Checking Valve Position and Liquid Flow Refer to the appropriate procedures below. Hamilton 86905 valve. To verify that the valve is properly installed: Fill a syringe. Connect the syringe to the top left-side port and dispense liquid into the port. Verify that the liquid exits the top right-side port. - Page 34 Installation Rheodyne 5011, 5012, 7060, or 9060 valve. To verify that the valve is properly installed: If the valve has a loop, remove the loop. Fill a syringe. Connect the syringe to the center port and dispense liquid into the port. Verify that the liquid exits port 1.
- Page 35 Installation Rheodyne 5041, 5042, 7000, 7010, 7040, 7610, 7710, 9010, or 9710 valve. To verify that the valve is properly installed: If the valve has a loop, remove the loop. Fill a syringe. Connect the syringe to port 2 and dispense liquid into the port.
-
Page 36: If You Turned Power Off During Valve Replacement
If You Turned Power OFF During Valve Replacement If you turned power OFF during valve installation, the coupling inside of the VALVEMATE may rotate when you install the valve. This may make it difficult to locate and tighten the coupling screws, accessed via the holes on the right side of the VALVEMATE. - Page 37 Artisan Technology Group - Quality Instrumentation ... Guaranteed | (888) 88-SOURCE | www.artisantg.com...
-
Page 38: Operation
VALVEMATE using the front panel, contact closures, or Gilson Serial Input/Output Channel (GSIOC). Note: If a Rheodyne 5000-series valve is installed in the VALVEMATE, check and if necessary, tighten the screws located on the front of the valve before each run. These screws may loosen over time causing fluid to leak. -
Page 39: Front Panel Control
Operation Front Panel Control The VALVEMATE’s front panel provides for complete valve control. Display The two 16-character lines show status, parameter, and error information. REMOTE This indicator illuminates when the VALVEMATE is being externally controlled via its RS-232 or GSIOC port. - Page 40 In unit ID mode, use these keys to select a unit ID from 30 to 39. The default is 35. You need to change the VALVEMATE’s unit ID if it and another VALVEMATE are being externally controlled via their GSIOC or RS-232 ports.
-
Page 41: Accessing Position Mode
VALVEMATE and a message indicating that the non-volatile memory is being checked: VALVEMATE V1.11 Checking NV-RAM If the VALVEMATE passes the software check, you see the following message: VALVEMATE V1.11 System OK Next you see a display indicating that the... -
Page 42: Change Valve Position
Operation Change Valve Position If you want to change the position of the valve, press the up or down arrow key. For a multi- position valve, pressing the up arrow key turns the valve in a counterclockwise direction and pressing the down arrow key turns it in a clockwise direction. -
Page 43: Contact Closure Control
For information on sending contact signals, refer to the information below and to the user’s guide for the contact device. When controlling a VALVEMATE using contacts, send pulse signals. These signals momentarily close (activate) and open (deactivate) a contact. The duration of the pulse must be at least 0.0017 minute... - Page 44 If the installed valve should require maintenance, please refer to the instruction sheet supplied with the valve. Note: If a Rheodyne 5000-series valve is installed in the VALVEMATE, check and if necessary tighten the screws located on the front of the valve before each run. These screws may loosen over time causing fluid to leak.
-
Page 45: Replacing The Fuse(S)
Maintenance Replacing the Fuse(s) A blown fuse may indicate the existence of another problem in the instrument. If the replacement fuses blow, do not try others. To change a fuse, follow these steps. Disconnect the power cord from the power outlet and from the rear panel receptacle. - Page 46 Troubleshooting If you encounter a problem while operating the VALVEMATE, refer to the following pages. If you cannot solve or isolate the problem, contact Gilson or your local Gilson representative. See Before Calling Us on page 5-5. Artisan Technology Group - Quality Instrumentation ... Guaranteed | (888) 88-SOURCE | www.artisantg.com...
-
Page 47: Error Messages
Error Description Solution NV-RAM Error There is a problem in the VALVEMATE software. Reset its parameters by turning OFF power. Then hold down the MODE key while turning ON power. Position Error The VALVEMATE is having difficulty rotating the valve. Try replacing the valve seal. -
Page 48: Troubleshooting
• Confirm that device supplying input to the VALVEMATE is turned ON and working properly • Make sure that the pulse to the VALVEMATE is at least 0.1 second in duration Artisan Technology Group - Quality Instrumentation ... Guaranteed | (888) 88-SOURCE | www.artisantg.com... - Page 49 • The valve may be misaligned; turn power OFF then ON to the VALVEMATE • The valve may not have been in home position when installed in the VALVEMATE; remove the valve and use an adjustable wrench to place it in home position then reinstall the valve (refer Section •...
-
Page 50: Repair And Return Policies
Troubleshooting Repair and Return Policies Before Calling Us Gilson Customer Service personnel will be able to serve you more efficiently if you have the following information: • the serial number of the VALVEMATE • the installation procedure you used • list of concise symptoms •... -
Page 51: Rebuilt Exchange
Rebuilt Exchange For some units, rebuilt exchange components are available. Contact Gilson for details. Return Procedure In the United States, contact the Gilson Customer Service Department to obtain authorization before returning any Gilson equipment. To return a piece of equipment: •... -
Page 52: Replacement Parts And Accessories
Replacement Parts and Accessories High-Pressure Valves, Stainless Steel 33035401 Rheodyne 7000 (2-Position, 6-Port) Switching Valve Assembly with attached mounting adapter and fittings 33035402 Rheodyne 7010 (2-Position, 6-Port) Injection Valve Assembly with attached mounting adapter and fittings 33035403 Rheodyne 7030 (2-Position, 6-Port) 3-Way Valve Assembly with attached mounting adapter and fittings 33035404 Rheodyne 7040 (2-Position, 6-Port) 4-Way Valve Assembly... -
Page 53: High-Pressure Peek Valves
Appendix High-Pressure PEEK Valves 33035407 Rheodyne 9010 (2-Position, 6-Port) Injection Valve Assembly with attached mounting adapter and fittings 33035408 Rheodyne 9030 (2-Position, 6-Port) 3-Way Valve Assembly with attached mounting adapter and fittings 33035409 Rheodyne 9060 (6-Position) 4-Way Valve Assembly with attached mounting adapter and fittings 33035418 Rheodyne 9710 (2-Position, 6-Port) Injection Valve... -
Page 54: Replacement Valves
Appendix 33035424 Hamilton 86918 HVXD 8-5 (8-Position) Selection Valve Assembly with attached mounting adapter but without fittings; see Note on page Replacement Valves 4967000 Rheodyne 7000 (2-Position, 6-Port) Switching Valve Assembly and fittings 496010 Rheodyne 7010 (2-Position, 6-Port) Injection Valve Assembly and fittings 4967030 Rheodyne 7030 (2-Position, 6-Port) 3-Way Valve Assembly... -
Page 55: Mounting Adapter Kits
Appendix 4965012 Rheodyne 5012 (6-Position) Selection Valve Assembly and fittings 4965031 Rheodyne 5031 (2-Position, 6-Port) 3-Way Valve Assembly and fittings 4965032 Rheodyne 5032 (2-Position, 6-Port) 3-Way Valve Assembly and fittings 4965041 Rheodyne 5041 (2-Position, 6-Port) 4-Way Valve Assembly and fittings 4965042 Rheodyne 5042 (2-Position, 6-Port) 4-Way Valve Assembly and fittings... -
Page 56: Accessories And Replacement Parts
Shielded GSIOC cable, 30 inches 6730204007 Fuse, 2.0 Amp “T” Slo-Blo, 5 x 20 mm 638304512 Terminal block connector 709910206 2-conductor cable, 6 ft. 334971 VALVEMATE OQ Test Kit Artisan Technology Group - Quality Instrumentation ... Guaranteed | (888) 88-SOURCE | www.artisantg.com... - Page 57 Artisan Technology Group - Quality Instrumentation ... Guaranteed | (888) 88-SOURCE | www.artisantg.com...
-
Page 58: Valve Flow Path Diagrams
Valve Flow Path Diagrams Artisan Technology Group - Quality Instrumentation ... Guaranteed | (888) 88-SOURCE | www.artisantg.com... -
Page 59: Rheodyne Valves
Appendix Rheodyne Valves The following graphics are provided courtesy of Rheodyne, L.P. Artisan Technology Group - Quality Instrumentation ... Guaranteed | (888) 88-SOURCE | www.artisantg.com... - Page 60 Appendix Artisan Technology Group - Quality Instrumentation ... Guaranteed | (888) 88-SOURCE | www.artisantg.com...
- Page 61 Appendix Artisan Technology Group - Quality Instrumentation ... Guaranteed | (888) 88-SOURCE | www.artisantg.com...
- Page 62 Appendix Artisan Technology Group - Quality Instrumentation ... Guaranteed | (888) 88-SOURCE | www.artisantg.com...
- Page 63 Appendix Artisan Technology Group - Quality Instrumentation ... Guaranteed | (888) 88-SOURCE | www.artisantg.com...
-
Page 64: Hamilton Valves
Appendix Hamilton Valves The following graphics are provided courtesy of Hamilton Company. Artisan Technology Group - Quality Instrumentation ... Guaranteed | (888) 88-SOURCE | www.artisantg.com... - Page 65 Artisan Technology Group - Quality Instrumentation ... Guaranteed | (888) 88-SOURCE | www.artisantg.com...
-
Page 66: Gsioc Control
Each slave device is identified by a unique number which must be known to the device and to the controller. The unit ID of the VALVEMATE is 35. But you can set its unit ID to another number. Refer to Checking the VALVEMATE’s Configuration... - Page 67 VALVEMATE. • Buffered commands (B) send instructions to the VALVEMATE. These commands are executed one at a time. The VALVEMATE returns a period (.) to indicate that it accepted the buffered command. • Immediate commands (I) request status information from the VALVEMATE.
- Page 68 Appendix Command Type Description Resets the VALVEMATE software, saves how valve positions are being displayed (as numbers 1–8 or letters A–H), and rotates the valve to home position. Returns ‘$’. Identifies the selected device. Returns ‘VALVEMATEVx.yz’, where x, y, and z indicate version number.
- Page 69 VALVEMATE or a valve has been in use. Sets the counter that tracks the number of hours that either the VALVEMATE or a valve has been in use. Replace x with a number from 0 to 99999. For example, the command ‘N0’ sets the number to 0; you can use this command after installing a new valve.
- Page 70 0 - Reconnects upper display line 1 - Reconnects lower display line If you omit the parameter n, both lines are reconnected, and the VALVEMATE software will display prompts and data. Artisan Technology Group - Quality Instrumentation ... Guaranteed | (888) 88-SOURCE | www.artisantg.com...
- Page 71 Artisan Technology Group - Quality Instrumentation ... Guaranteed | (888) 88-SOURCE | www.artisantg.com...
Need help?
Do you have a question about the VALVEMATE and is the answer not in the manual?
Questions and answers