
Related Manuals for Minuteman Endeavor RTXL Series


Summary of Contents for Minuteman Endeavor RTXL Series
- Page 1 Endeavor 5 - 10KVA RTXL UPS Series User's Manual Para Systems, Inc. 1455 Lemay Dr. Carrollton, TX 75007 Phone: 1-972-446-7363 Fax: 1-972-446-9011 Internet: minutemanups.com UPS Sizing: sizemyups.com PN - 34000471 R2...
-
Page 2: Table Of Contents
Table Of Contents Introduction Controls and Indicators Installation Operation Configurable Parameters & Settings Troubleshooting Obtaining Service Specifications Limited Product Warranty A1. Declaration of Conformity... -
Page 3: Introduction
The external vents and openings on the UPS are provided for ventilation. tion and Servicing of these UPS systems. MINUTEMAN accepts no liabilities To ensure reliable operation of the UPS and to protect the UPS from over- and is not limited to: injury to the Service Personnel, or damages to; the UPS, heating, these vents and openings must not be blocked or covered. - Page 4 CAUTION! To de-energize the outputs of the UPS: If the UPS is on press and release the On/Off/Test button after the second beep. Turn off the input circuit breaker on the rear panel of the UPS. Turn off the DC breaker(s) on the rear panel of the Battery Pack(s). Disconnect the UPS from the AC source.
-
Page 5: Controls And Indicators
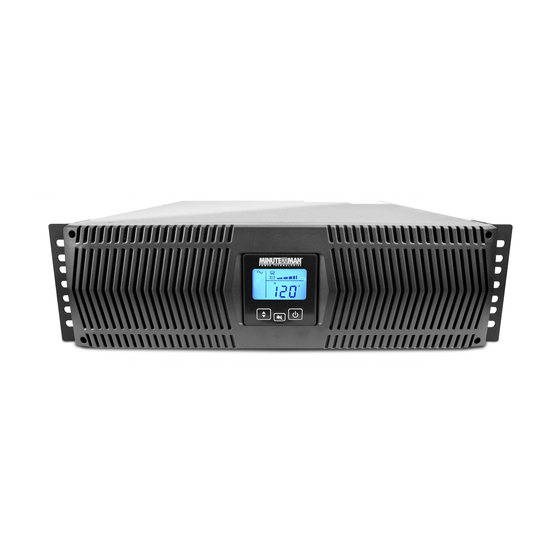
Chapter 2: Controls and Indicators The Battery Capacity Bar Graph operates as follows: LED #1: When the battery capacity is >20% the LED will illuminate. CONTROL PANEL LED #2: When the battery capacity is >40% the LED will illuminate. LED #3: When the battery capacity is >60% the LED will illuminate. LED #4: When the battery capacity is >80% the LED will illuminate. -
Page 6: Installation
REAR PANELS Chapter 3: Installation INSTALLATION PLACEMENT This UPS series is ONLY intended to be installed in an indoor temperature controlled environment that is free of conductive contaminants. DO NOT oper- ate the UPS in: extremely dusty and/or unclean areas, locations near heating devices, water or excessive humidity, or where the UPS is exposed to direct sunlight. - Page 7 RACKMOUNT CONFIGURATION TOWER CONFIGURATION Use the included rackmount brackets and screws to mount the UPS in a rack The tower configuration allows the user to install the UPS in the up-right posi- by following the steps below. tion. The tower stands are provided with the UPS. WARNING: Use two or USE CAUTION: The UPS system is heavy.
- Page 8 CAUTION: The battery can present a risk of electrical shock. These batteries CONNECTING THE UPS TO AN AC SOURCE produce sufficient current to burn wire or tools very rapidly, producing molten 1. When connecting the UPS to the utility power and the load, it is recomme- metal.
-
Page 9: Operation
The ED8000RT-CU and ED10000RT-CU are hardwire input only. The pins for Chapter 4: Operation the input cable are included. The UPS must be connected to the appropriate SYSTEM OVERVIEW branch protection (circuit breaker) to avoid shock hazard and violation of any This double conversion On-Line UPS protects computers, servers, telecommuni- local electrical codes. - Page 10 Block Diagram of the Basic Wiring and Internal Circuit Configuration 2. Turn on the connected equipment one at a time. 3. Press, hold and then release the On/Off/Test Button during the audible ala- rm's first beep to transfer the UPS to the On-Line mode. 4.
- Page 11 h) If all the test pass successfully (takes approximately 15-seconds to NOTE: If you are using more than one Battery Pack with this UPS series, the complete) then the UPS will transfer to the Battery mode. NOTE: If UPS must be configured so that the UPS will report the correct estimated any of the test fail an error code will be displayed and then UPS will runtime on the LCD screen and in the Power Monitoring software and/or the shutdown.
- Page 12 ALARMS Chapter 5: Configurable Parameters and Settings ON BATTERY When the UPS is operating on the batteries, the On-Battery icon will illumi- (These items may require optional software or hardware) nate, the audible alarm will sound once every ten-seconds. The alarm will stop User Choices Description Function...
-
Page 13: Troubleshooting
Chapter 6: Troubleshooting Symptom / Error Code Cause / What To Do Error Code: E19. Bad This could be a disconnected battery, a weak battery or a bad bat- Battery. tery. Check the battery connections. Charge the batteries over- Symptom / Error Code Cause / What To Do night and if the error code is still there replace the batteries and/or call for service. -
Page 14: Obtaining Service
6. Return the unit by insured, prepaid carrier to: >126% - <150% for 30-seconds Protection Over-Current, and Short-Circuit Protected Para Systems Inc. MINUTEMAN UPS 1809 W. Frankford Road, Suite 150 Carrollton, TX 75007 ATTN: RMA # _______ NOTE: Specifications are subject to change without notice. -
Page 15: Limited Product Warranty
Chapter 9: Limited Product Warranty ECONOMY MODE OPERATION 208VAC: 187 - 228VAC (240VAC: 216 - 264VAC) Output Voltage Range Para Systems, Inc. (Para Systems) warrants this equipment, when properly applied and Low Voltage Transfer Point At -10% of the rated input voltage transfers to the On-Line mode operated within specified conditions, against faulty materials or workmanship for a pe- 8-Volt hysteresis to reset to the Economy mode riod of three years from the date of purchase. -
Page 16: A1. Declaration Of Conformity
EN 50091-2:1995 Class A, IEC61000-4-2: level4, IEC61000-4-3: level3, IEC61000-4-4:level4, IEC61000-4-5:level4, IEC61000-4-6: level3, IEC61000- 4-8: level3, IEC 62040-1-1, IEEE C62.41 Category A1 Manufacturer’s Name: Para Systems, Inc. (MINUTEMAN UPS) Manufacturer’s Address: 1455 LeMay Drive Carrollton, Texas 75007 USA Type of Equipment: Uninterruptible Power Supplies (UPS)
Need help?
Do you have a question about the Endeavor RTXL Series and is the answer not in the manual?
Questions and answers