Table of Contents
Advertisement
Quick Links
Installation and Assembly:
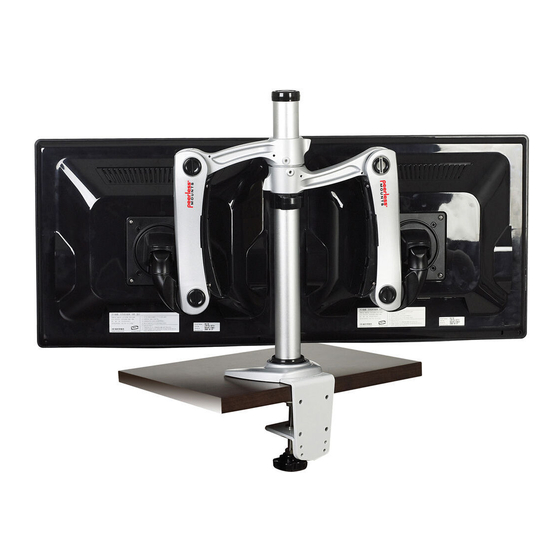
Dual Desktop Two-Link Pole for 15" - 24" LCD monitors
Models: LCT-A1B4C, LCT-A1B4H
Max Load Capacity per Arm: 17.6 lb (8 kg)
3215 W. North Ave. • Melrose Park, IL 60160 • (800) 729-0307 or (708) 865-8870 • Fax: (708) 865-2941 • www.peerlessmounts.com
ISSUED: 06-23-09 SHEET #: 090-9181-1
Advertisement
Table of Contents

Related Manuals for PEERLESS Mounts LCT-A1B4C


Summary of Contents for PEERLESS Mounts LCT-A1B4C
- Page 1 Installation and Assembly: Dual Desktop Two-Link Pole for 15" - 24" LCD monitors Models: LCT-A1B4C, LCT-A1B4H Max Load Capacity per Arm: 17.6 lb (8 kg) 3215 W. North Ave. • Melrose Park, IL 60160 • (800) 729-0307 or (708) 865-8870 • Fax: (708) 865-2941 • www.peerlessmounts.com...
- Page 2 NoTe: Read entire instruction sheet before you start installation and assembly. WARNING • Do not begin to install your Peerless product until you have read and understood the instructions and warnings contained in this Installation Sheet. If you have any questions regarding any of the instructions or warnings, please call Peerless customer care at 1-800-865-2112.
- Page 3 Before you begin, make sure all parts shown are included with your product. Parts List LCT-A1B4C LCT-A1B4H Description pipe assembly arm assembly M4 x 10 mm screws M4 x 16 mm screws bar bushing cable guide lower pipe cap upper pipe cap...
- Page 4 Clamp Installation Method Pipe assembly (A) can be mounted to mounting Turn handle to tighten pipe assembly (A) to surface with a thickness of 1/3" - 3.5" (8.5 - 89 mm). mounting surface until firmly attached. Insert the clamp onto mounting surface as shown below.
- Page 5 Place arm assembly #1 (B) over pipe then insert Place bar bushing (e) over pipe and align with bar bushing (e) over pipe into arm assembly (A) set screw on pipe assembly (A) and then place and align with set screw on pipe assembly (A). arm assembly #2 (B) over pipe assembly and bar bushing (e).
- Page 6 Attach upper pipe cap (H) to lower pipe cap as Adjust arm to desired height and tighten set screw shown below until click sound is heard. on both arms using 2.5 mm allen wrench (L). Control Bolt Tension Adjustment NoTe: This product is factory set for a 19" (483 mm) monitor. When changing the size of the monitor, adjust the control bolt with 4 mm allen wrench (K) as shown in figure 7.1.
- Page 7 Height Adjustment of Arm Loosen pipe assembly set screw using 4 mm allen wrench (K) then loosen arm assembly set screw using 2.5 mm allen wrench as shown in detail 2. Adjust monitor to desired height as shown in figure 8.1, then retighten all fasteners. ARM ASSEMBLY SET SCREW PIPE ASSEMBLY...
- Page 8 Cable Management Loop cords through cable guide (F) and attach to arm using one M4 x 8 mm screw (J) as shown below. Cords may also route through arm assembly. Open gap to press fit cables as shown in detail 4. CABLE CABLE DeTAIL 4...
Need help?
Do you have a question about the LCT-A1B4C and is the answer not in the manual?
Questions and answers