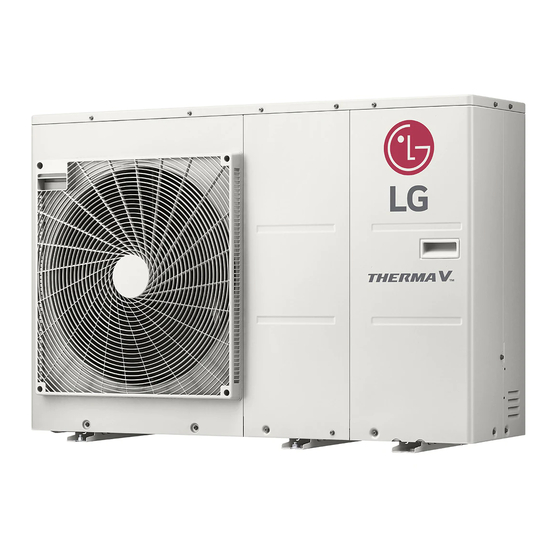
LG THERMA V Installation Manual
Air-to-water heat pump
Hide thumbs
Also See for THERMA V:
- User manual ,
- Installation manual (201 pages) ,
- Owner's manual (70 pages)
Table of Contents
Advertisement
Quick Links
INSTALLATION MANUAL
AIR-TO-WATER
HEAT PUMP
Please read this installation manual completely before installing the
product. Installation work must be performed in accordance with the
national wiring standards by authorized personnel only. Please retain
this installation manual for future reference after reading it thoroughly.
Original instruction
MFL68681810
Rev.13_102720
Copyright © 2017 - 2020 LG Electronics Inc. All Rights Reserved.
www.lg.com
Advertisement
Table of Contents

Related Manuals for LG THERMA V


Summary of Contents for LG THERMA V
- Page 1 Installation work must be performed in accordance with the national wiring standards by authorized personnel only. Please retain this installation manual for future reference after reading it thoroughly. Original instruction www.lg.com MFL68681810 Rev.13_102720 Copyright © 2017 - 2020 LG Electronics Inc. All Rights Reserved.
-
Page 2: Table Of Contents
TABLE OF CONTENTS TABLE OF CONTENTS PREFACE SAFETY INSTRUCTIONS INSTALLATION PART GENERAL INFORMATION Model Information Model name and related information Parts and Dimensions Control Parts (For Split) Control Parts (For Hydrosplit) Control Panel Typical Installation Example Cycle Diagram (For R410A) Cycle Diagram (For R32 Split) Cycle Diagram (For Hydrosplit) Water cycle (For R410A) - Page 3 TABLE OF CONTENTS ACCESSORIES INSTALLATION Before Installation Thermostat 3rd Party Boiler 3rd Party Controller Meter Interface Central Controller DHW Tank DHW Tank Kit Solar Thermal Kit (For Split) Solar Thermal System (For Hydrosplit) Dry Contact External Controller - Setting up programmable digital input operation Remote Temperature Sensor Solar pump External pump...
- Page 4 Overview settings Installer setting (For Hydrosplit) Select Temperature Sensor Use Heating Tank Heater Mixing Circuit Use External Pump RMC master/slave LG Therma V Configuration Forced operation Pump Prerun/Overrun Water Flow Control Password Reset Screed drying Heater on temperature Air heating set temp.
- Page 5 TABLE OF CONTENTS Cooling temp. setting Pump setting in cooling Seasonal auto temp. Heater priority DHW set temp. Tank disinfection setting 1, 2 Tank setting 1 Tank setting 2 DHW time setting Solar Thermal System Pump test run Frost Protection Temp. Dry Contact Mode Central Control Address CN_CC...
-
Page 6: Preface
• Check points before starting operation are explained. Chapter 10 • Troubleshooting, maintenance, and error code list are presented to correct problems. REMARK : ALL CONTENTS OF THIS MANUAL ARE SUBJECT TO CHANGE WITHOUT NOTICE. TO GET THE LATEST INFORMATION, PLEASE VISIT LG ELECTRONICS WEB SITE. -
Page 7: Safety Instructions
SAFETY INSTRUCTIONS SAFETY INSTRUCTIONS Read the precautions in this This appliance is filled with manual carefully before flammable refrigerant (R32) operating the unit. This symbol indicates that a This symbol indicates that service personnel should be the Operation Manual should handling this equipment with be read carefully. - Page 8 SAFETY INSTRUCTIONS • Always ground the unit. - There is risk of fire or electric shock. • Install the panel and the cover of control box securely. - There is risk of fire or electric shock. • Always install a dedicated circuit and breaker. - Improper wiring or installation may cause fire or electric shock.
- Page 9 SAFETY INSTRUCTIONS • Do not touch leaked refrigerant directly. - There is risk of frostbite. • Copper in contact with refrigerants shall be oxygen-free or deoxidized, for example Cu-DHP as specified in EN 12735-1 and EN 12735-2. • Compliance with national gas regulations shall be observed. (for R32) •...
- Page 10 SAFETY INSTRUCTIONS • Pipe-work shall be protected from physical damage. (for R32) • Mechanical connections (mechanical connectors or flared joints) shall be accessible for maintenance purposes. (for R32) Operation • Take care to ensure that power cable could not be pulled out or damaged during operation.
- Page 11 SAFETY INSTRUCTIONS • Stop operation and close the window in storm or hurricane. If possible, remove the unit from the window before the hurricane arrives. - There is risk of property damage, failure of unit, or electric shock. • Do not open the front cover of the unit while operation. (Do not touch the electrostatic filter, if the unit is so equipped.) - There is risk of physical injury, electric shock, or unit failure.
- Page 12 SAFETY INSTRUCTIONS • Ventilate the unit from time to time when operating it together with a stove, etc. - There is risk of fire or electric shock. • Turn the main power off when cleaning or maintaining the unit. - There is risk of electric shock. •...
- Page 13 SAFETY INSTRUCTIONS CAUTION Installation • Always check for gas (refrigerant) leakage after installation or repair of unit. - Low refrigerant levels may cause failure of unit. • Keep level even when installing the unit. - To avoid vibration or water leakage. •...
- Page 14 SAFETY INSTRUCTIONS • The Installation kit supplied with the appliance are to be used and that old Installation kit should not be reused. • If the supply cord is damaged, it must be replaced by the manufacturer, its service agent or similarly qualified persons in order to avoid a hazard.
-
Page 15: Installation Part
INSTALLATION PART INSTALLATION PART Thank you for choosing LG Electronics Air-to-Water Heat Pump Before starting installation, please make it sure that all parts are found inside the product box. (For Split) INDOOR UNIT BOX Item Image Item Image Indoor unit... - Page 16 INSTALLATION PART (For Hydrosplit) INDOOR UNIT BOX Item Image Quantity Item Image Quantity Indoor unit Installation Sheet OUTDOOR UNIT BOX Item Image Quantity Outdoor Unit U3 Chassis Drain Cap Drain Nipple Installation Manual Owner's / Installation manual Strainer Damper...
- Page 17 INSTALLATION PART INSTALLATION TOOLS Figure Name Figure Name Screw driver Ohmmeter Electric drill Hexagonal wrench Measuring tape, Knife Ammeter Hole core drill Leak detector Thermometer, Spanner Horizontal meter Torque wrench Flaring tool set Manifold Gauge Vacuum Pump...
-
Page 18: General Information
GENERAL INFORMATION GENERAL INFORMATION With advanced inverter technology, is suitable for applications like under floor heating, under floor cooling, and hot water generation. By Interfacing to various accessories user can customize the range of the application. In this chapter, general information of is presented to identify the installation procedure. - Page 19 GENERAL INFORMATION Factory Model Name (For Hydrosplit) Outdoor unit Series Number Function B : Hydrosplit Type Electrical ratings 6 : 1 phase 220-240 V~ 50 Hz 8 : 3 phase 380-415 V~ 50 Hz Heating Capacity 12 : 12 kW 14 : 14 kW 16 : 16 kW Model Type W : Inverter Heat Pump Classification...
- Page 20 GENERAL INFORMATION Buyer Model Name (For R410A) Outdoor unit 3 Series Series Number Chassis U3, U4 Electrical ratings 1 : 50 Hz 220-240 V~ 3 : 50 Hz 380-415 V 3N~ Heating Capacity Ex) “05” : 5 kW, “07” : 7 kW, “09” : 9 kW “12”...
- Page 21 GENERAL INFORMATION Buyer Model Name (For R32 Split) Outdoor unit Series Number Chassis Classification U : Outdoor unit Refrigerant R : R32 M : Middle Temperature Electrical ratings 1 : 1Ø, 220-240 V AC 50 Hz Heating capacity Ex ) 9 kW : ‘09’ Classification U : Outdoor unit H : Air to water Heat Pump...
- Page 22 GENERAL INFORMATION Buyer Model Name (For Hydrosplit) Outdoor unit Series Number Chassis Classification U : Outdoor unit B : Hydrosplit Type Refrigerant R : R32 M : Middle Temperature Electrical ratings 1 : 1Ø, 220-240 V~ 50 Hz 3 : 3Ø, 380-415 V~ 50 Hz Heating capacity Ex) 12 kW : “12”, 14 kW : “14”, 16 kW : “16”...
-
Page 23: Model Name And Related Information
GENERAL INFORMATION Model name and related information Model Name Power Capacity Built-In Power Outdoor Unit Indoor Unit Source Electric Source (Electric Type Refrigerant Series Capacity Capacity Heating Cooling Heater(kW) (Unit) Phase Phase Heater) (kW) (kW) (kW) (kW) 220-240 V~ 220-240 V~ 1Ø... -
Page 24: Parts And Dimensions
GENERAL INFORMATION Parts and Dimensions Indoor unit(For R410A) : External (unit : mm) Description Name Remark Control Panel Built-in Remote Controller... - Page 25 GENERAL INFORMATION Indoor unit(For R410A) : Internal (unit : mm) 289.6 84.5 76 41...
- Page 26 GENERAL INFORMATION Description Name Remark Leaving Water Pipe Male PT 1 inch Entering Water Pipe Male PT 1 inch Refrigerant Pipe Ø 9.52 mm Refrigerant Pipe Ø 15.88 mm Water Pump Max Head 9.5 / 7 / 6 m Safety Valve Open at water pressure 3 bar Control Box PCB and terminal blocks...
- Page 27 GENERAL INFORMATION Outdoor unit(For R410A) : External Product Heating Capacity : 4-holes for anchor bolts 12 kW,14 kW,16 kW U3 Chassis (unit : mm) Supporter Description Name Liquid-side Service Valve Gas-side Service Valve Air discharge Grille...
- Page 28 GENERAL INFORMATION Product Heating Capacity : 5 kW,7 kW,9 kW 4-holes for anchor bolts U4 Chassis (unit : mm) Supporter Description Name Liquid-side Service Valve Gas-side Service Valve Air discharge Grille...
- Page 29 GENERAL INFORMATION Indoor unit(For R32 Split) : External (unit : mm) Description Name Remark Control Panel Built-in Remote Controller...
- Page 30 GENERAL INFORMATION Indoor unit(For R32 Split) : Internal (unit : mm) 289.5 84.9 115.6 123.3 40.7...
- Page 31 GENERAL INFORMATION Description Name Remark Leaving Water Pipe Male PT 1 inch Entering Water Pipe Male PT 1 inch Refrigerant Pipe Ø 9.52 mm Refrigerant Pipe Ø 15.88 mm Water Pump Circulating the water Safety Valve Open at water pressure 3 bar Control Box PCB and terminal blocks Cut-off power input to electric heater at 90 °C...
- Page 32 GENERAL INFORMATION Outdoor unit(For R32 Split) : External Product Heating Capacity : 5 kW,7 kW,9 kW 4-holes for anchor bolts U4 Chassis (unit : mm) Supporter Description Name Liquid-side Service Valve Gas-side Service Valve Air discharge Grille...
- Page 33 GENERAL INFORMATION Indoor unit (For Hydrosplit) : External (unit : mm) Description Name Remark Control Panel Built-in Remote Controller...
- Page 34 GENERAL INFORMATION Indoor unit (For Hydrosplit) : Internal (unit : mm) 84.5...
- Page 35 GENERAL INFORMATION Description Name Remark Leaving Water Pipe Male PT 1 inch Entering Water Pipe Male PT 1 inch Water Pump Circulating the water Safety Valve Open at water pressure 3 bar Control Box PCB and terminal blocks Flow Sensor Range : 5 ~ 80 L/min Pressure Sensor Indicates circulating water pressure...
- Page 36 GENERAL INFORMATION Outdoor unit (For Hydrosplit) : External Product Heating Capacity : 4-holes for anchor bolts (M10) 12 kW, 14 kW, 16 kW U3 Chassis (unit : mm) Description Name Entering Water Pipe Leaving Water Pipe Air discharge Grille...
-
Page 37: Control Parts (For Split)
GENERAL INFORMATION Control Parts (For Split) Control Box : Indoor Unit 1Ø Electric Heater Model Production Until From date Sep. 30, 2019 Oct. 1, 2019 With magnet switch With heater PCB Description Name Remark Terminal blocks The terminal blocks allow easy connection of field wiring Unit ELB The ELB protects the unit against overload or short circuit Water tank heater... - Page 38 GENERAL INFORMATION 3Ø Electric Heater Model Description Name Remark Terminal blocks The terminal blocks allow easy connection of field wiring Unit ELB The ELB protects the unit against overload or short circuit Water tank heater The ELB protects the water tank heater in sanitary water tank ELB(optional) against overload or short circuit Magnet switch...
-
Page 39: Control Parts (For Hydrosplit)
GENERAL INFORMATION Control Parts (For Hydrosplit) Control Box : Indoor Unit Description Name Remark Terminal blocks The terminal blocks allow easy connection of field wiring The Main PCB(Printed Circuit Board) controls the functioning Main PCB of the unit... -
Page 40: Control Panel
GENERAL INFORMATION Control Panel Operation display window Back button On/Off Button OK Button Up/Down/Left/Right Button Operation display window Operation and Settings status display Back button When you move to the previous stage from the menu’s setting stage Up/down/left/right button When you change the menu’s setting value OK button When you save the menu’s setting value On/Off button... -
Page 41: Typical Installation Example
GENERAL INFORMATION Typical Installation Example CAUTION is installed with pre-existing boiler, the boiler and should not be operated together. If entering water temperature of is above 55 °C, the system will stop operation to prevent mechanical damage of the product. For detailed electric wiring and water piping, please contact authorized installer. - Page 42 GENERAL INFORMATION CASE 2: Connecting DHW Tank Outdoor Indoor Indoor Unit Outdoor Unit M / F Hot water Fan coil unit Floor heating loop Radiator tank tank tank City water NOTE • DHW tank - It should be equipped with internal electric heater to generate sufficient heat energy in tank very cold season.
- Page 43 GENERAL INFORMATION CASE 3: Connecting Solar thermal system Outdoor Indoor Indoor Unit Outdoor Unit M / F Solar heat source Hot water tank Fan coil unit Floor heating loop Radiator tank tank tank City water NOTE • DHW tank - It should be equipped with internal electric heater to generate sufficient heat energy in very cold season.
- Page 44 - When cooling, Main Zone can not be lower than Add Zone. (For Split) - The types and specifications of the Mix Kit are to comply with Chapters 4 and 7 of the THERMA V Installation Manual. High Temperature Room Thermostat(Field supply)
- Page 45 GENERAL INFORMATION CASE 5: Connecting 3 Party 3 Way V/V direction Boiler On : Boiler Off : Outdoor Indoor Indoor Unit Boiler Outdoor Unit Buffer Tank M / F Floor Floor Floor heating loop heating loop heating loop NOTE • DHW tank - 3rd Party Boiler - You can control the boiler automatically and manually by comparing the outside temperature and the set temperature.
-
Page 46: Cycle Diagram (For R410A)
GENERAL INFORMATION Cycle Diagram (For R410A) 3 Series LIQUID SIDE Service Indoor Unit Valve Plate Heat (3 way) Exchanger Water. Out Outdoor Unit Heat Exchanger Water. In 4 way Pressure Valve GAS SIDE Sensor Service (Accessories) Valve (3 way) Accumulator Compressor 4 Series LIQUID SIDE... - Page 47 GENERAL INFORMATION Description Category Symbol Meaning Remarks Connector Pressure sensor CN_H_PRESS Condenser middle temperature CN_MID sensor Compressor-discharge pipe CN_DISCHA temperature sensor Outdoor Compressor-suction pipe CN_SUCTION Unit temperature sensor - Description is expressed based on Condenser temperature sensor CN_C_PIPE Cooling mode. Outdoor air temperature sensor CN_AIR Electronic Expansion Valve...
-
Page 48: Cycle Diagram (For R32 Split)
GENERAL INFORMATION Cycle Diagram (For R32 Split) <Refrigerant Side> <Water Side> : Cooling : Heating Pressure Sensor Pressure Switch <Indoor Unit> Air Vent A8/A9 Muffler Accumulator Expansion Tank EEV1 Relief valve Water Pressure Gauge Air Vent EEV3 (Inj.EEV) Water In Strainer Flow [PHE]... -
Page 49: Cycle Diagram (For Hydrosplit)
GENERAL INFORMATION Cycle Diagram (For Hydrosplit) <Refrigerant Side> <Water Side> : Cooling : Heating <Indoor Unit> Air Vent A8/A9 Pressure Expansion Tank Sensor Pressure Switch Relief valve Muffler Accumulator Pressure Air Vent Sensor EEV1 Flow Sensor Water EEV2 (Inj.EEV) Water In Strainer [PHE] <Inside of Hydrosplit>... -
Page 50: Water Cycle (For R410A)
GENERAL INFORMATION Water cycle (For R410A) - Page 51 : Solar panel, Sensors, Thermostats, Interim heat SOLAR party accessory and Field installation exchanger, Water pump, etc. THERMAL (no connector) - To utilized hot water heated by SOLAR THERMAL (sold separately) SYSTEM SYSTEM, end-user must install Solar-Kit accessory (PHLLA) provided by LG...
-
Page 52: Water Cycle (For R32 Split)
GENERAL INFORMATION Water cycle (For R32 Split) - Page 53 : Solar panel, Sensors, Thermostats, Interim heat SOLAR party accessory and Field installation exchanger, Water pump, etc. THERMAL (no connector) - To utilized hot water heated by SOLAR THERMAL (sold separately) SYSTEM SYSTEM, end-user must install Solar-Kit accessory (PHLLA) provided by LG...
-
Page 54: Water Cycle (For Hydrosplit)
GENERAL INFORMATION Water cycle (For Hydrosplit) - Page 55 GENERAL INFORMATION Description (For Hydrosplit) Category Symbol Meaning PCB Connector Remarks Refrigerant temperature sensor (Liquid side) CN_PIPE_IN Meaning is expressed based on Cooling mode. Inlet water temperature sensor CN_WATER_IN Entering water temperature sensor Outlet water temperature sensor CN_WATER_OUT Leaving water temperature sensor Outdoor Unit - 3rd party accessory and Field installation (sold...
-
Page 56: Installation Of Outdoor Unit
INSTALLATION OF OUTDOOR UNIT INSTALLATION OF OUTDOOR UNIT The outdoor unit of is installed outside to exchange heat with ambient air. Therefore, it is important to secure proper space around the outdoor unit and care for specific external conditions. This chapter presents a guide to install the outdoor unit, make a route to connect with the indoor, and what to do when installed around seaside. -
Page 57: Transporting The Unit
INSTALLATION OF OUTDOOR UNIT Transporting the Unit • When carrying the suspended unit, pass the ropes between legs of base panel under the unit. • Always lift the unit with ropes attached at four points so that impact is not applied to the unit. •... - Page 58 INSTALLATION OF OUTDOOR UNIT CAUTION Be very careful while carrying the product. • Do not have only one person carry product if it is more than 20 kg. • PP bands are used to pack some products. Do not use them as a mean for transportation because they are dangerous.
-
Page 59: Installation At Seaside
INSTALLATION OF OUTDOOR UNIT Installation at Seaside CAUTION • Air conditioners should not be installed in areas where corrosive gases, such as acid or alkaline gas, are produced. • Do not install the product where it could be exposed to sea wind (salty wind) directly. It can result corrosion on the product. -
Page 60: Seasonal Wind And Cautions In Winter
INSTALLATION OF OUTDOOR UNIT Seasonal wind and cautions in winter • Sufficient measures are required in a snow area or severe cold area in winter so that product can be operated well. • Get ready for seasonal wind or snow in winter even in other areas. •... -
Page 61: Installation Of Indoor Unit
INSTALLATION OF INDOOR UNIT INSTALLATION OF INDOOR UNIT The indoor unit of is installed inside where terminal of under floor water pipe cycle and refrigerant pipe from the outdoor unit are accessible at the same time. In this chapter conditions for installation place is described. In addition, considerations when installing accessories or 3rd party accessories are described, too. - Page 62 INSTALLATION OF INDOOR UNIT Mounting to Wall Step 1. Disconnect the remote control case from the front panel and disconnect the remote control cable. CAUTION After installation is completed, return the remote control to its original state. NOTE Use a flat-blade screwdriver or a coin to remove the remote control case. Step 2.
- Page 63 INSTALLATION OF INDOOR UNIT Step 4. Detach the Installation sheet. Screw bolts at the hole marks on the wall. When screwing bolts, use M8 ~ M11 anchor bolts to secure hanging the indoor unit. (For R410A Split) (For R32 Split) (For Hydrosplit) NOTE Self drilling screw can be used as alternatives of M8 ~ M11 anchor bolts.
-
Page 64: Flow Area Requirement : Indoor Unit(For R32 Split)
INSTALLATION OF INDOOR UNIT Flow area requirement : indoor unit(For R32 Split) ) is in system ≥1.842 kg, additional minimum floor area - If the total refrigerant charge (m requirements is complied in the following flow chart. Room A Room B >... -
Page 65: Ventilation Requirements
INSTALLATION OF INDOOR UNIT Ventilation requirements • Two ventilation openings, one at bottom, another at top, for ventilation purposes are made between room A and room B. • Bottom opening : - Must comply to the minimum area requirement of AV - Opening must be located 300 mm from the floor. - Page 66 INSTALLATION OF INDOOR UNIT Table 2 - Minimum floor area Total Ref. Minimum Floor Area + Amount m (kg) Based on h 1.3 m 1.84 6.15 1.86 6.27 1.88 6.41 1.90 6.54 1.92 6.68 1.94 6.82 1.96 6.96 1.98 7.11 2.00 7.25 2.02...
- Page 67 INSTALLATION OF INDOOR UNIT Table 3 - Minimum venting opening area for natural ventilation Minimum opening area AV (Based on h 1.3 m) room Total Ref. Amount m (kg) NOTE - The value of "Installation height (h )“ in this unit is considered 1 300 mm to comply to IEC 60335-2-40:2013 A1 2016 Clause GG2.
-
Page 68: Electrical Wiring
INSTALLATION OF INDOOR UNIT Electrical Wiring Two kind of cables should be connected to the outdoor unit : One is ‘Power cable’, the other one is ‘Connecting cable’. Power cable is a cable which is used to supply external electricity to the outdoor unit. - Page 69 INSTALLATION OF INDOOR UNIT Precautions when laying power wiring Use round pressure terminals for connections to the power terminal block. Power wire Round pressure terminal When none are available, follow the instructions below. - Do not connect wiring of different thicknesses to the power terminal block. (Slack in the power wiring may cause abnormal heat.) - When connecting wiring which is the same thickness, do as shown in the figure below.
- Page 70 INSTALLATION OF INDOOR UNIT Point for attention regarding quality of the public electric power supply This equipment complies with respectively: - EN/IEC 61000-3-12 (1) provided that the short-circuit power Ssc is greater than or equal to the minimum Ssc value at the interface point between the user's supply and the public system. It is the responsibility of the installer or user of the equipment to ensure, by consultation with the distribution network operator if necessary, that the equipment is connected only to a supply with respectively: Ssc greater than or equal to the minimum Ssc value.
-
Page 71: Piping And Wiring For Outdoor Unit
PIPING AND WIRING FOR OUTDOOR UNIT Procedures about refrigerant piping and electric wiring at the outdoor are described in this chapter. Most of procedures are similar to those of LG Air Conditioner. *Pipes and wires should be purchased separately for installation of the product. -
Page 72: Preparation For Piping
PIPING AND WIRING FOR OUTDOOR UNIT Preparation for Piping - Main cause of gas leakage is defect in flaring work. Carry out correct flaring work in the following procedure. - Use the de-oxidised copper as piping materials to install. Step 1. Cut the pipes and the cable. Copper - Use the accessory piping kit or the pipes Slanted Uneven Rough... -
Page 73: Connecting Pipe To Indoor Unit
PIPING AND WIRING FOR OUTDOOR UNIT Connecting Pipe to Indoor Unit Connecting pipe to the indoor unit is two steps. Read following directions carefully. Step 1. Pre-tightening. - Align the center of the pipes and sufficiently tighten the flare nut by hand. Indoor unit tubing Flare nut Pipings... - Page 74 PIPING AND WIRING FOR OUTDOOR UNIT Step 2. Tightening Continuous - Align the center of the pipes and sufficiently tighten the flare nut by hand. - Tighten the flare nut with a wrench until the wrench clicks. - Tightening torque is as following. Outside diameter [mm(inch)] Torque [kgf·m] 6.35 (1/4) 1.8 ~ 2.5...
- Page 75 PIPING AND WIRING FOR OUTDOOR UNIT Step 3. : Use cable clamps (or cord clamps) to prevent unintended move of Power cable and Connecting cable. Step 4. : Reassemble the side panel to the outdoor unit by fastening screws. Control Terminal (Terminal for Connecting Cable) Main Power...
-
Page 76: Finalizing
PIPING AND WIRING FOR OUTDOOR UNIT CAUTION The Power cord connected to the unit should be selected according to the following specifications. Finalizing After pipes are connected and electric cables are wired, pipe forming and some tests are Seal a small remained. -
Page 77: Leakage Test And Evacuation
PIPING AND WIRING FOR OUTDOOR UNIT Leakage test and Evacuation Air and moisture remaining in the refrigerant system have undesirable effects as indicated below. - Pressure in the system rises. - Operating current rises. - Cooling(or heating) efficiency drops. - Moisture in the refrigerant circuit may freeze and block capillary tubing. - Water may lead to corrosion of parts in the refrigeration system. - Page 78 PIPING AND WIRING FOR OUTDOOR UNIT Evacuation Indoor unit - Connect the charge hose end described in the preceding steps to the vacuum pump to evacuate the tubing and indoor unit. Confirm the "Lo and Hi" knob of the manifold valve is open.
- Page 79 PIPING AND WIRING FOR OUTDOOR UNIT Wiring Procedure for Power Cable and Connecting Cable (For Hydrosplit) This cable is generally connected between external power source (such as main electric power distribution panel of user's house) and the unit. Before starting wiring, check if wire specification is suitable and read following directions and cautions VERY carefully.
- Page 80 PIPING AND WIRING FOR OUTDOOR UNIT Step 2. : Connect power cable to main power terminal See below figure for detailed information. When connecting earth cable, the diameter of cable should be refer to the below table. The earth cable is connected to the Control box case where earth symbol is marked.
-
Page 81: Electrical Wiring
PIPING AND WIRING FOR OUTDOOR UNIT Electrical Wiring General Consideration Followings are should be considered before beginning indoor unit wiring. - Field-supplied electrical components such as power switches, circuit breakers, wires, terminal boxes, etc should be properly chosen with compliance with national electrical legislation or regulation. - Page 82 PIPING AND WIRING FOR OUTDOOR UNIT Terminal Block Information (For Split) Symbols used below pictures are as follows : - L, L1, L2 : Live (230 V AC) - N : Neutral (230 V AC) - BR : Brown, WH : White, BL : Blue, BK : Black Terminal Block 1 water flow switching between energizing water...
- Page 83 PIPING AND WIRING FOR OUTDOOR UNIT Terminal Block Information (For Hydrosplit) Symbols used below pictures are as follows : - L, L1, L2, L3 : Live (230 V AC) - N : Neutral (230 V AC) - BR : Brown, WH : White, BL : Blue, BK : Black Terminal Block 1 water flow switching between energizing water...
- Page 84 PIPING AND WIRING FOR OUTDOOR UNIT CAUTION You should separate the communication wiring, in case of communication wiring length is over 40 M. Shield Separation cable Power Supply Communication Wiring Connecting with Outdoor Unit 1(L) 2(N) 3 1(L) 2(N) 3 Terminal block Terminal block at outdoor unit...
- Page 85 PIPING AND WIRING FOR OUTDOOR UNIT Electric Heater Wiring CAUTION Power Cable Specification : The power cord connected to the outdoor unit should be complied with IEC 60245 or HD 22.4 S4(Rubber insulated cord, type 60245 IEC 66 or H07RN-F) 1 Phase(Ø) 3 Phase(Ø) NORMAL...
- Page 86 PIPING AND WIRING FOR OUTDOOR UNIT CAUTION External power supply (same dedicated power supply for the indoor unit and outdoor unit) 1Ø Electric Heater 3Ø Electric Heater (For Hydrosplit) (For Hydrosplit)
-
Page 87: Piping And Wiring For Indoor Unit
PIPING AND WIRING FOR INDOOR UNIT PIPING AND WIRING FOR INDOOR UNIT Procedures about water piping and electric wiring at the indoor unit are described in this chapter. Water piping and water circuit connection, water charging, pipe insulations will be shown for water piping procedures. - Page 88 PIPING AND WIRING FOR INDOOR UNIT WARNING Installing shut-off valve • While assembling two shut-off valves, that are found inside ‘AWHP Installation Kit (AET69364401)’, pop sound will be heard when valve is open or close by rotating handles. It is normal condition because the sound is due to leakage of charged nitrogen gas inside the valve.
- Page 89 PIPING AND WIRING FOR INDOOR UNIT Water Charging (For Split) For water charging, please follow below procedures. Step 1. Open all valves of whole water circuit. Supplied water should be charged not only inside the indoor unit, but also in the under floor water circuit, sanitary water tank circuit, FCU water circuit, and any other water circuits controlled by the product.
- Page 90 PIPING AND WIRING FOR INDOOR UNIT Water Charging (For Hydrosplit) For water charging, please follow below procedures. Step 1. Open all valves of whole water circuit. Supplied water should be charged not only inside the indoor unit, but also in the under floor water circuit, sanitary water tank circuit, FCU water circuit, and any other water circuits controlled by the product.
-
Page 91: Water Pump Capacity
PIPING AND WIRING FOR INDOOR UNIT Water pump Capacity The water pump us variable type which is capable to change flow rate, so it may be required to change default water pump capacity in case of noise by water flow. In most case, however, it is strongly recommended to set capacity as Maximum. -
Page 92: Performance Curve
PIPING AND WIRING FOR INDOOR UNIT Performance curve Indoor : Electric Heater 1Ø, Indoor : Electric Heater 3Ø Pump model : PY-122NDDD3 (for R410A) 8 000 7 000 6 000 5 000 4 000 3 000 2 000 1 000... - Page 93 PIPING AND WIRING FOR INDOOR UNIT MGQ62321902 : UPM3K GEO 20 - 75 CHBL (5 kW, 7 kW, 9 kW / for R32) MGQ62321901 : UPML GEO 20-105 CHBL (12 kW, 14 kW, 16 kW / for Hydrosplit) Performance test based on standard ISO 9906 with pre-pressure 2.0bar and liquid temperature 20 °C.
-
Page 94: Water Quality
PIPING AND WIRING FOR INDOOR UNIT Water Quality Water quality should be complied with EN 98/83 EC Directives. Detailed water quality condition can be found in EN 98/83 EC Directives. CAUTION • If the product is installed at existing hydraulic water loop, it is important to clean hydraulic pipes to remove sludge and scale. -
Page 95: Water Volume And Expansion Vessel Pressure
PIPING AND WIRING FOR INDOOR UNIT Water Volume and Expansion Vessel Pressure Inside expansion vessel is included which is 8 liter capacity with 1 bar pre-pressure. That means, according to the volume-pressure graph, total water volume of 230 liter is supported as default. If total water volume is changed because of installation condition, the pre-pressure should be adjusted to secure proper operation. -
Page 96: Accessories Installation
In this chapter, specifications about supported 3rd party accessories and how to connect to is introduced. It is noted that this chapter only deal with 3rd party accessories. For accessories supported by LG Electronics, please refer to installation manual of each accessories. Accessories supported by LG Electronics... - Page 97 ACCESSORIES INSTALLATION CAUTION • Install the drain pan when cooling. • If not installed, water may form. • Please refer to separate installation manual when installing drain pan. Accessories supported by 3rd party Companies Item Purpose Specification • Solar collector To generate auxiliary heating energy •...
-
Page 98: Before Installation
ACCESSORIES INSTALLATION Before Installation WARNING Followings should be kept before installation • Main power must be turned off during installing 3rd party accessories. • 3rd party accessories should be comply with supported specification. • Proper tools should be chosen for installation. •... - Page 99 ACCESSORIES INSTALLATION General Information The Heat Pump supports following thermostats. Type Power Operating Mode Supported Heating Only (3) Mechanical 230 V~ Heating / Cooling (4) Heating / Cooling / DHW Heating (5) Heating Only (3) Electrical 230 V~ Heating / Cooling (4) Heating / Cooling / DHW Heating (5) (1) There is no electric circuit inside the thermostat and electric power supply to the thermostat is not required.
- Page 100 ACCESSORIES INSTALLATION How to wire thermostat Follow below procedures Step 1 ~ Step 5. Step 1. Uncover front cover of the unit and open the control box. Step 2. Identify the power specification of the thermostat. If it is 220-240 V~, go to Step 3. Step 3.
- Page 101 ACCESSORIES INSTALLATION How to wire Heating / Cooling / DHW Heating thermostat (For Hydrosplit) Follow below procedures Step 1 ~ Step 5. Step 1. Uncover front cover of the unit and open the control box. Step 2. Identify the power specification of the thermostat. If it is 220-240 V~, go to Step 3. Step 3.
- Page 102 ACCESSORIES INSTALLATION Circuit (For Split) The 2nd circuit is generally used to control the temperature of 2 rooms differently. To use the 2nd Circuit, you need to prepare a separate Mix Kit. The mix kit must be installed in the main zone.
- Page 103 ACCESSORIES INSTALLATION How to Wire 2nd Circuit (For Split) Follow below procedures Step 1 ~ Step 2. Step 1. Uncover front cover of the unit. Step 2. Find terminal block and connect wire as below (L) : Live signal from PCB to mix pump (N) : Neutral signal from PCB to mix pump (L1) : Live signal (for Normal* Closed type) from PCB to MIXING VALVE...
- Page 104 ACCESSORIES INSTALLATION [Thermistor for 2 circuit] Sensor Sensor Holder Sensor Connector Follow below procedures step 1 ~ step 4. Step 1. Install sensor connector to outlet pipe of mix kit water pump. (Welding must be performed to connect the sensor connector to the pipe) Step 2.
- Page 105 ACCESSORIES INSTALLATION How to Wire 2nd Circuit (For Hydrosplit) Follow below procedures Step 1 ~ Step 2. Step 1. Uncover front cover of the unit. Step 2. Find terminal block and connect wire as below (L) : Live signal from PCB to mix pump (N) : Neutral signal from PCB to mix pump (L1) : Live signal (for Normal* Closed type) from PCB to MIXING VALVE...
-
Page 106: 3Rd Party Boiler
ACCESSORIES INSTALLATION 3rd Party Boiler The product can be used by connecting an Auxiliary boiler. You can control the boiler automatically and manually by comparing the outside temperature and the set temperature. How to install 3rd party boiler Follow below procedures step 1 ~ step 3. Step 1. -
Page 107: 3Rd Party Controller
3rd Party Controller The product can also be linked to 3rd party controller. You can connect external controllers using Modbus protocol except for LG controller. If 3rd party controller is used, LG controller is not applied to AWHP simultaneously. How to install 3rd party controller Follow below procedures step 1 ~ step 4. -
Page 108: Meter Interface
ACCESSORIES INSTALLATION Meter Interface This product can be used by connecting the meter interface module supplied in the field. The meter interface module can communicate with the wired remote controller. The meter interface module lets you know the amount of power generated by the product. How to install Meter Interface [Parts of Meter interface] Meter interface body... -
Page 109: Central Controller
ACCESSORIES INSTALLATION Central Controller The product can communicate and control through the central controller. The following functions can be controlled in the central control linked state (Operation/Stop, Desired temperature, Hot water operation / stop, Warm water temperature, Full lock, Etc) How to Installation PI485 Fix the PI485 PCB as shown in below images. -
Page 110: Dhw Tank
ACCESSORIES INSTALLATION DHW Tank To establish DHW circuit, 3way valve and DHW tank kit is required. If solar thermal system is pre-installed at the installation field, solar thermal kit is required to interface solar thermal system – to – DHW tank – to – Installation condition Installing sanitary water tank requires following considerations : - Sanitary water tank should be located at the flat place. - Page 111 ACCESSORIES INSTALLATION WARNING Installing recirculation pump When is used with DHW tank, it is STRONGLY recommended to install recirculation pump to prevent flooding out cold water at the end of hot water supply and to stabilize the water temperature inside DHW tank - The recirculation pump should be operated when DHW demand is not required.
- Page 112 ACCESSORIES INSTALLATION How to Wire DHW Tank Heater Step 1. Uncover heater cover of the DHW tank. It is located side of the tank. Step 2. Find terminal block and connect wires as below. Wires are field-supplied item. (L) : Live signal from PCB to Heater. (N) : Neutral signal from PCB to Heater.
-
Page 113: Dhw Tank Kit
ACCESSORIES INSTALLATION DHW Tank Kit This product can be used by connecting the DHW tank kit in the field. It can be utilized hot water heated by booster heater in DHW tank. How to install DHW tank kit [Parts of DHW Tank Kit] Tank kit body Sensor Multi harness... - Page 114 ACCESSORIES INSTALLATION Check Polarity (For Split) 1Ø Electric Heater Model - Connect port no. 1 of the circuit breaker to port no. 3 of the terminal block 3 - Connect port no. 2 of the circuit breaker to port no. 4 of the terminal block 3 Production Until From...
-
Page 115: Solar Thermal Kit (For Split)
Solar Thermal Kit (For Split) This product can be used by connecting the solar thermal kit in the field. It can be utilized hot water heated by solar thermal system. End-user must be LG AWHP solar thermal kit. How to Install Solar Thermal Kit... - Page 116 ACCESSORIES INSTALLATION - insert sensor until the cable tie as shown below. CAUTION Sensor mounting Insert sensor into sensor socket and bolt it tightly.
-
Page 117: Solar Thermal System (For Hydrosplit)
ACCESSORIES INSTALLATION Solar Thermal System (For Hydrosplit) This product can be used by connecting the Solar Thermal System in the field. It can be utilized hot water heated by solar thermal system. How to Install Solar Thermal System [Parts of Solar Thermal Kit] Follow below procedures step 1 ~ step 4. -
Page 118: Dry Contact
ACCESSORIES INSTALLATION Dry Contact Dry Contact is a solution for automatic control of HVAC system at the owner's best. In simple words, it's a switch which can be used to turn the unit On/Off after getting the signal from external sources. How to install dry contact [Parts of Dry contact] Dry Contact body... - Page 119 ACCESSORIES INSTALLATION [Setting of Contact Signal Input] • For input contact closure only(No power input) Thermostat LG does not supply this section (Field supply) Notes Do not input the voltage signal in "NON VOLT" setting mode otherwise it will cause serious damage •...
-
Page 120: External Controller - Setting Up Programmable Digital Input Operation
ACCESSORIES INSTALLATION External Controller - Setting up programmable digital input operation If you require to operate control depending on external digital input(ON/OFF), connect cable to indoor PCB(CN_EXT). Follow below procedures step 1 ~ step 4. Step 1. Check if the power of the unit is turned off. Step 2. -
Page 121: Remote Temperature Sensor
ACCESSORIES INSTALLATION Remote Temperature Sensor Remote temperature sensor can be installed any place a user wants to detect the temperature. • The function is not available for some products. Installation condition Role and constraint while installation of remote air temperature sensor is very similar to that of thermostat. - Page 122 ACCESSORIES INSTALLATION CN_ROOM Fixing screws 60 mm Sensor Indoor PCB [fig. 1] [fig. 2] (For Split) CN_ROOM Fixing screws 60 mm Sensor Indoor PCB [fig. 1] [fig. 2] (For Hydrosplit) Fixing the Step 6. Integrate the remote temperature sensor with the screws as the Remote Sensor order of arrows.
-
Page 123: Solar Pump
ACCESSORIES INSTALLATION Solar pump Solar pump can be required to energize water flow when solar thermal system is installed. How to install solar pump Follow below procedures step 1 ~ step 4. Step 1. Check if the power of the unit is turned off. Step 2. -
Page 124: External Pump
ACCESSORIES INSTALLATION External pump External pump can be required when the room to take floor heating is too large or not well- insulated.(potential free) Also, External pump is installed with buffer tank to retain sufficient capacity. How to install external pump Follow below procedures step 1 ~ step 3. -
Page 125: Wi-Fi Modem
ACCESSORIES INSTALLATION Wi-fi Modem Wi-fi modem enables remote system operation from smartphone. Available functions include selection of on/off, operation mode, DHW heating, temperature setup and weekly scheduling etc. How to install Wi-fi Modem [Parts of Wi-fi modem] Wi-fi modem body USB Cable Extension Cable Follow below procedures step 1 ~ step 5. -
Page 126: Smart Grid (For Split)
ACCESSORIES INSTALLATION Smart Grid (For Split) This product provides SG function for users. It enables to stop internal operation(Heating / DHW) and control target temperature depending on input signal from power provider. How to install smart grid Follow below procedures step 1 ~ step 3. Step 1. -
Page 127: Energy State (For Hydrosplit)
ACCESSORIES INSTALLATION Energy State (For Hydrosplit) This product provides energy states that enable customers to use as much as possible of their own renewable energy. It can shift setpoints depending on input signal from Energy Storage System (ESS) or from any other third-party device using Modbus RTU or Digital 230V inputs. Available Energy States There are 8 energy states available. -
Page 128: Digital Input For Energy Saving (Ess, Smart Grid)(For Hydrosplit)
ACCESSORIES INSTALLATION Digital Input for energy saving (ESS, Smart Grid) (For Hydrosplit) This product provides two digital inputs (TB_SG1 / TB_SG2) that can be used to switch between energy states when not using Modbus RTU (CN-COM). Available Energy States There are 8 energy states available in total. Four different states can be triggered using the 230V-inputs –... -
Page 129: 2Way Valve
ACCESSORIES INSTALLATION 2Way Valve 2way valve is required to control water flow while cooling operation. Role of 2way valve is to cut off water flow into under floor loop in cooling mode when fan coil unit is equipped for cooling operation. -
Page 130: 3Way Valve(A)
ACCESSORIES INSTALLATION 3Way Valve(A) 3Way Valve(A) is required to operate DHW water tank. Role of 3way valve is flow switching between under floor heating loop and water tank heating loop. Plus, it is required to operate 3 party boiler. General Information supports following 3way valve. -
Page 131: 3Way Valve(B)
ACCESSORIES INSTALLATION 3Way Valve(B) 3way valve(B) is required to operate Solar thermal system. Role of 3way valve is flow switching between open and close mode of the solar circuit. General Information supports following 3way valve. Type Power Operating Mode Supported Selecting “Flow A”... -
Page 132: Final Check
ACCESSORIES INSTALLATION Final check Check point Description - Check if the shut-off valves should be assembled with Connection of Water Water inlet and outlet pipe of the unit Inlet/Outlet - Check the location of the water inlet/outlet water pipe - Check the pressure of supplying water by using pressure gauge inside the unit Hydraulic pressure - Pressure of Supplying water should be Under 3.0 bar... -
Page 133: Configuration
CONFIGURATION CONFIGURATION is designed to satisfy various installation environment, it is important to set up system correctly. If not configured correctly, improper operation or degrade of performance can be expected. DIP Switch Setting (For Split) CAUTION Turn off electric power supply before setting DIP switch •... - Page 134 CONFIGURATION DIP Switch Information Option Switch 2 Description Description Setting Setting Default Default As Master Role when central controller is equipped As Slave Unit + Outdoor unit is installed Unit + Outdoor unit + DHW tank is installed Accessory installation Unit + Outdoor unit information + DHW tank...
- Page 135 CONFIGURATION Option Switch 1 Description Setting Default Description Description Setting Setting Default Default As Master MODBUS As Slave Common 3 party MODBUS Function SIEMENS Reserved Reserved Reserved Reserved Option Switch 3 Description Description Setting Setting Default Default Remote sensor is not installed Description Setting Default...
- Page 136 CONFIGURATION Outdoor PCB (5, 7, 9 kW) U4 Chassis (For R32) OFF is selected ON is selected U4 Chassis (For R410A) OFF is selected ON is selected...
- Page 137 CONFIGURATION Outdoor PCB (12, 14, 16 kW) OFF is selected ON is selected DIP Switch Information Description Description Setting Setting Default Default Normal Low Noise Mode Low Noise Mode Limited Low Noise Mode Max Mode Peak Control Peak Control : To limit maximum current (Power saving) h Only DIP-switch no.
-
Page 138: Dip Switch Setting (For Hydrosplit)
CONFIGURATION DIP Switch Setting (For Hydrosplit) CAUTION Turn off electric power supply before setting DIP switch • Whenever adjusting DIP switch, turn off electric power supply to avoid electric shock. General Information Indoor PCB OFF is selected ON is selected... - Page 139 CONFIGURATION DIP Switch Information Option Switch 2 Description Description Setting Setting Default Default As Master Role when central controller is equipped As Slave Unit + Outdoor unit is installed Unit + Outdoor unit + DHW tank Accessory installation is installed information Unit + Outdoor unit + DHW tank...
- Page 140 CONFIGURATION Option Switch 1 Description Description Setting Setting Default Default As Master MODBUS As Slave REGINE MODBUS Function Unified Open Protocol Antifreeze mode not use ANTIFREEZE Antifreeze mode Outdoor PCB (12, 14, 16 kW) DIP_SW01D DIP_SW02D OFF is selected ON is selected...
- Page 141 CONFIGURATION Description Setting Default (Option Switch 1) Description Description Setting Setting Default Default Normal Low Noise Mode Low Noise Mode Limited Low Noise Mode (Option Switch 2) Description Description Setting Setting Default Default Max Mode Peak Control Step 1 : Peak Control Description Setting...
- Page 142 CONFIGURATION NOTE Emergency Operation • Definition of terms - Trouble : a problem which can stop system operation, and can be resumed temporally under limited operation without certificated professional's assist. - Error : problem which can stop system operation, and can be resumed ONLY after certificated professional's check.
- Page 143 CONFIGURATION NOTE • Duplicated trouble : Option trouble with slight or heavy trouble - If option trouble is occurred with slight (or heavy) trouble at the same time, the system puts higher priority to slight (or heavy) trouble and operates as if slight (or heavy) trouble is occurred.
-
Page 144: Service Setting
SERVICE SETTING SERVICE SETTING How to enter service setting To enter the menu displayed at the bottom, you need to enter the service setting menu as follows. • In the menu screen, press [<,>(left/right)] button to select the setting category, and press [OK] button to move to the setting list. -
Page 145: Service Setting
SERVICE SETTING Service contact Check and input the service center phone number that you can call when there is service issue. • In the service setting list, select the service contact point and press [OK] button to move to the detail screen. -
Page 146: Model Information
SERVICE SETTING Model information Check product and capacity information to which the remote controller is connected. • In the service setting list, select model information category, and press [OK] button to move to the detail screen. • The unit capacity - 1 kWh = 1 kBtu * 0.29307 kWh is the result calculated based on Btu, There may be a small difference between calculated and actual capacity. -
Page 147: Rmc Version Lnformation
SERVICE SETTING RMC version lnformation View the remote controller software version. • In the service setting list, select the RMC version information and press [OK] button to move to the detail screen... -
Page 148: Open Source License
SERVICE SETTING Open source license View the remote controller’s open source license. • In the service setting list, select the open source license category, and press [OK] button to move to the detail screen. -
Page 149: Installer Setting
It must be set by the installation specialist with the installation license, and if it is installed or changed without installation license, all problems caused will be the responsibility of the installer, and may void the LG warrenty. • In the menu screen, press [<,>(left/right)] button to select the setting category, and press [∧(up)] button for 3 seconds to enter the password input screen for the installer setting. -
Page 150: Installer Setting (For Split)
INSTALLER SETTING Installer setting (For Split) • You can set the product user functions. • Some functions may not be displayed/operated in some product types. Function Description 3 Minutes Delay Factory use only Selection for setting temperature as air temperature or leaving Select Temperature Sensor water temperature or air+leaving water temperature Dry contact function is the function that can be used only when the... - Page 151 INSTALLER SETTING Function Description TH on/off Variable, cooling Cooling air temperature TH On / Off Type setting TH on/off Variable, cooling Cooling Water Outlet Temperature TH On / Off Type Water At the leaving water control in heating mode, the control reference Heating temp.
- Page 152 INSTALLER SETTING 3 Minutes Delay Temporarily eliminates the 3-minute delay function of the outdoor unit Comp - Factory use only • In the installer setting list, select 3 Minutes Delay category, and press [OK] button to move to the detail screen.
-
Page 153: Select Temperature Sensor
INSTALLER SETTING Select Temperature Sensor The product can be operated according to air temperature or leaving water temperature. The selection for setting temperature as air temperature or leaving water temperature is determined. • In the installer setting list, Select Temperature Sensor category, and press [OK] button to move to the detail screen. -
Page 154: Dry Contact Mode
INSTALLER SETTING Dry Contact Mode Dry contact function is the function that can be used only when the dry contact devices is separately purchased and installed. • Change setting values using [<,>(left/right)] button. Value Auto manual NOTE For dry contact mode related detail functions, refer to the individual dry contact manual. What is dry contact? It means the contact point signal input when the hotel card key, human body detection sensor, etc. -
Page 155: Central Control Address
INSTALLER SETTING Central Control Address When connecting the central control, set the central control address of the unit. • In the installer setting list, select Central Control Address category, and press [OK] button to move to the detail screen. NOTE Enter address code as hexadecimal value Front: Central Control Gr. -
Page 156: Pump Test Run
INSTALLER SETTING Pump test run The pump test run is the function to test run by operating the water pump. This function can be used for air vents / flow sensors and others. • In the installer setting list, Pump Test run category, and press [OK] button to move to the detail screen. -
Page 157: Air Cooling Set Temp
INSTALLER SETTING Air cooling set temp. Determine cooling setting temperature range when air temperature is selected as setting temperature. • In the installer setting list, select Air cooling set temp category, and press [OK] button to move to the detail screen. Value Default Range... -
Page 158: Water Cooling Set Temp
INSTALLER SETTING Water cooling set temp. Determine cooling setting temperature range when leaving water temperature is selected as setting temperature. • In the installer setting list, select water cooling set temp category, and press [OK] button to move to the detail screen. Value Default Range... -
Page 159: Air Heating Set Temp
INSTALLER SETTING Air heating set temp. Determine heating setting temperature range when air temperature is selected as setting temperature • In the installer setting list, select Air heating set temp. category, and press [OK] button to move to the detail screen. Value Default Range... -
Page 160: Water Heating Set Temp
INSTALLER SETTING Water heating set temp. Determine heating setting temperature range when leaving water temperature is selected as setting temperature. • In the installer setting list, select Water heating set temp. category, and press [OK] button to move to the detail screen. Default Range Value... -
Page 161: Dhw Set Temp
INSTALLER SETTING DHW set temp. Determine heating setting temperature range when DHW temperature is selected as setting temperature • In the installer setting list, select DHW set temp. category, and press [OK] button to move to the detail screen. Value Range Max. -
Page 162: Screed Drying
INSTALLER SETTING Screed drying This function is a unique feature of AWHP that, when AWHP is installed in a new concrete structure, controls the specific temperature floor heating out temperature for a certain period of time to cure the floor cement. •... - Page 163 INSTALLER SETTING NOTE • During Screed drying operation, button input except for installer function and temperature display is restricted. • When the power is applied again after a power outage during product operation, the product operation state before power failure is remembered and the product is automatically operated.
-
Page 164: Heater On Temperature
INSTALLER SETTING Heater on temperature Depending on local climatic conditions, it is necessary to change the temperature condition in which electric heater turns on / off. • In the installer setting list, Heater on temperature category, and press [OK] button to move to the detail screen. - Page 165 INSTALLER SETTING NOTE • Heater on temperature Using Half capacity of electric heater : when DIP Switch No. 6 and 7 is set as ‘ON-OFF’ : - Example : If Heater on temperature is set as ‘-1’ and DIP switch No 6. and 7 is set as ‘ON- OFF’, then half capacity of electric heater will start operation when outdoor air temperature is below -1 °C and current leaving water temperature or room air temperature is much belower than target leaving water temperature or target room air temperature.
-
Page 166: Water Supply Off Temp. During Cooling
INSTALLER SETTING Water supply off temp. during cooling Determine leaving water temperature when the unit is turned off. This function is used for preventing condensation on the floor in cooling mode • In the installer setting list, select Water supply off temp. during cooling category, and press [OK] button to move to the detail screen. - Page 167 INSTALLER SETTING - Stop temp. : cut-off temperature. Stop temp. is valid when FCU is installed. - FCU : determines if FCU is installed or not. - Example : If Stop temp. is set as ‘10’ and FCU is ’Use’ and actually FCU is NOT installed in the water loop, the unit stop operation in cooling mode when the leaving water temperature is below 10 °C.
-
Page 168: Tank Disinfection Setting
INSTALLER SETTING Tank disinfection setting 1, 2 • Disinfection operation is special DHW tank operation mode to kill and to prevent growth of legionella inside the tank. - Disinfection active : Selecting enable or disable of disinfection operation. - Start date : Determining the date when the disinfection mode is running. - Start time : Determining the time when the disinfection mode is running. - Page 169 INSTALLER SETTING Tank setting 1 • In the installer setting list, select tank setting 1 category, and press [OK] button to move to the detail screen. Value Range Max outdoor temp 58~40 Min temp 30~1...
- Page 170 INSTALLER SETTING Tank setting 2 • In the installer setting list, select tank setting 2 category, and press [OK] button to move to the detail screen. Value Range Hysteresis Heating priority Floor heating / DHW...
-
Page 171: Tank Setting
INSTALLER SETTING • Tank setting 1, 2 Descriptions for each parameters are as following. - Min temp. : temperature gap from Max outdoor temp. - Max outdoor temp. : maximum temperature generated by AWHP compressor cycle. - Example : If Min temp. is set as ‘5’ and Max outdoor temp. is set as ’48’, then Session A (see the graph) will be started when the water tank temperature is below 45 °C…. -
Page 172: Heater Priority
INSTALLER SETTING Heater priority • Heater priority : determine electric heater and DHW tank heater on and off. • Example : If Heater priority is set as ‘Main+Boost heater ON’, then electric heater and DHW tank heater are on and off according to control logic. If Heater priority is set as ‘Boost heater only ON’, then electric heater is never turned on and only DHW tank heater is on and off according to control logic. -
Page 173: Dhw Time Setting
INSTALLER SETTING DHW time setting Determine following time duration : operation time of DHW tank heating, stop time of DHW tank heating, and delay time of DHW tank heater operating. - Active time : This time duration defines how long time DHW tank heating can be continued. - Stop time : This time duration defines how long time DHW tank heating can be stopped. -
Page 174: Th On/Off Variable, Heating Air
INSTALLER SETTING TH on/off Variable, heating air It is a function to adjust the heating air temperature Thermal On / Off temperature according to the field environment in preparation for heating or heating claim. • You can set the following setting values using [<,>(left/right)] button. Description Value TH On... -
Page 175: Th On/Off Variable, Heating Water
INSTALLER SETTING TH on/off Variable, heating water It is a function to adjust the heating water temperature Thermal On / Off temperature according to the field environment in preparation for heating or heating claim. • You can set the following setting values using [<,>(left/right)] button. Description Value TH On... -
Page 176: Th On/Off Variable, Cooling Air
INSTALLER SETTING TH on/off Variable, cooling air It is a function to adjust the cooling air temperature Thermal On / Off temperature according to the field environment in preparation for cooling or cooling claim. • You can set the following setting values using [<,>(left/right)] button. Description Value TH On... -
Page 177: Th On/Off Variable, Cooling Water
INSTALLER SETTING TH on/off Variable, cooling water It is a function to adjust the cooling water temperature Thermal On / Off temperature according to the field environment in preparation for cooling or cooling claim. • You can set the following setting values using [<,>(left/right)] button. Description Value TH On... -
Page 178: Heating Temp. Setting
INSTALLER SETTING Heating temp. setting • At the leaving water control in heating mode, the control reference water temperature position setting - If the air / leaving water temperature selection setting is set to leaving water temperature • Change setting values using [<,>(left/right)] button •... -
Page 179: Cooling Temp. Setting
INSTALLER SETTING Cooling temp. setting • At the leaving water control in cooling mode, the control reference water temperature position setting - If the air / leaving water temperature selection setting is set to leaving water temperature • Change setting values using [<,>(left/right)] button. •... -
Page 180: Pump Setting In Heating
INSTALLER SETTING Pump setting in heating • It is a function to help the water pump's mechanical life by putting the water pump's rest time • Installer setting function to set water pump operation / delay time option in heating mode •... -
Page 181: Pump Setting In Cooling
INSTALLER SETTING Pump setting in cooling • It is a function to help the water pump's mechanical life by putting the water pump's rest time • installer setting function to set water pump operation / delay time option in cooling mode •... -
Page 182: Forced Operation
INSTALLER SETTING Forced operation • If the product is not used for a long time, the product will be forced to operate to prevent pump failure and PHEX freezing • Water pump off After 20 consecutive hours, disable / enable the logic that drives the water pump by itself •... -
Page 183: Cn_Cc
INSTALLER SETTING CN_CC It is the function to set the usage of the unit’s CN_CC port. • Change setting values using [<,>(left/right)] button Value Description When power is applied to the product, the unit when the contact point D/C Automatic is on in Dry Contact installed state recognizes Dry Contact installation D/C Not Installed Do not use (install) Dry Contact... -
Page 184: Pump Frequency Setting (Rpm)
INSTALLER SETTING Pump frequency setting (RPM) It is a function to enable installer to control pump RPM of BLDC pump application model. • In the installer setting list, select Pump frequency setting(RPM) category, and press [OK] button to move to the detail screen. •... -
Page 185: Pump Capacity
INSTALLER SETTING Pump Capacity It is a function to enable installer to control Pump capacity application model. • In the installer setting list, select Pump Capacity category, and press [OK] button to move to the detail screen. • The function is not available for some products. Value Description 10~100 : %... -
Page 186: Smart Grid(Sg)
INSTALLER SETTING Smart Grid(SG) It is the function to enable / disable the SG Ready function and to set the reference value at SG2 step. • In the installer setting list, select Smart Grid(SG) category, and press [OK] button to move to the detail screen. -
Page 187: Seasonal Auto Temp
INSTALLER SETTING Seasonal auto temp. It is the function to set the operation reference value in Seasonal Auto mode. • In the installer setting list, select Seasonal auto temp category, and press [OK] button to move to the detail screen. Range Function Description... - Page 188 INSTALLER SETTING - Setting range: Celsius - Seasonal Auto Driving mode: Heating, Heating & Cooling, Air-conditioning * If heating mode is selected, heating & cooling or cooling can not be selected. - Depending on the air / outflow control selection value, the water / air related setting value is displayed on the screen.
-
Page 189: Modbus Address
INSTALLER SETTING Modbus Address It is function to set the address of the Modbus device that is externally linked to the product. Modbus address setting function is available from indoor unit. • In the installer setting list, select Modbus Address , and press [OK] button to move to the detail screen. -
Page 190: Cn_Ext
INSTALLER SETTING CN_EXT It is a function to control external input and output according to DI type set by customer using CN-EXT Port. • In the installer setting list, select CN-EXT Port category, and press [OK] button to move to the detail screen. -
Page 191: Anti-Freezing Temperature
INSTALLER SETTING Anti-freezing Temperature Anti-freeze temperature setting is available in installer mode. It prevents frostbite from happening In the range of -25 to -5 degree celsius. • Change setting values using [<, >(left/right)] button. • The function is not available for some products. NOTE To use this function, the antifreeze short pin(CN_FLOW2) must be open and switch No.2 in Option SW 3 must be on. -
Page 192: Add Zone
INSTALLER SETTING Add Zone Function to set whether or not to use a installed 2nd circuit function using mixing kit. You can set valve closing time[s] and hysteresis temperature[°C] on screen by yourself. Activating this function, It allows 2 zones(Room1, Room2) temperature to be controlled, separately. -
Page 193: Use External Pump
INSTALLER SETTING Use External Pump This function can be set to control the external water pump. • In the installer setting list, select Use External Pump category, and press [OK] button to move to the detail screen. Value Not use... -
Page 194: 3Rd Party Boiler
INSTALLER SETTING Party Boiler This function is to configure the 3rd party boiler to be controlled. If the status of this function is “Use”, you can choose control mode of boiler, Auto or Manual. If the mode of this function is set to “Manual”, you can set temperature of the boiler and hysteresis, respectively. -
Page 195: Meter Interface
INSTALLER SETTING Meter Interface It is the function that can check the status of energy and power on screen. It collects and calculates power or calorie data to create data for energy monitoring and energy warning alarm pop-ups. This function can be activated in installer mode. There are 2 options, modbus address and unit, in this function. -
Page 196: Pump Prerun/Overrun
INSTALLER SETTING Pump Prerun/Overrun Pump Prerun operates to ensure sufficient flow before the compressor is operated. This is a function that allows heat exchange to work smoothly. Pump Overrun is a function to prevent water pump failure and to help mechanical life. If the water pump has been off for 20 hours, Water pump will operate for the set time Value Default... -
Page 197: Solar Thermal System
INSTALLER SETTING Solar Thermal System It is function to set operation reference value in Solar Thermal System. In the installer setting list, select Solar thermal system category, and press [OK] button to move to the detail screen. NOTE To use this function, switch No.2 of option switch 2 must be turned ON and No.3 of option switch 2 must be turned OFF. - Page 198 INSTALLER SETTING Descriptions for each parameters are as following. • Solar collector set temp - Min temp : It is the minimum solar collector temperature at which the solar thermal system can operate. - Max temp : It is the maximum solar collector temperature at which the solar thermal system can operate.
-
Page 199: Current Flow Rate
INSTALLER SETTING Current flow rate It is the function to check the current flow rate. • In the installer setting list, select Current Flow Rate category, and press [OK] button to move to the detail screen. The current flow rate can be checked. (Range : 7 ~ 80 L/min) •... -
Page 200: Data Logging
INSTALLER SETTING Data logging It is the function to set the operation reference value in Seasonal Auto mode. • In the installer setting list, select Data logging category, and press [OK] button to move to the detail screen. NOTE Error history lookup range: 50 Error history information Item: date, time, mode (including Off), set temperature, incoming temperature, outgoing temperature, room temperature, Hot water operation / stop, Hot water set... -
Page 201: Password Initialization
INSTALLER SETTING Password Initialization It is the function to initialize (0000) when you forgot the password set in the remote controller. • In the installer setting list, select the password initialization setting category, and press [OK] button to move to the detail screen. •... -
Page 202: Power Supply Blockage (Smart Grid)
INSTALLER SETTING Power Supply Blockage (Smart Grid) The heat pump operated automatically by the power supply status signals from power supply companies. This function can respond to European countries’ special tariff for heat pump using on a smart grid. Power Supply Status Operating Mode 0:0 [Normal Operation] The heat pump works at maximum... -
Page 203: Overview Settings
INSTALLER SETTING Overview settings Menu Structure Menu Sub function .............145 Service contact .............146 Model information .............147 RMC version lnformation .............148 Open source license Installer .............152 3 Minutes Delay .............153 Select Temperature Sensor .............154 Dry Contact Mode .............155 Central Control Address .............156 Pump Test run .............157... - Page 204 INSTALLER SETTING .............176 TH on/off Variable, cooling air .............177 TH on/off Variable, cooling water .............178 Heating temp. setting .............179 Cooling temp. setting .............180 Pump setting in heating .............181 Pump setting in cooling .............182 Forced operation .............183 CN_CC .............184 Pump frequency setting (RPM) .............185 Pump Capacity .............186...
-
Page 205: Installer Setting (For Hydrosplit)
Function to use 2 remote control environment Function to save the environment settings of the LG Therma V Configuration product for use in LG Therma V Configurator through SD Card. Water pump off After 20 consecutive hours, disable Forced operation... - Page 206 INSTALLER SETTING Segmentation Functions Description At the leaving water control in cooling mode, the Cooling temp. setting control reference water temperature position setting Adjusting range of 'Setting Air Temperature' in Air cooling set temp. cooling mode Adjusting range of 'Setting Leaving Water Water cooling set temp.
- Page 207 INSTALLER SETTING Segmentation Functions Description Dry contact function is the function that can be Dry Contact Mode used only when the dry contact devices is separately purchased and installed. When connecting the central control, set the Central Control Address central control address of the unit. It is the function to set whether to install (use) Dry Contact.
-
Page 208: Select Temperature Sensor
INSTALLER SETTING Select Temperature Sensor The product can be operated according to air temperature or leaving water temperature. The selection for setting temperature as air temperature or leaving water temperature is determined. • In the installer setting list, Select Temperature Sensor category, and press [OK] button to move to the detail screen. -
Page 209: Use Heating Tank Heater
INSTALLER SETTING Use Heating Tank Heater This is a function to change the set value for the operation of the hot water tank heater, such as heating tank heater use /not use and heater delay time. • In the installer setting list, Select Configuration category, and press [OK] button to move to the detail screen. -
Page 210: Mixing Circuit
INSTALLER SETTING Mixing Circuit Function to set whether or not to use a installed 2nd circuit function using mixing kit. You can set valve closing time[s] and hysteresis temperature[°C] on screen by yourself. Setting the cut-off temperature protects the water from flowing over the cut-off temperature in the mixing circuit during heating operation. -
Page 211: Use External Pump
INSTALLER SETTING Use External Pump This function can be set to control the external water pump. • In the installer setting list, select Use External Pump category, and press [OK] button to move to the detail screen. • Heating/Cooling You can use this feature when you have installed a 3 Way valve to switch the water flow between the underfloor and the water tank. -
Page 212: Lg Therma V Configuration
INSTALLER SETTING LG Therma V Configuration This function can be set to save the environment settings of the product for use in LG Therma V Configurator through SD Card. • In the Installer setting list, and select LG Therma V Configuration setting category, and press [OK] button to move to the detail screen. -
Page 213: Forced Operation
INSTALLER SETTING Forced operation • If the product is not used for a long time, the product will be forced to operate to prevent pump failure and PHEX freezing • Water pump off After 20 consecutive hours, disable / enable the logic that drives the water pump by itself •... -
Page 214: Pump Prerun/Overrun
INSTALLER SETTING Pump Prerun/Overrun Pump Prerun operates to ensure sufficient flow before the compressor is operated. This is a function that allows heat exchange to work smoothly. Pump Overrun is a function to prevent water pump failure and to help mechanical life. If the water pump has been off for 20 hours, Water pump will operate for the set time Value Default... -
Page 215: Water Flow Control
INSTALLER SETTING Water Flow Control This function controls the water flow by controlling the water pump. Select the way to control the water pump and set the target value • In the installer setting list, select Configuration category, and press [OK] button to move to the detail screen. -
Page 216: Password Reset
INSTALLER SETTING Password Reset It is the function to initialize (0000) when you forgot the password set in the remote controller. • In the installer setting list, select the password Reset setting category, and press [OK] button to move to the detail screen. •... -
Page 217: Screed Drying
INSTALLER SETTING Screed drying This function is a unique feature of AWHP that, when AWHP is installed in a new concrete structure, controls the specific temperature floor heating out temperature for a certain period of time to cure the floor cement. •... - Page 218 INSTALLER SETTING NOTE • During Screed drying operation, button input except for installer function and temperature display is restricted. • When the power is applied again after a power outage during product operation, the product operation state before power failure is remembered and the product is automatically operated.
-
Page 219: Heater On Temperature
INSTALLER SETTING Heater on temperature Depending on local climatic conditions, it is necessary to change the temperature condition in which electric heater turns on / off. • In the installer setting list, Heater on temperature category, and press [OK] button to move to the detail screen. - Page 220 INSTALLER SETTING NOTE • Heater on temperature Using Half capacity of electric heater : when DIP Switch No. 6 and 7 is set as ‘ON-OFF’ : - Example : If Heater on temperature is set as ‘-1’ and DIP switch No 6. and 7 is set as ‘ON- OFF’, then half capacity of electric heater will start operation when outdoor air temperature is below -1 °C and current leaving water temperature or room air temperature is much belower than target leaving water temperature or target room air temperature.
-
Page 221: Air Heating Set Temp
INSTALLER SETTING Air heating set temp. Determine heating setting temperature range when air temperature is selected as setting temperature • In the installer setting list, select Air heating set temp. category, and press [OK] button to move to the detail screen. Value Default Range... -
Page 222: Water Heating Set Temp
INSTALLER SETTING Water heating set temp. Determine heating setting temperature range when leaving water temperature is selected as setting temperature. • In the installer setting list, select Water heating set temp. category, and press [OK] button to move to the detail screen. Value Default Range... -
Page 223: Hysteresis Room Air(Heating)
INSTALLER SETTING Hysteresis Room Air(Heating) It is a function to adjust the heating air temperature Thermal On / Off temperature according to the field environment in preparation for heating or heating claim. • In the Installer setting list, and select Hysteresis Room Air(Heating) category, and press [OK] button to move to the detail screen. -
Page 224: Hysteresis Heating Water
INSTALLER SETTING Hysteresis Heating Water It is a function to adjust the heating water temperature Thermal On / Off temperature according to the field environment in preparation for heating or heating claim. • In the Installer setting list, and select Hysteresis Heating Water category, and press [OK] button to move to the detail screen. -
Page 225: Heating Temp. Setting
INSTALLER SETTING Heating temp. setting • At the leaving water control in heating mode, the control reference water temperature position setting - If the air / leaving water temperature selection setting is set to leaving water temperature • Change setting values using [<,>(left/right)] button •... -
Page 226: Pump Setting In Heating
INSTALLER SETTING Pump setting in heating • It is a function to help the water pump's mechanical life by putting the water pump's rest time • Installer setting function to set water pump operation / delay time option in heating mode •... -
Page 227: Air Cooling Set Temp
INSTALLER SETTING Air cooling set temp. Determine cooling setting temperature range when air temperature is selected as setting temperature. • In the installer setting list, select Air cooling set temp category, and press [OK] button to move to the detail screen. Value Default Range... -
Page 228: Water Cooling Set Temp
INSTALLER SETTING Water cooling set temp. Determine cooling setting temperature range when leaving water temperature is selected as setting temperature. • In the installer setting list, select water cooling set temp category, and press [OK] button to move to the detail screen. Value Default Range... -
Page 229: Water Supply Off Temp. During Cooling
INSTALLER SETTING Water supply off temp. during cooling Determine leaving water temperature when the unit is turned off. This function is used for preventing condensation on the floor in cooling mode • In the installer setting list, select Water supply off temp. during cooling category, and press [OK] button to move to the detail screen. - Page 230 INSTALLER SETTING - Stop temp. : cut-off temperature. Stop temp. is valid when FCU is installed. - FCU : determines if FCU is installed or not. - Example : If Stop temp. is set as ‘10’ and FCU is ’Use’ and actually FCU is NOT installed in the water loop, the unit stop operation in cooling mode when the leaving water temperature is below 10 °C.
-
Page 231: Hysteresis Room Air(Cooling)
INSTALLER SETTING Hysteresis Room Air(Cooling) It is a function to adjust the cooling air temperature Thermal On / Off temperature according to the field environment in preparation for cooling or cooling claim. • In the Installer setting list, and select Hysteresis Room Air(Cooling) setting category, and press [OK] button to move to the detail screen. -
Page 232: Hysteresis Cooling Water
INSTALLER SETTING Hysteresis Cooling Water It is a function to adjust the cooling water temperature Thermal On / Off temperature according to the field environment in preparation for cooling or cooling claim. • In the Installer setting list, and select Hysteresis Cooling Water setting category, and press [OK] button to move to the detail screen. -
Page 233: Cooling Temp. Setting
INSTALLER SETTING Cooling temp. setting • At the leaving water control in cooling mode, the control reference water temperature position setting - If the air / leaving water temperature selection setting is set to leaving water temperature • Change setting values using [<,>(left/right)] button. •... -
Page 234: Pump Setting In Cooling
INSTALLER SETTING Pump setting in cooling • It is a function to help the water pump's mechanical life by putting the water pump's rest time • installer setting function to set water pump operation / delay time option in cooling mode •... -
Page 235: Seasonal Auto Temp
INSTALLER SETTING Seasonal auto temp. It is the function to set the operation reference value in Seasonal Auto mode. • In the installer setting list, select Seasonal auto temp category, and press [OK] button to move to the detail screen. - Page 236 INSTALLER SETTING Default Default Function Description Range Boundary (Circuit1) (Circuit2) Outdoor1,Heat Heating lower ambient Out1 ≤ Out2-1 -10 °C (Out1) temp -25 ~ 35 °C Out2 ≥ Out1 +1 Outdoor2,Heat Heating higher ambient 18 °C Out2 ≤ Out3 -5 (Out2) temp Out3 ≥...
- Page 237 INSTALLER SETTING - Setting range: Celsius - Seasonal Auto Driving mode: Heating, Heating & Cooling * If heating mode is selected, heating & cooling or cooling can not be selected. - Depending on the air / outflow control selection value, the water / air related setting value is displayed on the screen.
-
Page 238: Heater Priority
INSTALLER SETTING Heater priority • Heater priority : determine electric heater and DHW tank heater on and off. • Example : If Heater priority is set as ‘Main+Boost heater ON’, then electric heater and DHW tank heater are on and off according to control logic. If Heater priority is set as ‘Boost heater only ON’, then electric heater is never turned on and only DHW tank heater is on and off according to control logic. -
Page 239: Dhw Set Temp
INSTALLER SETTING DHW set temp. Determine heating setting temperature range when DHW temperature is selected as setting temperature • In the installer setting list, select DHW set temp. category, and press [OK] button to move to the detail screen. Value Range Max. -
Page 240: Tank Disinfection Setting
INSTALLER SETTING Tank disinfection setting 1, 2 • Disinfection operation is special DHW tank operation mode to kill and to prevent growth of legionella inside the tank. - Disinfection active : Selecting enable or disable of disinfection operation. - Start date : Determining the date when the disinfection mode is running. - Start time : Determining the time when the disinfection mode is running. - Page 241 INSTALLER SETTING Tank setting 1 • In the installer setting list, select tank setting 1 category, and press [OK] button to move to the detail screen. Value Range Comp Limit Temp. 58~40 Min. Temp. 30~1...
- Page 242 INSTALLER SETTING Tank setting 2 • In the installer setting list, select tank setting 2 category, and press [OK] button to move to the detail screen. Value Range Hysteresis Heating priority Floor heating / DHW...
-
Page 243: Tank Setting
INSTALLER SETTING • Tank setting 1, 2 Descriptions for each parameters are as following. - Min temp. : temperature gap from Max outdoor temp. - Max outdoor temp. : maximum temperature generated by AWHP compressor cycle. - Example : If Min temp. is set as ‘5’ and Max outdoor temp. is set as ’48’, then Session A (see the graph) will be started when the water tank temperature is below 45 °C…. -
Page 244: Dhw Time Setting
INSTALLER SETTING DHW time setting Determine following time duration : operation time of DHW tank heating, stop time of DHW tank heating, and delay time of DHW tank heater operating. - Active time : This time duration defines how long time DHW tank heating can be continued. - Stop time : This time duration defines how long time DHW tank heating can be stopped. -
Page 245: Solar Thermal System
INSTALLER SETTING Solar Thermal System It is function to set operation reference value in Solar Thermal System. In the installer setting list, select Solar thermal system category, and press [OK] button to move to the detail screen. NOTE To use this function, switch No.2 of option switch 2 must be turned ON and No.3 of option switch 2 must be turned OFF. - Page 246 INSTALLER SETTING Descriptions for each parameters are as following. • Solar collector set temp - Min temp : It is the minimum solar collector temperature at which the solar thermal system can operate. - Max temp : It is the maximum solar collector temperature at which the solar thermal system can operate.
-
Page 247: Pump Test Run
INSTALLER SETTING Pump test run The pump test run is the function to test run by operating the water pump. This function can be used for air vents / flow sensors and others. • In the installer setting list, Pump Test run category, and press [OK] button to move to the detail screen. -
Page 248: Frost Protection Temp
INSTALLER SETTING Frost Protection Temp. Anti-freeze temperature setting is available in installer mode. It prevents frostbite from happening In the range of -25 to -5 degree celsius. • Change setting values using [<, >(left/right)] button. • The function is not available for some products. NOTE To use this function, the antifreeze short pin(CN_FLOW2) must be open and switch No.2 in Option SW 3 must be on. -
Page 249: Dry Contact Mode
INSTALLER SETTING Dry Contact Mode Dry contact function is the function that can be used only when the dry contact devices is separately purchased and installed. • Change setting values using [<,>(left/right)] button. Value Auto manual NOTE For dry contact mode related detail functions, refer to the individual dry contact manual. What is dry contact? It means the contact point signal input when the hotel card key, human body detection sensor, etc. -
Page 250: Central Control Address
INSTALLER SETTING Central Control Address When connecting the central control, set the central control address of the unit. • In the installer setting list, select Central Control Address category, and press [OK] button to move to the detail screen. NOTE Enter address code as hexadecimal value Front: Central Control Gr. -
Page 251: Cn_Cc
INSTALLER SETTING CN_CC It is the function to set the usage of the unit’s CN_CC port. • Change setting values using [<,>(left/right)] button Value Description When power is applied to the product, the unit when the contact point D/C Automatic is on in Dry Contact installed state recognizes Dry Contact installation D/C Not Installed Do not use (install) Dry Contact... -
Page 252: Energy State
INSTALLER SETTING Energy state This function is to control the product according to the energy state. When the charged state of ESS is transmitted, it changes the target temperature of heating, cooling and DHW by setting value according to energy state. Select either Signal Mode or Modbus Mode according to the connection type between the product and the ESS. -
Page 253: Thermostat Control Type
INSTALLER SETTING Thermostat control type It is a function to enable installer to control Water Pump Options using water flow sensor. • In the Installer setting list, and select Connectivity category, and press [OK] button to move to the detail screen. Type Heat &... -
Page 254: Pump Operation Time
INSTALLER SETTING Pump operation time It is a function to show the water pump’s operation time for check mechanical life. • In the Installer setting list, and select Information category, and press [OK] button to move to the detail screen. -
Page 255: Idu Operation Time
INSTALLER SETTING IDU operation time It is a function to show the Indoor Unit’s operation time for check mechanical life. • In the Installer setting list, and select Information category, and press [OK] button to move to the detail screen. -
Page 256: Modbus Address
INSTALLER SETTING Modbus Address It is function to set the address of the Modbus device that is externally linked to the product. Modbus address setting function is available from indoor unit. • In the installer setting list, select Modbus Address , and press [OK] button to move to the detail screen. -
Page 257: Modbus Gateway Memory Map
INSTALLER SETTING Modbus gateway memory map Baud Rate : 9 600 bps Stop Bit : 1 stop bit Parity : None Parity Coil Register (0x01) Register Description Value explanation 00001 Enable/Disable (Heating/Cooling) 0 : Operation OFF / 1 : Operation ON 00002 Enable/Disable (DHW) 0 : Operation OFF / 1 : Operation ON... - Page 258 INSTALLER SETTING Holding Register (0x03) Register Description Value explanation 30001 Error Code Error Code 30002 ODU operation Cycle 0 : Standby(OFF) / 1 : Cooling / 2 : Heating 30003 Water inlet temp. [0.1 °C ×10] 30004 Water outlet temp. [0.1 °C ×10] 30005 Backup heater outlet temp.
- Page 259 INSTALLER SETTING Input Register (0x04) Register Description Value explanation 40001 Operation Mode 0 : Cooling / 4 : Heating / 3 : Auto 0 : Water outlet temp. control 40002 Control method (Circuit 1/2) 1 : Water inlet temp. control 2 : Room air control Target temp (Heating/Cooling) 40003...
-
Page 260: Cn_Ext
INSTALLER SETTING CN_EXT It is a function to control external input and output according to DI type set by customer using CN-EXT Port. • In the installer setting list, select CN-EXT Port category, and press [OK] button to move to the detail screen. -
Page 261: 3Rd Party Boiler
INSTALLER SETTING Party Boiler This function is to configure the 3rd party boiler to be controlled. If the status of this function is “Use”, you can choose control mode of boiler, Auto or Manual. If the mode of this function is set to “Manual”, you can set temperature of the boiler and hysteresis, respectively. -
Page 262: Meter Interface
INSTALLER SETTING Meter Interface It is the function that can check the status of energy and power on screen. It collects and calculates power or calorie data to create data for energy monitoring and energy warning alarm pop-ups. This function can be activated in installer mode. There are 2 options, modbus address and unit, in this function. -
Page 263: Current Flow Rate
INSTALLER SETTING Current flow rate It is the function to check the current flow rate. • In the installer setting list, select Current Flow Rate category, and press [OK] button to move to the detail screen. The current flow rate can be checked. (Range : 7 ~ 80 L/min) •... -
Page 264: Data Logging
INSTALLER SETTING Data logging It is the function to set the operation reference value in Seasonal Auto mode. • In the installer setting list, select Data logging category, and press [OK] button to move to the detail screen. NOTE Error history lookup range: 50 Error history information Item: date, time, mode (including Off), set temperature, incoming temperature, outgoing temperature, room temperature, Hot water operation / stop, Hot water set... -
Page 265: Commissioning
• Refrigerant leakage degrades the performance. If leakage found, contact Installation Refrigerant leakage qualified LG air conditioning installation person. • While cooling operation, condensed dew can drop down to the bottom of the Drainage treatment unit. In this case, prepare drainage treatment (for example, vessel to contain... -
Page 266: Starting Operation
COMMISSIONING To assure best performance of , it is required to perform periodical check and maintenance. It is recommended to proceed following check list for once a year. CAUTION Turn off the power before proceeding maintenance. Category Item Check Point •... -
Page 267: Starting Operation Flow Chart
COMMISSIONING Starting Operation flow chart START Check whether the power cable and Operate the unit in heating mode. communication cable are completely connected Does Test operation start? Is cold water discharged for * Check the load (In/Out Temp.) more than 3 minutes ? * Check pipe length and amount of refrigerant Is there any temperature... -
Page 268: Vacuum & Charge Of Refrigerant
COMMISSIONING Vacuum & Charge of Refrigerant By default, the product was charged of refrigerant. Vacuum and refrigerant charge, If there is leak refrigerant. 1. Vacuum To work of vacuum action. when the leak of refrigerant. Manifold valve (For Split) Pressure gauge Open Close... - Page 269 COMMISSIONING 2. Charge of refrigerant You should be charged after vacuum. You can see amount of refrigerant at quality label. Please to charge at cooling mode when there is not full charging. (For Split) Refrigerant cylinder SVC Port Manifold gauge (For Hydrosplit) SVC Port Manifold gauge...
- Page 270 COMMISSIONING 3. Location of SVC port (For Split) 1Ø : 5 kW, 7 kW, 9 kW 1Ø : 5 kW, 7 kW, 9 kW SVC Port (For Split) 1Ø : 12 kW, 14 kW, 16 kW 3Ø : 12 kW, 14 kW, 16 kW SVC Port (For Hydrosplit) 1Ø...
-
Page 271: Troubleshooting
COMMISSIONING Troubleshooting operates not properly or it does not start operation, please check following list. CAUTION Turn off the power before proceeding troubleshooting. Troubleshooting for Problem while Operation Problem Reason Solution • Set target temperature correctly. • Setting target temperature •... - Page 272 COMMISSIONING Troubleshooting for Error Code Display Title Cause of error Check point & Normal condition code Problem in remote room air sensor • Resistance: 10 kΩ at 25 centigrade Problem in refrigerant (inlet side) sensor (unplugged) → for Remote room air sensor Problem in refrigerant (outlet side) sensor •...
- Page 273 COMMISSIONING Display Title Cause of error Check point & Normal condition code • Abnormal operation of electric • If there is no problem in electric heater control, possible Water pipe heater maximum leaving water temperature is 57 °C(R410A)/65 overheated • Leaving water temperature is above °C(R32) 57 °C(R410A)/65 °C(R32) •...
- Page 274 COMMISSIONING Display Title Cause of error Check point & Normal condition code • Defective low pressure sensor • Defective unit fan • Refrigerant shortage/leakage • Deformation because of damage of refrigerant pipe • Defective unit EEV Low Presser Error Excessive decrease of low pressure •...
- Page 275 COMMISSIONING Display Title Cause of error Check point & Normal condition code 1. Part no. : EBR37798101~09 - Check the heatsink sensor: 10 kΩ / at 25 °C(Unplugged) - Check the outdoor fan is driving rightly 2. Part no. : EBR37798112~21 Heat sink Temp, Heat sink sensor detected high - Check the soldered condition in the 22,23 pin of IPM,...
- Page 277 • The information for Eco design is available on the following free access website. https://www.lg.com/global/support/cedoc/cedoc [Representative] LG Electronics Inc. EU Representative : LG Electronics European Shared Service Center B.V. Krijgsman 1, 1186 DM Amstelveen, The Netherlands [Manufacturer] LG Electronics Inc. Changwon 2nd factory 84, Wanam-ro, Seongsan-gu,...
Need help?
Do you have a question about the THERMA V and is the answer not in the manual?
Questions and answers