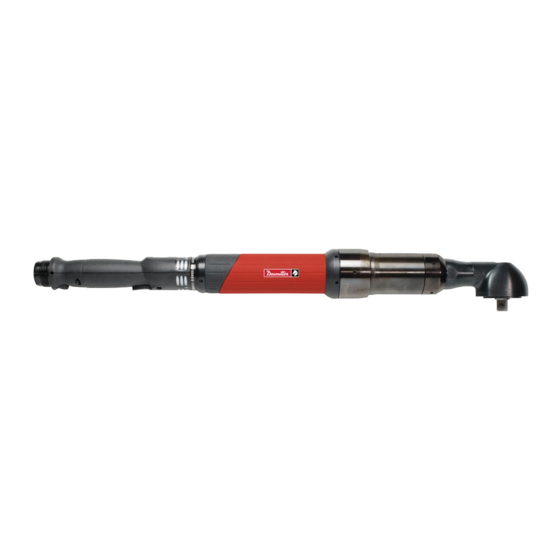
Desoutter EAD20-1300 Product Instructions
Angle-head electric nutrunner
Hide thumbs
Also See for EAD20-1300:
- Safety information manual (205 pages) ,
- User manual (79 pages) ,
- Original instructions manual (69 pages)
Table of Contents
Advertisement
Quick Links
Model
EAD20-1300
EAD32-900
EAD50-900
EAD50-900-HAD
EAD70-800
EAD70-700-HAD
EAD70-800 SQ1/2
EAD80-650
EAD105-500
EAD105-500-HAD
EAD160-430
EAD160-430-HAD
EAD200-370
EAD280-260
EAD280-370
EAD440-250
EAD660-160
Download the latest version of this document at
http://www.desouttertools.com/info/6159929650_EN
Read all safety warnings and instructions
Failure to follow the safety warnings and instructions may result in
electric shock, fire and/or serious injury.
Save all warnings and instructions for future reference
Angle-head Electric Nutrunner
Product Instructions
Part number
6151656060
6151656070
6151656090
6151658770
6151656110
6151658780
6151658820
6151656120
6151656130
6151658790
6151656810
6151658800
6151656820
6151656830
6151656840
6151656850
6151656860
WARNING
Printed Matter No. 6159929650_EN
Issue No.
01
Date
10/2020
Page
1 / 20
Advertisement
Table of Contents

Subscribe to Our Youtube Channel
Related Manuals for Desoutter EAD20-1300


Summary of Contents for Desoutter EAD20-1300
- Page 1 Printed Matter No. 6159929650_EN Issue No. Date 10/2020 Page 1 / 20 Angle-head Electric Nutrunner Product Instructions Model Part number EAD20-1300 6151656060 EAD32-900 6151656070 EAD50-900 6151656090 EAD50-900-HAD 6151658770 EAD70-800 6151656110 EAD70-700-HAD 6151658780 EAD70-800 SQ1/2 6151658820 EAD80-650 6151656120 EAD105-500 6151656130 EAD105-500-HAD...
-
Page 2: Table Of Contents
Table of Contents Product Information .......................... 3 General Information......................... 3 Safety Signal Words...................... 3 Warranty.......................... 3 Website .......................... 3 Information about spare parts .................... 3 Dimensions (mm) ......................... 4 CAD files .......................... 6 Overview ............................ 6 General overview ......................... 6 Product description ...................... 6 Technical data........................ 7 Accessories.......................... 9 Service Overview .......................... 11 Maintenance program ...................... 11 Spare parts......................... 11 Installation............................ 12 Installation Instructions........................ 12... -
Page 3: Product Information
• The product warranty relies on the correct use, maintenance, and repair of the tool and its component parts. • Damage to parts that occurs as a result of inadequate maintenance or performed by parties other than Desoutter or their Certified Service Partners during the warranty period is not covered by the warranty. -
Page 4: Dimensions (Mm)
Product Information Dimensions (mm) ØA ØB 20-1300 32-900 50-900 70-800 70-800 Sq.1/2 80-650 105-500 ØC 20-1300 45.5 32-900 45.5 50-900 51.1 70-800 56.7 70-800 Sq.1/2 80-650 17.5 60.4 105-500 17.5 60.4 ØA ØB 160-430 200-370 280-260 280-370 440-250 660-160 4 / 20 10/2020... - Page 5 Product Information 160-430 6 (0 to 0.012) 200-370 6 (0 to 0.012) 280-260 6 (0 to 0.012) 280-370 6 (0 to 0.012) 440-250 8 (0 to 0.015) 660-160 10 (0 to 0.015) 160-430 37° 200-370 40° 280-260 40° 280-370 40° 440-250 37°...
-
Page 6: Cad Files
For information about the dimensions of a product, see the Dimensional drawings archive: https://www.desouttertools.com/resource-centre Overview General overview EAD / EAD-HAD are electric angle-head nutrunners powered by one of the following Desoutter controllers. - CVI3 Essential - CVI3 Function - CVI3 Vision - TWINCVI3 They are hand-held by the operator. -
Page 7: Technical Data
Product Information Output drive Trigger Reverse button Reporting LEDs Technical data Voltage 3 ~ 230 V Power consumption Model EAD20-1300 EAD32-900 EAD50-900 EAD50-900-HAD EAD70-700-HAD EAD70-800 EAD70-800 SQ 1/2 EAD80-650 EAD105-500 EAD105-500-HAD EAD160-430 EAD160-430-HAD EAD200-370 EAD280-260 EAD280-370 EAD440-250 EAD660-160 Output drive... - Page 8 Product Information Torque range (Nm) Model Min. / Nominal / Max. EAD20-1300 3 / 18 / 20 EAD32-900 5 / 30 / 32 EAD50-900 8 / 45 / 50 EAD50-900-HAD 8 / 45 / 50 EAD70-700-HAD 12 / 65 / 70...
-
Page 9: Accessories
Product Information Model EAD80-650 EAD105-500 EAD105-500-HAD EAD160-430 EAD160-430-HAD EAD200-370 EAD280-260 EAD280-370 EAD440-250 EAD660-160 Weight Model EAD20-1300 1.55 3.41 EAD32-900 1.55 3.41 EAD50-900 1.95 4.30 EAD50-900-HAD 1.80 3.96 EAD70-700-HAD 2.00 4.40 EAD70-800 2.15 4.74 EAD70-800 SQ 1/2 2.15 4.74 EAD80-650 2.55 5.62... - Page 10 Product Information Front trigger (mechanical) for EAD20 to EAD105 6153985300 Warning: this trigger must be mounted on tool by authorized Desoutter technician only. Front trigger (electric) for EAD20 to EAD32 6159110135 Front trigger (electric) for EAD50 to EAD105 6159110125 Suspension bail (up to EAD105 / EID75)
-
Page 11: Service Overview
Product Information Tool extension cables Length (m) Length (ft) Part number 26.2 6159175810 52.5 6159175840 6159175870 6159175890 Service Overview Maintenance program Please consult us on the Tool Care program that includes production support and maintenance solutions. Spare parts Exploded views and spare parts lists are available at https://www.desouttertools.com/resource-centre. The use of spare parts other than those originally supplied by the manufacturer may result in a drop in performance or in increased maintenance and level of vibration and in the full cancellation of the manufacturer’s liability. -
Page 12: Installation
Whether the tool is handled by an operator with a torque arm or embedded in a robot with high dynamics, it is advised to select two clamping locations instead of one. Before selecting where to clamp the tool, take into account the following instructions. From EAD20-1300 to EAD105-500 From EAD160-430 to EAD660-160 Dedicated clamping area for torque reaction. -
Page 13: Connecting The Tool To The Controller
Installation Connecting the tool to the controller Connect the cable to the tool. Plug the cable with help of TOP indication. Tighten the nut. No need to tighten it too much. The locking system will prevent any loosening. To enable the loosening of the cable, actuate the locking trigger at the bottom of the handle. Connect the cable to the controller. -
Page 14: Operation
How to set up the tool as a fixtured tool Desoutter should not be held responsible for any injury, accident or damage which may be the consequence of an in- correct installation, modification or start-up, or a use out of the intended use of Desoutter products, by the customer or a third party. -
Page 15: Tightening Status And Led Reporting
Operation Tightening status and LED reporting Reporting LEDs Green Yellow How to read the tightening report LED color Description Action to do Green Accept report None Yellow Incomplete rundown Tighten again. Yellow and red (orange) Reject report Loosen and tighten again. Above max. -
Page 16: Service
To upgrade tools, it is necessary to have: • an ACCESS KEY USB stick set with the right profile. This USB stick is provided by your CVIKEY manager. • CVIMONITOR software Contact your Desoutter representative to get more information and support. 16 / 20 10/2020... -
Page 17: Checking Before Putting Back Into Service
Service Checking before putting back into service Prior to putting the equipment back into service, check that its main settings have not been modified and that the safety devices work properly. Recommissionning Prior to putting the different parts of the system back into service, check that the main settings have been correctly set up and that the safety devices work properly. - Page 20 Original instructions Founded in 1914 and headquartered in France, Desoutter Industrial Tools is a global leader in electric and pneumatic assembly tools serving a wide range of assembly and manufacturing operations, including Aerospace, Automotive, Light and Heavy Vehicles, Off-Road, General Industry.
Need help?
Do you have a question about the EAD20-1300 and is the answer not in the manual?
Questions and answers