Table of Contents
Advertisement
Quick Links
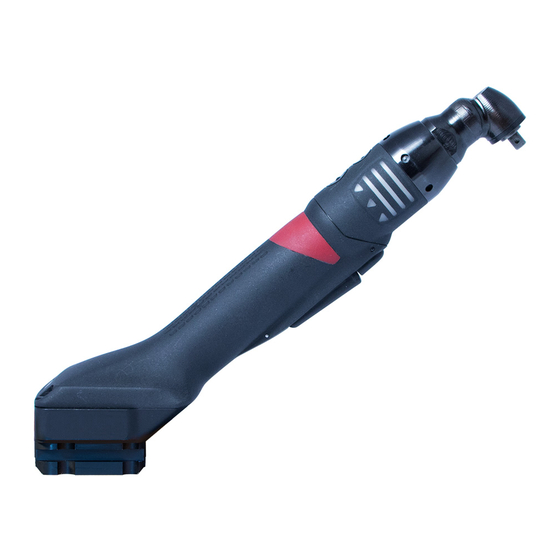
Model
EABS8-1500-4S
EABS8-1500-4Q
EABS12-1100-4S
EABS12-1100-10S
EABS12-1100-4Q
EABS17-800-4S
EABS17-800-10S
EABS17-800-4Q
EABS24-500-10S
EABS24-500-4Q
Download the latest version of this document at
www.desouttertools.com/info/6159925220
Read all safety warnings and instructions
Failure to follow the safety warnings and instructions may result in
electric shock, fire and/or serious injury.
Save all warnings and instructions for future reference
Cordless Angle Nutrunner
Product Instructions
Part number
6151660870
6151660880
6151660890
6151660900
6151660910
6151660920
6151660930
6151660940
6151660950
6151660960
WARNING
Printed Matter No. 6159925220
Issue No.
03
Date
01/2020
Page
1 / 24
Advertisement
Table of Contents

Related Manuals for Desoutter EABS8-1500-4S


Summary of Contents for Desoutter EABS8-1500-4S
- Page 1 Printed Matter No. 6159925220 Issue No. Date 01/2020 Page 1 / 24 Cordless Angle Nutrunner Product Instructions Model Part number EABS8-1500-4S 6151660870 EABS8-1500-4Q 6151660880 EABS12-1100-4S 6151660890 EABS12-1100-10S 6151660900 EABS12-1100-4Q 6151660910 EABS17-800-4S 6151660920 EABS17-800-10S 6151660930 EABS17-800-4Q 6151660940 EABS24-500-10S 6151660950 EABS24-500-4Q 6151660960 Download the latest version of this document at www.desouttertools.com/info/6159925220...
-
Page 2: Table Of Contents
Table of Contents Product Information .......................... 3 General Information......................... 3 Warranty.......................... 3 Website .......................... 3 Information about spare parts .................... 3 Dimensioning ........................ 4 CAD files .......................... 5 Overview ............................ 5 General overview ......................... 5 Product description ...................... 6 Technical data........................ 6 Accessories.......................... 8 Installation.............................. 9 Installation Instructions........................ 9 Changing the angle head orientation ................... 9 How to connect EABS to a computer................. 10 How to connect the tool to CONNECT................ 10 How to connect the tool to CVI3 Vision................ 11... -
Page 3: Product Information
• The product warranty relies on the correct use, maintenance, and repair of the tool and its component parts. • Damage to parts that occurs as a result of inadequate maintenance or performed by parties other than Desoutter or their Certified Service Partners during the warranty period is not covered by the warranty. -
Page 4: Dimensioning
Product Information Dimensioning Model Output drive EABS8-1500-4S Sq. 1/4" EABS8-1500-4Q Hex 1/4" EABS12-1100-4S Sq. 1/4" EABS12-1100-10S Sq. 3/8" EABS12-1100-4Q Hex 1/4" EABS17-800-4S Sq. 1/4" EABS17-800-10S Sq. 3/8" EABS17-800-4Q Hex 1/4" EABS24-500-10S Sq. 3/8" EABS24-500-4Q Hex 1/4" Model ØA ØB ØC... -
Page 5: Cad Files
Product Information Model EABS12-1100-10S EABS12-1100-4Q EABS17-800-4S EABS17-800-10S EABS17-800-4Q EABS24-500-10S EABS24-500-4Q Model ØA ØB ØC EABS8-1500-4S 11.69 1.54 0.87 0.87 EABS8-1500-4Q 11.69 1.54 0.87 0.87 EABS12-1100-4S 11.69 1.54 0.87 0.87 EABS12-1100-10S 11.69 1.54 0.87 0.87 EABS12-1100-4Q 11.69 1.54 0.87 0.87 EABS17-800-4S 11.69... -
Page 6: Product Description
Technical data Voltage (V) 18 V or 36 V Torque range (Nm) Model Min. / Nominal / Max. EABS8-1500-4S 1.5 / 7 / 8 EABS8-1500-4Q 1.5 / 7 / 8 EABS12-1100-4S 4 / 10 / 12 EABS12-1100-10S 4 / 10 / 12... - Page 7 Product Information Rated speed (rpm) Model EABS8-1500-4S 1500 EABS8-1500-4Q 1500 EABS12-1100-4S 1100 EABS12-1100-10S 1100 EABS12-1100-4Q 1100 EABS17-800-4S EABS17-800-10S EABS17-800-4Q EABS24-500-10S EABS24-500-4Q Weight (kg) Model EABS8-1500-4S EABS8-1500-4Q EABS12-1100-4S EABS12-1100-10S EABS12-1100-4Q EABS17-800-4S EABS17-800-10S EABS17-800-4Q EABS24-500-10S EABS24-500-4Q Weight (lb) Model EABS8-1500-4S 2.20 EABS8-1500-4Q 2.20...
-
Page 8: Accessories
Product Information Storage and use conditions Storage temperature -20 to +70 °C (-4 to +158 F) Operating temperature 0 to 45 °C (32 to 113 F) Storage humidity 0-95 % RH (non-condensing) Operating humidity 0-90 % RH (non-condensing) Altitude up to 2000 m (6562 feet) Usable in Pollution degree 2 environment Indoor use only... -
Page 9: Installation
Installation Installation Installation Instructions Changing the angle head orientation See the instructions in the diagrams. The angle head is in its standard position. Use fixing clamps to unscrew the angle head in the clockwise direction. Disconnect the parts and locate the new position of the angle head. Re-mount the angle head. -
Page 10: How To Connect Eabs To A Computer
Installation Use fixing clamps to tighten the angle head in the anticlockwise direction. Apply a torque of 50 Nm. The angle head is in its new position. How to connect EABS to a computer Plug the eDOCK to the tool and connect it to the USB port of the computer. Plug a full-loaded battery pack to the tool. -
Page 11: How To Connect The Tool To Cvi3 Vision
Installation How to connect the tool to CVI3 Vision Plug the eDOCK to the tool and connect it to the USB port of the bottom panel of CVI3 Vision. Plug a full-loaded battery pack to the tool. See the instructions in the diagram. Respect the connection order. -
Page 12: Installing The Dth Battery (Single)
Installing the DTH battery (single) Installation on a table Installation on a rail Note above that an additional accessory (1) is required to hold the tool. This Desoutter accessory can be ordered as 6158114110. Installing the EABS back suspension This accessory can only be mounted on a tool with a serial number starting from 19B63996. -
Page 13: Installing The Eabs Front Suspension Swiveling Bail
Installation Installing the EABS front suspension swiveling bail 01/2020 13 / 24... -
Page 14: Operation
How to use the tool in the stand-alone working mode How to change the working mode To activate the screens, you need to have a CVIKEY USB stick with the right profile (configured with the Desoutter CVIKEY software). If not, contact your CVIKEY manager for support. - Page 15 Operation Click the tab Tool working mode. Keep the tool awake. Tick Standalone. Click Write to tool. Click File > Exit to quit CVIMONITOR. How to set up parameters Plug the eDOCK to the tool and connect it to the USB port of the computer where CVI CONFIG is installed. 01/2020 15 / 24...
- Page 16 Operation Launch CVI CONFIG. Go to the tree view area. Create or select a "Factory / Assembly Line / Working area". Right-click the "Working area" and add a product. Select ExBC Standalone. In the box "Tool model", select the tool model. Click Finish. For example: Click Parameters / Setup.
-
Page 17: How To Read The Tool Status
Operation Select how the tool goes intodeep-sleep mode. Set the time to 0 to keep the communication always active. The tool will never power off. Set the time between 5 and 99 minutes. Click this icon to update the tool. If the transfer fails, unplug and plug the battery pack. -
Page 18: Operating Instructions
Operation The LED is blinking blue twice at a regular frequency. The tool is synchronized with the system but locked. The tool is not allowed to run the tightening process. Go to the system, press the icon "STOP" to visualize the rea- son why the tool is locked. -
Page 19: How To Wake Up The Tool
Operation The battery is discharged. How to wake up the tool There are 4 ways to wake up the tool: 1/ Press the trigger. 2/ Press the "Run reverse" button (1). 3/ Press the "Function" button (2). 4/ Unplug and plug the battery pack. 01/2020 19 / 24... -
Page 20: Service
Service Service Maintenance Instructions Instructions for transducerized tools • Do not damage the wires when pulling out the connectors. • Do not pull out the torque transducer wires. • Ensure that wires are not crushed. Read before maintenance WARNING Connection Hazard The tool can start unexpectedly and cause severe bodily injury. -
Page 21: Troubleshooting
The red light is steady. The WI-FI board is not detected. Contact your Desoutter representative to get more information and support. Low battery alarm When the light on the right side illuminates in white, the battery pack must be reloaded. - Page 24 Original instructions Founded in 1914 and headquartered in France, Desoutter Industrial Tools is a global leader in electric and pneumatic assembly tools serving a wide range of assembly and manufacturing operations, including Aerospace, Automotive, Light and Heavy Vehicles, Off-Road, General Industry.
Need help?
Do you have a question about the EABS8-1500-4S and is the answer not in the manual?
Questions and answers