Humanscale QuickStand Eco Installation Instructions Manual
Hide thumbs
Also See for QuickStand Eco:
- Assembly instructions manual (32 pages) ,
- Installation instructions manual (12 pages) ,
- Assembly instructions manual (24 pages)
Advertisement
Quick Links
Advertisement

Related Manuals for Humanscale QuickStand Eco


Summary of Contents for Humanscale QuickStand Eco
- Page 1 I NSTAL LATIO N INST R UCTI ON S...
-
Page 2: Parts Required
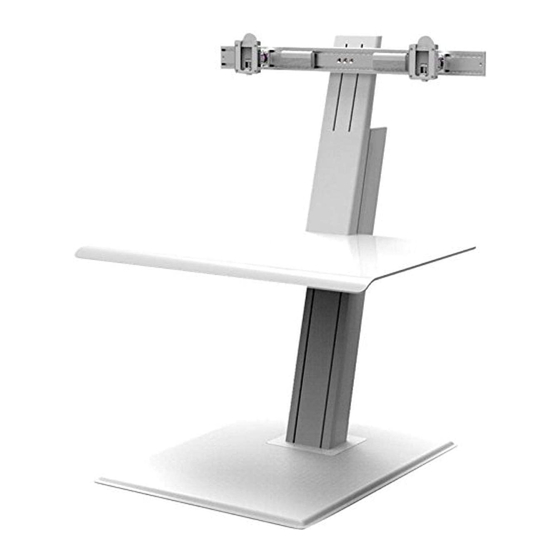
Dual monitor (package contents will depend on configuration ordered) Basic Single Monitor Dual Monitor (package contents will depend on configuration ordered) Tools required for installation 2.5mm hex key (included) 4.0mm hex key (included) 6.0mm hex key(included) Phillips head screw driver www.humanscale.com... - Page 3 ST EP 1 • Place the base on a desk and remove the plastic covers and set them aside. Step 2 Step 2 emove the plastic covers and set them aside. Slide the main post onto the base by inserting the 2 tabs in the front and ST EP 2 side.
- Page 4 ST EP 3 • Slide the pre-installed screw and work surface into the slotted position. • Hand tighten all 3 screws with the 6mm ball point allen wrench. Then tighten all 3 screws securely using the short end side of the allen wrench. Step 3 Step 4 Slide the pre-installed screw and work surface into the slotted position.
- Page 5 plate tab in from the top. Refer to the ST EP 6 (F OR SINGL E MONITOR) • Attach the monitor to the unit by sliding the Vesa plate tab in from the top. Step 6 (for single monitor) Step 6a (for dual monitor) Attach the monitor to the unit by sliding the Vesa Attach the crossbar to the unit.
- Page 6 ST EP 8 Adjust the counter balance system • Using the 6mm hex tool, rotate the screw located on the top clockwise until forces pushing the keyboard platform up and down becomes about equal. • Clockwise to increase upward force and counter clockwise to lower upward force. ST EP 9 Adjust The Monitor Height •...
- Page 7 ST EP 10 • With the keyboard platform at its highest position, remove the cable cover and feed the power and video cables through the clips shown below. ST EP 10A (F O R MOD EL S W IT H C A BL E COV ERS) •...
-
Page 8: Dual Monitor
ST EP 11 • Install the cable cover back on. • Repeat these steps on the other side for dual monitor. Dual Monitor Single Monitor... - Page 9 CONVERSION FROM LAPTOP TO SINGLE/DUAL MONITOR ST EP 1 • Remove the top cover. ST EP 2 • Remove front cover.
- Page 10 ST EP 3 • Attach monitor mount assembly. ST EP 4 • Attach lower plastic cover. ST EP 5 • Remove the main colomn top cover.
- Page 11 ST EP 6 • Slide the right side cover upward to remove it from the post. • Install the new side cover. (Repeat this on the other side for dual monitor) • Place the top cover back on. ST EP 7 •...
Need help?
Do you have a question about the QuickStand Eco and is the answer not in the manual?
Questions and answers