
Related Manuals for LaMotte TC-3000


Summary of Contents for LaMotte TC-3000
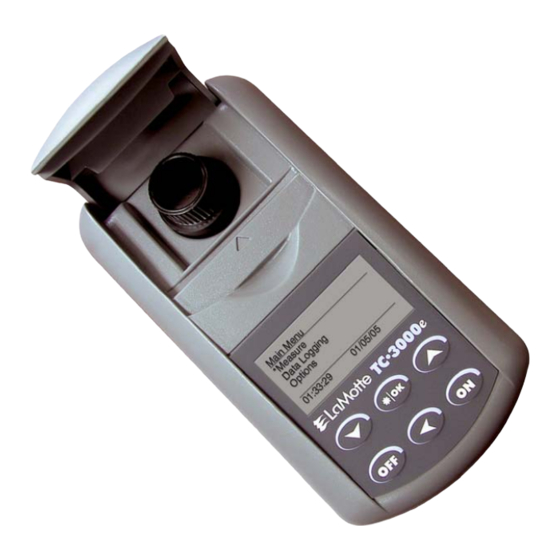
- Page 1 TC-3000e • Code 1964-EPA TC-3000i • Code 1964-ISO Version 1.3 • Code 1964-MN • 4-6-05...
-
Page 3: Table Of Contents
CONTENTS General Information Packaging and Delivery ......5 General Precautions ......5 Safety Precautions . - Page 4 Selecting a Language......33 Setting Auto Shutdown ......34 Data Logging .
-
Page 5: General Information
Experienced packaging personnel at LaMotte Company assure adequate protection against normal hazards encountered in transportation of shipments. After the product leaves LaMotte Company, all responsibility for safe delivery is assured by the transportation company. Damage claims must be filed immediately with the transportation company to receive compensation for damaged goods. -
Page 6: Specifications
Specifications- TC-3000e and TC-3000i Instrument Type: Turbidity: Nephelometer Color: Colorimeter Chlorine: Colorimeter Standard: Turbidity: EPA 180.1, TC-3000e ISO7027, TC-3000i Color: Adapted from Standard Methods 2120B Chlorine: Standard Methods 4500-CL G Units of Measure: Turbidity: NTU (Nephelometric Turbidity Units) FNU (Formazin Nephelometric Units) ASBC (American Society of Brewing Chemists) EBC (European Brewery Convention) FAU (Formazin Attenuation Unit) - Page 7 Detector: Turbidity: Photodiode, centered at 90°, maximum peak 550 nm, TC-3000e; Photodiode, centered at 90° TC-3000i Color: Photodiode Chlorine: Photodiode Light Source Automatic Stabilization: Response Time: <5 seconds Signal Averaging: Turbidity and color Sample Chamber: Accepts 25 mm flat-bottomed test tubes Sample: 10 mL in capped tube Display:...
-
Page 8: Statistical And Technical Definitions Related To Product Specifications
2 or 3 days. Reproducibility: Reproducibility is the between-run precision. Detection Limit (DL): The detection limit (DL) for the TC-3000 is defined as the minimum value or concentration that can be determined by the meter, which is greater than zero, independent of matrix, glassware, and other sample handling sources of error. -
Page 9: Contents And Accessories
Contents and Accessories TC-3000e Trimeter Kit TC-3000i Trimeter Kit EPA Version ISO Version Code 1964-EPA Code 1964-ISO CONTENTS Code Code 0 NTU Standard, 60 mL 1480 1480 1 NTU Standard, 60 mL 1484 1481 10 NTU Standard, 60 mL 1485 1482 *Chlorine DPD #1;... -
Page 10: Epa Compliance
European CE Mark of compliance for electromagnetic compatibility and safety. To view certificates of compliance, see our website www.lamotte.com NOTE: The devise complies to the product specifications for the Low Voltage Directive when furnished with the AC Adapter (Code 1754). -
Page 11: General Operating Information Overview
The menus can be displayed in six different languages. The TC-3000 uses a state of the art, multi-detector micro optical configuration for each test factor that assures long term stability of calibrations, high precision and accuracy, and low detection limits. - Page 12 Bottom Serial Number View View TC•3000 L Mott Battery Compartment GENERAL OPERATING INFORMATION...
-
Page 13: The Keypad
A menu is a list of choices. This allows a selection of various tasks for the TC-3000 to perform, such as, scan blank and scan sample. The keypad is used to make menu selections that are viewed on the display. -
Page 14: The Display & Menus
Think of the menu selections as a vertical list in the display that moves up or down each time an arrow button (‡ or ˆ) is pressed. All menus in the TC-3000 are looping menus. The top and bottom menu choices are connected in a loop. Scrolling down past the bottom of the menu will lead to the top of the menu. - Page 15 Large format graphic information, such as test results or error messages or the LaMotte logo is displayed. The top three lines of the display are used to display information in a large, easy to read format. The menus work in the same way as previously described but only one line of the menu is visible at the bottom of the display.
- Page 16 The meter must be re-blanked and the sample rescanned E r r 6 Call LaMotte Tech Service – meter may have to be returned for E r r 7 repairs l o w b a t t e r y Low battery >...
- Page 17 Footer Shows current time and date. Header M e n u T i t l e Message or Result Me s s ag e Window or Result Menu Selection Window * F i r s t C h o i c e FOOTER 1 6 : 0 2 : 1 9 0 1 / 0 4 / 0 5 S e c o n d C h o i c e a n o t h e r...
-
Page 18: Tubes
Tubes The TC-3000 uses one type of tube (Code 0290) for the turbidity, color and chlorine tests. There is no need for a special turbidity tube. The handling of the tubes is of utmost importance. Tubes must be clean and free from lint, fingerprints, dried spills and significant scratches, especially the central zone between the bottom and the sample line. -
Page 19: Introduction
0.1 NTU. The trend has been to check the calibration of on-line turbidimeters with hand-held field units. The optical design and low detection limit of the TC-3000 allow very accurate readings for such calibrations. The meter also allows the user to choose the units of measure for expressing turbidity. -
Page 20: How Is Turbidity Measured
How is Turbidity Measured? Scattered Turbidity 90° and Color Detector Chlorine Detector Turbidity Light Direct Source Turbidity IR LED 860nm: 3000i Tungsten Lamp: 3000e Detector and stabilization detector Chlorine LED 525nm and stabilization detector Color UV LED 375nm and stabilization detector Turbidity is measured by detecting and quantifying the scattering of light in water (solution). -
Page 21: Taking Turbidity Water Samples
(FNU). The TC-3000e meets the EPA specification and the TC-3000i meets the ISO specification. The nephelometric method is most useful for low turbidity. The TC-3000 is a nephelometer that is capable of measuring turbidity by both the attenuation method and the nephelometric method. It uses a detector placed at 180°... -
Page 22: How Is Chlorine Measured
TC-3000 makes it ideal for such measurements. Because of its wide range, the TC-3000 can be used to measure the water used in the wastewater process, in a distribution system and for many low level discharge requirements. -
Page 23: How Is Color Measured
The color determination in the TC-3000 uses a 375 nm wavelength. This UV light was found to give the greatest sensitivity in reading the APHA color standards. The results are expressed as APHA color units (cu). -
Page 24: Sample Dilution Techniques
SAMPLE DILUTION TECHNIQUES If a test result is out of the range of the meter, it must be diluted. The test should then be repeated on the diluted sample. The following table gives quick reference guidelines for dilutions of various proportions. Amount of Sample Deionized Water to Bring Multiplication Factor... -
Page 25: Options And Set Up
OPTIONS & SET UP Settings that have user options have been set at the factory to default settings. The factory default settings are: Turbidity Units Turbidity Calibration formazin Chlorine Units Chlorine Calibration Tablet Averaging Disabled Date Format MM/DD/YY Language English Auto Shutdown Disabled To return the meter to the factory settings, Hold down *IOK button. -
Page 26: Selecting A Turbidity Calibration Curve
4. Press the *IOK to select Units. T u r b i d i t y * U n i t s C a l i b r a t i o n 1 6 : 0 2 : 1 9 0 1 / 0 4 / 0 5 5. - Page 27 Note: StablCal standards below 50 NTU should not be used to calibrate the TC-3000. The diluent has a different refractive index than traditional formazin standards and will affect the results. 6. Press … to exit to a previous menu or make another menu selection or press OFF to turn the meter off.
-
Page 28: Chlorine
CHLORINE The default units are ppm and the default calibration curve is for DPD Tablet reagents. To change the settings: SELECTING CHLORINE UNITS 1. Press ON to turn the meter on. 1 . 3 2. Scroll down and then press *IOK M a i n M e n u to select Options. -
Page 29: Selecting A Chlorine Reagent System
6. Press … to exit to a previous menu or make another menu selection or press OFF to turn the meter off. SELECTING A CHLORINE CALIBRATION/REAGENT SYSTEM 1. Press ON to turn the meter on. 1 . 3 2. Scroll down and then press *IOK M a i n M e n u to select Options. -
Page 30: Averaging
6. Press … to exit to a previous menu or make another menu selection or press OFF to turn the meter off. AVERAGING The averaging option is available for color and turbidity testing. It allows the user to average multiple readings. This option will improve the accuracy of samples with readings that may tend to drift with time. -
Page 31: Setting Date & Time
5. Press … to exit to a previous menu or make another menu selection or press OFF to turn the meter off. Note: When the Averaging option is selected, it will take longer to get the final result and more power will be used. - Page 32 5. When setting the time or the date, S e t D a t e use the ˆ or ‡ to change the 0 1/0 4 / 05 highlighted number on the display. Press *IOK to accept the value and move to the next value.
-
Page 33: Selecting A Language
SELECTING A LANGUAGE The default setting is English. To change the setting: 1. Press ON to turn the meter on. 1 . 3 2. Scroll down and then press *IOK M a i n M e n u to select Options. M e a s u r e D a t e * O p t i o n s... -
Page 34: Setting Auto Shutdown
SETTING AUTO SHUTDOWN The power saving Auto Shutdown feature will turn the meter off when a button has not been pushed for a set amount of time. The default setting is disabled. To change the setting: 1. Press ON to turn the meter on. 1 . -
Page 35: Data Logging
DATA LOGGING The default setting for the data logger is start (on). The meter will log the last 4004 data points. 1. Press ON to turn the meter on. 1 . 3 2. Scroll down and press *IOK to M a i n M e n u select Data Logging. - Page 36 Or scroll down and press *IOK to D a t a L o g g i n g select Stop or Start to stop or start V i e w the data logging feature. * S t o p E r a s e 1 6 : 0 2 : 1 9 0 1 / 0 4 / 0 5 D a t a L o g g i n g...
-
Page 37: Tube Positioning Ring
TUBE POSITIONING RING The Tube Positioning Ring To put a ring on a tube, remove the cap from the tube. The tube positioning ring has two tapered notches and one squared-off notch. Place the ring on the tube with the squared-off notch closest to the top of the tube and tapered notches closer to the bottom of the tube. -
Page 38: Analysis
ANALYSIS 1. Press *IOK to turn the meter on. 1 . 3 2. Press *IOK to select Measure. M a i n M e n u * M e a s u r e D a t a O p t i o n s 1 6 : 0 2 : 1 9 0 1 / 0 4 / 0 5 3. - Page 39 6. Dry the tube with a lint-free cloth. Put on a dry positioning ring. Cap the tube. Wipe the tube thoroughly again with a lint-free cloth. 7. Open the meter lid. Insert the tube into the chamber. Align the index notch on the positioning ring with the index arrow on the meter.
- Page 40 11. Cap the tube. Wipe the tube thoroughly again with a lint-free cloth. 12. Open the meter lid. Insert the tube into the chamber. Align the index notch on the positioning ring with the index arrow on the meter. Close the lid.
-
Page 41: Dilution Procedures
Dilution Procedures If a sample is encountered that is more than 4000 NTU, a careful dilution with 0 NTU or very low turbidity water will bring the sample into an acceptable range. However, there is no guarantee that halving the concentration will exactly halve the NTU value. Particulates often react in an unpredictable manner when diluted. - Page 42 3. Remove the filter from the syringe. Remove the plunger from the barrel. (This step is required to prevent rupturing the filter by the vacuum that would be created when the plunger is removed.) 4. Replace the filter and repeat step 2 for a second rinse of the syringe and storage container.
-
Page 43: Turbidity Standards
Turbidity Standards Only use AMCO or formazin standards with the TC-3000. StablCalâ standards below 50 NTU should not be used to calibrate the TC-3000. The diluent used in â StablCal standards has a different refractive index than traditional formazin standards and will affect the results. - Page 44 4. Rinse a clean tube (0290) three times with the blank. Below 1 NTU – The meter should be blanked with a 0 NTU Primary Standard or prepared low turbidity (<0.1 NTU) water. For the most accurate results, use the same tube for the blank and the sample.
- Page 45 9. Rinse a clean tube (0290), or the same tube, three times with the standard. Avoid spilling standard on the outside of the tube. 10. Fill the tube to the fill line with the standard. Pour the standard down the inside of the tube to avoid creating bubbles.
- Page 46 14. Observe the result. T u r b i d i t y ( F ) 0 .54 N T U * S c a n S a m p l e 1 6 : 0 2 : 1 9 0 1 / 0 4 / 0 5 15.
-
Page 47: Testing Tips
17. When the value on the display C a l i b r a t e matches the concentration of the 0 0.5 0 turbidity standard, press the *IOK to select Set. * S e t 1 6 : 0 2 : 1 9 0 1 / 0 4 / 0 5 Or press ˆ... -
Page 48: Chlorine
12. Observe shelf life recommendations for turbidity standards. 13. Do not use silicone oil on tubes with when testing turbidity with the TC-3000. 14. When testing at low concentrations use the same tube for the blank and the sample. - Page 49 3. Scroll down and then press *IOK M e a s u r e to select Chlorine. T u r b i d i t y C o l o r * C h l o r i n e 1 6 : 0 2 : 1 9 0 1 / 0 4 / 0 5 4.
- Page 50 8. Close the lid and press *IOK to F r e e C h l o r i n e ( T ) select Scan Blank. * S c a n B l a n k 1 6 : 0 2 : 1 9 0 1 / 0 4 / 0 5 9.
- Page 51 11. Open the meter lid. Insert sample F r e e C h l o r i n e ( T ) into chamber. Align the index notch 1 .00 on the positioning ring with the index p p m arrow on the meter.
- Page 52 TOTAL CHLORINE 1. Press *IOK to turn the meter on. 1 . 3 2. Press *IOK to select Measure. M a i n M e n u * M e a s u r e D a t a O p t i o n s 1 6 : 0 2 : 1 9 0 1 / 0 4 / 0 5 3.
- Page 53 6. Open the meter lid. Insert the tube T o t a l C h l o r i n e ( T ) into the chamber. Align the index notch on the positioning ring with the index arrow on the meter. Close the lid and press *IOK to select ‚...
-
Page 54: Liquid Dpd Reagents
11. Press OFF to turn the meter off or press … to exit to a previous menu or make another menu selection. *Warning: Reagents marked with an * are potential health hazards. To view or print a Material Safety Data Sheet (MSDS) for these reagents see MSDS CD or our web site. To obtain a printed copy, contact us by e-mail phone or fax. - Page 55 4. Press *IOK to select Test Free C h l o r i n e ( L ) Chlorine. * T e s t F r e e T e s t T o t a l 1 6 : 0 2 : 1 9 0 1 / 0 4 / 0 5 5.
- Page 56 8. Add 5 drops of *DPD 1B Free Chlorine Reagent (P-6741). Cap and mix. Solution will turn pink if free chlorine is present. Read within 30 seconds. 9. Open the meter lid. Insert tube into F r e e C h l o r i n e ( L ) chamber.
- Page 57 12. Open the meter lid. Insert the F r e e C h l o r i n e ( L ) sample into the chamber. Align the 1 .00 index notch on the positioning ring p p m with the index arrow on the meter. Close lid, select *IOK to select ~ €...
- Page 58 TOTAL CHLORINE 1. Press *IOK to turn the meter on. 1 . 3 2. Press *IOK to select Measure. M a i n M e n u * M e a s u r e D a t a O p t i o n s 1 6 : 0 2 : 1 9 0 1 / 0 4 / 0 5 3.
- Page 59 7. Remove the tube from the meter. Add 5 drops of DPD 1A Free Chlorine Reagent (P-6740) and mix. 8. Add 5 drops of *DPD 1B Free Chlorine Reagent (P-6741). Cap and mix. 9. Add 5 drops of *DPD 3 Total Chlorine Reagent (P-6741).
-
Page 60: Dilution Procedures
The concentration of the standards should be verified by a Ferrous Ammonium Sulfate titration. An approximately 250 ppm chlorine standard (Code 6973-H, 60 mL) and a Chlorine titration kit (Code 3176-01) are available from LaMotte Company. CALIBRATION & ANALYSIS • CHLORINE... -
Page 61: Calibration Procedure - Tablets
Calibration Procedure The meter should be calibrated with free chlorine standards. The calibration should be done with a distilled or deionized water blank and one chlorine standard of known concentration. The concentration of the calibration standard should be similar to the expected concentration of samples that will be tested. - Page 62 6. Open the meter lid. Insert the tube F r e e C h l o r i n e ( T ) into the chamber. Align the index notch on the positioning ring with the index arrow on the meter. Close the lid and press *IOK to select €...
- Page 63 C a l i b r a t e 0 1.2 5 q , Q , p 1 6 : 0 2 : 1 9 0 1 / 0 4 / 0 5 C a l i b r a t e 0 1.2 5 q , Q , p 1 6 : 0 2 : 1 9...
-
Page 64: Calibration Procedure - Liquid
*Warning: Reagents marked with an * are considered to be potential health hazards. To view or print a Material Safety Data Sheet (MSDS) for these reagents see MSDS CD or our web site. To obtain a printed copy, contact us by e-mail, phone or fax. Note: The meter will remember the last scanned blank reading. - Page 65 5. Rinse a clean tube (0290) with the chlorine standard. Fill the tube to the 10 mL line with the chlorine standard. Dry tube with a lint-free cloth. Put on a dry positioning ring. Cap the tube. 6. Open the meter lid. Insert the tube F r e e C h l o r i n e ( L ) into the chamber.
- Page 66 9. Open the meter lid. Insert tube into F r e e C h l o r i n e ( L ) chamber. Align the index notch on the positioning ring with the index arrow on the meter. Close lid, press *IOK to select Scan Sample.
-
Page 67: Testing Tips
12. When the value on the display C a l i b r a t e matches the concentration of the 0 1.3 0 chlorine standard, press *IOK to select Set. € * S e t 1 6 : 0 2 : 1 9 0 1 / 0 4 / 0 5 Or press the ˆ... - Page 68 9. When testing at low concentrations use the same tube for the blank and the sample. 10. Always use the tube positioning ring. Always insert tube into the meter chamber with the same amount of pressure and to the same depth. 11.
-
Page 69: Color
COLOR Test results are reported as cu (Color Units). ANALYSIS 1. Press *IOK to turn the meter on. 1 . 3 2. Press *IOK to select Measure. M a i n M e n u * M e a s u r e D a t a O p t i o n s 1 6 : 0 2 : 1 9... -
Page 70: Dilution Procedures
One unit of color is equivalent to the color that is produced by 1 mg platinum/L in the form of the chloroplatinate ion. A 500 cu Color Standard (60 mL, Code 6058-H) is available from LaMotte. CALIBRATION & ANALYSIS • COLOR... -
Page 71: Calibration Procedure
Calibration Procedure The meter should be calibrated with platinum cobalt color standards. For the most accurate results, a user calibration should be performed with LaMotte Color Standards. The calibration should be done with a distilled or deionized water blank and one color standard of known concentration. The concentration of the calibration standard should be similar to the expected concentration of samples that will be tested. - Page 72 6. Remove the tube from the meter. Empty the tube. Rinse the tube with the color standard. Fill the tube to the 10 mL line with the color standard. 7. Open the meter lid. Insert the tube C o l o r with the color standard.
- Page 73 C a l i b r a t e 0 38. 0 q , Q , p 1 6 : 0 2 : 1 9 0 1 / 0 4 / 0 5 C a l i b r a t e 0 38.
-
Page 74: Testing Tips
Note: The meter will remember the last scanned blank reading. It is not necessary to scan a blank each time the test is performed. To use the previous blank reading, instead of scanning a new one, scroll to Scan Sample and proceed. For the most accurate results, the meter should be blanked before each test and the same tube with tube positioning ring should be used for the blank and the reacted sample. -
Page 75: Troubleshooting Guide
No blank reading. The meter has never been blanked for this test factor. Blank meter. Err6 Internal mathematical error. Re-blank the meter and rescan the sample. Err7 Configuration error. Call LaMotte Tech Service. Meter may have to be returned for repairs. low battery Low battery. Change battery. TROUBLESHOOTING PROBLEM... -
Page 76: Pc Link
PC LINK The TC-3000 may be interfaced with any Windows-based computer by using the LaMotte SMARTLink 2 Program and Interface Cable (Code 1912-3 with 3.5 inch disk or Code 1912-CD with compact disk). -
Page 77: Battery Operation
BATTERY OPERATION The TC-3000 may be operated on battery power or using an AC adapter. If using the meter as a bench top unit, use the AC adapter if possible. If using the meters only on battery power, always keep a spare battery on hand. -
Page 78: Maintenance Cleaning
Should it be necessary to return the meter for repair or servicing, pack the meter carefully in a suitable container with adequate packing material. A return authorization number must be obtained from LaMotte Company by calling 800-344-3100 (US only) or 410-778-3100, faxing 410-778-6394, or emailing tech@lamotte.com. Often a problem can be resolved over the phone or by email. - Page 80 LaMotte Company • PO Box 329 • 802 Washington Avenue Chestertown • Maryland • 21620 • USA USA 800-344-3100 • 410-778-3100 • fax 410-778-6394 • www.lamotte.com Code 1964-MN...
Need help?
Do you have a question about the TC-3000 and is the answer not in the manual?
Questions and answers