
Related Manuals for LaMotte Smart 2


Summary of Contents for LaMotte Smart 2
- Page 1 SMART ••••••••••••••••••••••••••••••••••••••••••••••• Colorimeter OPERATOR’S MANUAL V.2.3 1/07 • 1919-MN...
-
Page 3: Table Of Contents
Calibration························································································14-16 Calibration Curves ···········································································14-16 Standard Additions ··········································································16-17 Sample Dilution Techniques & Volumetric Measurements ············ 17 Interferences ····················································································18 Stray Light Interference ···································································18 OPERATION OF THE SMART 2 COLORIMETER Overview ·························································································19 Power Source ····················································································19 Components ····················································································20 Quick Start ······················································································21-22 GENERAL OPERATING PROCEDURES The Keypad ······················································································23... - Page 4 TABLE OF CONTENTS (cont.) Calibrating LaMotte Pre-Progammed Tests······································ 31-32 Measuring in the %T/ABS Mode ····················································· 33-34 EDITING MENU Edit a Sequence ···············································································35-36 Adding or Deleting Tests ································································· 36-38 Edit User Tests ·················································································39 Naming the Test ··············································································40-41 Selecting the Vial and Wavelength ·················································· 42 Entering a New Calibration ·····························································...
-
Page 5: General Information
Poison Control Center listed in the front of the phone book. Be prepared to supply the name and four-digit LaMotte code number found on the container label or at the top of the MSDS. LaMotte reagents are registered with a computerized poison control information system available to all local poison control centers. -
Page 6: Limited Warranty
(2) years from original purchase date. In the event that a defect is found during the warranty time frame, LaMotte Company agrees that it will be repaired or replaced without charge except for the transporation costs. This guarantee does not cover batteries. -
Page 7: Statistical And Technical Definitions
STATISTICAL AND TECHNICAL DEFINITIONS RELATED TO PRODUCT SPECIFICATIONS Method Detection Limit (MDL): “The method detection limit (MDL) is defined as the minimum concentration of a substance that can be measured and reported with 99% confidence that the analyte concentration is greater than zero and is determined from analysis of a sample in a given matrix containing the analyte.”... -
Page 8: Contents And Accessories
Sensitivity: Sensitivity is the resolution based on how this term is used in LaMotte catalogs. This term is not listed in any of the references. Sometimes it is used for detection limit. It is a confusing term and should be avoided. -
Page 9: Ce Compliance
Manufacturer's Name: LaMotte Company Manufacturer's Address: 802 Washington Avenue PO Box 329 Chestertown, MD 21620 Type of Equipment: Colorimeter SMART 2 Model Name: Year of Manufacture: 2001 Testing Performed By: Windermere 2000 Windermere Court Annapolis, MD 21401 I, the undersigned, hereby declare that the equipment specified above conforms to the above Directive and Standards. -
Page 10: Chemical Testing
This type of sampling requires more sophisticated sampling equipment. For dissolved oxygen studies, or for tests requiring small sample sizes, a Water Sampler (LaMotte Code 1060) will serve as a subsurface or in-depth sampler. SMART2 COLORIMETER 1.07... -
Page 11: Filtration
To test for total constituents, organically bound and suspended or colloidal materials, a rigorous high temperature acid digestion is necessary. **LaMotte offers a filtering apparatus: syringe assembly (Code 1050) and membrane filters, 0.45 micron, (Code 1103). SMART2 COLORIMETER 1.07... -
Page 12: An Introduction To Colorimetric Analysis
AN INTRODUCTION TO COLORIMETRIC ANALYSIS Most test substances in water are colorless and undetectable to the human eye. To test for their presence we must find a way to “see” them. The SMART2 Colorimeter can be used to measure any test substance that is itself colored or can be reacted to produce a color. -
Page 13: Reagent Blank
Handle the tubes carefully, making sure the bottom half of the tube is not handled. LaMotte Company makes every effort to provide high quality colorimeter tubes. However, wall thicknesses and diameter of tubes may still vary slightly. -
Page 14: Calibration
CALIBRATION CURVES The Smart2 Colorimeter contains tests for the LaMotte reagent systems (see Page 49). The first step in using a non-LaMotte reagent system with your Smart2 Colorimeter is to create a calibration curve for the reagent system. To create a calibration curve, prepare standard solutions of the test factor and use the reagent system to test the standard solutions with the Smart2 Colorimeter. - Page 15 3. Use the unreacted 0 ppm standard to standardize the colorimeter by using it to scan blank. 4. Following the individual reagent system instructions, react each standard solution beginning with 0 ppm. Continue with standards in increasing concentration. Record the reading and the standard solution concentration on a chart.
-
Page 16: Standard Additions
PREPARING DILUTE STANDARD SOLUTIONS Standard solutions should be prepared to create a calibration curve. Standard solutions can be prepared by diluting a known concentrated standard by specified amounts. A chart or computer spreadsheet can be created to determine the proper dilutions. Use volumetric flasks and volumetric pipets for all dilutions. -
Page 17: Sample Dilution Techniques & Volumetric Measurements
0.3 + 0.5 = 0.8 ppm iron. (Note: any error due to the increased volume from the “spike” is negligible). LaMotte offers a line of calibration standards which can be used to generate calibration curves and perform standard additions. -
Page 18: Interferences
LaMotte reagent systems are designed to minimize most common interferences. Each individual test instruction discusses interferences unique to that test. Be aware of possible interferences in the water being tested. The reagent systems also contain buffers to adjust the water sample to the ideal pH for the reaction. -
Page 19: Operation Of The Smart2 Colorimeter
The test library consists of 100 LaMotte tests (not all 100 may be available at present) and 10 “User Tests”. The LaMotte tests are precalibrated for LaMotte reagent systems. -
Page 20: Components
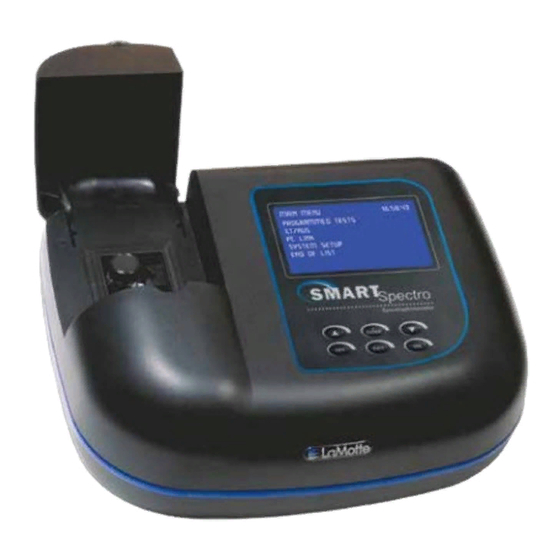
COMPONENTS Figure 1 shows a diagram of the Smart2 Colorimeter and its components. Bottom View Top View Serial Number SMART2 •••••••••••••••••• ENTER Battery EXIT Compartment Side Views RS232 Serial Port Adapter Socket Figure 1 SMART2 COLORIMETER 1.07... -
Page 21: Quick Start
QUICK START Some quick instructions to get into testing. 1. Press ON to turn on the SMART2. The VER 1.0 LaMotte logo screen will appear for about 2 Smart2 seconds and then the Start screen appears. Press Q/ENTER to start testing. - Page 22 8. Insert the reacted sample. Press Q/ENTER to 015 Chlorine scan sample. The SMART2 will scan the sample and display the concentration. * Scan Sample 9. After recording test result, scroll with t or s 015 Chlorine and make another selection with Q/ENTER. 1.28 ppm Press EXIT to escape to previous menus.
-
Page 23: General Operating Procedures
GENERAL OPERATING PROCEDURES The operation of the SMART2 Colorimeter is controlled by a microprocessor. The microprocessor is programmed with menu driven software. A menu is a list of choices. This allows a selection of various tasks for the colorimeter to perform, such as, scan blank, scan sample, and edit test sequences. -
Page 24: The Display & The Menus
THE DISPLAY & THE MENUS The display allows menu selections to be viewed and chosen. These choices instruct the colorimeter to perform specific tasks. The menus are viewed in the display using two general formats which are followed from one menu to the next. - Page 25 The second general format of the display takes advantage of the graphics capabilities of the display. The top line of the display is still a title line. The middle two lines of the display are used to display important messages, results or graphics in a large, easy to read format.
-
Page 26: Looping Menus
LOOPING MENUS Long menus, such as All Tests, incorporate a looping feature which allow the user to quickly reach the last choice in the menu from the first choice. In a looping menu the last choices in the menu are above the first choice and scrolling upward moves through the menu in reverse order. -
Page 27: Testing
TESTING TESTING MENU The Testing Menu is used to run all LaMotte pre-programmed tests, USER TESTS and Absorbance test at one of four wavelengths. Testing from any of three sequences can also be done. 1. Press the ON button to turn on the VER 1.0... -
Page 28: Sequences Of Tests
SEQUENCES OF TESTS SEQUENCE 1, SEQUENCE 2, and SEQUENCE 3 are alterable sequences. They may be edited using the Editing Menu. Any of the LaMotte pre-programmed tests or User Tests may be placed in these sequences in whatever testing order that is preferred. Some examples of typical sequences are given below. -
Page 29: General Testing Procedures
TESTING WITH THE LaMOTTE PRE-PROGRAMMED TESTS VER 1.0 Press ON to turn on the Smart2 Colorimeter. The LaMotte logo will appear for about 2 seconds and then the Start screen appears. Press the Q/ENTER button to start testing. Smart2 * Start The MAIN MENU will appear. - Page 30 Press the Q/ENTER button to select ALL TESTS 002 Aluminum. * 002 Aluminum 003 Ammonia - NLF 004 Ammonia - NLS The SMART2 Colorimeter is ready to scan at the correct wavelength. Place the 002 Aluminum blank in the sample chamber, close the lid and press the Q/ENTER button to scan blank.
-
Page 31: Calibrating Lamotte Pre-Progammed Tests
CALIBRATING LaMOTTE PRE-PROGRAMMED TESTS The LaMotte Pre-Programmed Tests have been pre-calibrated. Recalibration of the pre-programmed tests by the user is not possible. However, a procedure to standardize the calibration can be performed to obtain the most accurate readings or to meet regulatory requirements. - Page 32 002 Alumninum A reverse font (dark background with light characters) will appear to indicate that the reading can be adjusted. Use s or t to scroll to the concentration of the sample, 0.10 ppm in this example. 0.09 * Calibrate Set the calibration by pressing Q/ENTER to select Calibrate.
-
Page 33: Measuring In The %T/Abs Mode
MEASURING IN THE ABSORBANCE MODE Press ON to turn on the SMART2 Colorimeter. The LaMotte logo will appear for VER 1.0 about 2 seconds and then the Start screen appears. Press the Q/ENTER button to start testing. Smart2 * Start The MAIN MENU will appear. - Page 34 Insert blank, press the Q/ENTER button to scan blank. 102 Abs 520 * Scan Blank 102 Abs 520 The screen will display Blank Done for about 1 second. Blank Done * Scan Blank Insert the reacted sample. Press the Q/ENTER button to scan the sample. 102 Abs 520 * Scan Sample Record test result.
-
Page 35: Editing Menu
1, SEQUENCE 2, and SEQUENCE 3) to be edited. Press ON to turn on the SMART2 Colorimeter. VER 1.0 The LaMotte logo will appear for about 2 seconds Smart2 and then the Start screen appears. Press the Q/ENTER button to start testing. -
Page 36: Adding Or Deleting Tests
Sequence 1 appears. EDIT SEQUENCE 1 *015 Chlorine 079 Phosphate H 009 Bromine-LR ADDING OR DELETING TESTS There are three ways to alter a sequence: Insert Before, Insert After, and Delete. Insert Before adds a new test to the sequence before the selected test. - Page 37 Press the Q/ENTER button to select ALL TESTS 002 Aluminum. * 002 Aluminum 003 Ammonia-N LF 004 Ammonia-N LS Sequence 1 appears in EDIT SEQUENCE 1 menu and 002 Aluminum is now EDIT SEQUENCE 1 before Bromine-LR in the sequence. All changes to Sequence 1 are automatically saved.
- Page 38 Press the t button to scroll to Delete. EDIT SEQUENCE 1 * Insert Before Insert After Delete Press the Q/ENTER button to select Delete. EDIT SEQUENCE 1 * Delete EDIT SEQUENCE 1 Sequence 1 appears in the EDIT SEQUENCE 1 menu and 002 Aluminum has been deleted.
-
Page 39: Edit User Tests
A User Test may be added for a reagent system for which no precalibrated test exists. A calibration of a LaMotte reagent system may also be entered. The calibration of a User Test can be changed at any time. -
Page 40: Naming The Test
NAMING THE TEST A User Test can be up to 11 characters long. The menu choices for each character are 26 upper case letters A to Z, 26 lower case letters a to z, ten numerals 0 to 9, a space (SP), a dash (-) and a decimal point (.). The existing name is displayed on the bottom line of the display. - Page 41 NAME THE TEST The number “2” has been entered in the second position of the name and the cursor has moved to the third letter “e”. 105 H2er Test01 Use the t and s buttons to scroll to the letter “O” into the center of the display. NAME THE TEST Press the Q/ENTER button to select the letter “O”.
-
Page 42: Selecting The Vial And Wavelength
SELECTING THE VIAL AND WAVELENGTH The Smart2 Colorimeter has three different vials (the 25 mm 0290 tube, UDVs and COD tubes) and 4 different wavelengths (430, 520, 570, and 620 nm). The colorimeter uses different settings for each of the twelve combinations of vial and wavelength. -
Page 43: Entering A New Calibration
ENTERING A NEW CALIBRATION To enter a new calibration two reacted standards solutions of known concentration are required: a “low standard” and a “high standard”. These should be ready to use. Use the t button to scroll to New Calibration and press Q/ENTER button EDIT USER TEST01 to select. - Page 44 Place a clear blank in the sample chamber. Press the Q/ENTER button to scan the blank. Insert Blank * Continue The screen will display Blank Done for about 1 second. Blank Done * Scan Blank Place the reacted low standard in the sample chamber. Press Q/ENTER to scan the low standard.
-
Page 45: Selecting The Numerical Format Of The Result
SELECTING THE NUMERICAL FORMAT OF THE RESULT To input tests with very different ranges, the number of decimal places displayed for a result can be selected. A test which ranges from 20 to 1000 ppm should not be displayed with three decimal places. A test with a range from 0.010 to 0.500 needs three decimal places (the microprocessor will always calculate the concentration to many more significant figures than will be displayed). -
Page 46: Selecting Units Of Concentration
SELECTING THE UNITS OF CONCENTRATION The SMART2 Colorimeter has seven options for units of concentration. They are No Units, ppm, pH, FTU, ppb, ppt and mgL. Use the t button to scroll to Select Units and press Q/ENTER to select. EDIT USER TEST01 * Decimal Places Select Units... -
Page 47: Setting The Clock
SETTING THE CLOCK Setting the clock allows the correct time and date stamp to be stored with each reading in the data logger and with each reading sent out the serial port. From the EDITING MENU use the t button to scroll to Set Clock. Press EDITING MENU Q/ENTER to select. -
Page 48: Turning The Data Logger On And Off
TURNING THE DATA LOGGER ON AND OFF The default setting for the datalogger is “Enabled” or turned off. If there is no need for data logging, this setting is suggested. If data logging is needed, the data logger can be “Enabled” or turned on. use the t button to scroll to EDITING MENU From the EDITING MENU... -
Page 49: Factory Setup
FACTORY SETUP The Factory Setup menu is used in the manufacturing of the SMART2 Colorimeter. This menu is not for use by the operator in the field. SETTING THE POWER SAVING FUNCTION The SMART2 Colorimeter has a power saving function that turns the meter off after an interval of inactivity. -
Page 50: Pc Link
PC LINK The SMART2 Colorimeter may be interfaced with any Windows-based computer by using the LaMotte SMARTLink2 Program and Interface Cable (Order Code 1912-3 [3.5 disk] or 1912-CD [compact disk]). The program stores customer information and test data in a database. It can be used to download data stored in the Smart2 datalogger for each test site. -
Page 51: Maintenance
MAINTENANCE CLEANING Clean with a damp, lint-free cloth. DO NOT ALLOW WATER TO ENTER THE COLORIMETER CHAMBER OR ANY OTHER PARTS OF THE METER. METER CARE The optical system of the SMART2 must be kept clean and dry for optimal performance. -
Page 52: Troubleshooting Guide
This can be done following the user calibration described on page 31. If the user calibration fails to properly adjust the meter then the meter should be returned to LaMotte Company for recalibration. (See page 5). SMART2 COLORIMETER 1.07... -
Page 53: Helpful Hints
HELPFUL HINTS STRAY LIGHT The SMART2 Colorimeter should have no problems with stray light. Make sure that the sample compartment lid is always fully closed, except when testing COD with the adapter. SMART2 COLORIMETER 1.07... - Page 54 SMART2 COLORIMETER 1.07...
Need help?
Do you have a question about the Smart 2 and is the answer not in the manual?
Questions and answers