
Related Manuals for Taylor Tim Hortons 390


Summary of Contents for Taylor Tim Hortons 390
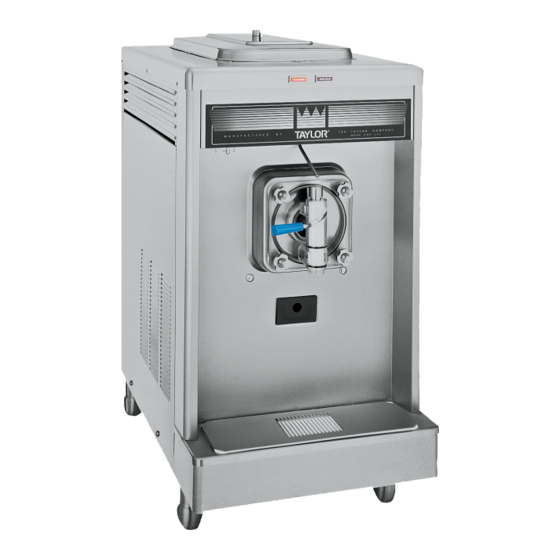
- Page 1 OPERATOR'S MANUAL Model 390 Tim Hortons Slush Freezer Original Operating Instructions 066836-M 8/14/08 (Original Publication) Updated 8/12/14...
- Page 2 Complete this page for quick reference when service is required: Taylor Distributor: Address: Phone: Fax: E-mail: Service: Parts: Date of Installation: Information found on the data label: Model Number: Serial Number: Electrical Specs: Voltage Cycle Phase Maximum Fuse Size: Minimum Wire Ampacity: 2008 Carrier Commercial Refrigeration, Inc.
-
Page 3: Table Of Contents
Section 1 To the Installer ..........Section 2 To the Operator . - Page 4 Statutory Damages of up to $250,000 (17 USC 504) for infringement, and may result in further civil and criminal penalties. All rights reserved. Taylor Company a division of Carrier Commercial Refrigeration, Inc. 750 N. Blackhawk Blvd.
-
Page 5: To The Installer
Site Preparation Uncrate the unit and inspect it for damage. Report any damage to your Taylor Distributor. Review the area where the unit will be installed This piece of equipment is made in the USA and has before uncrating the unit. Make sure that all possible USA sizes of hardware. - Page 6 If the supply cord is damaged, it must be replaced Each unit requires one power supply for each data by an authorized Taylor service technician in order label on the unit. Check the data label(s) on the to avoid a hazard.
- Page 7 Taylor reminds technicians to be cautious of government laws regarding refrigerant recovery, A back siphon device must be installed to prevent recycling, and reclaiming systems. If you have any...
-
Page 8: To The Operator
Taylor Distributor. unit's refrigeration system, only the refrigerant specified on the affixed data label should be Your Taylor warranty is valid only if the parts are used. The unauthorized use of alternate refrigerants authorized Taylor parts, purchased from the local will void your Taylor compressor warranty. - Page 9 Taylor will continue to monitor the industry and test To find out the current status of an alternate new alternates as they are being developed. Should refrigerant as it relates to your compressor warranty, a new alternate prove, through our testing, that it call the local Taylor Distributor or the Taylor factory.
-
Page 10: Safety
We, at Taylor Company, are concerned about the safety of the operator when he or she comes in contact with the freezer and its parts. Taylor has gone to extreme efforts to design and manufacture All repairs must be performed by an built-in safety features to protect both you and the authorized Taylor service technician. - Page 11 Cleaning and sanitizing schedules are governed by your Federal, State, or local regulatory DO NOT allow untrained personnel to agencies and must be followed accordingly. Please operate this machine. refer to the cleaning section of this manual for the DO NOT operate the freezer unless all proper procedure to clean this unit.
-
Page 12: Operator Parts Identification
Section 4 Operator Parts Identification Spinner Motor Figure 1 ITEM DESCRIPTION PART NO. ITEM DESCRIPTION PART NO. COVER A.-HOPPER X51152 GASKET-INSERT BASE PAN 051150 TRIM-CORNER LEFT 047002 SPINNER A.-PANEL 2 BLADE X66023-27 PANEL-REAR 047008 TRAY-DRIP 14.8 BLACK 046275-BLA TRIM-CORNER RIGHT 047003 SHIELD-SPLASH 068730... - Page 13 Beater Door Assembly Figure 2 ITEM DESCRIPTION PART NO. ITEM DESCRIPTION PART NO. DOOR A.-PARTIAL PRIME X50403-SER ARM-TORQUE 014500 PIN A.-VALVE HANDLE X25929 TORQUE A. X14488 VALVE-DRAW SLUSH 047734 O-RING-7/8 OD X .139W 025307 O-RING-1"OD X .139W 032504 BLADE-SCRAPER-PLASTIC 081094 HANDLE A.-DRAW-SLUSH-BLK X47384 BEARING-GUIDE...
- Page 14 Accessories Figure 3 ITEM DESCRIPTION PART NO. ITEM DESCRIPTION PART NO. PAIL-10 QT. 013163 BRUSH-DRAW VALVE 1 x 2 x 17 013073 BRUSH-MIX HOPPER 3 x 7 023316 BRUSH-PRIME PORT 045079 BRUSH-DOUBLE ENDED 013072 TRAY-PARTS-BARREL 7 QT. 068012 BRUSH-REAR BEARING 1” x 2” 013071 KIT A.-TUNE UP X50413A...
-
Page 15: Important: To The Operator
Section 5 Important: To the Operator Figure 4 The following chart identifies the symbol definitions ITEM DESCRIPTION used on the unit label. POWER SWITCH RESET BUTTON = “WASH” key LIGHT-MIX OUT LIGHT-ADD MIX = “OFF” LIGHT-SPINNER = “ON/AUTO” key 100927 Model 390 Tim Hortons Important: To the Operator... -
Page 16: Power Switch
15 seconds, indicating the proper blend press the reset button. time. “ADD MIX” Indicator Light and IMPORTANT: Taylor recommends daily Alarm cleaning and sanitizing. The “ADD MIX” indicating light is located on the front of the machine. The indicator light will flash and an audible tone will sound when the mix hopper has a FOLLOW YOUR LOCAL HEALTH CODES. -
Page 17: Operating Procedures
Assembly Note: When lubricating parts, use an approved food Figure 6 grade lubricant (example: Taylor Lube). Step 3 Step 1 Check the scraper blades for any nicks or signs of Lubricate the groove on the drive shaft and slide the wear. - Page 18 Step 5 Step 7 Holding the blades in position, insert the beater Insert the torque rotor end with the guide bearing assembly into the freezing cylinder and slide it into into the pilot hole in the center of the drive shaft. The position over the drive shaft.
- Page 19 Step 10 Rotate the draw valve so the flats on the top of the draw valve are perpendicular to the door face. Figure 14 Step 13 Place the o-ring onto the prime plug and lubricate. Figure 12 Step 11 Insert the ice buster through the door spout and into the slot located just above the lower o-ring.
- Page 20 Step 15 Step 16 Place the rounded side of the large rubber gasket Place the front end of the torque rotor into the hole into the groove on the back side of the freezer door. in the center of the door. Position the door onto the Slide the white plastic front bearing onto the bearing four studs on the front of the freezing cylinder.
-
Page 21: Sanitizing
Step 18 Sanitizing Install the front drip pan. Slide the long drip pan into Step 1 the hole in the front panel. Prepare an approved 100 PPM sanitizing solution (examples: 2-1/2 gal. [9.5 liters] of Kay-5 or 2 gal. [7.6 liters] of Stera-Sheen ). USE WARM WATER AND FOLLOW THE MANUFACTURER'S SPECIFICATIONS. -
Page 22: Priming
Step 5 Step 3 Place an empty pail beneath the door spout and Place the power switch in the “AUTO” position. move the draw handle to the right. Draw off all the When the unit cycles off, the product will be at sanitizing solution. -
Page 23: Draining Product From The Freezing Cylinder
freezing cylinder. When the rinse water stops flowing Draining Product From The from the door spout, move the draw handle to the Freezing Cylinder left and place the control switch in the “OFF” position. Step 1 Repeat this procedure until the rinse water being Place the power switch in the “OFF”... -
Page 24: Disassembly
Step 3 Disassembly Remove the handle pin, handle, draw valve, ice buster, front bearing, prime plug, and gasket from Step 1 the freezer door. Remove all o-rings. Note: To remove the o-ring, use a single service BE SURE THE CONTROL SWITCH IS IN towel to grasp the o-ring. -
Page 25: Important: Operator Checklist
Section 7 Important: Operator Checklist During Cleaning and Sanitizing: This will break the rerun cycle and reduce the possibility of high bacteria and coliform counts. 7. Properly prepare the cleaning and sanitizing ALWAYS FOLLOW LOCAL HEALTH CODES. solutions. Read and follow label directions carefully. - Page 26 Winter Storage If the place of business is to be closed during the Wrap detachable parts of the freezer such as winter months, it is important to protect the freezer beater, blades, drive shaft, and freezer door, and by following certain precautions, particularly if the place in a protected dry place.
-
Page 27: Troubleshooting Guide
Section 8 Troubleshooting Guide PROBLEM PROBABLE CAUSE REMEDY PAGE REF. 1. No product being a. Power switch is in the a. Place power switch in the “AUTO” position. dispensed. “OFF” position. b. Improper mixing of b. Carefully follow directions - - - for mixing product. - Page 28 Replace or install front bearing. missing. 7. Excessive leakage into a. Improper or inadequate a. Use correct lubricant (Taylor Lube) and follow rear drip pan. lubrication of drive shaft lubrication procedures. seal. b. Bad or missing seal on b. Replace seal every 3 months.
-
Page 29: Parts Replacement Schedule
Section 9 Parts Replacement Schedule PART DESCRIPTION EVERY 3 MONTHS EVERY 6 MONTHS ANNUALLY QUANTITIES TO BE REPLACED Drive Shaft Seal Drive Shaft O-Ring Scraper Blade Freezer Door Gasket Front Bearing Draw Valve O-Rings Black Bristle Brush - 1” x 2” Inspect &... -
Page 30: Limited Warranty On Equipment
Taylor, through an authorized Taylor distributor or service agency, will provide a new or re-manufactured part, at Taylor’s option, to replace the failed defective part at no charge for the part. Except as otherwise stated herein, these are Taylor’s exclusive obligations under this limited warranty for a Product failure. - Page 31 LEGAL REMEDIES The owner must notify Taylor in writing, by certified or registered letter to the following address, of any defect or complaint with the Product, stating the defect or complaint and a specific request for repair, replacement, or other correction of the Product under warranty, mailed at least thirty (30) days before pursuing any legal rights or remedies.
-
Page 32: Limited Warranty On Parts
Taylor warrants the Parts against failure due to defect in materials or workmanship under normal use and service as follows. All warranty periods begin on the date of original installation of the Part in the Taylor unit. If a Part fails due to defect during the applicable warranty period, Taylor, through an authorized Taylor distributor or service agency, will provide a new or re-manufactured Part, at Taylor’s option, to replace the failed defective Part at no... - Page 33 Parts or the units in which they are installed repaired or altered in any way so as, in the judgment of Taylor, to adversely affect performance, or normal wear or deterioration.
-
Page 34: Taylor Company
LEGAL REMEDIES The owner must notify Taylor in writing, by certified or registered letter to the following address, of any defect or complaint with the Part, stating the defect or complaint and a specific request for repair, replacement, or other correction of the Part under warranty, mailed at least thirty (30) days before pursuing any legal rights or remedies. - Page 35 Section 12 Parts List + Available Separately Model 390 Tim Hortons Parts List...
- Page 36 + Available Separately Model 390 Tim Hortons Parts List...
- Page 37 + Available Separately Model 390 Tim Hortons Parts List...
- Page 38 + Available Separately Model 390 Tim Hortons Parts List...
- Page 39 + Available Separately Model 390 Tim Hortons Parts List...
- Page 40 + Available Separately Model 390 Tim Hortons Parts List...
- Page 41 Model 390 050945-27H 7/12...
Need help?
Do you have a question about the Tim Hortons 390 and is the answer not in the manual?
Questions and answers