
Related Manuals for Taylor 390


Summary of Contents for Taylor 390
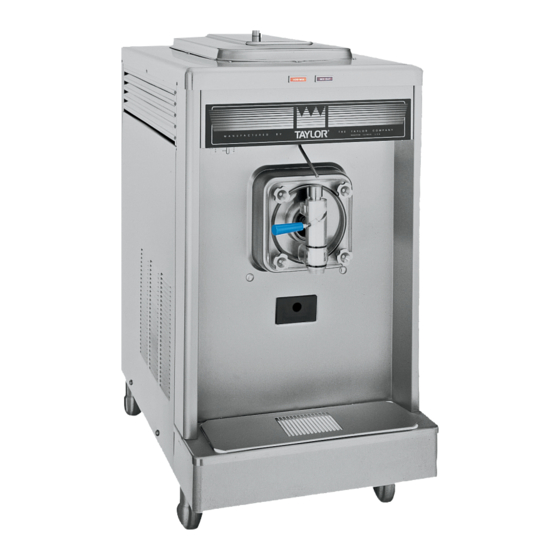
- Page 1 OPERATOR’S MANUAL Model 390 Slush Freezer Original Operating Instructions 6/01 (Original Publication) 048693-M (Updated 7/26/2018)
- Page 2 Note: Only instructions originating from the factory or its authorized translation representative(s) are considered to be the original set of instructions. © 2001 Taylor Company 048693-M Any unauthorized reproduction, disclosure, or distribution of copies by any person of any portion of this work may be...
-
Page 3: Table Of Contents
Model 390 ........ - Page 4 Section 8: Troubleshooting Guide Section 9: Parts Replacement Schedule Maintenance Intervals..........9-1 Section 10: Limited Warranty on Equipment Section 11: Limited Warranty on Parts 048693-M...
-
Page 5: Section 1: To The Installer
Uncrate the machine and inspect it for damage. Report electrical shock or hazardous moving parts, as well as any damage to your Taylor distributor. poor performance or damage to the machine. This machine is made in the USA and has USA sizes of hardware. -
Page 6: Water Connections
This code contains provisions considered necessary for To the Installer Model 390... -
Page 7: Refrigerant
If the supply cord is damaged, it must be replaced by an authorized Taylor service technician in order to avoid a hazard. CAUTION! Use only R404A refrigerant that conforms to the AHRI standard 700 specification. The use of any other refrigerant may expose users and operators to unexpected safety hazards. - Page 8 TO THE INSTALLER Notes: To the Installer Model 390...
-
Page 9: Section 2: To The Operator
Taylor distributor. It should also be noted that Taylor does not warrant the Note: Your Taylor warranty is valid only if the parts are refrigerant used in its machines. For example, if the... - Page 10 TO THE OPERATOR Notes: To the Operator Model 390...
-
Page 11: Section 3: Safety
We, at the Taylor Company are concerned about the safety of the operator when he or she comes into contact with the freezer and its parts. Taylor has gone to extreme IMPORTANT! An equipotential grounding lug is efforts to design and manufacture built-in safety features provided with this machine. - Page 12 • If the supply cord is damaged, it must be level surface. Extreme care should be taken when replaced by an authorized Taylor service moving machine for any reason. Two or more persons technician in order to avoid a hazard.
- Page 13 Noise Level: Airborne noise emission does not exceed 78 dB(A) when measured at a distance of 39 in. (1.0 m) from the surface of the machine and at a height of 62 in. (1.6 m) from the floor. Safety Model 390...
- Page 14 SAFETY Notes: Safety Model 390...
-
Page 15: Model 390
Operator Parts Identification Section 4 Model 390 Figure 4-1 Item Description Part No. Item Description Part No. Cover A.-Hopper-STD X38458-SER Pan-Drip 19-1/2 Long 035034 Gasket-Hopper Cover 038375 Shield-Splash-Wire 046177 Tube-Feed-Non Reverse 015176-9 Tray-Drip 14.8 046275 Operator Parts Identification Model 390... -
Page 16: Beater Assembly
X46233 Valve-Draw *SLUSH* Ice Buster 047734 Blade-Scraper-Plastic 9-13/16L 084950 Buster-Ice 047735 Shaft-Beater 036412 Gasket-Door 5.177 X 5.938 016672 Seal-Drive Shaft 032560 Bearing-Front 013116 O-Ring-7/8 OD X .139W 025307 O-Ring-.291 ID X .080W 018550 Nut-Stud 029880 Operator Parts Identification Model 390... -
Page 17: Section 5: User Interface
The center position is Off. The Wash position activates the beater motor only. The Auto position allows the If your Model 390 Taylor freezer has been factory- beater motor and compressor to run. equipped with the Remote Continuous Fill System, the mix supply to the freezer will be replenished Indicator Light—MIX LOW... - Page 18 USER INTERFACE Notes: User Interface Model 390...
-
Page 19: Section 6: Operating Procedures
Operating Procedures Section 6 The following are step-by-step operating procedures for model 390 slush freezer. This unit has a 20 qt. (18.9 L) mix hopper, and the freezing cylinder holds USE EXTREME CAUTION when handling the 7 qt. (6.6 L) of slush product. - Page 20 This will lock the ice buster in place. Install the draw handle pin, and close the draw valve by moving the handle to the left. 101612 Figure 6-3 Figure 6-6 Operating Procedures Model 390...
-
Page 21: Sanitizing
16. Install the rear drip pan. Slide the long drip pan into the hole in the front panel. 17. Install the front drip tray and the splash shield under the door spout. 18. Lay the hopper gasket and feed tube in the bottom of the mix hopper. Operating Procedures Model 390... -
Page 22: Priming
Follow the instructions in the previous step, except drain the Closing Procedures product into a pail and properly discard the mix. To disassemble model 390, the following items will be needed: ALWAYS FOLLOW LOCAL HEALTH CODES. •... -
Page 23: Rinsing
Draw off all of the cleaning solution.When the solution stops flowing from the door spout, move the draw handle to the left and place the control switch in the OFF position. Figure 6-9 Operating Procedures Model 390... -
Page 24: Brush Cleaning
If there is more than one O-ring to be 7. Wipe clean all exterior surfaces of the freezer. removed, always remove the rear O-ring first. This will allow the O-ring to slide over the forward rings without falling into the open grooves. Operating Procedures Model 390... -
Page 25: Section 7: Operator Checklist
Properly prepare the cleaning and sanitizing solutions. Read and follow label directions carefully. Too strong of a solution may damage the parts, and too weak of a solution will not do an adequate job of cleaning or sanitizing. Operator Checklist Model 390... -
Page 26: Regular Maintenance Checks
Dirty condensers will reduce the efficiency mice and other vermin. and capacity of the machine. Condensers should Your local Taylor distributor can perform this service for be cleaned monthly with a soft brush. Never use you. screwdrivers or other metal probes to clean between the fins. - Page 27 Improper or inadequate lubrication a. Use an approved food grade lubricant in rear drip pan. on drive shaft O-ring or seal on (example: Taylor Lube) and follow drive shaft. lubrication procedures. b. Bad or missing O-ring or seal on b.
- Page 28 Improper or inadequate lubrication a. Use an approved food grade lubricant the door spout. on draw valve O-rings. (example: Taylor Lube) and follow lubrication procedures. b. Bad or missing O-rings on draw b. Replace rubber parts every three valve.
- Page 29 Double Ended Brush Inspect & replace if Minimum necessary White Bristle Brush, 1 in. x 2 in. Inspect &replace if Minimum necessary White Bristle Brush, 3 in. x 7 in. Inspect & replace if Minimum necessary Parts Replacement Schedule Model 390...
- Page 30 PARTS REPLACEMENT SCHEDULE Notes: Parts Replacement Schedule Model 390...
- Page 31 Taylor, through an authorized Taylor distributor or service agency, will provide a new or re- manufactured part, at Taylor’s option, to replace the failed defective part at no charge for the part. Except as otherwise stated herein, these are Taylor’s exclusive obligations under this limited warranty for a Product failure. This limited warranty is subject to all provisions, conditions, limitations, and exclusions listed below and on the reverse (if any) of this document.
- Page 32 LEGAL REMEDIES The owner must notify Taylor in writing by certified or registered letter to the following address,of any defect or complaint with the Product, stating the defect or complaint and a specific request for repair, replacement, or other correction of the Product under warranty, mailed at least thirty (30) days before pursuing any legal rights or remedies.
- Page 33 Taylor warrants the Parts against failure due to defect in materials or workmanship under normal use and service as follows. All warranty periods begin on the date of original installation of the Part in the Taylor unit. If a Part fails due to defect during the applicable warranty period, Taylor, through an authorized Taylor distributor or service agency, will provide a new or re-manufactured Part, at Taylor’s option, to replace the failed defective Part at no charge for the Part.
- Page 34 Taylor. 5. Replacement of wear items designated as Class “000” Parts in the Taylor Operator's Manual, as well as any release sheets and clips for the Product's upper platen assembly.
- Page 35 LEGAL REMEDIES The owner must notify Taylor in writing, by certified or registered letter to the following address, of any defect or complaint with the Part, stating the defect or complaint and a specific request for repair, replacement, or other correction of the Part under warranty, mailed at least thirty (30) days before pursuing any legal rights or remedies.
- Page 36 LIMITED WARRANTY ON PARTS 11-4 Limited Warranty on Parts Models 390...
Need help?
Do you have a question about the 390 and is the answer not in the manual?
Questions and answers