
Related Manuals for Miele PG 8110 SmartBiz


Summary of Contents for Miele PG 8110 SmartBiz
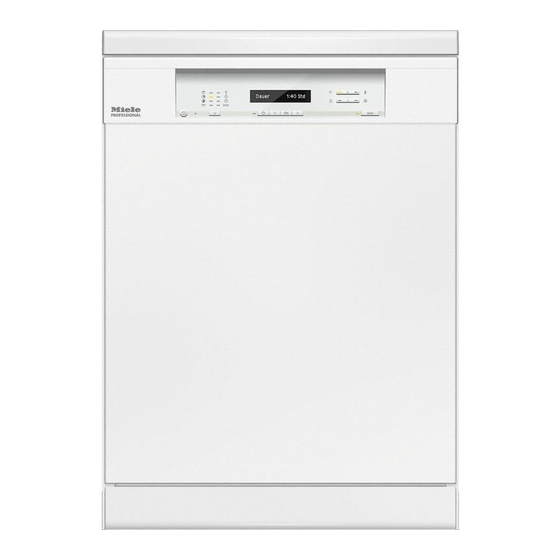
- Page 1 Operating instructions PG 8110 SmartBiz en - GB, IE To avoid the risk of accidents or damage to the machine, it is essential to read these instructions before it is installed and used for the first time. M.-Nr. 11 649 200...
-
Page 2: Table Of Contents
Contents Notes about these instructions................ Operating steps ....................Product description................... Appliance overview ..................... Control panel ....................... Display......................... Correct use ......................Warning and Safety instructions..............11 Caring for the environment ................17 Economical dishwashing..................18 Before using for the first time ................19 Opening the door .................... - Page 3 Contents Selecting a programme ..................40 Starting the programme ..................40 Time display ......................41 Energy management ................... 41 End of programme....................42 Switching off......................42 Removing load items................... 42 Interrupting a programme..................43 Changing a programme..................43 Programme options................... 44 Options........................
- Page 4 Contents Installation......................70 Electrical connection ................... 70 The Miele Waterproof system................71 Water intake ......................71 Connecting the drainage system................. 73 Technical data....................74 Settings menu....................75 Open the Settings menu ..................75 Language ......................75 Time of day......................76 Water hardness ....................
-
Page 5: Notes About These Instructions
Notes about these instructions Warnings Information which is important for safety is highlighted in a thick framed box with a warning symbol. This alerts you to the potential danger of injury to people or damage to property. Read these warning notes carefully and observe the procedural instructions and codes of practice they describe. -
Page 6: Product Description
Product description Appliance overview a Upper spray arm (not visible) g Data plate b Upper basket h Rinse aid container c Middle spray arm i Dual compartment detergent dispenser d Air inlet for drying j Salt reservoir e Bottom spray arm f Filter combination... -
Page 7: Control Panel
Product description Control panel a Programme selection f OK button (confirmation) b Display g button (FlexiTimer) with indicator light c Option buttons h Programme selection button d Start button with indicator light i On/off button e Arrow buttons ... -
Page 8: Display
Product description Settings menu Display General The display is used to select or set the following: - Programme - FlexiTimer (delay start) - Settings menu The Settings menu is used to alter the dishwasher's electronics to suit The display can show the following: different requirements. -
Page 9: Correct Use
Correct use This commercial dishwasher complies with all current local and national safety requirements. Inappropriate use can, however, lead to personal injury and material damage. Read the operating instructions carefully before using the commercial dishwasher for the first time. They contain important information on the safety, use and maintenance of the machine. - Page 10 This lamp must only be used for the purpose for which it is intended. The lamp is not suitable for room lighting. Replacement lamps may only be fitted by a Miele authorised technician or by the Miele Customer Service Department.
-
Page 11: Warning And Safety Instructions
Technical safety This dishwasher must only be commissioned, repaired and maintained by the Miele Customer Service Department, a dealer or a suitably qualified service technician. Unauthorised installation, maintenance and repairs can cause considerable danger for the user. - Page 12 Department, a Miele dealer or a suitably qualified service technician. Faulty components must only be replaced by genuine Miele original spare parts. Only when these parts are fitted can Miele guarantee the correct functioning and safety of the appliance. ...
- Page 13 The Waterproof system will work even when the dishwasher is switched off. However, the dishwasher must remain connected to the electricity supply. While the dishwasher is under warranty, repairs should only be undertaken by a Miele authorised service technician. Otherwise the warranty is invalidated.
- Page 14 Warning and Safety instructions Correct use This dishwasher is designed for operation with water and detergents suitable for use in commercial dishwashers only. Organic solvents and flammable liquid agents must not be used in it. This could cause an explosion, damage rubber or plastic components in the dishwasher and cause liquids to leak out of it.
- Page 15 Miele cannot be held liable for any effect chemical cleaning agents may have on the material of the items being cleaned. Observe the cleaning agent manufacturer's instructions with regard to storage conditions, use and dosage.
- Page 16 Seek medical advice immediately if a child has swallowed or inhaled chemical agent. Accessories Only use original Miele accessories. If other parts are used, warranty, performance and product liability claims will be invalidated. Miele will guarantee to supply functional spare parts for 10 years following the discontinuation of your appliance.
-
Page 17: Caring For The Environment
Please dispose of it at your local community waste collection / recycling centre for electrical and electronic appliances, or contact your dealer or Miele for advice. You are also responsible for deleting any personal data that may be stored on the appliance being disposed of. Please... -
Page 18: Economical Dishwashing
Caring for the environment Economical dishwashing This dishwasher is exceptionally economical in its use of water and electricity. You can make the most of your machine by following these tips: - For most economical dishwashing, make full use of the baskets without overloading the dishwasher. -
Page 19: Before Using For The First Time
Before using for the first time Opening the door Closing the door Push the baskets right in. At the end of programmes with a drying phase (see “Programme chart”), the Then raise the door up, and push door will open automatically a little in until it clicks into position. -
Page 20: Basic Settings
Before using for the first time Time of day Basic settings The display will then change to the Switch the dishwasher on with the screen for setting the time of day. button. The current time of day must be set The welcome screen will appear when before you can use the “FlexiTimer”... - Page 21 Before using for the first time Water hardness Next, the information Miele@home enabled Set up finished will appear in The display will change to the screen the display. for setting the water hardness. The unit of measurement “°dH” is After confirming these prompts with shown as “°d”...
-
Page 22: Before Using The Machine For The First Time, You Will Need
ECO programme at a water Suitable products are available from hardness of 2.5 mmol/l (14 °dH – Miele Professional. German scale). For other programmes and water hardness levels, the Every dishwasher is tested at the frequency of reactivation will differ. -
Page 23: Filling The Salt Reservoir
Before using for the first time Filling the salt reservoir Before filling the salt reservoir for the first time, you must fill it with approx. 2 litres of water to enable the salt to dissolve. Once the dishwasher has been used, there is always sufficient water in the reservoir. -
Page 24: Rinsing Agent
Do not fill it with washing-up liquid or detergent. This would damage the rinsing agent container. Suitable products are available from Miele Professional. Alternatively, it is possible to use - Household vinegar with max. 5 % acid content - Liquid citric acid up to 10 % acid... -
Page 25: Rinsing Agent Refill Reminder
Before using for the first time You can adjust the rinsing agent dosage for best results (see “Settings menu, Rinsing agent”). Rinsing agent refill reminder When the Add rinse aid message appears, the reservoir contains sufficient rinsing agent for 2–3 programmes only. -
Page 26: Preparing The Load Items
Preparing the load items Economical dishwashing Notes This dishwasher is exceptionally Remove coarse food residues from the economical in its use of water and load items. electricity. There is no need to pre-wash items You can make the most of your under running water. - Page 27 Preparing the load items - Make sure that small items cannot fall through the holders in the baskets. Small items such as lids should therefore be placed in the cutlery tray or cutlery basket (depending on model). Some foods may contain natural dyes, e.g.
- Page 28 Preparing the load items Load items not suitable for Aluminium components (e.g. dishwashers cooker hood grease filters) must not - Wooden load items or items with be cleaned in the dishwasher with wooden parts may discolour or fade. caustic alkaline commercial or The glue used in these items is not industrial cleaning agents.
-
Page 29: Flexassist
Preparing the load items Cup rack FlexAssist Raise the rack upwards using the The yellow coded FlexAssist parts yellow lever to make room for tall indicate which elements of the items. dishwasher baskets and cutlery tray are moveable. They also act as grips and Glasses can be arranged along the cup have symbols embossed on them to rack for support during the programme. -
Page 30: Adjusting The Upper Basket
Preparing the load items Adjusting the upper basket Dishwasher with cutlery basket (see data plate for model number) In order to gain more space for taller items in the upper or lower basket, the Plate in cm Upper upper basket can be adjusted on three basket Upper basket Lower... -
Page 31: Lower Basket
Preparing the load items MultiComfort zone Lower basket The rear section of the lower basket is See “Loading the dishwasher, Loading used for washing cups, glasses, plates examples” for examples of how to and pots. load crockery and cutlery. The glass rack can be raised to make ... - Page 32 Preparing the load items Hinged spikes (depending on model) The spikes at the front are used for washing plates, soup bowls, platters, dessert bowls, and saucers. The spikes can be lowered to make more room for large items, e.g. pots, pans and serving dishes.
-
Page 33: Cutlery
Preparing the load items Cutlery Cutlery basket Fit it onto the cutlery basket if required. The cutlery basket can be placed anywhere on the front rows of spikes in the lower basket. To avoid the risk of injury, knives and forks should be placed with the handles upwards in the basket. -
Page 34: Loading Examples
Preparing the load items Loading examples Dishwashers with cutlery basket Upper basket Lower basket... - Page 35 Preparing the load items Cutlery basket Heavily soiled items...
-
Page 36: Operation
Press the opening catch in the Suitable products are available from direction of the arrow. The flap will Miele Professional. spring open. Add powder detergent or detergent The flap is always open at the end of a tabs to the detergent compartment. -
Page 37: Liquid Detergent
See “Settings menu, External dispensing” to activate the dispenser pump and set the dosage. For special soiling and if using liquid detergent, contact the Miele Customer Service Department for advice on how to set the dosage for best results. ... - Page 38 Operation Refilling or changing containers The dispensing module is equipped with a level monitoring function. Refill detergent will appear in the display when the level drops below the minimum. As soon as the message appears in the display, refill or replace the container with a full one containing the appropriate process chemical at the end of the programme.
- Page 39 Operation Changing detergent If you want to change the detergent used, the system must first be rinsed through with water to avoid a reaction between the different detergents. Remove the suction lance from the media canister and place it in a container of water.
-
Page 40: Switching On
Operation Switching on Selecting a programme Make sure the spray arms can rotate Choose your programme according to freely. the type of load items and the degree of soiling. Close the door. The different programmes and their Open the stopcock, if it is closed. uses are described in the “Programme ... -
Page 41: Time Display
Operation Time display Energy management The estimated duration of the To save energy the dishwasher will programme selected appears in the switch off automatically 10 minutes display before the programme begins. after the last time a button is pressed or During the programme sequence, the after the end of a programme. -
Page 42: End Of Programme
Operation End of programme Switching off The programme has finished when At the end of a programme sequence: Finished appears in the display and The dishwasher can be switched off the door has opened slightly (if at any time using the button. applicable). -
Page 43: Interrupting A Programme
Operation Interrupting a programme Changing a programme A programme is interrupted as soon as If the detergent dispenser flap has the door is opened. already opened, do not change the If the door is closed again, the programme. programme will continue from the point it was at before the door was opened. -
Page 44: Programme Options
Programme options Time left indicator Options The Time left indicator option is Options can be selected and selected as standard and displays the deselected using the appropriate time remaining until the end of the buttons and the display before starting programme. -
Page 45: Flexitimer With Ecostart
Programme options Switch on the dishwasher with the FlexiTimer with EcoStart button. With the FlexiTimer you have three The Start indicator light will flash. options for starting the programme using delay start. You can set the start Select the programme you want to time or the finish time of a programme. - Page 46 Programme options Start at Finish at With the Start at function, you set the With the Finish at function, you set the time at which you want the programme time at which you wish the programme to start. to finish. ...
- Page 47 Programme options EcoStart Changing or deleting set times You can use the EcoStart function to You can change the set times or the benefit from cheaper electricity tariffs at programme before the start time in the night. Before you can use this option, display is reached.
-
Page 48: Programme Chart
Programme chart Programme When to use Detergent The following dosages are based on Miele products. Please follow manufacturer's instructions on dosage. Compartment I Compartment II For fresh, easily removed food residues. 20 - 25 g Short or 1 tab ... - Page 49 Programme chart Programme sequence Pre-wash Main wash Interim Interim Final rinse Drying Extra AutoOpen rinse I drying rinse II 70 °C 65 °C 30 s 10 s 15 min 10 s 65 °C 65 °C 10 min 3 min 30 min 1.5 min 75 °C 65 °C 8 min 10 min 3 min 30 min 1.5 min 50 °C 50 °C 1 min 3 min 1 min...
- Page 50 Programme chart Programme Consumption Duration Energy Water Cold water Hot water Cold water Hot water 15 °C 55 °C 15 °C 55 °C Short 1.6 kWh 1.0 kWh 14.5 l 53 min 36 min Universal 1.6 kWh 1.0 kWh 15.2 l 67 min 51 min Intensive 1.8 kWh 1.0 kWh 20.2 l 83 min 63 min ...
- Page 51 Programme chart Regulations EU 2019/2022 and EU 2019/2017, which contain new requirements for marketing, commissioning and labelling mains-operated domestic dishwashers, come into force on 1 March 2021. The tables below present the current energy consumption classification and the classification that will apply from 1 March 2021 in accordance with EU 1059/2010 and EU 2019/2017.
-
Page 52: Cleaning And Care
- Water inlet and drainage (available from Miele). Follow the - Internal and external dispensing dosage recommended by the systems manufacturer on the packaging. -
Page 53: Cleaning The Door And The Door Seal
Cleaning and care To avoid damaging the external Cleaning the door and the door surfaces, do not use: seal - cleaning agents containing soda, The door seals and the sides of the ammonia, acids or chlorides, dishwasher door cannot be reached and cleaned by the spray arm jets. -
Page 54: Cleaning The Spray Arms
Cleaning and care Cleaning the spray arms Particles of food can get stuck in the spray arm jets and bearings. The spray arms should therefore be checked and cleaned regularly. Switch the dishwasher off. Remove the spray arms as follows: ... -
Page 55: Checking The Filters In The Wash Cabinet
Cleaning and care Checking the filters in the Cleaning the filters wash cabinet Switch the dishwasher off. The filter combination in the base of the wash cabinet retains coarse soil from the suds solution. This prevents soiling getting into the circulation system and re-entering the cabinet through the spray arms. - Page 56 Cleaning and care Replace the filter combination so that To clean the inside of the filter, the flap it lies flat in the base of the wash must be opened: cabinet. Press catches together in the Then turn the handle clockwise to direction of the arrows as shown, and open the filter .
-
Page 57: Problem Solving Guide
Problem solving guide With the aid of the following guide, most minor problems can be corrected without contacting Miele. You can save time and money in many cases, as you do not need to call the Miele Customer Service Department. - Page 58 Switch the dishwasher back on. Select the programme you want. Press the Start button. If the fault message appears again, there is a technical fault. Call the Miele Customer Service Department. The Waterproof system has reacted. Waterproof Close the stopcock.
-
Page 59: Faults With Water Intake Or Drainage
Problem solving guide Faults with water intake or drainage Problem Cause and remedy One of the following fault messages appears in the display: Open stopcock The stopcock is closed. Open the stopcock fully. Water intake Before rectifying the problem: ... -
Page 60: General Problems
Problem solving guide General problems Problem Cause and remedy The indicator lights and The display has switched off automatically to save the display are dark. energy. Switch the dishwasher on again with the button. The interior lighting The interior lighting has been switched off does not come on when permanently. -
Page 61: Noises
Problem solving guide Noises Problem Cause and remedy Knocking noise in the A spray arm is knocking against an item in a basket. wash cabinet. Interrupt the programme, and rearrange the items which are obstructing the spray arm. Rattling noise in the Items are insecure in the wash cabinet. -
Page 62: Unsatisfactory Washing Result
Problem solving guide Unsatisfactory washing result Problem Cause and remedy The dishes are not The dishes were not loaded correctly. clean. See notes in “Loading the dishwasher”. The programme was not suitable for the load. Select a more suitable programme (see “Programme chart”). - Page 63 Problem solving guide Problem Cause and remedy Dishes are not dry or The rinse aid dosage is set too low or the rinse aid cutlery and glasses are reservoir or container is empty. flecked. Replenish the reservoir, increase the dosage or change the brand of rinse aid (see “Before using for the first time, Rinse aid”).
- Page 64 Problem solving guide Problem Cause and remedy White residue is visible The rinse aid dosage is set too low. on the dishware. Cloud- Increase the dosage (see “Settings menu, Rinse ing occurs on glass- aid”). ware and cutlery; film There is no salt in the salt reservoir.
-
Page 65: Maintenance
Refit the filter and seal. Make sure This water filter is available from a Miele they are fitted correctly. dealer or from the Miele Customer Service Department. -
Page 66: Cleaning The Drain Pump And Non-Return Valve
Maintenance Cleaning the drain pump and non-return valve If the water has not been pumped away at the end of a programme the drain pump or the non-return valve might be blocked. They are, however, easy to clean. Disconnect the dishwasher from the mains supply. -
Page 67: Customer Service
Programme updates In the event of any faults which you cannot remedy yourself, please contact The programme update function is your Miele dealer or the Miele Customer designed to enable a service technician Service Department. to update your dishwasher's electronics in keeping with advances in technology. -
Page 68: Warranty
“Comparison tests”. The latest version of this leaflet can be ordered by email from: - testinfo@miele.de Please quote your postal address, as well as the model and serial number of your dishwasher (see data plate). -
Page 69: Optional Accessories
Cappuccinatore insert The Cappuccinatore insert can be used for cleaning the individual parts of the Miele Cappuccinatore in the dishwasher. Cutlery basket The cutlery basket is placed in the lower basket and can be used to wash additional items of cutlery. -
Page 70: Installation
- If replacing the mains cable, use only original Miele replacement parts or a suitable cable with core cable ends. - For technical data, see the data plate or wiring diagram supplied. -
Page 71: The Miele Waterproof System
The Miele Waterproof system ensure the water supply is As long as your dishwasher has been adequately protected. installed correctly, the Miele waterproof - The water pressure (flow pressure at anti-leak system will protect you from the take-off point) must be between water damage throughout its lifetime. - Page 72 *INSTALLATION* Installation To avoid any damage to the machine, the dishwasher must only be connected to a fully vented plumbing system. The inlet hose must not be shortened or damaged in any way as it contains electrical components (see illustration).
-
Page 73: Connecting The Drainage System
*INSTALLATION* Installation Venting the drainage system Connecting the drainage system If the on-site drainage connection is situated lower than the guide path for - The machine drainage system is the lower basket rollers in the open fitted with a non-return valve, which door, the drainage system must be prevents dirty water from flowing vented. -
Page 74: Technical Data
13/14 standard place settings Noise emission values Sound power in LwA 45 dB (A) Sound pressure in LpA 34 dB (A) Test certificates awarded EMC, VDE, radio and television suppressed CE mark 2006/42/EC Machinery directive Manufacturer's address Miele & Cie. kg, Carl-Miele-Straße 29, 33332 Gütersloh, Germany... -
Page 75: Settings Menu
Settings menu Settings menu for changing Language standard settings The display can be set to appear in one of several different languages. Open the Settings menu You can change the language in the Switch the dishwasher on with the display via the Language ... -
Page 76: Time Of Day
OK. (see “Settings menu - Network”). You can adopt the current time of day from a Miele@home SuperVision appliance. Select the Synchronise option. Select the setting you want and confirm with OK. -
Page 77: Water Hardness
Settings menu Water hardness °d mmol/l °f Display Your dishwasher is fitted with a water softener. You need to programme the water softener to the water hardness level in your area. - The dishwasher must be programmed exactly to the correct water hardness for your area. -
Page 78: Rinse Aid
Settings menu Rinse aid External dispensing You can adjust the rinse aid dosage for Activate automatic dispensing of liquid best results. detergent if you have installed the The dispenser can be set between 0 optional external dosing module. and 6 ml. The DOS module is supplied with its 3 ml is set as standard. -
Page 79: Temperature Unit
Settings menu DOS flow rate The “Pre-wash” programme is offered directly after the venting process is A flow rate of 60 ml/min is set as finished. Start the programme in order standard. The flow rate can be modified to dilute and drain any detergent that between 10 and 150 ml/min in escaped into the wash cabinet. -
Page 80: Ecostart
Settings menu Setting the energy tariff times EcoStart Before you can use the EcoStart option, In order to run your dishwasher in the you must set at least one energy tariff most economical way, you can use the time. EcoStart option to take advantage of your electricity supplier's time-variable ... - Page 81 Settings menu Deleting the energy tariff times You can delete the settings for an energy tariff time and in doing so deactivate the EcoStart option for this time period. Use the arrow buttons to select the electricity tariff time (T1–T3) you want to delete and confirm with OK.
-
Page 82: Networking
(see “Settings menu - Network”). - Call up information on the There are a number of ways of programme sequence of your connecting your dishwasher to your Professional appliance WiFi network: - Set up a Miele@home network with other WiFi-enabled Miele Professional appliances... - Page 83 WPS on your confirm with OK. router quickly enough. Repeat the steps Confirm the message with OK. above. System settings This function is reserved for the manual integration of your machine into your network by a Miele service technician.
-
Page 84: 2Nd Interim Rinse
If you wish to reset all entered settings Select the brightness you want and and values for Miele@home, you can confirm this with OK. restore the factory default settings on your WiFi module. Any settings that do... -
Page 85: Check Filters
Settings menu Check filters BrilliantLight (depending on model) You can adjust the interval at which the message to remind you to check the The dishwasher is fitted with interior filters appears. lighting. You can set an interval between 30 and When the door is open, the lighting 60 programme cycles. -
Page 86: Showroom Programme
The dishwasher is equipped with WiFi module settings (where applicable) various demo programmes for have to be reset separately (see showroom use. “Settings, Miele@home, module Demo mode settings”). Demonstration programme for Select Reset and confirm with OK. - Page 88 Tel. +971 4 3044 999, Fax. +971 4 3418 852 Tel: (01) 461 07 10, Fax: (01) 461 07 97 800-MIELE (64353) E-Mail: info@miele.ie, Internet: www.miele.ie E-Mail: info@miele.ae, Website: www.miele.ae Manufacturer: Miele & Cie. KG, Carl-Miele-Straße 29, 33332 Gütersloh, Germany 2020-08-26 GG09 M.-Nr. 11 649 200 / 01...
Need help?
Do you have a question about the PG 8110 SmartBiz and is the answer not in the manual?
Questions and answers