Table of Contents
Advertisement
Quick Links
Advertisement
Table of Contents

Related Manuals for Miele PG 8172


Summary of Contents for Miele PG 8172
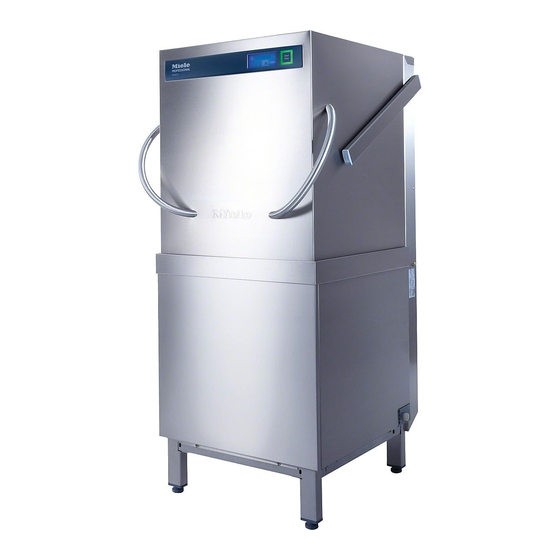
- Page 1 PG 8172 PG 8172 ECO...
-
Page 2: Table Of Contents
About this manual Original operating instructions for Miele commercial dishwashers PG 8172 and PG 8172 ECO Table of contents About this manual ------------------------------- 42 Info level 1 ----------------------------------------- 60 Safety notes --------------------------------------- 42 Info level 2 ----------------------------------------- 62 ... -
Page 3: About This Manual
Safety notes 2.1 Proper use – The PG 8172 commercial dishwasher is a technical device for commercial use and is not intended for private use. – Use the commercial dishwasher only for washing dishes such as plates, cups, cutlery and trays or for washing glasses of a gastronomic and related type. -
Page 4: Electrical Safety
Electricity consumers (heating element, frequency inverter, ...) are under voltage until the on-site mains disconnector has been operated. – Only original Miele spare parts may be used for maintenance and repairs. If original spare parts are not used, the warranty is invalidated. –... -
Page 5: Before Working With The Machine
(water, waste water, electrical system) ( 16 and 17). After connecting the water and the power properly, contact the relevant Miele Service Department or your dealer for the commissioning of the machine and for providing training in its operation. Have yourself and your operating personnel trained in the operation of the machine. -
Page 6: Overview
Product description 4.3 Overview Pos. Description Pos. Description ECO module (acc. to equipment version) (11) Bushings for cables and hoses Display (Touchscreen) (12) Water supply hose Start button (13) Suction tube for rinse aid (red cover cap) Machine hood (= hood) (14) Suction tube for detergent (blue cover cap) Basket support... -
Page 7: Display (Touchscreen) And Start Button
Wash programme is ended; hood has not been opened yet flashing green-blue Only for PG 8172 ECO model machines: Vapours being extracted. The wash programme has not completely finished. Menu levels The machine electronic control unit is split into 3 levels: ... -
Page 8: The Standard Wash Programme
Product description 4.5 The standard wash programme The wash programme display depends on which application the machine has been programmed for. If necessary, the machine can also be reprogrammed later. Programme 2 is already pre-selected when the machine is ready. Another wash programme is selected by tapping. -
Page 9: Rinse Aid And Detergent
Rinse aid and detergent Rinse aid and detergent When handling chemicals, observe the safety notes and the dosage recommendations on the packaging. Use only chemicals recommended for the purpose by the manufacturer to avoid violent Danger chemical reactions (such as a detonating gas reaction) and material damage. ... -
Page 10: Suction Tube With Level Control
A new detergent product usually requires a new setting of the dispenser pump. Assign the required work to an authorised service technician to attain good cleaning results. If this is not done, Miele’s warranty and product liability is invalidated. -
Page 11: Priming The Dispenser Pumps
Internal water softener (special equipment) Procedure: When handling chemicals, observe the safety notes and the dosage recommendations on the packaging. Wear protective clothing, protective gloves and protective goggles when handling chemicals. Danger Do not mix different detergents. ... -
Page 12: Operation
Operation Operation 7.1 Before switching on the machine Possible risk of damage due to suction of items from within the machine e.g. pieces of cutlery The pump inlet filter protects the circulating pump and the drain pump. Operate the machine Caution only with the pump inlet filter fitted. - Page 13 The start button flashes green, as soon as the wash programme has ended and the hood remains unopened. Only for the PG 8172 ECO model At first, the start button flashes blue-green. At the same time, the steam and vapours are extracted from the washing compartment and the heat energy stored in them is recovered for the next wash cycle.
-
Page 14: Switching Off
Operation 7.3.7 Prematurely terminating the wash programme A wash programme can be terminated in the following ways: Press the start button On the screen, tap on the button of the selected wash programme 7.3.8 Periods of disuse Do not switch the machine off during periods of disuse. ... -
Page 15: Servicing And Maintenance
Servicing and maintenance Servicing and maintenance Do not spray the machine and the surrounding area (panels, base) using a water hose, steam-jet air ejector or high-pressure cleaner. Ensure that the base of the machine is not flooded when cleaning the floor in order to Warning prevent an uncontrolled inflow of water. -
Page 16: Weekly Cleaning
Servicing and maintenance Terminating the self-cleaning programme: Press this button. The background of the button becomes blue. The machine is filled again. 8.1.3 Cleaning the interior Ensure that there are no rusty foreign objects in the machine which can also cause the "stainless steel rust-free"... -
Page 17: Monthly Cleaning
Cleaning the dirt trap Close the on-site stop cock for the water supply. Clean the dirt filter in the dirt trap. Only for the PG 8172 ECO model Cleaning the ECO module Slide the ventilation grille upwards and remove it. -
Page 18: Malfunctions
Malfunctions Malfunctions This chapter explains the remedies for malfunctions. The causes and remedies are specified in the tables. Contact an authorised service technician if you cannot rectify the error yourself. Danger to life: Live components! Do not open any machine covers or machine parts if it requires tools. There is danger of shock. - Page 19 Malfunctions Pictogram Meaning Possible cause Remedy Spray arm is not correctly Correctly engage the spray arm. engaged Lower spray arm is Spray arm obstructed by, e.g. a Remove the obstruction. blocked piece of cutlery Clean the spray arm bearings Spray arm blocked by soiling (...
-
Page 20: Accessing The Error Code
Malfunctions 9.1 Accessing the error code In the display, the following symbol flashes: Tap the following buttons in turn: The error codes are displayed in area (a). INFO Malfunctions already resolved are also displayed here (e.g. ERR 1 OK). ... -
Page 21: Info Level
Info level 1 10 Info level 1 Calling info level 1 Press the following button: Buttons for retrieving information, the priming of the dispenser pumps and the selection of additional programmes Back button Start button Switch to info level 2 ( 11) Type designation Current tank temperature Current rinse temperature... - Page 22 Info level 1 Integrated operating instructions ( 13) Press the button. The integrated operating instructions appear. Tips Press the button. Tips appear concerning themes such as hygiene, conservation of dishes and economy. INFO Accessing the integrated operating instructions and tips is possible at any time, even while a wash programme is running.
-
Page 23: Info Level
Info level 2 11 Info level 2 Calling info level 2 Tap the following buttons in turn: Area for displaying events and malfunctions Back button Start button Switch to the PIN Menu ( 12) Current time Current tank temperature Current rinse temperature Current date Info field... -
Page 24: Pin Menu
PIN menu 12 PIN menu INFO If you switch to the PIN menu, the machine switches off. Accessing the PIN menu Tap the following buttons in turn: Type in "1575" INFO Incorrectly entered digits can be corrected with the ... - Page 25 PIN menu Set the date: Press the button (1). Use the numeric keypad to enter the current date. Format: YYYY-MM-DD (Year-Month-Day) INFO During entry, the date is checked for whether it exists. Only plausible dates can be entered. Setting the time: ...
-
Page 26: Automatic Switch On / Switch Off
PIN menu 12.2 Automatic switch on / switch off Here you can: programme, when the machine is to fill and heat up automatically. programme, when the machine is to switch off automatically. The automatic switching on/off can be set either per day and/or for a special date. If the inputs overlap, a specific date always takes precedence over the weekly programme. -
Page 27: Operating Data
INFO The display depends on the equipment of the machine. Press the back button to exit from the menu. An authorised service technician can activate this function. only for the PG 8172 ECO when a new display is installed... -
Page 28: Hygiene Logbook
PIN menu 12.4 Hygiene logbook In the hygiene logbook you can: retrieve all operating conditions, actions, and failures for one day in chronological order. retrieve all hygiene relevant data. The list starts with the current date and the first event on this day. Then the following events on that day, and then the events of days before. - Page 29 PIN menu Starting the descaling programme Tap the following buttons in turn: The button flashes while the programme is running. Descaler causes corrosion The descaler may not remain in the machine for hours. If you switch off the machine when the descaling programme is in progress or if you terminate the programme, the machine must be Warning emptied, refilled and again emptied.
- Page 30 PIN menu 12.5.2 Basic cleaning programme New dishes and new glasses generally have a protective coating, which can be removed by using the basic cleaning programme. The programme can also be used if coatings such as starch have built up on the dishes.
-
Page 31: Changing The Amount Of Detergent / Rinse Aid
PIN menu 12.6 Changing the amount of detergent / rinse aid When a new detergent or rinse aid is used, it may be necessary to change the dosing amount. Please observe the dosing recommendations on the packing. The dosing amount can be adjusted separately for every standard programme. IMPORTANT In the next menu, only the dosing amount of the internal dispenser pumps is changed. -
Page 32: Integrated Operating Instructions
Integrated operating instructions 13 Integrated operating instructions The integrated operating instructions gives a brief description of the operation of the machine. Retrieving the integrated operating instructions Repeat Tap the following buttons in turn: 14 Customer-specific modifications The controls of the machine can be adapted to individual needs within certain limits. Examples ... -
Page 33: Attaching The Tables
Installing the machine and tables 15.2 Attaching the tables Risk of electric shock Include tables in the equipotential bonding of the machine. Danger Assemble the tables. Secure the brace holder to the machine. The aluminium strut supports are in the machine. ... -
Page 34: Water Connection
The fresh water must in microbiological aspects have the quality of drinking water. Water inlet temperature PG 8172: max. 60 °C PG 8172 ECO: Cold water (max. 20 °C) Water hardness 3 °dH (3.8 °e / 5.34 °TH / 0.54 mmol/l ) (recommendation, to prevent scaling of the machine) ... -
Page 35: Connecting The Drain Hose
Electrical connection 16.4 Connecting the drain hose The drain hose may not be shortened or damaged. Do not bend the drain hose when laying it. Caution The drain hose is located in the machine. INFO The machine is equipped with a drain pump. The on-site water drain must have a trap. The maximum height of the on-site water drain is 650 mm. -
Page 36: Connecting The Mains Cable
Electrical connection 17.1 Connecting the mains cable Requirements for the mains cable Cable type: Type H07 RN-F or equivalent The wires must be fitted with wire end ferrules. Cross section and number of cores: suitable for on-site power and protection for more information see the sticker in the front panel Connect the mains Withdraw the mains... -
Page 37: Connection Diagram
Electrical connection 17.3 Connection diagram... -
Page 38: External Dispenser Pumps
External dispenser pumps 18 External dispenser pumps Instead of the internal dispenser pump, external dispenser pumps can also be used. Follow the instructions in this chapter. 18.1 Terminals Danger to life: Live components! Have the dispenser pumps installed and commissioned by an authorised service technician. Danger Detergent dosing nipple Connector strip with red plug for the connection of external dispenser pumps... -
Page 39: Electrical Connection
External dispenser pumps 18.2 Electrical connection IMPORTANT maximum current drain at the connector strip: 0.5 A. Connect the external dispenser pump to the 5-pin plug. Terminals (arranged from top to bottom) Terminal Voltage is on Condition Restriction Continuous voltage parallel to solenoid valve (O7) P709 = 0 ... -
Page 40: Setting The Parameters
Taking the machine out of service for a long period 18.3 Setting the parameters Retrieving the settings Tap the following buttons in turn: Type in "1575" INFO Incorrectly entered digits can be corrected with the button. Using the scroll buttons (4), set the value of parameter P704. -
Page 41: Technical Information
Maximum inlet pressure 16.1 Water inlet temperature Dimensions PG 8172 PG 8172 ECO *) Working height optional, also 900 mm instead of 850 mm. The vertical dimensions then increase by 50 mm. 22 Emissions Noise Workplace-related emission sound pressure level Leq = 62.7 dBA... - Page 42 Fax: 056 417 24 69 Miele S.à r.l. E-mail: info@miele.ie Reparatur- und Pikettservice: 0800 551 670 20, rue Christophe Plantin Internet: www.miele.ie Miele Service Professional 0 800 551 670 Postfach 1011 Singapore E-mail: info.mieleprofessional@miele.ch L-1010 Luxemburg/Gasperich Miele Southeast Asia Internet: www.miele-professional.ch Tel: 4 97 11 30 (Werkkundendienst) Miele Pte.
Need help?
Do you have a question about the PG 8172 and is the answer not in the manual?
Questions and answers