
Subscribe to Our Youtube Channel
Related Manuals for Miele PG 8133 SCVi


Summary of Contents for Miele PG 8133 SCVi
- Page 1 Operating Instructions Commercial dishwasher PG 8133 SCVi en - US To prevent accidents and machine damage, read these instructions before installation or use. M.-Nr. 10 895 560...
-
Page 2: Table Of Contents
Contents Guide to the manual .................... 5 Proper use...................... 6 Important safety instructions ................ 8 Product description..................... 14 Machine overview....................14 Control panel ......................15 Display functions ....................16 Caring for the environment ................ 17 Energy-saving dishwashing................... 18 Initial commissioning .................. 19 Opening the door .................... - Page 3 Water hardness ..................... 56 Rinse Aid ....................... 57 Temperature unit....................57 High-temperature final rinse .................. 57 EcoStart......................... 58 Networking ......................60 Miele@home ......................60 2nd interim rinse....................63 Brightness ......................63 Volume........................64 Refill reminders...................... 64 Check filters ......................64 AutoOpen Drying....................
- Page 4 Program updates ....................82 Optional accessories .................. 83 Installation Instructions ..................84 Electrical connection .................. 85 Plumbing ...................... 86 The Miele Waterproof system................86 Water intake ......................86 Connecting the water drainage system..............88 Technical details .................... 89 Sound emission tests.................. 90...
-
Page 5: Guide To The Manual
Guide to the manual Warnings Warnings important for safety are highlighted like this. Warnings alert you to potential injury and damage. Read the warnings carefully and follow the instructions and directions. Notes Notes contain information that is particularly important to follow. -
Page 6: Proper Use
Any other use, conversions and modifications are not permit- ted and could be dangerous. Miele cannot be held liable for damage resulting from incorrect or improper use or operation. ... - Page 7 This special bulb must only be used for the purpose for which it is intended, i.e. to illuminate the wash chamber. It is not suitable for room lighting. Replacement of bulbs may only be carried out by a Miele-authorized technician.
-
Page 8: Important Safety Instructions
Important safety instructions Proper installation The installation and operation of this commercial dishwasher in non-stationary locations (for example, aboard ships) should only be performed by professional operations or individuals, if they ensure that the preconditions for safe use of this appliance have been met. ... - Page 9 Faulty components may only be replaced by genuine Miele origi- nal parts. Only when these parts are fitted can Miele guarantee the safety standards of the appliance. The electrical safety of this dishwasher can only be guaranteed when correctly grounded.
- Page 10 Important safety instructions Do not use an extension cord to connect this machine to electric- ity. Extension cords do not guarantee the required safety of the ma- chine (e.g., danger of overheating). Do not open the casing of the dishwasher. Any contact with live connections or tampering with the electrical or mechanical compo- nents of the dishwasher will endanger your safety and may lead to machine malfunctions.
- Page 11 Important safety instructions Correct use This dishwasher is designed for operation with water and cleaning agents suitable for use in dishwashers only. Organic solvents and flammable liquid agents must not be used. This could cause an explosion, damage rubber or plastic compo- nents in the dishwasher and cause liquids to leak out of it.
- Page 12 Miele cannot be held liable for any effect chemical detergents may have on the material of the items being cleaned. Observe the deter- gent manufacturer's instructions with regard to storage conditions, use, and dosage.
- Page 13 Accessories Accessories may only be fitted if approved by Miele. If other parts are used, any warranty and product liability claims shall be void. Miele cannot be held liable for damage caused by failure to com-...
-
Page 14: Product Description
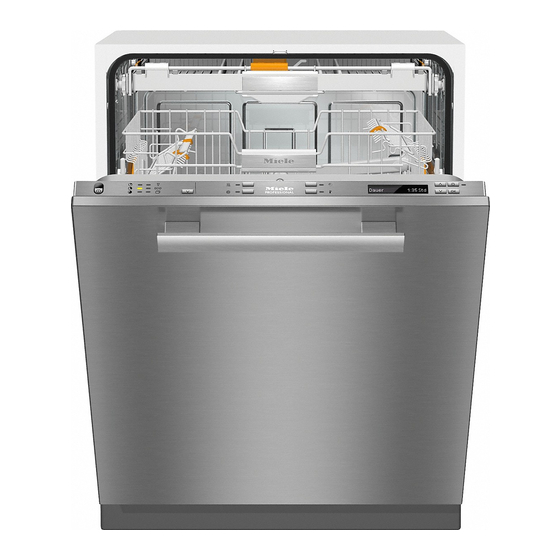
Product description Machine overview a Upper spray arm (not visible) g Filter combination b Cutlery tray h Data plate c Upper basket i Rinse aid reservoir d Middle spray arm j Dual-compartment detergent dis- penser e Air intake for drying k In-operation indicator light f Lower spray arm l Reservoir for dishwasher salt... -
Page 15: Control Panel
Product description Control panel a In-operation indicator light f OK button b Program selection g Display c Option buttons with indicator lights h Program selection button d Arrow buttons i On/off button e button – FlexiTimer with indicator light... -
Page 16: Display Functions
Product description Settings menu Display functions General information The display is used to select or set the following: The Settings menu is used to alter the – The program dishwasher's electronics to suit differ- ent requirements. The Settings menu is –... -
Page 17: Caring For The Environment
Consult with local authorities, dealers or Miele in order to dispose of and recycle electrical and electronic appliances. Miele assumes no responsibility for deleting any personal data left on the appliance being disposed. -
Page 18: Energy-Saving Dishwashing
Caring for the environment Energy-saving dishwashing This dishwasher is exceptionally eco- nomical in its use of water and electric- ity. You can make the most of your ma- chine by following these tips: – Make full use of the baskets without overloading the dishwasher. -
Page 19: Initial Commissioning
Initial commissioning Opening the door Closing the door Push the baskets in. At the end of programs with a drying phase (see “Program guide”), the door Then lift the door upwards and push will open automatically a little in order to until it clicks into position. -
Page 20: Basic Settings
Initial commissioning Time of day Basic settings The display will then change to the Open the door. screen for setting the time. Turn the dishwasher on with the The current time of day must be set be- button. - Page 21 Initial commissioning Water hardness Finally, the notes Miele@home enabled Set up complete will appear in the The display changes to the screen for display. setting the water hardness. After confirming these notes with OK, – The dishwasher must be pro- the messages ...
-
Page 22: Before Using The Machine For The First Time, You Require
Do not fill the salt compartment with ers. dishwasher detergent (including liq- uid detergent). Suitable products are available from Miele Professional. Use only special, coarse-grained dishwasher salt or other pure kitchen Every dishwasher is tested at the fac- salt. -
Page 23: Filling The Salt Reservoir
Initial commissioning Filling the salt reservoir Important! Before filling the salt reservoir with dishwasher salt for the first time, you must fill it with approx. 2 L of water to enable the salt to dis- solve. Once the dishwasher has been used for the first time, there is always suf- ficient water in the reservoir. -
Page 24: Salt Refill Indicator
Initial commissioning Salt refill indicator After the salt reservoir has been filled, the refill reminder may still appear in the Fill the salt reservoir with dishwasher display if the salt concentration has not salt when Refill salt appears in the yet reached the correct level. -
Page 25: Rinse Aid
Suitable products are available from Miele Professional. Alternatively, it is possible to use – household vinegar with a max. 5 % acid content – liquid citric acid with up to 10 % acid content. -
Page 26: Rinse Aid Indicator
Initial commissioning Rinse aid indicator When the Refill rinse aid message ap- pears in the display, the reservoir con- tains sufficient rinse aid for 2 – 3 pro- grams only. Add rinse aid in plenty of time. Confirm with OK. The rinse aid refill indicator will go out. -
Page 27: Loading The Dishwasher
Loading the dishwasher – Make sure that small items cannot Tips fall through the holders in the bas- Remove coarse food residues from the kets. dishes. Small items, e.g., lids, should there- fore be placed in the cutlery tray or There is no need to rinse items under cutlery basket (depending on model). - Page 28 Loading the dishwasher Items not recommended for dish- Glass care washing – Clouding may occur on glasses after – Wooden cutlery, cutting boards and frequent washing. When washing del- dishes or items with wooden parts icate glassware in the dishwasher, ensure that only a special glass-care –...
-
Page 29: Loading Examples
Loading the dishwasher Loading examples Loading for 10 standard place settings with cutlery tray Lower basket Upper basket Cutlery tray (depending on model) - Page 30 Loading the dishwasher Loading for 16 standard place settings with cutlery tray Upper basket Lower basket Cutlery tray (depending on model)
-
Page 31: Flexassist
Loading the dishwasher Cup rack FlexAssist Using the yellow lever , lift the cup The yellow FlexAssist components indi- rack upwards to make room for tall cate which elements of the baskets for items. dishes and cutlery tray are moveable. They also act as grips and have sym- Glasses can be arranged along the cup bols embossed on them to show what... - Page 32 Loading the dishwasher Hinged spikes XXL cup rack (depending on model) The rows of spikes can be lowered to The cup rack can be set at two different make more room for larger items such widths so that it can also accommodate as casserole dishes.
- Page 33 Loading the dishwasher Glassware rail Adjusting the height The glassware rail is designed to hold You can set the glassware rail at two glasses with long stems securely. different heights. Lower the glassware rail with the yel- Pull the rail upwards and click it back low lever ...
-
Page 34: Adjusting The Upper Basket
Loading the dishwasher Adjusting the upper basket Dishwashers with cutlery tray (see data plate for model number) In order to gain more space for taller items the upper basket can be adjusted Plate in inches (cm) Upper on three levels with 3/4" (2 cm) between basket Upper basket Lower... -
Page 35: Lower Basket
Loading the dishwasher Removable MultiComfort insert Lower basket The rear section of the lower basket is See “Loading the dishwasher, Loading used for washing cups, glasses, plates, examples” for examples of how to pots and pans. load dishware and cutlery. You can remove the MultiComfort insert ... - Page 36 Loading the dishwasher FlexCare glass holder Glassware rail Silicone padding in the FlexCare glass The glassware rail is designed to hold holder provides a stable and secure glasses with long stems securely. hold for delicate stemware. Stem glassware, e.g. wine glasses or champagne flutes, can be leaned against the glass rack or suspended from it.
- Page 37 Loading the dishwasher Hinged spikes Bottle holder The spikes at the front are used for The bottle holder can be used to wash washing plates, soup bowls, platters, narrow items, e.g., milk and baby bot- dessert bowls, and saucers. tles. The spikes can be lowered to make more room for large items, e.g.
-
Page 38: Cutlery
Loading the dishwasher Cutlery The upper spray arm must not be blocked by items which are too big 3D cutlery tray+ (e.g., very large platters). See “Loading the dishwasher, Loading The side sections of the tray can be examples” for examples of how to moved into the middle using the yellow load dishware and cutlery. - Page 39 Loading the dishwasher Both rows of spikes in the middle sec- tion of the cutlery tray can be flipped over to make room for larger pieces of cutlery. You can use the yellow slide to adjust the height of the middle section of the cutlery tray to make more room for large items of cutlery.
-
Page 40: Operation
Only use detergent tabs that are lowed. Seek medical attention imme- quick dissolving. Suitable detergent diately if detergent has been swal- tabs are available from Miele Profes- lowed or inhaled. Keep children away sional. from detergents. Keep children away from the dishwasher when the door ... -
Page 41: Adding Detergent
Operation Dispensing aid Adding detergent Compartment I holds a maximum of 10 mL and compartment II holds a maximum of 50 mL of detergent. In compartment II there are markings to assist with dispensing: 20 and 30. They indicate the filling quantity in mL when the door is open in the horizontal posi- tion. -
Page 42: Switching On
Operation Switching on Selecting a program Turn on the water supply if it is turned Choose your program according to the off. type of load and the degree of soiling. Open the door The different programs and their uses are described in the Program guide ... -
Page 43: Starting A Program
Operation Starting a program Time display Start the program by closing the The estimated duration of the program door. selected appears in hours and minutes in the display before the program be- The program starts. gins. During the program, the time left The in-operation indicator comes on to until the end of the program is dis- show that a program has been started. -
Page 44: Energy Management
Operation Energy management Program end To save energy, the dishwasher will At the end of a program, the in-opera- switch off automatically 10 minutes af- tion indicator light will be flashing slowly ter the last time a button has been with the door shut. -
Page 45: Switching Off
Operation Switching off Interrupting a program At the end of a program: A program will be interrupted as soon as the door is opened. Open the door. If the door is closed again, the program The dishwasher can be switched off will continue from the point it was at be- at any time using the button. -
Page 46: Options
Options Countdown indicator Options The Countdown indicator option is Options can be selected and dese- selected as standard and displays the lected using the appropriate buttons time remaining until the end of the pro- and the display before starting the pro- gram. -
Page 47: Flexitimer With Ecostart
Options Open the door. FlexiTimer with EcoStart Switch the dishwasher on with the With the FlexiTimer , you have three button. options for starting the program using delay start. The start or finish time of a Select the desired program. program can be delayed. - Page 48 Options Start at Finish at With the Start at function, you set the With the Finish at function, you set the exact time at which you want the pro- latest time at which you wish the pro- gram to start. gram to end.
- Page 49 Options EcoStart Changing or deleting set times This enables you to benefit from You can change the set times or start cheaper electricity rates at night using the program before the start time in the EcoStart function. To do this you display is reached.
-
Page 50: Program Chart
Program chart Program Application Detergent The following dosages are based on Miele cleaning agents. Please follow manufacturer's in- structions on dosage. Compartment I Compartment II For fresh, non-sticky food residues. 20 – 25 g ProSpeed or 1 tab For normal, slightly dried food residues. - Page 51 Program chart Program cycle Pre-rinse Main wash Interim Interim Final rinse Drying Additional AutoOpen rinse I drying rinse II 160 °F 150 °F (70 °C) 10 s (65 °C) 15 min 30 s 10 s 150 °F 150 °F (65°C) 3 min 30 min (65 °C) 10 min 1.5 min 165 °F 150 °F (75 °C) 8 min 3 min (65 °C) 30 min 10 min...
- Page 52 Program chart Program Consumption Duration Energy Water Cold water Hot water Cold water Hot water 60 °F (15 °C) 130 °F (55 °C) 60 °F (15 °C) 130 °F (55 °C) 208 V 240 V 208 V 240 V 208 V 240 V 208 V 240 V 208 V 240 V 3.5 kW 4.2 kW 3.5 kW 4.2 kW 3.5 kW 4.2 kW 3.5 kW 4.2 kW 3.5 kW 4.2 kW...
- Page 53 Program chart Program Consumption Duration Energy Water Cold water Hot water Cold water Hot water 60 °F (15 °C) 130 °F (55 °C) 60 °F (15 °C) 130 °F (55 °C) 120 V 120 V 120 V 120 V 120 V 1.5 kW 1.5 kW 1.5 kW 1.5 kW 1.5 kW ProSpeed 1.7 kWh 1.1 kWh 3.8 gal (14.5 L) 88 min 58 min ...
-
Page 54: Settings Menu
Settings menu Adjusting default values Language The display can be set to appear in one Open the Settings menu of several different languages. Open the door. You can change the language in the Switch the dishwasher on with the display via the Language ... -
Page 55: Time Of Day
OK. This option is only displayed if you have activated the network settings (see “Settings menu – Network”). You can adopt the current time of day from another Miele@home SuperVision machine. Select the menu option. Synchronize Select the setting you want and con- firm with OK. -
Page 56: Water Hardness
Settings menu Water hardness °d gr/gal Display Your dishwasher is fitted with a water softener. You need to program the wa- ter softener to the water hardness level in your area. – The dishwasher must be pro- grammed for the water hardness in your area. -
Page 57: Rinse Aid
Settings menu Rinse Aid Temperature unit You can adjust the rinse aid dosage for The temperature can be displayed in best results. degrees Celsius or degrees Fahrenheit. The dispenser can be set between 0 Select the setting you want and con- and 6 mL. -
Page 58: Ecostart
Settings menu Setting the electricity rate times EcoStart Before you can use the EcoStart option, In order to run your dishwasher in the you must set at least one electricity rate most economical way, you can use the time. EcoStart option to take advantage of your electricity supplier's time variable ... - Page 59 Settings menu Deleting the electricity rate times You can delete the settings for an electricity rate time and in doing so deactivate the EcoStart option for this time zone. Use the arrow buttons to select the electricity rate time (R1 – R3) you want to delete and confirm with OK.
-
Page 60: Networking
There are a number of ways of connect- ing your dishwasher to your WLAN net- – Call up information on the program work: sequence of your professional ma- chine – Set up a Miele@home network with other WLAN-enabled Miele profes- sional machines... - Page 61 The dishwasher will then revert to the cally. menu. Miele@home enabled Select the setting you want and con- If the connection fails, you have proba- firm with OK. bly not connected WPS to your router ...
- Page 62 Remote control function System settings must be activated. This function is reserved for Miele Cus- Select the setting you want and con- tomer Service and used to add your firm with OK. professional machine to your network ...
-
Page 63: 2Nd Interim Rinse
There are seven different display bright- If you wish to reset all entered settings ness settings. and values for Miele@home, you can re- Select the brightness you want and store the standard settings on your confirm this with OK. -
Page 64: Volume
Settings menu Refill reminders Volume If you consistently use a Tab detergent A sequence of buzzer tones will sound and the refill indicators for salt and rinse at the end of the program or if there is a aid are bothering you, you can deacti- fault as long as the buzzer has been ac- vate them if you wish. -
Page 65: Autoopen Drying
Settings menu AutoOpen Drying Optimize standby At the end of programs with a drying The dishwasher is supplied with the phase (see “Program guide”), the door timize standby function switched on as will open automatically a little in order to standard. -
Page 66: Showroom Program
The dishwasher is fitted with various WLAN module settings (where applica- demonstration programs for showroom ble) have to be reset separately (see use. “Settings – Miele@home – Module set- tings”). – Demo mode Demonstration program for show- Select Reset and confirm with OK. -
Page 67: Cleaning And Care
To prolong the service life of the dish- months). This way, faults and prob- washer, it should should be serviced at lems can be avoided. least once a year by Miele Customer Service. All surfaces of this machine are This service work covers the following susceptible to scratching. -
Page 68: Cleaning The Door And The Door Seal
Cleaning and care To better maintain your appliance Cleaning the door and the door avoid the following: seal – Cleaning products containing soda, The door seal and the sides of the dish- ammonia, acid, or chloride washer door are not accessed and cleaned by the spray arm jets. -
Page 69: Checking The Filters In The Wash Chamber
Cleaning and care Filter system Checking the filters in the Turn the dishwasher off. wash chamber The filter combination in the base of the wash chamber retains coarse soil from the suds solution. This prevents soiling getting into the circulation system and re-entering the chamber through the spray arms. - Page 70 Cleaning and care Replace the filter system so that it lies To clean the inside of the filter, the flap flat in the base of the wash cabinet. must be opened: Press catches together in the di- ...
-
Page 71: Cleaning The Spray Arms
Cleaning and care Cleaning the spray arms Particles of food can get stuck in the spray arm jets and bearings. The spray arms should therefore be checked and cleaned regularly. Turn the dishwasher off. Remove the spray arms as follows: ... -
Page 72: Frequently Asked Questions
Service Department. Repairs must only be carried out by a Miele technician or a Miele-autho- rized service agent in accordance with local and national safety regulations. Unauthorized or incorrect repairs and other work by unqualified persons could be dangerous. - Page 73 Turn the dishwasher off for at least 30 seconds with the button. Turn the dishwasher back on. Select the desired program. Press the Start button. If the fault message is displayed again, there has been a malfunction. Call Miele Customer Service.
-
Page 74: Faults With Water Intake Or Drainage
Frequently asked questions Faults with water intake or drainage Problem Possible cause and solution One of the following fault messages is dis- played: Open water supply The faucet is closed. Open the faucet completely. Before remedying the fault: Intake ... -
Page 75: General Dishwasher Problems
Frequently asked questions General dishwasher problems Problem Possible cause and solution The indicator lights and The dishwasher has switched off automatically to display are dark. save energy. Turn the dishwasher on again with the button. The interior lighting The interior lighting has been switched off perma- does not switch on nently. -
Page 76: Noises
Frequently asked questions Noises Problem Possible cause and solution There is a knocking A spray arm is hitting the dishware. noise in the wash cabi- Interrupt the program, and rearrange the items net. which are obstructing the spray arm. There is a rattling noise Dishware is moving around in the wash cabinet. -
Page 77: Poor Cleaning Results
Frequently asked questions Poor cleaning results Problem Possible cause and solution The dishes are not The dishes were not loaded correctly. clean. See notes in “Loading the dishwasher”. The program was not suitable for the requirements. Select a more suitable program (see “Program guide”). - Page 78 Frequently asked questions Problem Possible cause and solution Dishware is not dry or The rinse aid dosage is set too low or the rinse aid cutlery and glasses are reservoir is empty. spotty. Replenish the reservoir, increase the dosage, or change the brand of rinse aid (see “Before using for the first time –...
- Page 79 Frequently asked questions Problem Possible cause and solution White residue is visible The rinse aid dosage is too low. on the dishware. Cloud- Increase the dosage (see “Settings menu – Rinse ing occurs on glass- aid”). ware and cutlery; the The salt reservoir is empty.
-
Page 80: Cleaning The Water Intake
Replace the filter and washer, making This filter is available from a Miele sure they are sitting correctly. dealer or Miele Service. Reconnect the water intake valve to... -
Page 81: Cleaning The Drain Pump And Non-Return Valve
Frequently asked questions Cleaning the drain pump and non-return valve If the water has not been pumped away at the end of a program, the drain pump or the non-return valve might be blocked. They are, however, easy to clean. ... -
Page 82: Miele Service
Program updates can only be per- of this document. formed by a Miele service technician. Please quote the model and serial num- ber of your dishwasher when contacting Miele. These can be found on the data plate along the right edge of the open door. -
Page 83: Optional Accessories
Cappuccinatore insert The Cappuccinatore insert for the upper basket can be used for cleaning the in- dividual parts of the Miele Cappuccina- tore in the dishwasher. Cutlery basket The cutlery basket is placed in the lower basket and can be used to wash... -
Page 84: Installation Instructions
Installation Instructions Please refer to the Installation Diagram supplied with these instructions. To comply with IEC sound testing protocols, please contact Miele for additional instructions. Information is subject to change. Please refer to our website to obtain the most current product specification, technical & warranty information. -
Page 85: Electrical Connection
All work on the electrical con- longer program durations, resulting in nection must be carried out by Miele increased energy consumption. Customer Service, a Miele-autho- The values declared on the label will... -
Page 86: Plumbing
The Miele Waterproof system the connection point) must be be- Provided your dishwasher has been in- tween 50 and 1000 kPa (0.5 and stalled correctly, the Miele Waterproof 10 bar). system will provide extensive protection If the water pressure is lower than... - Page 87 Plumbing To avoid any damage to the ma- chine, the dishwasher must only be connected to fully vented pipework. The intake hose must not be shortened or damaged in any way as it contains electrical components (see illustration).
-
Page 88: Connecting The Water Drainage System
Plumbing Venting the drain Connecting the water drainage system If the on-site drain connection is situ- ated lower than the guide path for the – The machine drainage system has a lower basket rollers in the open door, non-return valve, which prevents dirty the drainage system must be vented. -
Page 89: Technical Details
14 place settings Noise emission values Sound power in LwA 45 dB (A) Sound pressure in LpA 34 dB (A) Test certificates awarded CSA, NSF, UL 921, UL 749, Energy Star Manufacturer's address Miele & Cie. KG, Carl-Miele-Straße 29, 33332 Gütersloh, Germany... -
Page 90: Sound Emission Tests
Sound emission tests Prerequisites for sound emission tests Load the dishwasher with 16 standard place settings and use the Normal pro- gram. Setup for sound emission tests The dishwasher must be set up according to the following specifications. Install the dishwasher into an analyzing unit. ... - Page 91 Sound emission tests Push the provided fleece strips (depending on model) under the toe-kick until it is flush with the appliance feet . Push the toe-kick into place in such a way that it is flush with the door front .
- Page 92 Sound emission tests Remove the protective film from the provided insulating strip (depending on model) . Push the insulating strip into the front top edge of the toe-kick .
- Page 96 America: +1 866 694 5849 Australia, Asia, Oceania: +61 3 9764 7880 Europe, Africa, Middle East: +49 5241 89 66 877 E-mail: service@miele-marine.com www.miele.com/marine-service Manufacturer: Miele & Cie. KG, Carl-Miele-Straße 29, 33332 Gütersloh, Germany 2018-03-20 M.-Nr. 10 895 560 / 00...
Need help?
Do you have a question about the PG 8133 SCVi and is the answer not in the manual?
Questions and answers