Inficon Micro GC Fusion Rack Mount Instruction Sheet
Hide thumbs
Also See for Micro GC Fusion:
- Quick start manual (9 pages) ,
- Installation sheet (19 pages) ,
- Installation manual (24 pages)
Table of Contents
Advertisement
Quick Links
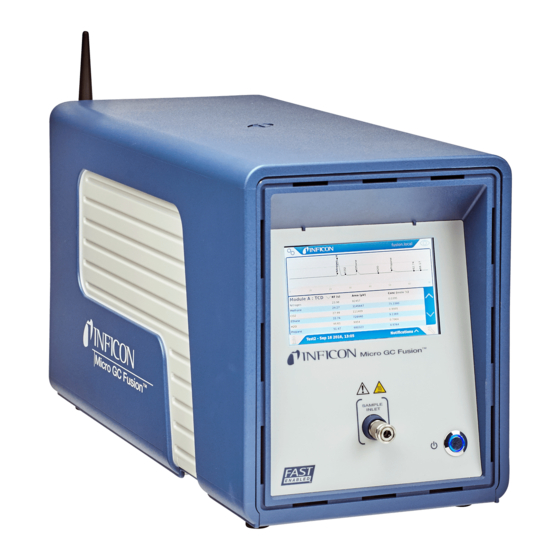
INSTRUCTION SHEET
Micro GC Fusion
Introduction
This document indicates the necessary materials and proper procedure when installing
the 4-module Micro GC Fusion into a rack.
NOTE: The Rack Mount Kit (952-4100-G1) is intended for the 4-module
Rack Mount Kit (952-4100-G1)
PN
952-4005-P2 . . . Bracket-Rack Mount, Right. . . . . . . . . . . . . . . . . . . . . . . . . . . 1
952-4006-P2 . . . Bracket-Rack Mount, Left . . . . . . . . . . . . . . . . . . . . . . . . . . . . 1
070-2026 . . . . . . Handle 6.375 LG 2-leg 10-32 THD SS ROHS . . . . . . . . . . . . 2
090-076 . . . . . . . Screw 10-32 x 0.500 LG Button SOC HD SS . . . . . . . . . . . . . 4
070-2028 . . . . . . Washer, Countersink #10 hole 0.593 OD SS . . . . . . . . . . . . . 8
070-2027 . . . . . . Nut, Retainer G-Type 10-32 THD Steel/ZN RoHS . . . . . . . . . 8
090-062 . . . . . . . Screw, 10-32 x 0.375 Lg Phil Flat Head SS . . . . . . . . . . . . . . 6
090-077 . . . . . . . Screw, 10-32 x 0.750 Lg Phil Oval Head SS . . . . . . . . . . . . . 8
NOTE: PN 070-2026 and 090-076 are preassembled on PN 952-4005-P2 and
Required Tools
Phillips-head screw driver
3 mm hex driver
Installing the Rack Mount Kit
1
Ensure the instrument is powered down and all connections are removed (including
power supply, Ethernet cable and carrier gas lines).
2
Remove the rubber feet from the bottom of Micro GC Fusion by removing the hex
screw located at the center of the foot. (See
NOTE: If needed, properly store the rubber feet and screws for future
Figure 1 Remove rubber feet from Micro GC Fusion
IPN 074-683-P1A
®
Rack Mount Instruction Sheet
Micro GC Fusion chassis only.
Description
952-4006-P2 at the factory.
bench top installation.
Figure
1.)
Quantity
1 of 4
Advertisement
Table of Contents

Related Manuals for Inficon Micro GC Fusion


Summary of Contents for Inficon Micro GC Fusion
- Page 1 Ensure the instrument is powered down and all connections are removed (including power supply, Ethernet cable and carrier gas lines). Remove the rubber feet from the bottom of Micro GC Fusion by removing the hex screw located at the center of the foot. (See...
- Page 2 Install brackets (PN 952-4005-P2 and 952-4006-P2) onto the 19 in. rack prior to attaching Micro GC Fusion when access is available below. Rack mount brackets shall be installed onto the unit prior to rack installation if underside access is not available.
- Page 3 To attach the right bracket (PN 952-4005-P2), repeat steps through 3d. Once both brackets are secure, gently place Micro GC Fusion onto the rack mount brackets. (See Figure Figure 5 Micro GC Fusion set on mounting brackets Line up the holes on the bottom of the unit to the holes in the brackets.
- Page 4 Secure the instrument on the brackets with the provided flat Phillips-head screws (PN 090-062). (See Figure Figure 7 Use screws to attach unit to brackets Micro GC Fusion is now attached to the rack. (See Figure Figure 8 Rack mounted Micro GC Fusion www.inficon.com reachus@inficon.com...
Need help?
Do you have a question about the Micro GC Fusion and is the answer not in the manual?
Questions and answers