Table of Contents
Advertisement
Quick Links
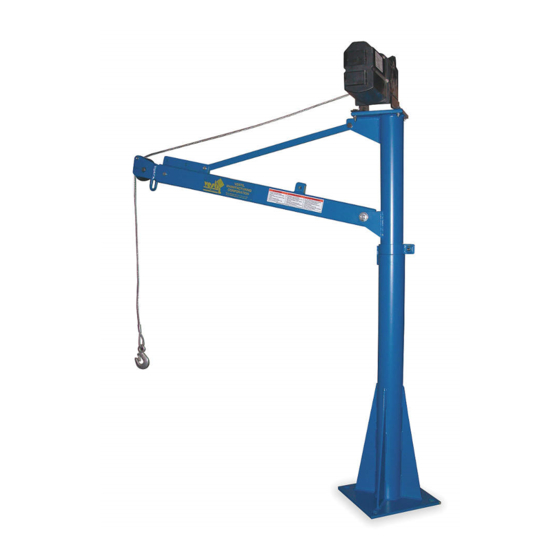
WTJ-E Series Vehicle Mounted Jib Cranes
Receiving instructions:
After delivery, remove the packaging from the product. Inspect the product closely to determine whether it
sustained damage during transport. If damage is discovered, record a complete description of it on the bill of
lading. If the product is undamaged, discard the packaging.
NOTE:
The end-user is solely responsible for confirming that product design, installation, use, and maintenance
comply with laws, regulations, codes, and mandatory standards applied where the product is used.
Specifications.................................................................................................................................... 2
Exploded parts diagrams and bills of materials......................................................................................... 3 - 4
Signal words..................................................................................................................................... 5
Hazards of improper use...................................................................................................................... 5
Assembling the crane.......................................................................................................................... 5 - 6
Storage configuration.......................................................................................................................... 6
Installing the crane............................................................................................................................. 7
Function tests.................................................................................................................................... 7
Using the crane.................................................................................................................................. 8
Boom angle adjustments...................................................................................................................... 9
Boom length adjustments..................................................................................................................... 9
Inspections........................................................................................................................................ 9 - 10
Troubleshooting Guide............................................................................................................................. 10
Labeling diagram................................................................................................................................ 10
Limited warranty................................................................................................................................. 11
Copyright 2017 Vestil Manufacturing Corp.
Rev. 7/27/2017
Vestil Manufacturing Corp.
2999 North Wayne Street, P.O. Box 507, Angola, IN 46703
Telephone: (260) 665-7586 -or- Toll Free (800) 348-0868
www.vestilmfg.com
Instruction Manual
WTJ-E-15-3-AC
Table of Contents
WTJ-E, MANUAL
Fax: (260) 665-1339
e-mail:
i nfo@vestil.com
U
H
WTJ-E-15-3-DC
U
Page 1 of 11
Advertisement
Table of Contents

Subscribe to Our Youtube Channel
Related Manuals for Vestil WTJ-E Series


Summary of Contents for Vestil WTJ-E Series
-
Page 1: Table Of Contents
Telephone: (260) 665-7586 -or- Toll Free (800) 348-0868 Fax: (260) 665-1339 www.vestilmfg.com e-mail: i nfo@vestil.com WTJ-E Series Vehicle Mounted Jib Cranes Instruction Manual WTJ-E-15-3-AC WTJ-E-15-3-DC Receiving instructions: After delivery, remove the packaging from the product. Inspect the product closely to determine whether it sustained damage during transport. -
Page 2: Specifications
1150 lb. 800 lb. (681.8kg) (522.7kg) (363.6kg) Capacity = 1,500 lb. Net weight = 320.0 lb. 12V DC powered winch with handheld pendant controller ” x 46’ long cable with hook Copyright 2017 Vestil Manufacturing Corp. Page 2 of 11... -
Page 3: Exploded Parts Diagrams And Bills Of Materials
60” reinforcing bars 4” 5” 17” ” reinforcing rod 23” Mounting 30” Reinforcing rods plate ~12” centers on Mortar pedestal in both sides center of bolt pattern ” reinforcing rod 60” Copyright 2017 Vestil Manufacturing Corp. Page 3 of 11... - Page 4 90° increments, i.e. check the vertical levelness of the mast at 4 locations equally spaced around the circumference of the mast. Adjust the leveling nuts to fine tune levelness; then tighten the lock nuts against the mounting plate. Copyright 2017 Vestil Manufacturing Corp. Page 4 of 11...
-
Page 5: Signal Words
(33622). Then, insert the mast into the mast receiver. Install the knobs and tighten them against the mast. Bolt AC winch DC winch Bolt Flat washer Lock washer Lock Flat Knob washer Mast Mast Mast receiver Copyright 2017 Vestil Manufacturing Corp. Page 5 of 11... -
Page 6: Storage Configuration
Whenever the crane is not in use, put it in storage configuration. Unpin the end of the brace from the boom bracket. Then, re-pin the brace to the storage bracket. Boom Storage brace bracket Unpin brace from boom bracket Pin brace to storage bracket Copyright 2017 Vestil Manufacturing Corp. Page 6 of 11... -
Page 7: Installing The Crane
2. Test the winch: Lower and raise the load hook. Make sure that the hook moves at a constant rate. The cable should not bind as the winch operates. Copyright 2017 Vestil Manufacturing Corp. Page 7 of 11... -
Page 8: Using The Crane
Remove the pivot pin. Rotate the boom so that it rests against the mast. Strap the boom to the mast to prevent it from bouncing during transport. c. Unplug the winch power cord and store it inside the vehicle whenever the jib is not in use. Copyright 2017 Vestil Manufacturing Corp. Page 8 of 11... -
Page 9: Boom Angle Adjustments
15% in excess of the original throat opening. Discard the hook if it is twisted more than 10° from the plane of the hook in its original condition. Confirm normal operation and operation of the safety latch. Copyright 2017 Vestil Manufacturing Corp. Page 9 of 11... -
Page 10: Troubleshooting Guide
The unit should be labeled as shown in the diagram. Replace all labels that are missing, damaged, or not easily readable (e.g. faded). A: Label 1038 C: Label 287 (covered with label 770) Copyright 2017 Vestil Manufacturing Corp. Page 10 of 11... -
Page 11: Limited Warranty
(you) for warranty service. Who may request service? Only a warrantee may request service. You are a warrantee if you purchased the product from Vestil or from an authorized distributor AND Vestil has been fully paid.
Need help?
Do you have a question about the WTJ-E Series and is the answer not in the manual?
Questions and answers