Table of Contents
Advertisement
Quick Links
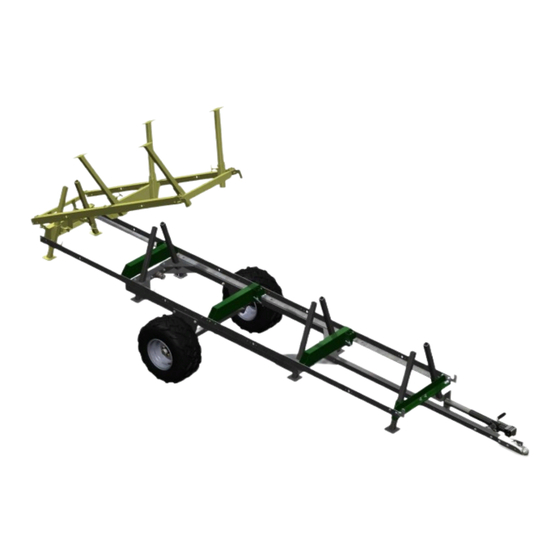
BUSHLANDER
SAWMILL TRAILER
™
& BUSHLANDER
™
XL (TRAILER EXTENSION)
Trailer Extension Assembly Instructions Included*
*Extension sold separately
OPERATOR'S MANUAL
The Bushlander
™
and Bushlander
™
XL are off-road only sawmill trailers compatible with HM122 sawmills.
Bushlander
™
is a trademark of Woodland Mills, Inc.
Advertisement
Table of Contents

Related Manuals for Woodland Mills BUSHLANDER


Summary of Contents for Woodland Mills BUSHLANDER
- Page 1 ™ XL (TRAILER EXTENSION) Trailer Extension Assembly Instructions Included* *Extension sold separately OPERATOR’S MANUAL The Bushlander ™ and Bushlander ™ XL are off-road only sawmill trailers compatible with HM122 sawmills. Bushlander ™ is a trademark of Woodland Mills, Inc.
- Page 2 This page intentionally left blank.
-
Page 3: Table Of Contents
Bushlander ™ Operator’s Manual TABLE OF CONTENTS TABLE OF CONTENTS _______________________________________ INTRODUCTION _____________________________________________ GENERAL SAFETY RULES ____________________________________ INSPECTION/MAINTENANCE __________________________________ TECHNICAL SPECIFICATIONS _________________________________ COMPATIBILITY ___________________________________________ INTENDED USE ___________________________________________ BOLT TORQUE SPECIFICATIONS ____________________________ TRAILER ASSEMBLY _________________________________________ 1. TOOLS REQUIRED _____________________________________ 2. UNPACKING ___________________________________________ 3. - Page 4 Bushlander ™ Operator’s Manual TRAILER EXTENSION ASSEMBLY _____________________________ 1. TRAILER EXTENSION TRACK ___________________________ 2. TRAILER EXTENSION SUPPORT LEGS ___________________ 3. TRAILER EXTENSION CARRIAGE STOPS _________________ 4. TRAILER EXTENSION LOG CLAMP _______________________ 5. TRAILER EXTENSION LOCK-DOWN BRACKETS ____________ 6. TRAILER EXTENSION-TO-TRAILER...
-
Page 5: Introduction
The entire manual must be read and understood before using the trailer. If any questions should arise that are not covered by this manual, please contact Woodland Mills, Inc. OWNER'S RECORD Please take a moment to record the following information about your Bushlander sawmill trailer. -
Page 6: General Safety Rules
It must be understood by the operator that common sense and caution are factors which cannot be built into this product but must be supplied by the operator. WARNING! The Bushlander ™ and Bushlander ™ XL sawmill trailers are for off- road use only. -
Page 7: Technical Specifications
Trailer Ball Coupler 2 in [50 mm] Finish Powder Coat Paint / Galvanized Steel Safety Locking pins and safety straps to secure sawhead while travelling COMPATIBILITY The Bushlander sawmill trailer is designed to work with the following sawmill models: Sawmill Model Model Years Trailer Compatible? 2019 &... -
Page 8: Trailer Assembly
Bushlander ™ Operator’s Manual TRAILER ASSEMBLY 1. TOOLS REQUIRED Tool Specification Phillips Head Screwdriver No. 3 Wrench/Socket 8 mm Wrench/Socket 9 mm Wrench/Socket 10 mm Wrench/Socket 13 mm Wrench/Socket 14 mm Wrench/Socket 15 mm Wrench/Socket 18 mm Adjustable Wrench Variable Torque Wrench Capable of 93 ft•lb [126 N•m]... -
Page 9: Unpacking
Bushlander ™ Operator’s Manual 2. UNPACKING Remove all the parts from the steel crate. Discard the crate as it is no longer needed. BHLR-MY2020-EN: Rev B Page 20-Aug-2020... -
Page 10: Trailer Box Frame
Bushlander ™ Operator’s Manual 3. TRAILER BOX FRAME Using the hardware listed below, assemble the trailer box frame as shown on the next page. M10 X 90 mm Trailer Side Flanged Hex Beam Bolt M10 X 90 mm Trailer End... - Page 11 Bushlander ™ Operator’s Manual Flat Head Flange Head Flange Head Flat Head T-Bolt T-Bolt Top Gusset 2 Top Gusset 1 Bottom Gusset 2 Bottom Gusset 1 M10 x 90 mm Flat Head M10 x 90 mm Flat Head M10 x 90 mm Hex Bolt...
-
Page 12: Support Legs
Bushlander ™ Operator’s Manual 4. SUPPORT LEGS Use the component listed in the table below to raise and level the trailer frame. Support Leg Lift one end of the frame and slide two (2) support legs up through the bottom of each pair of corner gussets. -
Page 13: Track Rails
Bushlander ™ Operator’s Manual 5. TRACK RAILS Using the hardware listed below, attach the track rails to the trailer box frame. Do not fully tighten these bolts. M10 X 90 mm Flanged Hex Track Rail Bolt M10 Flanged Reinforcement Lock Nut Plate The track rails and reinforcement plates are not included with the trailer assembly—they are... -
Page 14: Middle Bunks
Bushlander ™ Operator’s Manual 6. MIDDLE BUNKS Using the hardware listed below, install the three middle bunks as shown. Note that the replacement log bunk should be installed towards the rear of the trailer. Do not tighten these bolts. M10 X 90 mm... - Page 15 Bushlander ™ Operator’s Manual Replacement Bunk Log Bunk Replacement Bunk Log Bunk M10 x 25 mm M10 x 25 mm M10 x 90 mm M10 Lock Nut M10 Lock Nut M10 Lock Nut BHLR-MY2020-EN: Rev B Page 20-Aug-2020...
-
Page 16: End Bunks
Bushlander ™ Operator’s Manual 7. END BUNKS Using the following hardware, install the end bunks as shown. Ensure that the support legs are inserted into the leg holder portion of the end bunk prior to attaching the end bunk to the track rails. - Page 17 Bushlander ™ Operator’s Manual **Hinge bunk installation—for customers with Bushlander XL trailer extensions only** M10 X 30 mm Flanged Hex Rest Plate Bolt M10 Flanged Hinge Bunk Lock Nut Assemble the hinge bunk to the rear end of the track rails using four (4) M10 X 30 mm bolt and M10 flanged lock nuts.
-
Page 18: Tongue
Bushlander ™ Operator’s Manual 8. TONGUE Using the hardware listed below, install the tongue and the hitch ball coupler as shown. Torque all bolts per the table in section, BOLT TORQUE SPECIFICATIONS. M10 X 90 mm Flanged Hex Tongue Bolt... - Page 19 Bushlander ™ Operator’s Manual Tongue Jack Mount M10 x 90 mm M10 Lock Nut Europe North America Hitch Ball Coupler Hitch Ball Coupler M10 U-Bolt Locking Pin M10 x 70 mm M10 Lock Nut M10 x 80 mm M10 Lock Nut M10 Lock Nut ...
-
Page 20: Jack Mounts
Bushlander ™ Operator’s Manual 9. JACK MOUNTS Using the hardware listed below, install the two remaining jack mounts as shown. Torque all bolts per the table in section, BOLT TORQUE SPECIFICATIONS. M10 X 80 mm M10 Flanged Flanged Hex Lock Nut... -
Page 21: Carriage Stops
Bushlander ™ Operator’s Manual 10. CARRIAGE STOPS Using the hardware listed below, install the carriage stops as shown. The carriage stops are not included in this assembly—they are found in the sawmill crate. Torque all bolts per the table in section, BOLT TORQUE SPECIFICATIONS. -
Page 22: Axle Brackets
Bushlander ™ Operator’s Manual 11. AXLE BRACKETS Using the hardware listed below, install the axle brackets as shown. Torque all bolts per the table in section, BOLT TORQUE SPECIFICATIONS. M12 X 90 mm Flanged Hex Axle Support Bolt M12 Flanged Lock Nut Assemble the axle supports to both side beams as shown below. -
Page 23: Axle Housing
Bushlander ™ Operator’s Manual 12. AXLE HOUSING Using the hardware listed below, install the axle housing as shown. Torque all bolts per the table in section, BOLT TORQUE SPECIFICATIONS. M10 X 50 X M10 Flat 75 mm U-Bolt Washer M10 Flanged... -
Page 24: Axles
Bushlander ™ Operator’s Manual 13. AXLES Using the hardware listed below, install the axles in the axle housing. Note that during milling, the axle can be removed by reversing this step. Torque all bolts per the table in section, BOLT TORQUE SPECIFICATIONS. -
Page 25: Head Lock-Down Plates
Bushlander ™ Operator’s Manual 14. HEAD LOCK-DOWN PLATES Place the assembled sawhead on the trailer. Using the hardware listed below, install the head lock down plates as shown on the next page. Torque all bolts per the table in section, BOLT TORQUE SPECIFICATIONS. -
Page 26: Lock-Down Plate Installation
Bushlander ™ Operator’s Manual LOCK-DOWN PLATE INSTALLATION Remove the eight (8) spacers from the carriage wheel axles and discard the four (4) short spacers. Only the four (4) tall spacers will be reused in the next steps. Older model sawmills... -
Page 27: Drilling Lock-Down Holes For Standard Trailer
™ Operator’s Manual DRILLING LOCK-DOWN HOLES FOR STANDARD TRAILER **Do not drill the holes below for the lock-down brackets if a Bushlander XL trailer extension was purchased. Follow the directions in the section on the next page.** Place the sawhead on the trailer ensuring it rolls freely along the rails. Measure 61-¼ in [155.5 cm] from the rear edge of the track rail—not the carriage stop—to the rear post of the sawhead... -
Page 28: Drilling Lock-Down Holes For Trailer Extension
DRILLING LOCK-DOWN HOLES FOR TRAILER EXTENSION **Do not drill the holes below for the lock-down brackets if no trailer extension was purchased. These apply to owners with Bushlander XL trailer extensions only.** Place the sawhead on the trailer ensuring it rolls freely along the rails. Measure 64-¾ in [164.5 cm] from the rear edge of the track rail to the rear post of the sawhead and drill four (4) holes in the track rails using the provided ⅜... -
Page 29: Wheels
Bushlander ™ Operator’s Manual 15. WHEELS Using the hardware listed below, install the tires on the axles. Note the orientation of the left and right tire tread pattern. Using a torque wrench, torque the lug nuts to 80 ft•lb [110 N•m] following the pattern shown on the next page. - Page 30 Bushlander ™ Operator’s Manual The tread pattern is different for both the left and right tires. When mounting the wheels, ensure the air valve stems face outward. Tighten the lug nuts following the 4-bolt pattern shown in the diagram below. Note that the tapered/conical end of the lug nut points toward the rim.
-
Page 31: Trailer Extension Assembly
Bushlander ™ Operator’s Manual TRAILER EXTENSION ASSEMBLY **The Trailer Extension Assembly sections only apply to customers with Bushlander trailer extensions.** 1. TRAILER EXTENSION TRACK Using the hardware and components listed below, assemble the trailer extension track. M10 X 30 mm... - Page 32 Bushlander ™ Operator’s Manual With the extension loosely assembled, verify the width of the track is 26 in [661 mm] by measuring from the outside faces of the rails. Then measure diagonally across the rails, verifying the track is square. Once square and at the correct width, tighten all the hardware.
-
Page 33: Trailer Extension Support Legs
Bushlander ™ Operator’s Manual 2. TRAILER EXTENSION SUPPORT LEGS Assemble the components listed below to the trailer extension. Support Leg Lift one end of the track assembly and slide two (2) support legs up through the bottom of the tube sleeves in the end bunk. Secure the legs in place using the T-bolts on the bunk. Then lift the other end, insert the two (2) remaining legs into the middle log bunk, and level the track. -
Page 34: Trailer Extension Carriage Stops
Bushlander ™ Operator’s Manual 3. TRAILER EXTENSION CARRIAGE STOPS Using the hardware listed below, assemble the carriage stops to the end of the track rails where the end bunk is located. M10 X 50 mm Flanged Hex Spacer Bolt M10 X 25 mm... -
Page 35: Trailer Extension Log Clamp
Bushlander ™ Operator’s Manual 4. TRAILER EXTENSION LOG CLAMP Using the hardware listed below, assemble the log support to the trailer extension. Log Clamp M8 X 20 mm Connecting Hex Bolt Log Clamp M8 Lock Nut Log Clamp Attach the log dog assembly to the trailer extension in the location shown below using the two (2) M8 hex bolts and lock nuts. -
Page 36: Trailer Extension Lock-Down Brackets
Bushlander ™ Operator’s Manual 5. TRAILER EXTENSION LOCK-DOWN BRACKETS Using the components listed below, assemble the trailer extension lock-down brackets to the dashboard using existing hardware from the sawmill. Extension Lock-Down Bracket Remove the four (4) M10 X 80 mm hex bolts, flat washers, and lock nuts used to secure the upper portion of the dashboard to the carriage posts. -
Page 37: Trailer Extension-To-Trailer
Bushlander ™ Operator’s Manual 6. TRAILER EXTENSION-TO-TRAILER Using the hardware listed below, join the extension to the main trailer. M10 X 25 mm Hinge Bunk Flanged Hex [6x] Shim Bolt [Optional] M10 Flanged Lock Nut BHLR-MY2020-EN: Rev B Page 20-Aug-2020... - Page 38 Bushlander ™ Operator’s Manual Assemble the open end of the extension track rails to the hinge bunk using four (4) M10 X 25 mm bolts and M10 lock nuts. If the top faces of the track rails on the extension aren’t collinear with track rails on the main trailer, the provided shims can be used between the hinge bunk flanges and track rails to bring...
-
Page 39: Tuning The Hinge Bunk
Bushlander ™ Operator’s Manual TUNING THE HINGE BUNK If the top of the trailer and extension track rails are not parallel at the joints, the hinge bunk can be tuned to adjust the position of the extension track rails. Extension Side... - Page 40 Bushlander ™ Operator’s Manual Some components removed for clarity Loosen the jam nuts and use a hex key to adjust the two (2) Jam nut set screws. Turn each set screw counter-clockwise an equal amount. Re-latch the two (2) hook latches to pull...
- Page 41 Bushlander ™ Operator’s Manual If the track rails are parallel but a gap still exists between the rail seam (while the latches are engaged), the rails can be brought together by loosening the bolts that secure the hinge bunk to the track rails.
-
Page 42: Operation
Bushlander ™ Operator’s Manual OPERATION LEVELLING THE TRAILER To level the trailer, attach the jack to the mount at the front of the trailer frame. Raise the end of the trailer until the wheels come off the ground, then drop the two (2) support legs on either side of the jack and lock them in place using the T-bolts. -
Page 43: Trailer Extension Lock-Down
Bushlander ™ Operator’s Manual TRAILER EXTENSION LOCK-DOWN To make the trailer with an extension mobile, the extension folds up and locks into the sawmill dashboard. Follow the steps below to lock-down the extension. LOCK-DOWN THE SAWMILL CARRIAGE First, lock-down the sawmill carriage using the four (4) lock-down pins with linch pins. Be sure these are the lock-down holes drilled for the extension and not the holes drilled for the standard length trailer if the extension was purchased after the standard trailer was built. -
Page 44: Disengage Hinge Bunk
Bushlander ™ Operator’s Manual DISENGAGE HINGE BUNK Disengage the hinge bunk by releasing the two (2) hook latches. Then pull the extension away from the main trailer until the pivot bolts drop down to the bottom of the L-shaped hinge slots. -
Page 45: Rotate The Extension
Bushlander ™ Operator’s Manual ROTATE THE EXTENSION Rotate the extension up and around until the spacers at the end of the track rails seat into the dashboard lock-down brackets. If the extension is too heavy to lift, the four (4) supports can be removed. -
Page 46: Secure Extension With Ratchet Strap
Bushlander ™ Operator’s Manual SECURE EXTENSION WITH RATCHET STRAP With the extension nested in the dashboard lock-down brackets, route the ratchet strap around the end bunk on the extension, over the sawmill dashboard, and finally around the track bunk as shown below. -
Page 47: Parts List-Standard Trailer
Bushlander ™ Operator’s Manual PARTS LIST—STANDARD TRAILER NA = North America | EU - Europe Highlighted row(s) indicate components exclusive to European markets. Quantity Item Part No. Description 0002115 SIDE BEAM 0002116 END BEAM 0002117 TOP GUSSET 2 0002118 TOP GUSSET 1... -
Page 48: Parts List-Trailer Extension
Bushlander ™ Operator’s Manual Quantity Item Part No. Description SCREW, HFH, M10 X 1.5, 90 mm LG U-BOLT, 50 WD X 75 mm LG, M10 X 1.5, 50 mm LG THD FLAT WASHER, M6 FLAT WASHER, M10 FLAT WASHER, M24 LOCK NUT, M6 X 1 LOCK NUT, M10 X 1.5... -
Page 49: Exploded Assembly Views
Bushlander ™ Operator’s Manual EXPLODED ASSEMBLY VIEWS STANDARD TRAILER BHLR-MY2020-EN: Rev B Page 20-Aug-2020... -
Page 50: Standard Trailer Chassis
Bushlander ™ Operator’s Manual STANDARD TRAILER CHASSIS BHLR-MY2020-EN: Rev B Page 20-Aug-2020... -
Page 51: Standard Trailer Axles
Bushlander ™ Operator’s Manual STANDARD TRAILER AXLES BHLR-MY2020-EN: Rev B Page 20-Aug-2020... -
Page 52: Head Lock-Down Plates
Bushlander ™ Operator’s Manual HEAD LOCK-DOWN PLATES BHLR-MY2020-EN: Rev B Page 20-Aug-2020... -
Page 53: Trailer Extension
Bushlander ™ Operator’s Manual TRAILER EXTENSION BHLR-MY2020-EN: Rev B Page 20-Aug-2020... -
Page 54: Trailer Extension Hinge Bunk
Bushlander ™ Operator’s Manual TRAILER EXTENSION HINGE BUNK BHLR-MY2020-EN: Rev B Page 20-Aug-2020... -
Page 55: Notes
Bushlander ™ Operator’s Manual NOTES BHLR-MY2020-EN: Rev B Page 20-Aug-2020... - Page 56 Bushlander ™ Operator’s Manual BHLR-MY2020-EN: Rev B Page 20-Aug-2020...
- Page 57 Bushlander ™ Operator’s Manual BHLR-MY2020-EN: Rev B Page 20-Aug-2020...
- Page 58 Bushlander ™ Operator’s Manual BHLR-MY2020-EN: Rev B Page 20-Aug-2020...
- Page 59 This page intentionally left blank.
Need help?
Do you have a question about the BUSHLANDER and is the answer not in the manual?
Questions and answers