
Related Manuals for Agrison HP ULTRA Series

Summary of Contents for Agrison HP ULTRA Series
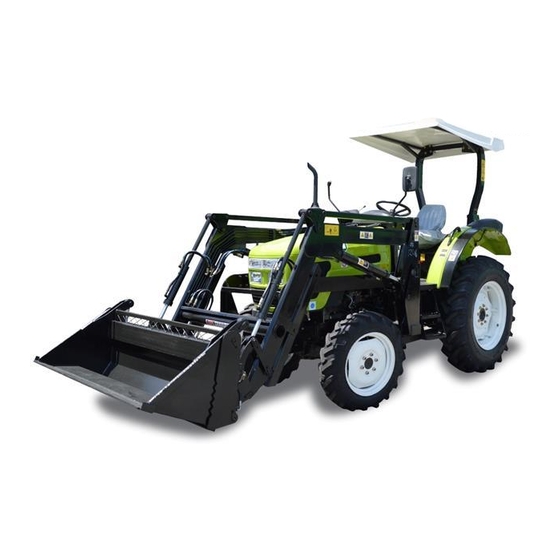
- Page 1 Operation Manual 110HP-130HP ULTRA TRACTOR IMPORT ANT! You must ensure all operators of this machine read and understand these instructions and any additional instructions provided prior to operation...
- Page 2 Product Identification marks record form Trade name: Model Type: Identification number of Tractor: Identification number of Chassis: Engine type: Identification number of Engine: Time of acquisition: Place of purchase and contact: User name: Manufacturer’s Name: Manufacturer’s Address: Manufacturer’s Phone: Note: 1. Please users fill out the above form carefully at time of purchasing. 2.
- Page 3 Instruction to Users Instruction to Users Valued Customer: Thank you for your belief in our company, and purchasing wheeled tractors of our company. For the sake of correct, reasonable and effective operation of tractors, please pay attention to the following information. 1、Before operating the tractor, please read this specification carefully whether you have experience of driving or not before, because it will help you operate tractor more reasonably and effectively.
- Page 4 General Description General Description The operation specification introduces in detail the safe operation rules, operation precautions, main technical specification, and methods of wearing, operation, technical maintenance, adjustment, and trouble clearing etc. of series 80 of wheeled tractors for reference of tractor drivers and .service man.
-
Page 5: Table Of Contents
Contents Contents 1. Safety Notes– – – – – – – – – – – – – – – – – – – – – – – – – – – – – – – – – – 1.1 Safety regulations and notes for use – – – – – – – – – – – – – – – – – – – – – – – – – – 1.2 Safety Warning Signs–... - Page 6 Contents Content 4. Maintenance Instructions – – – – – – – – – – – – – – – – – – – – – – – – – – – – – – – 4.1 Technical maintenance rules – – – – – – – – – – – – – – – – – – – – – – – – – – – – – – 4.2 Technical maintenance operation –...
- Page 7 Contents...
-
Page 8: Safety Notes
Safety Notes 1. Safety Notes 1.1 Safety regulations and notes for use Please carefully read the following information before operation 1. Must be fully read and understand the operator’s manuals and safety warning signs; 2. Must be remembered the correct operation and working method. Qualified operator 1. - Page 9 Safety Notes When the pipeline has leakage phenomenon Do not directly contact the high pressure oil leaking out from the oil pipe with hands; thick paper or wood board can be used to detect the possible positions suffering from leakage. Emergency response 1.
- Page 10 Safety Notes 6. Nobody shall get on/off the tractor when the tractor is moving; and nobody shall be under the tractor when the engine is running; Inspection and repair shall be performed to prevent accident and risk; 7. After tractor is stopped, before getting off the tractor, the driver must draw out the key;...
- Page 11 Safety Notes hinge pins are at separation status, so as to avoid machine damage and personal injury caused by unclear separation; 20. When lifting, pay attention to the control over the engine throttle, so as to prevent machine damage and personal injury caused to too high lifting speed; 21.
- Page 12 Safety Notes professionals with proper special tools, and serious accidents will be caused if the tire is not properly installed;. 6. When the water tank is cleaned, the engine shall be stopped firstly, and the cleaning shall be performed after the water tank cools, so as to prevent scald accident and damage of water tank;...
- Page 13 Safety Notes 9. When the agricultural implement is hung on the tractor for transfer, the upper pull rod of the suspension device shall be adjusted to the shortest status, and the limit rod shall be adjusted to prevent the left-right swing of the agricultural implement. In the meantime, the locking nut of the upper pull rod and limit rod shall be screwed down, so as to ensure safety and prevent the risk in damage of machine and agricultural implement;...
-
Page 14: Safety Warning Signs
Safety Notes 1.2 Safety warning signs Notes: 1.The safety warning signs must be kept clear and legible; if they are dirty, wash them with soap water, or clean them with soft rag; 2. If the safety warning signs are lost or unclear, contact the distribution department or manufacturer in time for replacement;... - Page 15 Safety Notes Meaning: When the lifting lever control mechanism works, keep away from the lifting area or personal injury may be caused! Application position: Rear side of left fender board. Figure1-3 Safety warning signs Meaning: Before the tractor is repaired, maintained and adjusted, stop the engine and draw out the key according to the requirements of the user manual! Application position:...
- Page 16 Safety Notes Meaning: Please read the operator’s manuals to understand the meaning of the letterless signs. Application position: Left side of instrumentation console Figure1-6 Safety warning signs Meaning: Lock-up sign of differential lock. Application position: Inside of right fender board. Figure1-8 Safety warning signs Meaning:...
- Page 17 Safety Notes Meaning: 1. Make sure the gear lever in the neutral position before starting tractors. 2. Make sure lock the left and right driving pedal Application position: Foreside of right fender boards Figure1-11 Safety warning signs Meaning: Make sure the power source separate with battery, When repairing electric parts;...
- Page 18 Safety Notes Meaning: Must make park braking after parking. Application position: Near parking braking control handle. Figure1-14 Safety warning signs Meaning: 1. It should far from lifter region, when controlling hydraulic lifters. 2. Three point suspension device is only used for its matching agricultural implements.
- Page 19 Safety Notes -12-...
- Page 20 Appendix 10.Appendix 10.1 Oil and solution for tractors Table 10-1 Oil and solution for tractors Engine oil: 20/50 Gearbox oil: 85/140 Hydraulic Oil: ISO68 National GB/T 7324 General purpose lithium lubricating grease standard Oil ring International D-217 grease lubricant ,meet the requirements of National Lubricating Grease Institute (USA), viscosity grade: 2.
- Page 21 Appendix Connecting bolts between engine and clutch 65-79 Large bevel gear bolts M14×1.5 160-200 Connecting bolts between driving shaft housing and rear axle M14×1.5 160-200 housing Connecting bolts between driving wheel hub and wheel plate M18×1.5 397-457 Connecting bolts between front wheel hub and wheel plate M16×1.5 200-260 Connecting bolts between front support and engine...
- Page 22 Appendix Hydraulic Plowing depth 20-26cm 1LF-430/335 mounted plow Deeply shallow Plowing depth 30-35cm 1LH-435/430 plow Deeply shallow Plowing depth 30-35cm 1FSL-435 plow 1GQNB-200/2 Various speed Plowing depth 12-15cm rotary plow 1GQN-200/230 Rotary plow Plowing depth 12-15cm 20-disc suspension Harrowing depth 12-14cm 1BJX-2.2 harrow 24-disc...
- Page 23 Appendix unreasonable matching, it will bring adverse effect on the unit. 3. Please users determine operating speed and working width etc. according to local operational conditions for fear of influence on operation efficiency and service performance of machinery.
-
Page 24: Operation Instruction
Operation Instruction 2. Operation Instruction The proper operation of the tractor can make the performance of the tractor fully exerted, reduce the tractor abrasion and accident, and guarantee that the operation on farmland and road is completed in high-quality, high-efficiency, and low-consumption and safely by the operator. 2.1 Product description The use, technical maintenance, adjustment, faults and troubleshooting method of the series tractors are described in the manual. -
Page 25: Start Of Engine
Operation Instruction 2.3 Start of engine Notes: Before use, the tractor shall be subject to careful and full inspection, so as to eliminate hidden trouble and effectively prevent the occurrence of risk and accident. 2.3.1 Preparation before start of engine ... - Page 26 Operation Instruction heat dissipation device installed at the proper position of the tractor. 2.3.2 Start of engine Notes: Before the engine is started, shall be ensured that the main and sub gear shift levers and the front drive operating lever are at the neutral position; and the lifter operating lever is at drop position, so as to prevent accident and risk caused by sudden start of the tractor.
-
Page 27: Start Of Tractor
Operation Instruction reduced, so as to prevent the engine flameout. 2.3.3 Operation of engine After the engine is started, the throttle shall be reduced immediately to make the engine at idle running status. Inspect the engine oil pressure at this time; it shall be ensured that the machine oil pressure is no less than 98 kPa. -
Page 28: Steering Of Tractor
Operation Instruction main clutch, so as to prevent collision of teeth of drive gear of gear box and the early damage of clutch. 2.5 Steering of tractor When steering of tractor on road, the horn switch on the instrument panel shall be operated firstly;... -
Page 29: Operation Of Differential Lock
Operation Instruction Figure 2-1 Gear shift of tractor Tread the main clutch pedal; operate the sub gear shift lever B to make it pushed leftwards from the neutral position; and then pushed forwards to get the Medium stage M; if it is pushed backwards, then Reverse stage R will be gotten. -
Page 30: Using Of Front Drive Axle
Operation Instruction Step on the main clutch pedal and operate the gear shift lever to change to low gear; Turn the throttle operating handle to the maximum oil-supply position; Step on the differential lock operating pedal by the right foot; ... -
Page 31: Braking Of The Tractor
Operation Instruction 2.9 Braking of the Tractor Generally, firstly decrease the throttle, step on the clutch pedal, and then gradually step on the brake pedal according to the condition to steadily pause the tractor. For emergency stop, you shall simultaneously step on the clutch and the brake pedal and cannot solely step on the brake pedal, so as to prevent rapid abrasion of the brake friction plate or causing engine stop. -
Page 32: Adjusting Of Tread
Operation Instruction Notices: 1. After stopping and before flameout of the engine, the driver is forbidden to leave the tractor, so as to prevent the tractor from starting suddenly, which will cause accidental risk. 2. If the tractor must stop at a slope land, you shall engage the gear (engage the forward gear at upslope position, and engage the backward gear at downslope position), and must use parking brake and plug the back wheels by triangle brake shoes, so as to prevent the tractor from suddenly starting and out of control automatically, which will cause accidental risk. -
Page 33: Using, Dismounting And Mounting Of Tyre
Operation Instruction Front wheel toe-in is 0-10mm, the number can be measured from two inside rims. Rotating tie rod is adjusting front axle toe-in. Picture 2-2 Adjusting of front wheel toe-in 2.12Using, Dismounting and Mounting of Type 2.12.1 Using of Tyre Tyre is the main wearing part of the tractor;... - Page 34 Operation Instruction Note:Four wheel tractors’ front and rear wheel inflate pressure should be same, as to avoid wearing heavily. 2.12.2 Dismounting and Mounting of the Tyre Dismounting of the tyre Special tools shall be used for dismounting the tyre and it is forbidden to use hard tools (like screwdriver) and sledge hammer to beat the tyre, so as to prevent puncturing the tyre or damaging the tyre edge and rim section.
-
Page 35: Using Of Balance Weight
Operation Instruction 2.13 Using of Balance Weight 2.13.1 Rear balance weight When the tractor is working in farm field, the quantity of the balance weight can be selected according to different working patterns in order to improve the working performance of the tractor. Each piece of cast iron balance weight weighs 50kg, and at most 3 pieces can be mounted at one side (150kg). -
Page 36: Covering Panels Of The Tractor
Operation Instruction Notice: Seat adjustment must be implemented when the tractor is under static condition, so as to prevent accidental risk. Under the rough road surface circumstances, please note the stiffness of seat is not too soft. 2.15 Covering Panels of the Tractor The covering panels mainly comprise an engine cover, a driving cab, a splash guard, an instrument desk, a floor, accessories, etc. - Page 37 Operation Instruction Pendulum traction apparatus is mainly used for demand heavy duty harrow, mower, traction seeder, single axle trailer, etc. Traction frame is mainly used for double axle trailer, etc. 2.16.1 Operation of hydraulic raiser Raiser of this series of tractor is of push-in-soil type, has the advantages of simple structure and strong practicability.
- Page 38 Operation Instruction hydraulic output. Picture 2-4 Hydraulic output device 图 2-5 多路阀总成 1.快换接头 4.多路阀总成 1.单双作用转换螺钉“E” 2.操纵手柄 5.多路阀支架 3.多路阀输油管 6.回油管总成 When using hydraulic quick-change coupler to implement connection, the following work need to be finished at first, and then the female connector on the agricultural machinery can be inserted into connector assembly: ...
- Page 39 Operation Instruction machinery must be lift at first and then the tractor can turn, after entering straight line driving position, the agricultural machinery can be dropped. 2.16.3 Using of suspension mechanism Ⅰ type This series of tractor is connected with agricultural machinery by adopting a three-point linkage.
- Page 40 Operation Instruction cultivator, mower, etc. 2.16.4 Operation of the power output device The power output shaft of this series of tractor is of a postposition detached type, a synchronous type, an independent type. 2.16.4.1 Operation of the power output shaft A synchronous type and an independent type power output shaft operated by power output shaft control handle.
- Page 41 Operation Instruction choose the power output shaft speed. Pull up the PTO control handle, it reach higher shift 1000r/min; press it, reach lower shift 720r/min or 540r/min. ○ when you don’t need power output, PTO control handle should be in neutral position, install and fasten traction bracket and PTO cover.
-
Page 42: Running-In Of Tractor
Operation Instruction 2.16.6 Operation and adjustment of electric system For this tractor, the electric system has the voltage of 12V and uses the silicon rectification generator, cathode earthing and double-line system. The system is composed of engine starting device and lighting signaling device, of which the engine starting device consists of starting motor and silicon rectification generator. - Page 43 Operation Instruction phenomenon or noise, check whether there is water leakage and oil leakage, and check the instrument for normal operation. If any, shut down the tractor for troubleshooting and then conduct running-in again. The following running-in can be done only after the engine operates normally. 2.17.3 Running-in of power take-off shaft at no load Place the engine throttle control handle at its position of medium throttle to make the engine operate at medium speed, respectively the power take-off shaft at low speed and high speed for...
- Page 44 Operation Instruction Table 2-1 Running-in specifications 3 ~ 4 Drawbar load(kN) 7~8 10.5~11.5 Throttle opening 100% 100% Direction Creeper gear Range gear Main gear Forward gears Reverse gear Total time(h) During the running-in at no load, conduct the turning operation and properly use the brake at single side at low speed, and check the emergency brake at high speed.
- Page 45 Operation Instruction Running-in precautions: Check the electrical equipment and instrument for normal readings; Check the engine for normal operation; Check the clutch for easy combination and thorough separation; Check whether the gear of gear case is shifted conveniently and whether there is disorder engagement and spontaneous out-of-gear;...
- Page 46 Operation Instruction 2.18 Troubleshooting faults and solutions of tractor 2.18.1 Faults and solutions of chassis 2.18.1.1 Faults and solutions of clutch Symptom Reason Solutions 1.The friction plate and pressure plate has oil stains; 1.Clean it with gasoline, find out the 2.The friction plate has too many reason and eliminate the fault.
- Page 47 Operation Instruction 2.18.1.3 Faults and solutions of rear axle and brake Symptom Reason Solutions 1. The bearing clearance of bevel 1. Adjust it as required. pinion is too large. 2. The gear fails to engage normally. 2. Readjust it as required. 3.
- Page 48 Operation Instruction 2.18.1.4 Faults and solutions of running system Symptom Reason Solutions 1. The front wheel rim or web has 1. Correct the front wheel rim or severe distortion. web. 2. The toe-in fails to be adjusted 2. Adjust the toe-in. properly.
- Page 49 Operation Instruction 2.18.1.5 Faults and solutions of hydraulic steering system Symptom Reason Solutions 1. Replace the rubber ring or fasten 1. The rubber ring of pipe joint is the bolt. damaged or the bolt is loose. 2. Clean it and replace the rubber 2.
- Page 50 Operation Instruction 2.18.1.6 Faults and solutions of hydraulic suspension system Symptom Reason Solutions 1. The oil level of lifter housing is too 1. Fill oil to the specified oil level. low. 2. The oil filter screen is blocked 2. Clean or replace the oil filter screen. severely.
- Page 51 Operation Instruction 5. The distributor 1. The safety valve opens because 1. Measure the height of farm tools at this generates sharp the internal lifting arm jacks the time, readjust and shorten the adjusting sound when the lifter housing due to the improper rod to ensure the highest lifting position is handle is at its lifting adjustment.
- Page 52 Operation Instruction 2.18.2.2 Faults and solutions of generator Symptom Reason Solutions 1.Inspect and repair circuit; 1.The connection is in error or broken, or it is in bad contact; 2.Inspect and repair or replace generator 2.The rotor coil is broken; assembly; 1.Generator fails 3.Replace the diode;...
- Page 53 Operation Instruction 2.18.2.4 Faults and solutions of instrument Symptom Reason Solutions 1.The circuit is broken and 1.Inspect and repair the circuit and 1.The indicator water the socket joint is in bad remove the dirt in the socket joint; temperature gauge always contact;...
-
Page 54: Accessories, Spare Parts And Quick-Wearing Parts
Accessories, Spare Parts and Quick-Wearing Parts 3. Accessories, Spare Parts and Quick-Wearing Parts 3.1 Accessories The accessories of the tractor include fan heater, pendulum type draw bar, etc. 3.1.1 Fan heater (optional) The fan heater on the tractor is installed in the front upper part in the driver’s cab. The fan heater switch is installed on the fan heater. -
Page 55: Spare Parts
Accessories, Spare Parts and Quick-Wearing Parts 3.2 Spare parts 3.2.1 Spare parts Table 3-1 Spare parts Code Name Quantity Remark Spare parts for engine From appliance factory Optional, used in 1 pair hydraulic output model SZ1204.58.033B Quick action couplings Optional, used in 2 pairs hydraulic output model 3.2.2 Useful Tools Useful tools... -
Page 56: Quick-Wearing Parts
Accessories, Spare Parts and Quick-Wearing Parts 3.2.3 List of attached documents Table 3-2 List of attached documents Name of documents Quantity Remark Attached technical documents From the engine factory, placed in archival bag relating to engine Product qualification certificate Placed in archival bag Three-guarantee service certificate placed in archival bag Operator’s manual for air conditioner... -
Page 57: Maintenance Instructions
Maintenance Instructions 4. Maintenance Instructions Such technical maintenance measures as regularly cleaning, inspecting, lubricating, adjusting or replacing some parts of the tractor are generally called technical maintenance. Good technical maintenance can decelerate the deterioration of technical conditions of parts, reduce faults, extend service life and make tractor in good condition all the time. - Page 58 Maintenance Instructions and the engine stops work 15min; Inject grease according to table 4-1; Inspect air pressure of front and rear tires and inflate tires as required if not enough; Inspect and adjust free travel of main and auxiliary clutches and travel brake pedal; ...
- Page 59 Maintenance Instructions 4.1.5 800h technical maintenance Finish the 400h technical maintenance; Inject grease according to table 4-1; Replace the transmission hydraulic oil for hydraulic steering system; Replace the transmission hydraulic oil for transmission system and lifter; ...
-
Page 60: Technical Maintenance Operation
Maintenance Instructions 4.2 Technical maintenance operation 4.2.1 Tractor maintenance Table 4-1 Tractor Maintenance Number of Maintenance Maintenance part Operation content points period Engine oil sump Inspect liquid level Per shift Oil bath type air cleaner Inspect oil level Per shift Battery Inspect oil level Per shift... - Page 61 Maintenance Instructions 4.2.2 Technical maintenance operation 4.2.2.1 Battery maintenance This series tractors use maintenance free battery, usually does not require special maintenance. Observed hydrometer view hole, sufficient electricity for the green, gray for the electricity shortage, no electricity for the black. The batteries are in need of additional charge when the view hole shows the gray;...
- Page 62 Maintenance Instructions oil pipe and joints should be free from oil leakage, or else the steering may fail to function. The filter screen in the steering oil tank should be cleaned or replaced regularly. When inspecting oil level, the breather valve in central position on tank cover should be inspected to make its rise and fall unobstructed;...
- Page 63 Maintenance Instructions As picture. Engine adopt 2-class filter concatenation, left is 1-class, right is 2-class. Paper filter is not allow cleaning. Engine works each 200 hours, then change 1-class filter. When is changing, could putting 2-class filter element into 1-class. Then change new one in 2-class. 4.2.2.8 Maintenance of rotary-type fuel filter Picture4-1 Fuel filter Rotary-type fuel filter located in left lower side of engine.
- Page 64 Maintenance Instructions Park the tractor on level ground; lower lift arm to extreme lower position; stall engine; screw off the oil dipstick with cover on lifter and inspect oil level; if oil level is below lower scale, inject oil between upper and lower scales. When replacing hydraulic oil, dismount the plug and drain off dirty oil;...
- Page 65 Maintenance Instructions into water tank to flush it, and here the water drain valve at the bottom of water tank should be opened. After end of cleaning, close the water drain valve; inject water and make engine run several minutes, and then drain water. After the engine is cooled, inject new anti-freezing solution or cooling water as required.
- Page 66 Maintenance Instructions The lubricated face of ZHB type injection pump shall be frequently checked. The lubricating oil must be added up to the position of scribed line in time in case of shortage. Lubricating oil must be replaced once when engine has worked for 200 hours.
- Page 67 Maintenance Instructions Fig.4-2 Brake adjustment 1-Control lever, 2-Pedal, 3-Limit screws, 4-Brake pump, 5- Brake oil tank, 6-Cotter pin, 7-Clevis pin with head, 8-Hand brake fork rod, 9-Nut, 10-Floor, 11-Limit screws By adjusting the limit screws 11, to ensure the height(between pedal center and floor)is in 175mm~185mm ;By adjusting the limit screws 3 to ensure the space(between limit screws 3 and between the brake pump 4)is in 3mm ~ 4mm, so that pedal free stroke in 20 mm~ 26 mm and pedal working stroke in 110 mm ~ 120 mm.
- Page 68 Maintenance Instructions brake emergency brake, and then check the driving wheel parking slip prints in the road. If the left and right driven wheel in the same road on the prints (prints both sides into a straight line, parallel to each other, equal in length), indicating that the appropriate adjustment, or need to re-adjust.
-
Page 69: Adjustment Of Hydraulic Suspension System
Maintenance Instructions Fig.4-10 Adjustment of final drive of front driving axle 1-Bolt, 2- planetary carrier, 3-adjusting nut, 4-drive shaft 5-Sun gear, 6- front hub, 7- conical roller bearing 4.4 Adjustment of hydraulic suspension system 4.4.1 Adjustment of separate lifting cylinder To assure agricultural implements are safety and reliably during transport. -
Page 70: Attention For The Operation Of Full Hydraulic Steering System
Maintenance Instructions 4.4.2 Adjustment of oil cylinder decreasing height The decreasing height follows by fixed valves and fixed clips in the oil cylinder to come true. Fixed clips block make up and down adjusting in the piston rod. More downer, less decrease space. - Page 71 Maintenance Instructions The oil must be clean. Filter core and oil must be checked frequently by dripping a drop of oil on blotter paper; if there a black center on the oil stain, it indicates that oil should be replaced.
-
Page 72: Storage
Deposit 5. Storage If the tractor should be disused for a long time after finishing the field work or due to other reasons, it will be necessary to properly seal and store the tractor. The tractor should be thoroughly cleaned before being sealed and stored. All connectors must be adjusted and fixed, and the technical service should be done in accordance with working hours, so that the tractor will be kept in good state. -
Page 73: Service During The Period Of Sealing And Storing Tractor
Deposit warehouse. Exhaust the antifreeze and antirust in radiator, air cylinder and water pump, the engine oil in lubrication system and the engine oil in hydraulic system. Remove the storage battery, and coat the terminal post with lubricant. Store the battery in shady room with fine ventilation and at the temperature of more than 10℃. - Page 74 Deposit Install the storage battery by following the requirements of Storage Battery Use Manual, and coat the terminal post with Vaseline. Clear away the antirust in the groove of fan belt, and mount the belt. Adjust the tightness degree of transmission belt in line with technical requirements (see the Use and Service Manual of Engine).
-
Page 75: Delivery, Acceptance And Transportation
Delivery, Acceptance and Transportation 6.Delivery, Acceptance and Transportation 6.1 Delivery and acceptance When the user purchases a tractor, he should mainly examine the following aspects: Whether the documents of the tractor are complete or not. The documents include: Use and Service Manual of Tractor, Warranty Booklet, Catalogue of Tractor’s Parts, List of Accessories (Spare Parts). -
Page 76: Technical Specification
Technical Specification Technical Specification 7.1 Product execution standard Product execution standard:Q/LYBM 005-2011 70-100 Wheeled Tractor series 7.2 Products Indication location 1. The chassis No. of this series are indicated at the left upper side of rear axle housing. 2. The tractor nameplate of this series are indicated at the left side of instrument panel. - 63 -... -
Page 77: Product Specification
Technical Specification 7.3 Product Specifications Parameters of the tractor 7.3.1 Techical specification Type -1104 -1204 -1254 -1304 Model — 4×4 Wheeled tractor Rated traction power Maximum PTO shaft power 69.35 71.25 78.85 81.7 Length 5040 Shape Width 2285 Height (to the top of cab) 2960 Sides 3040... - Page 78 Technical Specification Struction quality 4560 Minimum using quality 4910 Front base 1985 Quality distributes Rear base 2925 Front ballast (option) Ballast Rear ballast (option) - 65 -...
- Page 79 Technical Specification Engine 7.3.2 Technical specification Type Unit -1104 -1204 -1254 -1304 Style — LR6B3-23 LR6B5-23 LR6M5-23 LR6M5-23 Model — Inline、Injection、Water-cooling、Four-stroke、Naturally aspirate Cylinder NO. — Cylinder bore Travel Rated power 81.0 88.2 92.0 95.6 Rated swing speed r/min 2300 2300 2300 2300 Engine...
- Page 80 Technical Specification Transmission system 7.3.3 Technical specification Type Unit -1104/1204/1254/1304 The style of connect engine with transmission — Direct transmission Clutch — Dry-type、Combination、Double-action、Independent-type Streaming 4×(3+1) ,12F+4R,main variable speed gear,Vice Gearbox — variable straight gear, Main, vice variable speed meshing sleeve Rear Center transmission —...
- Page 81 Technical Specification Front differential — closed,2 planet cone gear Front final transmission — Single planet gear Running system ,steering system, braking system 7.3.4 Technical specification Type Unit -1104/1204/1254/1304 Walking bracket — None - 68 -...
- Page 82 Technical Specification system Front suspension — — Front base — — Standard : front wheel / rear wheel — 14.9-26/18.4-38 Pattern(front wheel / rear wheel ) — R style /R style Wheel Number(front wheel / rear wheel ) — specification Front wheel 118~137 Pressure...
- Page 83 Technical Specification 7.3.5 Working system Technical specification Type Unit -1104/1204/1254/1304 Style — Split Hydraulic system — open Safety valve setting pressure 20.5-21.5 Hydraulic pump — Gear pump,2CBN-G320/310A Dispatcher — Sliding valve diameter×trip φ110×200 Oil cylinder Hydraulic Style — Double-action suspension Suspension structure Postposition three point suspension, 2-class Power, position composite control and floating power...
- Page 84 Technical Specification pressure Streaming L/min Style — Postposition、independent and synchronous style φ38,8 tooch rectangle integral key shaft (Option φ35,6 Specification — tooth rectangle spline shaft or φ35,21 tooth rectangle spline shaft) Rotating speed r/min Standard:540/1000;Option:540/720 PTO shaft Front wheel rotating each 1 circle,output shaft rotating Synchronism rotating speed r/min 17.28 circles(540r/min)...
- Page 85 Technical Specification 7.3.6 Electrical appliances and instruments Technical specification Type Unit -1104/1204/1254/1304 Indirectly style — 12V negative grouding Style — See engine operation manual Engine Voltage Power Style — See engine operation manual Adjuster Adjusting voltage Style — See engine operation manual Starting Voltage motor...
- Page 86 Technical Specification Front combination — lamp Lighting Rear combination — lamp signal Rear working lamp — device Handle signal lamp — Trailer socket — 1 set of 7 holes trailer socket Monitor Combination With 1 set of tachometer, fuel indicator, water —...
- Page 87 Technical Specification warning device Instruments warning indicating lamp: left and right turning indicating lamp, driving lamp, charging indicating lamp, lower oil pressure indicating lamp, preheat indicating lamp, Warning device — parking braking indicating lamp, signal lamp and devices, braking lamp, left and right turning lamp, front and rear position lamp, reflector, safety warning identify - 74 -...
- Page 88 Technical Specification 7.3.7 Oil and water injection volume Technical specification Type Unit -1104/1204/1254/1304 Radiator Fuel tank Engine oil bottom cover Oil bath type air filter Hydraulic steering oil Filling capacity Braking oil Transmission system oil Lifter oil Front axle center transmission Front axle final transmission 1.36(each side)...
- Page 89 Technical Specification 7.3.8 Theoretical speed of tractor Unit:km/h Type -1104/1204/1254/1304 Shift Rear wheel sides: 18.4-38 Direction Vice various speed Main various speed 2.34 3.48 Low shift 4.23 6.61 4.94 7.35 Forward Middle shift shift 8.94 14.00 10.80 16.08 High shift 19.55 30.55 5.04...
-
Page 90: Disassembly & Disposal
Disassembly And Disposal 8.Disassembly and Disposal When the service life of the entire machine is run out, for the sake of personal safety and protection of social environment, please transfer the machine to processional recovery company with permit of disassembly for disposal. The machine shall be disassembled from up to bottom, from outside to inside. -
Page 91: Situations Beyond Warranty
9.Warranty 9.1 Basis of warranty The warranty of this series of wheeled tractors is based on the Warranty Booklet supplied by Agrison Pty Ltd. 9.2 Situations beyond warranty According to relevant laws and regulations, there are some situations beyond warranty.
Need help?
Do you have a question about the HP ULTRA Series and is the answer not in the manual?
Questions and answers
I have a 55HP agrison can you tell me the tappet gaps I have just rebuilt the engine dont have the tappet settings