
Related Manuals for Retro Games THEC64


Summary of Contents for Retro Games THEC64
- Page 1 Questo manuale d’istruzione è fornito da trovaprezzi.it. Scopri tutte le offerte per Retro Games Ltd The o cerca il tuo prodotto tra le migliori offerte di Console Giochi User Manual...
- Page 3 USER MANUAL...
- Page 4 © 2020 Retro Games Ltd. All rights reserved. THEC64 is a registered trademark of Retro Games Ltd. All other trademarks and copyrights are the property of their respective owners. No part of this publication may be reproduced, stored in any retrieval system or transmitted in any form or by any means, electronic, mechanical, photocopying, recording or otherwise, without the express prior written permission of Retro Games Ltd.
-
Page 5: Table Of Contents
• How to Switch Off THEC64 ........ - Page 6 Summary ..........70 • Inserting Virtual Disks on THEC64 ......70...
- Page 7 9. UPGRADING THEC64 ........
-
Page 8: Caution
These effects could trigger a previously undetected condition in people with no previous history of seizures or epilepsy. Stop using THEC64 immediately and consult a doctor if you or anyone using THEC64 experiences dizziness, eye or muscle twitches, disorientation, affected vision, any involuntary movements, convulsions or seizures. -
Page 9: Introduction
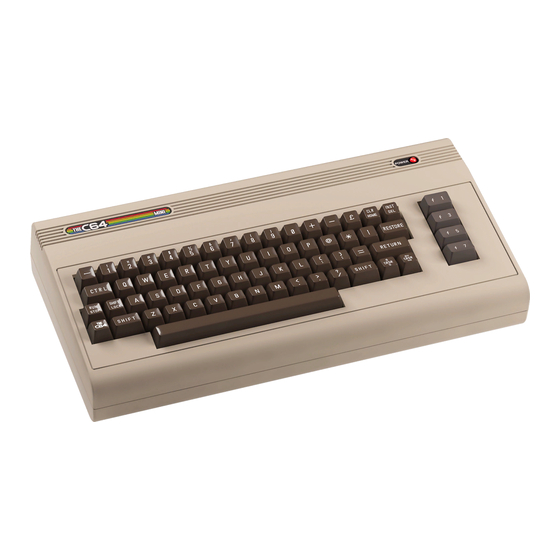
1982. THEC64 is instantly reminiscent of the original design, incorporating a fully functional keyboard but with modern peripheral support via the HDMI and USB ports. These ports allow you to connect THEC64 to an HD TV or monitor and connect a number of USB peripherals including additional controllers, memory sticks and powered hubs. - Page 10 See CHAPTER 8 for full details. We hope you have hours of fun, either reliving your childhood or enjoying the C64 or VIC 20 computer for the first time! We always recommend upgrading to the latest firmware build. Please check online at retrogames.biz/thec64/support/upgrade-thec64 viii...
-
Page 11: Setting Up
CHAPTER SETTING UP • Unpacking THEC64 • Connecting and Starting THEC64 • Initial Set Up... -
Page 12: Unpacking Thec64
• THEC64 USB Joystick • THEC64 Quick Guide • An HDMI cable • A USB power cable • A USB AC adapter. CONNECTING AND STARTING THEC64 FULLY FUNCTIONAL KEYBOARD POWER LED POWER POWER HDMI USB PORT PORTS ON/OFF INPUT & MENU... -
Page 13: Initial Set Up
1. Ensure that your HD TV or monitor is switched OFF before you connect THEC64 2. Connect the HDMI cable to THEC64, and then connect the other end to your HD TV or monitor 3. Connect THEC64 Joystick to a USB port on THEC64 4. -
Page 15: Thec64 Joystick
CHAPTER THEC64 JOYSTICK • Joystick Button Assignments • Alternative USB Controllers... - Page 16 You always have use of , which pauses the current program, and offers a number of options via a MENU. If you prefer, you can use THEC64 Keyboard to open/close the MENU and highlight and select options. See CHAPTER 4 for further information.
-
Page 17: Joystick Button Assignments
THEC64 is also compatible with a wide range of other modern USB controllers, which you use as either the primary or the secondary controller, where applicable. They need to have a minimum of eight buttons to be able to replicate THEC64 Joystick’s full functionality. - Page 18 This information is useful if you choose to assign joystick buttons to particular functions for programs you load from a USB stick. Note that you cannot remap the button functionality. See CHAPTER 8 for further details on how to remap buttons when loading other programs on THEC64.
-
Page 19: Using Thec64 For The First Time
CHAPTER USING THEC64 FOR THE FIRST TIME • Set Up Questions o Language o Video Output o Boot Mode • How to Switch Off THEC64... -
Page 20: Set Up Questions
VIDEO OUTPUT 3. THEC64 is set to output 60 Hz by default and is the current setting. The majority of HD TVs and computer monitors accept 60 Hz. Some also accept 50 Hz. If your display can only use 60 Hz, then you don’t see the Video output... -
Page 21: Boot Mode
7. If you see a black screen after step 5, wait ten seconds and THEC64 reverts to the previous Video output setting and displays the options again. In this scenario, choose the other output mode and repeat step 6 8. - Page 22 See CHAPTER 5 for further details about Carousel mode. Classic In this mode, THEC64 boots directly into BASIC. All options are available via . The version of BASIC available is dependent on the current computer model, which is set to be a C64 by default. See CHAPTER 6 for further details about Classic mode.
-
Page 23: How To Switch Off Thec64
Shutdown device (in Classic mode) or go to Options (spanner icon) and select Shutdown device (in Carousel mode) 2. In the unlikely event that THEC64 fails to respond at any point, press and hold the power switch for approximately six seconds to force THEC64 to shut down... -
Page 25: Thec64 Keyboard
CHAPTER THEC64 KEYBOARD • Using the Keyboard in THEC64 Menus • Keyboard Principles • Special Keys • VIC 20 Keys... -
Page 26: Using The Keyboard In Thec64 Menus
USING THE KEYBOARD IN THEC64 MENUS When you are in THEC64 menus, you can use any combination of the following keys on THEC64 Keyboard to highlight and select options, in preference to using THEC64 Joystick. Equivalent button action DIRECTIONAL STICK ↑... -
Page 27: Keyboard Principles
See CHAPTER 7 for further details on all of the options and settings on THEC64. KEYBOARD PRINCIPLES THEC64 keyboard is similar to a modern computer keyboard, but it has some special keys that let THEC64 do very specific tasks in BASIC when running as a C64 or VIC 20 computer. RETURN RETURN... -
Page 28: Special Keys
SHIFT LOCK same time. Press again to turn this OFF and the icon disappears. SPECIAL KEYS There are two cursor keys on THEC64 keyboard: CRSR ⇑ CRSR ⇓ moves the cursor up and down moves the cursor left and right ⇐CRSR⇒... - Page 29 INST/DEL stands for DELete. When you press the key, the cursor moves back a space and erases the character that’s there. PRINT "ERROR"#█ PRINT "ERROR"█ When you DELete in the middle of a line, first move the cursor just to the right of the character you want to DELete.
- Page 30 RESTORE keys on THEC64 keyboard while you press the key. This action is only possible using THEC64 keyboard, not the Virtual keyboard explained in CHAPTER 7. For example, suppose you’ve just played a music program that also turned your SHIFT screen red and yellow while it LISTed the program.
- Page 31 THEC64 keyboard. When you first enter BASIC, THEC64 is in the upper case/graphic mode, which means that everything you type in is in capital letters. When you are in this mode, you can also print all the graphics on the fronts of the keys.
- Page 32 SHIFT To print the graphic on the right side of a key, hold down the key while you press the key with the graphic you want to print. You can only print the right side graphics when you are in the upper case/graphic mode. To print the graphic on the left side of a key, hold down key while you press the graphic key.
-
Page 33: Vic 20 Keys
THEC64. For example, you don’t get the second set of eight colors mentioned previously when using THEC64 key on the VIC 20, as the VIC 20 computer has less colors available. -
Page 35: Carousel Mode
CHAPTER CAROUSEL MODE • Overview • Games Carousel • Game Preview • Game Information • Options Toolbar • Other Settings • Play a Game • Game Controls • Menu Options for Carousel Mode... -
Page 36: Overview
OVERVIEW THEC64 Carousel mode gives you instant access to a collection of pre-installed and pre-configured games. Just select a game and start playing! To use the Joystick in Carousel mode, connect it at any point before you launch a pre-installed game, otherwise the joystick won’t be available during play. -
Page 37: Games Carousel
VIC 20 compatible program files from a USB stick, using a virtual disk, tape, cartridge or stand-alone program. See APPENDIX B for full details on how to prepare a USB stick for use on THEC64, and see CHAPTER 8 for full details on using the File loader. -
Page 38: Other Settings
GAME CONTROLS The majority of the CAROUSEL games use the DIRECTIONAL STICK ←/→/↑/↓ and FIRE to play. Some games make use of the additional buttons on THEC64 Joystick. Visit the Retro Games Ltd. website for full instructions for each title on the CAROUSEL. -
Page 39: Menu Options For Carousel Mode
MENU OPTIONS FOR CAROUSEL MODE Pressing during gameplay temporarily suspends the game and reveals the MENU options for Carousel mode. Press again to return to the current program. MENU OPTIONS Use ←/→ to highlight a MENU option, and then press FIRE to confirm your selection. - Page 40 SAVE/LOAD STATE Use this to save the current computer state to THEC64, or load a previously state so you can continue to play from that position. Each game has four slots available, and each slot can be overwritten at any time with a different save.
- Page 41 Some games require you to press keys during play, e.g. when entering names into a high score table or selecting options from a menu. Use THEC64 keyboard to press these keys, or use the Virtual keyboard option to reveal an on-screen keyboard you control using THEC64 Joystick. SHIFT...
-
Page 43: Classic Mode
CHAPTER CLASSIC MODE • Overview • BASIC o Virtual Blank Disks • Menu Options for Classic Mode o Save/Load State o Media Access o Options • Saved State Location... -
Page 44: Overview
THEC64-drive8.d64 is present in the root of the stick. If the file is absent, then THEC64 creates one for you and inserts it the next time BASIC launches, ready for saving and loading programs. -
Page 45: Menu Options For Classic Mode
BASIC. From the menu, you can insert or auto-load virtual media files, change to a different computer model, amend settings for the display, upgrade THEC64’s firmware, and much more. Please note that the same group of options are available from the MENU... -
Page 46: Save/Load State
SAVE/LOAD STATE Use this option to save or load the computer’s current state. THEC64 allocates four save slots for each program that you load and run. Each used slot shows a thumbnail of the moment the state saved. In the bottom-right corner of each used slot is a timestamp. -
Page 47: Media Access
THEC64 if no suitably formatted USB stick is connected at the time the save is started. The very first time THEC64 saves on a USB stick, it creates a special folder on the USB stick named .THEC64SAVE. Inside that folder, THEC64 creates another folder, named after the virtual media file that contains the program currently running. -
Page 49: Options And Settings
CHAPTER OPTIONS AND SETTINGS • Boot Mode • Computer Model • Device Settings • Display Options • Exit to Carousel Mode • Factory Reset • Language • Legal Notices • Reset Computer • Shutdown Device • Switch to Classic Mode •... - Page 50 Note that if you change a shared setting in one mode, that setting also applies to the other. For example, change THEC64 language to Français in Carousel mode and it also changes the language to Français in Classic mode.
-
Page 51: Boot Mode
See CHAPTER 6 for CLASSIC MODE further details about Classic mode. In this mode, THEC64 boots directly into the current computer’s BASIC (C64 example shown below). All options You can load programs are available via from a USB stick in either mode. -
Page 52: Computer Model
See CHAPTER 8 for more details on CJM files The default computer on THEC64 is the C64, which and filename flags. runs C64 programs and has approximately 38 kB of memory available to BASIC. -
Page 53: Device Settings
HD TV or monitor. For best results, set your TV Aspect to Auto to preserve the aspect ratio of THEC64. We recommend not using 4:3, 16:9 or any zoom modes. PIXEL PERFECT This mode gives a fuller display width, with square... -
Page 54: Exit To Carousel Mode
A factory reset also erases RESET any saved states stored on Highlight the ‘Reset’ option and press FIRE to THEC64. It does not erase confirm. Only select this option if you are sure you saved states for programs want to reset THEC64. -
Page 55: Language
English. LEGAL NOTICES> IP NOTICES Lists information relating to the people who worked on THEC64, and the legal IP owners of the officially This option presents a licensed game files and computer system ROMS collection of legal notices included in the firmware. -
Page 56: Reset Computer
This option shuts down CANCEL THEC64, which is the same This is highlighted by default. as pressing and holding the POWER button for two SHUTDOWN seconds. Highlight the option and press FIRE . THEC64 shows ‘Shutting down…’ before powering off. -
Page 57: Switch To Classic Mode
UPGRADE See CHAPTER 9 for further This will upgrade your firmware to the latest version. details about how to upgrade All saved settings on THEC64 are unaffected by an THEC64 firmware. upgrade. You cannot install an earlier fi rmware than the build version currently installed. -
Page 58: Virtual Keyboard
Move the selector box over the KEYBOARD keys and press FIRE to send that key press to the computer. Using THEC64 Joystick, the Virtual keyboard gives access : Jump to the next virtual to all the keys of an original... -
Page 59: Loading Other Programs
Default Settings o What Are the Default Settings? • Fast Loader • Loading Files Using Customized Settings o Filename Flags for Individual Files o CJMs for Individual Files o CJMs for Multiple Files o Summary • Inserting Virtual Disks on THEC64... -
Page 60: Introduction
INTRODUCTION Load programs for the C64 or the VIC 20 from a USB stick connected to THEC64. The USB stick needs formatting as FAT32 (with MBR) before you begin, and you provide the USB stick and the compatible files. See APPENDIX B for further details about preparing a USB stick for use on THEC64. - Page 61 A VIC 20 virtual cartridge file with a prg file extension needs renaming with a crt file extension if it is to work on THEC64. See APPENDIX C for further details about the VIC 20. A standard virtual tape file, used C64, VIC 20 to store programs, e.g.
- Page 62 THEC64 also auto-loads the following special files, as if they are virtual cartridges: File extension Details Icon Computer model(s) A container that stores stand- alone virtual program files, e.g. game.t64. t64 files are auto-loaded on THEC64. Media access (in Classic mode) places these in the cartridge slot.
-
Page 63: Browsing Files On A Usb Stick
BROWSING FILES ON A USB STICK Connect your prepared USB stick to THEC64, and then do one of the following to browse the contents and see your compatible files: Carousel mode: From the HOME screen, select the USB stick icon on the far right of the toolbar under the GAMES CAROUSEL to launch the File loader. - Page 64 CURRENT FOLDER LOCATION FOLDER COMPATIBLE FILE (WITH ICON) FILES AND FOLDERS LIST CURRENT MEDIA FILES (MEDIA ACCESS ONLY) CURRENTLY HIGHLIGHTED FILE/FOLDER EJECT THE MEDIA FILE INDICATES THE MOST RECENTLY INSERTED MEDIA FILE Push ←/→ to move between the columns of folders and files. Press FIRE to open the highlighted folder and reveal its contents.
-
Page 65: Auto-Loading Files From Usb Using Default Settings
Media access or the File Loader screen. THEC64 will remember your current location on the USB stick, so when you next select the Media access or File loader option, you return to the previously visited folder. -
Page 66: What Are The Default Settings
WHAT ARE THE DEFAULT SETTINGS? The default settings used by THEC64 relate specifically to the computer model, the joystick port and the screen settings. Loading a compatible file from a USB stick without any customization will use the following: •... -
Page 67: Loading Files Using Customized Settings
C64 loading routines. The moment THEC64 detects a custom loader is used by a program, Fast loader disengages and THEC64 uses the custom loader instead for that one program. LOADING FILES USING CUSTOMISED SETTINGS If disabling the Fast loader doesn’t change the outcome and your program fails to load, then look at customization using filename flags or creating separate CJM files. - Page 68 This sets the disk to be read-only (also sometimes called write-protected) This tells THEC64 that the disk is part of a multi-disk set but is NOT the first disk. Saved states will then assign to the most recently inserted virtual disk file that does not have a CD flag (which should be the first disk of the set), rather than assign to this disk file.
- Page 69 M6ADRO in Classic mode. You press and choose save/load state without needing to load the program first. Choose to load either saved state found there and THEC64 will automatically insert the correct disk and continue running the program from where it was saved.
- Page 70 If your program looks like it is not completely in view, then you can set THEC64 to display using the full height (squeezing the top and bottom borders into full view on an HD TV or monitor).
-
Page 71: Cjms For Individual Files
Use the standard text editor that comes with Windows, Linux or macOS to create a CJM file. A CJM file tells THEC64 which settings to use for a virtual media file, but unlike filename flags, a CJM file can also define joystick button functions and apply to multiple virtual files rather than just one. - Page 72 A CJM file’s contents look like this: X:64,ntsc,accuratedisk,driveicon J:1*:JU,JD,JL,JR,JF,JF,1,2,JF,A,B,C,JF,4,5 J:2:JU,JD,JL,JR,JF,JF,F1,F2,JF,1,2,3,JF,F3,F4 V:12 This first example sets the computer model to a C64 NTSC, enables accurate disk mode, ensures that the drive icon is displayed in the top-right corner during disk loading, defines joystick functions for both port 1 (the primary controller in this example) and port 2.
- Page 73 (NTSC) computer. It doesn’t affect the HDMI output of THEC64. driveicon – This activates the on-screen drive icon, to show when a disk is accessed. readonly – This makes a disk read-only, meaning THEC64 cannot write back to the virtual disk.
- Page 74 fullheight – This displays the full height of the computer display when running the program, sacrificing the accurate display to fit everything into the 720p image. noaudioscale – This turns off the Audio scaling option, which is enabled by default. See APPENDIX D for full details about the Full Height and Audio scaling options.
- Page 75 CJM file, joysticks or alternative USB controllers will not work at all for that program even if you have the joystick or controller connected to THEC64. Here’s the table again from CHAPTER 2 to remind us how THEC64 Joystick and an alternative USB controller compare: THEC64 Joystick Alternative USB Controller ↑, ↓, ←, →...
- Page 76 Notice the extra buttons left shoulder, right shoulder, left stick and right stick. They are not available on THEC64 joystick but are common on alternative USB controllers. The shoulder buttons are usually assigned as FIRE buttons. The latter two are for controllers with two sticks that press down for additional button functions.
- Page 77 The IDs for key presses you can assign to joystick buttons are all in the following table. Key/function Joystick directions ↑/↓/←/→, and FIRE JU JD JL JR JF F1 F2 F3 F4 F5 F6 F7 F8 Function keys Alphanumeric keys A B C D E F G H I J K L M N O P Q R S T U V W X Y Z 1 2 3 4 5 6 7 8 9 0...
-
Page 78: Cjms For Multiple Files
TL button. CJMS FOR MULTIPLE FILES THEC64 can use a CJM file that applies to all files within a folder. This is particularly useful if you have multiple files that you wish to apply the exact same settings for. - Page 79 X:64,pal,accuratedisk,driveicon J:1*:JU,JD,JL,JR,JF,JF,1,2,JF,A,B,C,JF,4,5 J:2:JU,JD,JL,JR,JF,JF,F1,F2,JF,1,2,3,JF,F3,F4 V:12 thec64-default.cjm Multiple PAL C64 program files that use Port 1 as the primary controller thec64-default.cjm Multiple PAL C64 program files that use Port 2 as the primary controller ntsc thec64-default.cjm Multiple NTSC C64 program files that use Port 1 as the primary controller thec64-default.cjm...
-
Page 80: Summary
Inserting is essential if you plan to write and save programs to disk from BASIC or from within another program. THEC64 does insert a blank disk for you if it fails to find one on the connected USB stick. A file named thec64-drive8.d64 is automatically inserted for you, but you can easily eject it and/or insert a different disk, as explained later. - Page 81 Inserting rather than auto-loading is also necessary if you wish to browse the contents, or if you need to switch (or ‘flip’) disks whilst running a program using a multi-disk set. INSERTING OR SWAPPING DISKS Inserting a virtual disk is only possible from Classic mode using Media access. 1.
- Page 82 Type a simple command in BASIC to see a directory of the inserted disk’s contents. LOAD "$",8 The number 8 is the standard device ID for the virtual disk drive used on THEC64. Now type the following command to see what is stored on the disk. Only one drive is available to THEC64.
- Page 83 There are a number of different file item types that can be stored within a virtual disk. For example, PRG, SEQ, REL, USR. The main file type we are interested in are PRG, which are program files that can be loaded and run directly from BASIC. LOADING AND RUNNING A PROGRAM FROM DISK If you see a PRG file on a disk that you wish to load (e.g.
- Page 84 However, If you see ?VERIFYING ERROR then the current program in memory is not the same as the program saved to disk. There are many other BASIC commands relating to disks. Please visit the Retro Games Ltd website for links to further online resources.
- Page 85 BASIC but is still saved to the USB stick, unless the USB stick has been removed from THEC64. In this scenario, the state is assigned to BASIC on THEC64 itself, and that is where the saved state will be located rather than on the USB.
-
Page 87: Upgrading Thec64
CHAPTER UPGRADING THEC64 • Find Your Current Build Version • How to Upgrade Your Firmware... -
Page 88: Find Your Current Build Version
FIND YOUR CURRENT BUILD VERSION If you are unsure which build your THEC64 is currently running, look in ‘System information’, which is available in both Classic and Carousel modes: •... - Page 89 4. If there is a more recent firmware version on the website, download and move/ copy the file (e.g. theC64-1_3_2.bin) to your USB stick. Don’t place it inside a folder on the stick or rename the file. If you do, THEC64 won’t find the upgrade 5.
-
Page 91: Appendices
APPENDICES... -
Page 92: A: Troubleshooting
You should always check that you are using the latest firmware by visiting the Retro Games Ltd website at retrogames.biz/support/upgrade. Upgrades offer improvements, enhancements and/or new functionality for THEC64. See CHAPTER 9 for further details about how to upgrade THEC64 firmware. Symptom Possible cause... - Page 93 Possible cause Remedy TV output No picture HDMI cable not plugged in Check appropriate HD TV/ monitor and THEC64 HDMI ports Switch-box, device or display Remove the device between converter between THEC64 THEC64 and HD TV/monitor and HD TV/monitor faulty,...
- Page 94 Symptom Possible cause Remedy Joystick Joystick not Joystick not connected Connect joystick to THEC64 and working at all try again Joystick fault Test joystick on a desktop or laptop computer (Windows, Linux, macOS) to verify it is working correctly USB port fault...
- Page 95 USB stick has read or write Error-check the USB stick on a errors different computer or use an alternative stick THEC64 is not receiving Use a powered USB hub or sufficient power detach other USB devices from USB stick is not detected...
- Page 96 Master Boot Record (MBR) but can’t be accessed USB stick not Stick not connected Connect USB stick to THEC64 detected USB port before selecting Media access (Classic mode) or whilst on HOME screen (Carousel mode) Stick not formatted to FAT32...
- Page 97 Symptom Possible cause Remedy Virtual disk BASIC reports No disk has been inserted and/ Insert a disk using ‘Media or the current disk has been access’ ?FILE ejected FOUND File is not compatible with the Check that the file is ERROR compatible.
- Page 98 Symptom Possible cause Remedy Saved states Saved states Before the states were saved, Saved states associate with the for programs the relevant virtual media file last inserted virtual media file. loaded from (tape, disk, cartridge, etc.) was If you eject a file from Media USB are not ejected or replaced in Media access, saved states associate...
-
Page 99: B: Preparing Usb Sticks
PREPARING USB STICKS Upgrading the firmware, running other program files or saving and loading programs in BASIC on THEC64 all require a USB stick, formatted using FAT32 with MBR (Master Boot Record). With most formatting utilities, MBR isn’t explicitly stated as an option so it isn’t immediately obvious if your USB stick has it or not. - Page 100 formatting process. Also, not using ‘Quick format’ ensures that MBR will apply 4. Select ‘Start’ to begin. In Windows 10, you can check for MBR after formatting is complete: 5. Right-click over the USB stick in Windows Explorer 6. Select ‘Properties’ from the bottom of the menu 7.
- Page 101 6. Now type sudo mkfs.fat –F32 –v –I –n THEC64 /dev/sdb1 and press Return. Note that the name of the stick (e.g. THEC64) is just an example. Use another name, or just omit the ‘–n THEC64’ to not name the USB stick 7.
-
Page 102: C: Vic 20 Computer
A VIC 20 computer model is available on THEC64. The VIC 20 is the predecessor to the C64. The C64 and the VIC 20 share the same keyboard on THEC64, and the same commands work on both computers for loading, saving and verifying programs on disk. - Page 103 The original VIC 20 model has 3,583 bytes free from BASIC V2. Some VIC 20 programs require more memory, so THEC64 has the ability to expand the memory using filename flags and CJM files, using combinations of expanded memory banks.
- Page 104 Many of the virtual cartridge files for the VIC 20 are available as program (prg) files. For these to run correctly on THEC64, they must be renamed as cartridge (crt) files. Some virtual cartridge files for the VIC 20 are large and are split into separate files that need to load into different memory locations (addresses) before they can run.
- Page 105 720p image generated by THEC64. Add FH as a filename flag or add fullheight to the X entity in the relevant CJM file.
-
Page 106: D: Advanced Settings
If your current HD TV or monitor can display a 50 Hz signal, then Video output options appear when you first switch on THEC64 as part of the initial set up. If your HD TV or monitor cannot display at 50 Hz, then this screen does not appear and THEC64 automatically uses 60 Hz. - Page 107 For others, the difference is a little more obvious, especially in regards to the pitch of the audio on the running program. To compensate, THEC64 applies some automatic adjustments to make the pitch of the audio as close to the original experience as possible when a program is not running in its native mode.
- Page 108 THEC64. NTSC OR PAL The main area of THEC64 display (the dark blue area in BASIC on a C64) is pixel- for-pixel the same size for both a C64 NTSC and a C64 PAL computer. A light blue border (in BASIC) surrounds this main area, and this border is vertically smaller (has less display lines) on an NTSC C64 computer than on a PAL C64 computer.
- Page 109 Un-shifted display (PAL C64) Vertical Shift +12 (PAL C64) On THEC64, you can adjust the vertical position up or down using values of -15 (moving the main central area down) to +17 (moving the area up) for a C64, -16 to +16 for VIC 20 PAL, or -13 to 0 for VIC 20 NTSC, by adding this to a CJM text file.
- Page 110 FULL HEIGHT The FH filename flag or fullheight CJM setting makes THEC64 display the full height of the computer’s display when running a program, sacrificing the accurate display to fit everything into the 720p image. So, instead of moving the display up or down using vertical shift, you instead squash...
-
Page 111: E: Joystick Button Assignments
APPENDIX E JOYSTICK BUTTON ASSIGNMENTS THEC64 Joystick has a number of different functions assigned to the buttons depending on where you are within THEC64 screens. Below is a list of functions and a brief description of their use: Press to return to the previous screen...
Need help?
Do you have a question about the THEC64 and is the answer not in the manual?
Questions and answers