Table of Contents
Advertisement
Advertisement
Table of Contents

Related Manuals for Retro Games The C64 Mini


Summary of Contents for Retro Games The C64 Mini
- Page 1 User Guide...
- Page 3 USER GUIDE...
- Page 4 1980s or early 1990s. Retro Games Ltd. reserves the right to change the specification of this product and the content of this guide to reflect any such changes. The latest version of the User Guide will always be available from www.thec64.com, which we encourage you to regularly visit for full game instructions, guides, user forums, updates and firmware upgrades.
-
Page 5: Table Of Contents
TABLE OF CONTENTS OVERVIEW ........1. -
Page 7: Overview
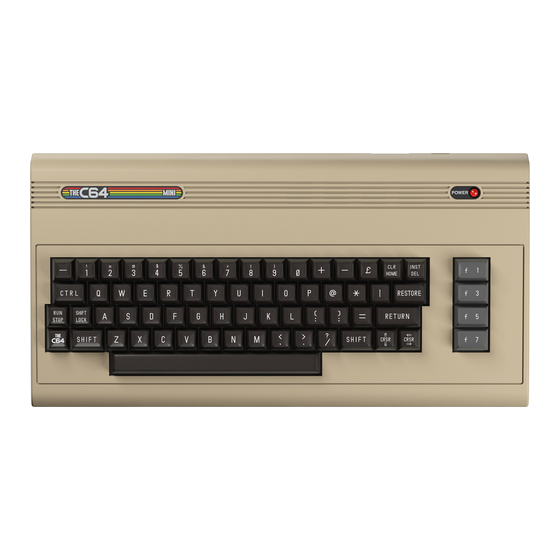
OVERVIEW THEC64 Mini home computer is a compact, modern take on the classic home computer system that first appeared in 1982. THEC64 Mini is instantly reminiscent of the original design, although the keyboard is purely aesthetic and non-functional. A selection of classic C64 games are pre-installed on THEC64 Mini, ready to be played with the sup- plied THEC64 Joystick. -
Page 9: Setting Up
CHAPTER SETTING UP • Unpacking THEC64 Mini • Connecting and Starting THEC64 Mini • Shutting down THEC64 Mini... -
Page 10: Unpacking Thec64 Mini
UNPACKING THEC64 MINI Before connecting anything, check the contents of the packaging. You should have: • THEC64 Mini Computer • THEC64 Joystick (USB) • HDMI Cable • Micro-USB to USB Power Supply Cable Please make sure to use a 5v 1A AC adapter that has been approved for use in your country, and read its instruction manual to ensure that it is able to supply power to THEC64 Mini. -
Page 11: Shutting Down Thec64 Mini
3. Connect THEC64 Joystick to either of THEC64 Mini’s USB ports. See CHAPTER 2 for full details on THEC64 Joystick 4. Connect the supplied USB power cable into a suitable USB power source, and then connect the other end to the Micro-USB port on THEC64 Mini 5. -
Page 13: Thec64 Joystick
CHAPTER THEC64 JOYSTICK... - Page 14 To use THEC64 Joystick, connect it to an unoccupied USB port before you switch on or before you launch a game. THEC64 Mini will not recognise a joystick that is plugged in while a game is running. THEC64 Joystick has a DIRECTIONAL STICK and eight buttons, referred to as left , right FIRE FIRE...
-
Page 15: Using Thec64 Mini For The First Time
CHAPTER USING THEC64 MINI FOR THE FIRST TIME... - Page 16 1. When you first switch on THEC64 Mini, you choose which language it will use for all the non-game menus and screens 2. Choose your preferred language for THEC64 Mini using THEC64 Joystick and pressing . This FIRE setting affects all the non-game menus and screens. THEC64 Mini will now remember your choice and use it automatically.
-
Page 17: The Home Screen
CHAPTER THE HOME SCREEN • Games Carousel • Game Preview • Game Overview • Options... -
Page 18: Games Carousel
The HOME screen is where you choose which game to play and access the configuration options. GAME PREVIEW GAME OVERVIEW GAMES CAROUSEL OPTIONS GAMES CAROUSEL Use the Joystick UP and DOWN to move the highlight between the GAMES CAROUSEL and the OPTIONS windows. - Page 19 Select this option to choose how the games display on your HD TV or monitor. • Pixel perfect — This mode gives a fuller display width, with square pixels. • European 4:3 — This mode reproduces the display width of the original European computer •...
-
Page 21: Playing Games
CHAPTER PLAYING GAMES • Choose a Game • Game Controls • Start a Game • The ☰ Button... -
Page 22: Choose A Game
CHOOSE A GAME Push LEFT or RIGHT on the Joystick to step through the games displayed by the GAMES CAROUSEL. The GAME PREVIEW and GAME OVERVIEW windows on the HOME screen give you a summary of the highlighted game. Press on the Joystick to launch the highlighted game. - Page 23 There are a number of options available when you press the button during play: ☰ Use this to save your current position in the game, or load a previously SA���� ���� �������������� saved game so you can continue to play from that position. Each game has four slots available to save to, and each slot can be overwritten at SAVE/LOAD GAME any time with a different save.
-
Page 25: Keyboards
CHAPTER KEYBOARDS • The Virtual Keyboard • USB Keyboards... -
Page 26: The Virtual Keyboard
THE VIRTUAL KEYBOARD Press the button in a game and select the ‘Virtual keyboard’ option. An on-screen ☰ keyboard appears on the right-side. Through THEC64 Joystick, the Virtual keyboard gives access to all the keys of an original C64 computer. See CHAPTER 5 for more details about the menu options. -
Page 27: Usb Keyboards
USB KEYBOARDS USB peripherals are only registered by THEC64 Mini whilst you are on the HOME screen, so to use a USB keyboard, connect to an unoccupied USB port before you launch a game from the HOME screen. THEC64 Mini supports the following USB keyboard layouts: •... -
Page 29: Technical Help
CHAPTER TECHNICAL HELP • Firmware Upgrades • Factory Reset • USB Devices • Forced Shutdown... -
Page 30: Firmware Upgrades
FIRMWARE UPGRADES Firmware upgrades for THEC64 Mini provide new features and/or correct any technical issues. We always recommend that you use the latest version of the firmware. 1. Check the current firmware version on THEC64 Mini by selecting the SYSTEM icon from the OPTIONS on the HOME screen, and then choose System information from the menu. -
Page 31: Factory Reset
FACTORY RESET Select the SYSTEM icon from the OPTIONS on the HOME screen. One of the settings is ‘Factory reset’. This resets THEC64 Mini and is an option you should not need to use very often, if at all. Selecting ‘Factory reset’ will permanently erase any previously saved settings (e.g. Display, Language, USB keyboard) and any saved game positions stored on THEC64 Mini. -
Page 33: Caring For You And Thec64 Mini
CHAPTER CARING FOR YOU AND THEC64 MINI • Caution • Epilepsy Information... -
Page 34: Caution
Please take a moment to read the following advice regarding THEC64 Mini: CAUTION • Do not connect cables while THEC64 Mini is powered on • Any certified 5V/1A AC power supply with a USB port can be used • Only connect USB keyboards, controllers and USB memory sticks •...
Need help?
Do you have a question about the The C64 Mini and is the answer not in the manual?
Questions and answers